The Tag Dynamic Content feature in Thrive Ovation allows you to automate your social proof. Instead of manually picking which testimonials to show on a page, you can display them automatically based on their tags (e.g., “Product A” or “Success Stories”). This ensures your website always features fresh content without you needing to update pages manually.
1. Preparing Your Testimonials with Tags
For the dynamic content feature to work, your testimonials must have at least one tag. There are two ways to ensure your content is tagged correctly:
Tagging Manually
If you are adding a testimonial manually or importing one from social media, ensure you fill out the Tag field before saving. You can add multiple tags by separating them with a comma.
Tagging Automatically (via Capture Forms)
You can set your Capture Testimonial forms to automatically tag any submission they receive.
- Open your capture form in Thrive Architect.
- Click on the form and select Form Settings in the left sidebar.
- In the popup window, find the Add tags field.
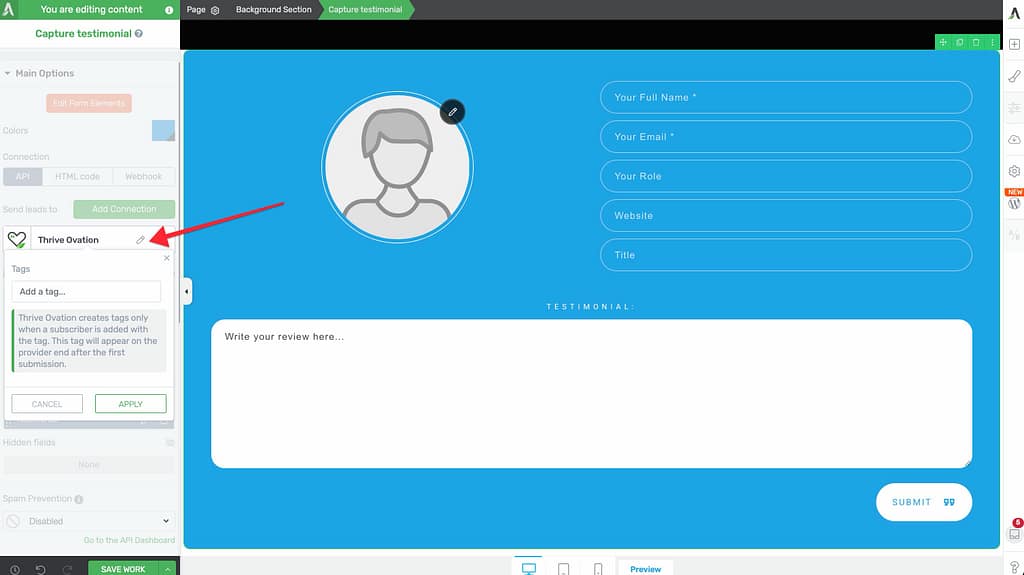
- Enter the tag(s) you want to apply to all testimonials collected through this specific form and click Apply.
2. Setting Up Dynamic Content Display
Once your testimonials are tagged, you can display them dynamically using the Display Testimonials element in Thrive Architect.
- Add the Display Testimonials element to your page and choose a design template.
- In the setup window that appears, select Create New Display Template (or choose an existing one you wish to edit).
- Under Selection Mode, choose Tags – build dynamic content.
- Select the specific tags you want to pull testimonials from.
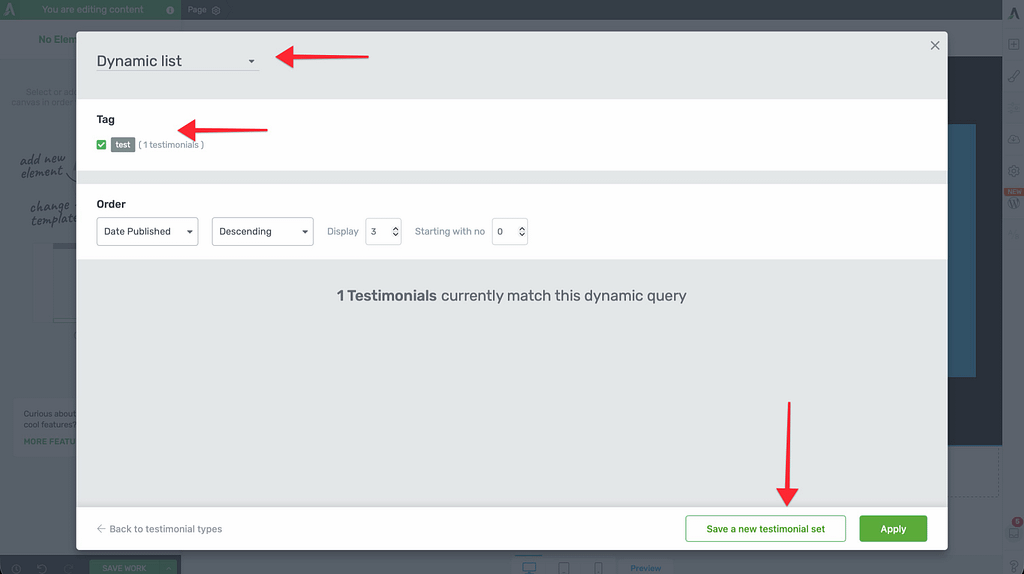
- Set the Max number of testimonials (the limit of how many should show at once).
- Click Save and Close.
How the Automation Works
When you use a tag like “Product A” for your display:
- Automatic Updates: As soon as you approve a new testimonial with the “Product A” tag in your dashboard, it will automatically appear on the page.
- Smart Replacement: If you’ve set a maximum limit (e.g., 3 testimonials) and a 4th one is approved, the oldest testimonial in that dynamic set will be replaced by the newest one. This keeps your social proof current.
3. Static vs. Dynamic Testimonials
It is important to understand the difference between these two display methods:
- Static Testimonials: These are individually selected from your library. They will never change unless you manually open the page and swap them out.
- Dynamic Content: These are “live” feeds. They update automatically based on tags and approval status, making them ideal for high-traffic sales pages.
Related Resources
- Collection Guide: Learn how to capture testimonials using forms.
- Management Guide: Learn how to organize and edit tags in the backend.
- Shortcodes: For advanced users, you can also use shortcodes to display dynamic content.