In this article, you’ll learn how to add Thrive Leads opt-in forms and widgets to your Thrive Theme Builder templates, including sidebar forms, in-content forms, and template-level opt-ins.
Overview
Thrive Leads is a lead generation plugin that creates opt-in forms (email signup forms, pop-ups, ribbons, slide-ins, and more). When used alongside Thrive Theme Builder, you can place opt-in forms directly in your templates so they appear consistently across your entire site.
There are three main ways to add opt-in forms to your TTB templates:
- Thrive Leads widgets in the sidebar — Display opt-in forms in the sidebar widget area.
- Thrive Leads Opt-In Form element — Add an opt-in form directly into a template using the Thrive Theme Builder editor.
- Thrive Leads display rules — Let Thrive Leads automatically show forms (pop-ups, ribbons, slide-ins) based on display rules, independent of your template layout.
Adding Thrive Leads Widgets to the Sidebar
The most common way to add an opt-in form to a Thrive Theme Builder template is through the sidebar widget area.
Prerequisites
- Thrive Leads must be installed and activated.
- You must have a Lead Group created in Thrive Leads with at least one opt-in form designed.
- Your template must include a Sidebar section (see Using the Content & Sidebar Sections).
Steps
- In the WordPress admin, go to Appearance > Widgets.
- Locate the widget area that corresponds to your template’s sidebar (e.g., Sidebar 1 or a custom widget area).
- Add a Thrive Leads Widget to the widget area.
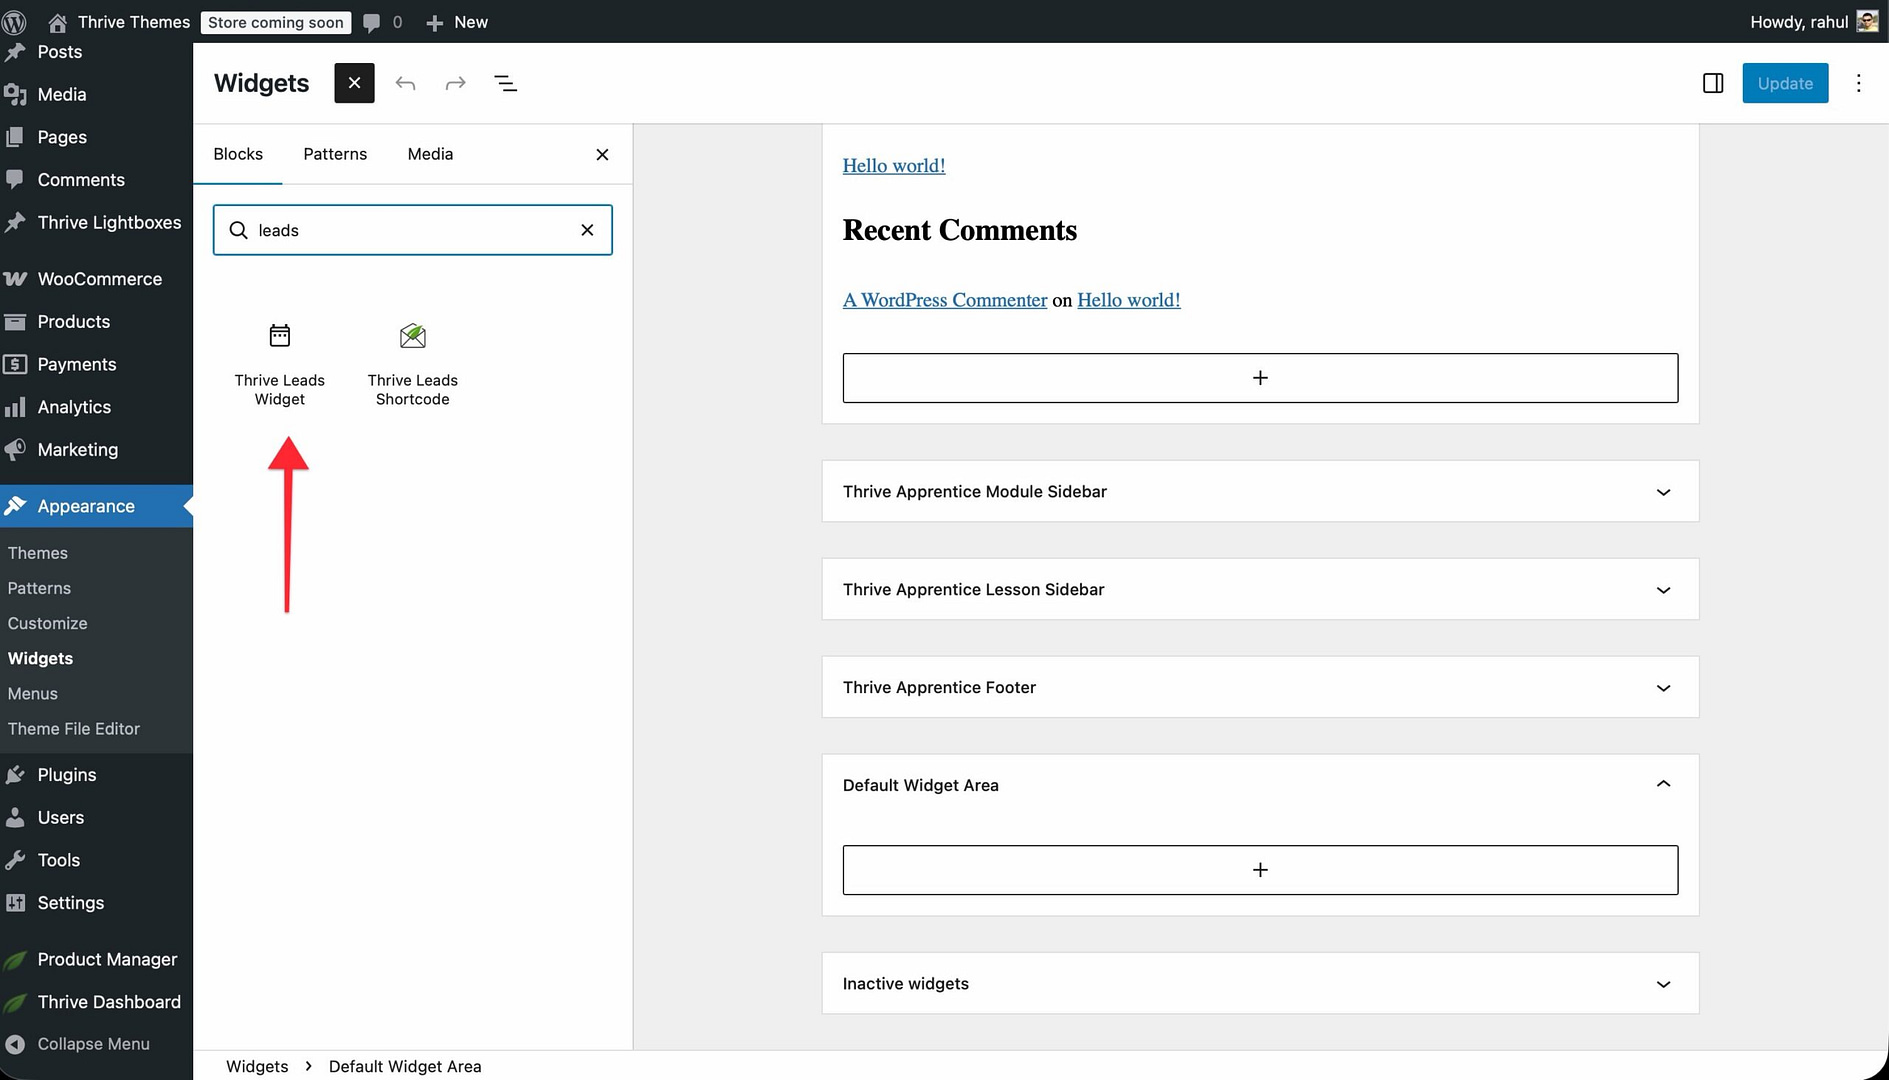
- In the widget settings, select the Lead Group you want to display.
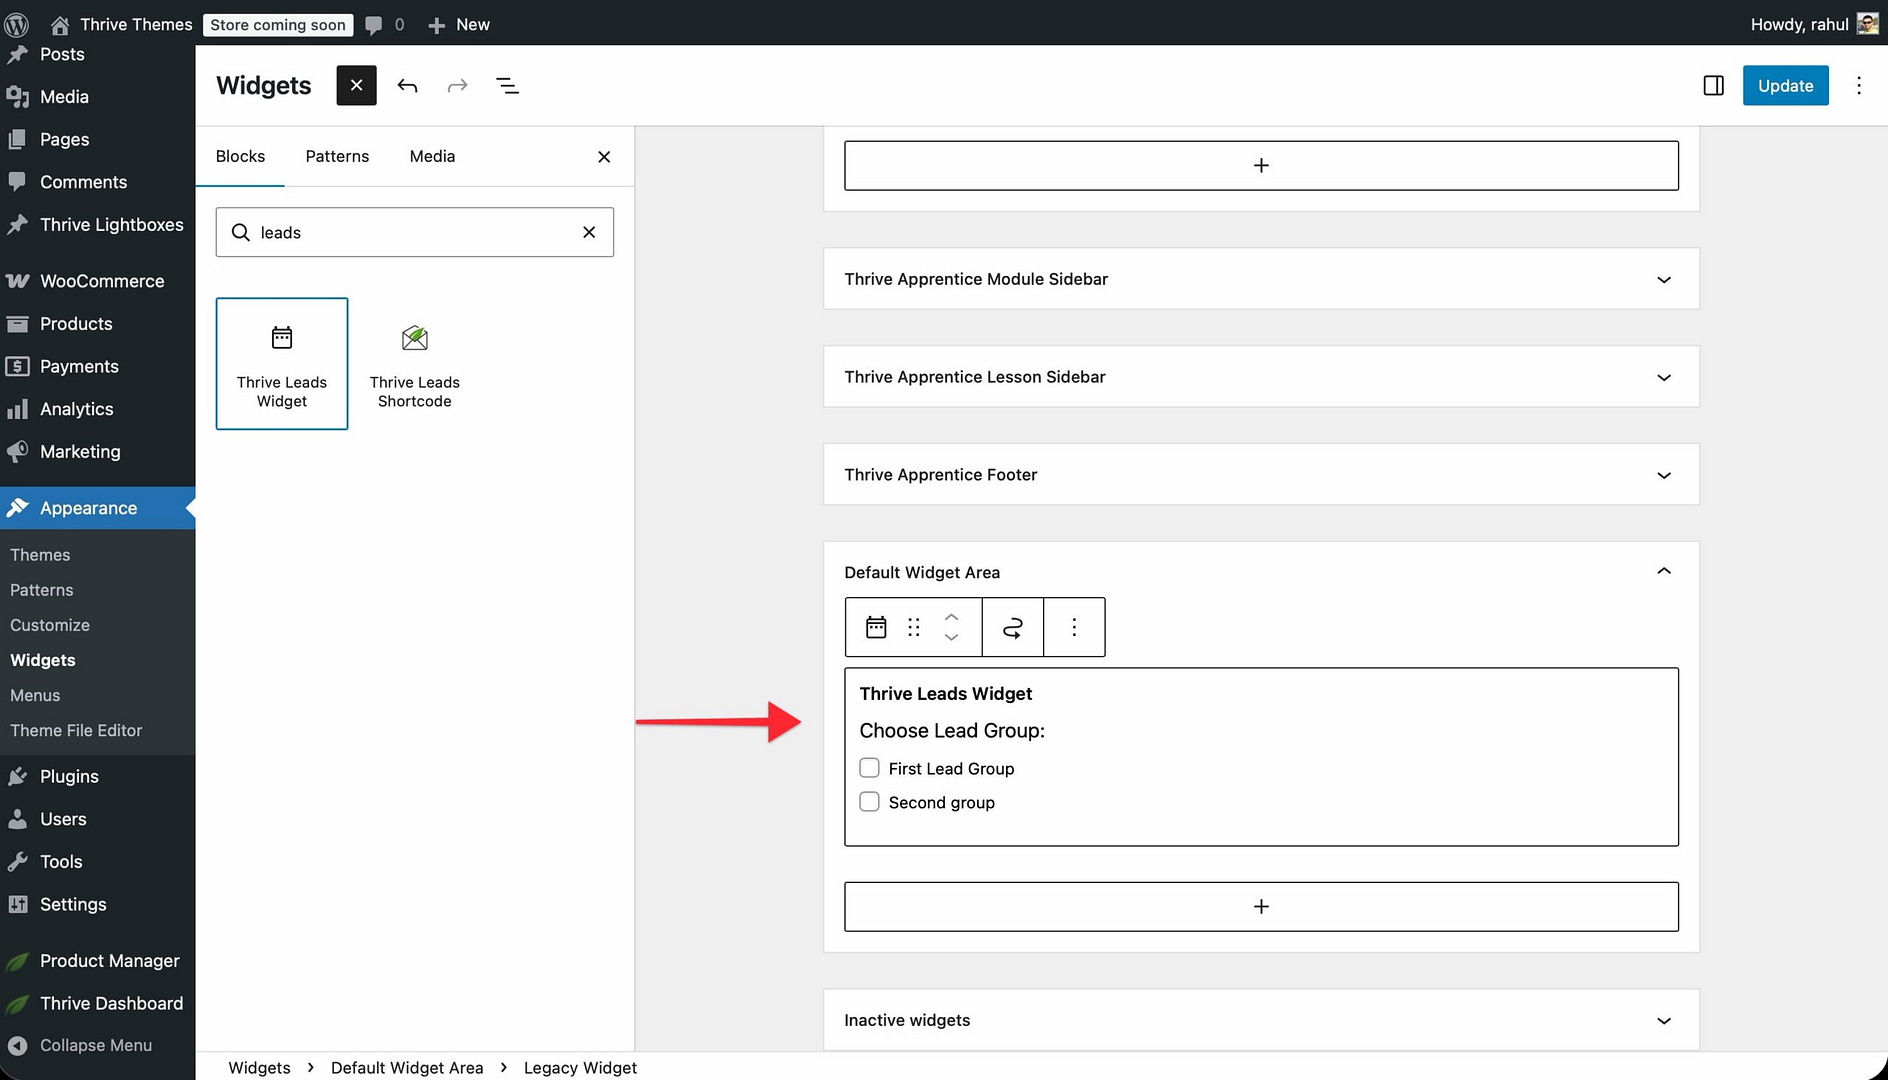
- Save the widget.
- Visit a page that uses the template with the sidebar. The Thrive Leads opt-in form now appears in the sidebar.
Adding an Opt-In Form Element to a Template
You can add a Thrive Leads opt-in form directly into any section of a Thrive Theme Builder template—not just the sidebar.
Steps
- Open the template in the Thrive Theme Builder editor.
- Click the plus (+) icon in the right sidebar to open the element panel.
- Search for Lead Generation or Thrive Leads.
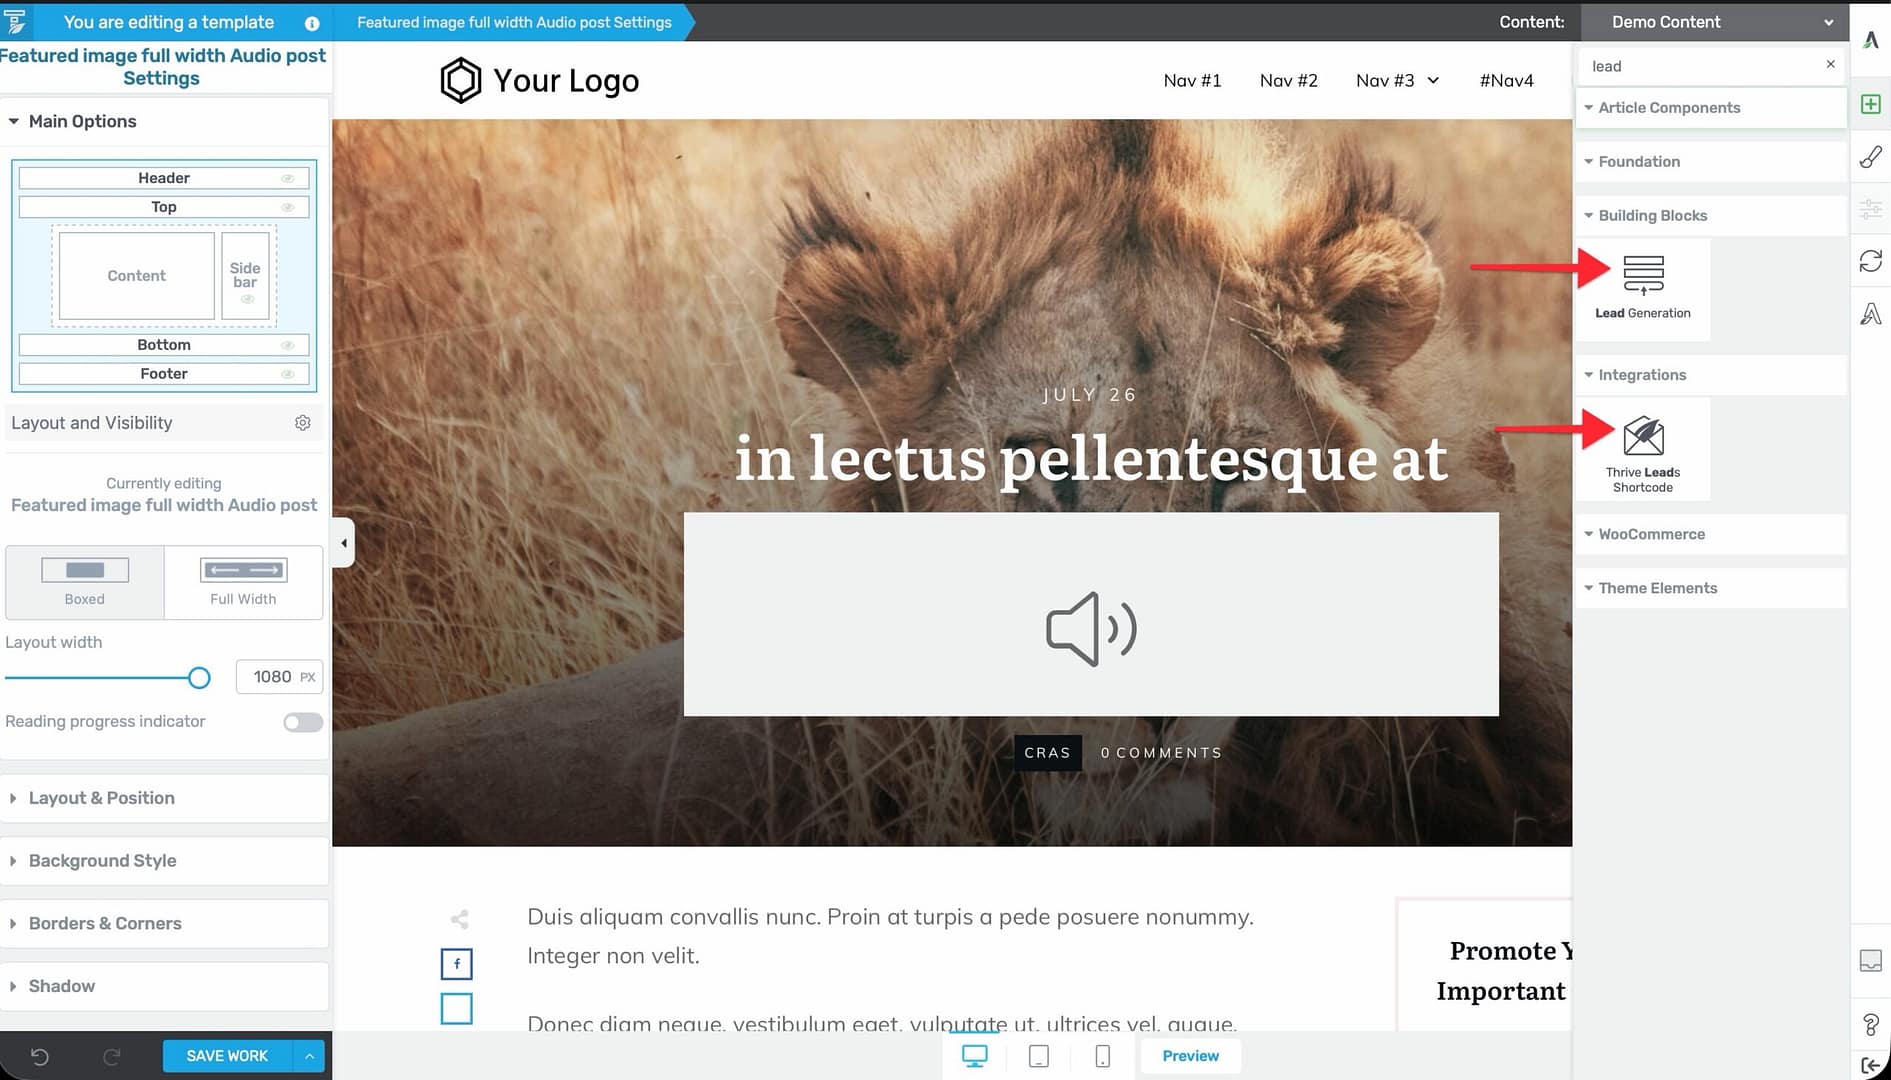
- Drag the Lead Generation element into the desired position in your template (e.g., below the content area, in the header, or in the footer).
- Configure the element:
- Choose the Connection (your email marketing service).
- Design the form fields and submit button.
- Set up the After Submission action (show a success message, redirect to a page, etc.).
- Save the template.
The opt-in form now appears on every page or post that uses this template.
Where to Place Opt-In Forms in Templates
- Below the post content — Add a form after the Post Content element to capture readers who finish an article.
- In the sidebar — Use a widget area or place the form element directly in the sidebar section.
- In the header — Add a compact opt-in bar or button that opens a lightbox.
- In the footer — Add a newsletter signup form in the footer section.
- Between content sections — On list/archive templates, add a form between post listings.
Using Thrive Leads Display Rules
Thrive Leads also supports display rules that show forms automatically based on visitor behavior—these work independently of your template layout:
- Lightbox (pop-up) — Appears as an overlay on the page.
- Ribbon — A sticky bar at the top or bottom of the screen.
- Slide-In — A form that slides in from the corner.
- In-Content — Automatically inserted within the post content.
- After Post — Automatically inserted after the post content.
- Screen Filler — A full-screen overlay.
These form types are managed entirely within Thrive Leads (under Thrive Dashboard > Thrive Leads) and don’t require any changes to your Thrive Theme Builder templates. Thrive Leads automatically displays them based on the display rules you set (which pages, when to show, frequency, etc.).
Troubleshooting
Opt-In Form Not Displaying in the Sidebar
- Check the form type — Only Widget type forms appear in widget areas. Lightbox, Ribbon, and Slide-In forms use display rules instead.
- Verify the widget area — Make sure the Thrive Leads widget is in the same widget area that your template’s sidebar is configured to display.
- Check template assignment — Confirm the page you’re viewing uses a template that includes a sidebar section.
Opt-In Form Displays Incorrectly
- Check for lazy loading conflicts — Thrive Theme Builder automatically disables lazy loading for Thrive Leads forms during editor rendering to prevent display issues.
- Clear caching — If you’re using a caching plugin, clear the cache after adding or modifying opt-in forms.
Best Practices
- Use Widget forms for sidebars — For sidebar opt-in forms, create a Widget type form in Thrive Leads and add it through the WordPress Widgets panel.
- Use Lead Generation elements for template-level forms — For forms that should appear in specific template sections (below content, in the footer), use the Lead Generation element directly in the Thrive Theme Builder editor.
- Don’t overdo it — Placing too many opt-in forms on a single page can overwhelm visitors. Choose one or two strategic placements per template.
- Test on different pages — After adding a form to a template, check multiple pages that use that template to make sure the form displays correctly in all contexts.
Related Resources
- Using the Content & Sidebar Sections: Learn how to add sidebar sections to your templates.
- Sidebar Widgets & Content: Learn how to add content to your sidebar.
- Getting Started with Thrive Theme Builder: Learn how to set up your site.