In this article, you’ll get an overview of Thrive Architect—what it does, how to launch the editor, and how the interface is organized. By the end, you’ll understand the editor layout and know where to find the tools you need.
Thrive Architect is a visual page builder for WordPress. It lets you design pages and posts using a drag-and-drop editor with real-time preview—no coding required. You can create everything from simple blog posts to advanced landing pages with opt-in forms, pricing tables, and more.
Launching the Editor
There are two ways to open the Thrive Architect editor:
For a New Page or Post
- In your WordPress admin dashboard, go to Pages > Add New (or Posts > Add New).
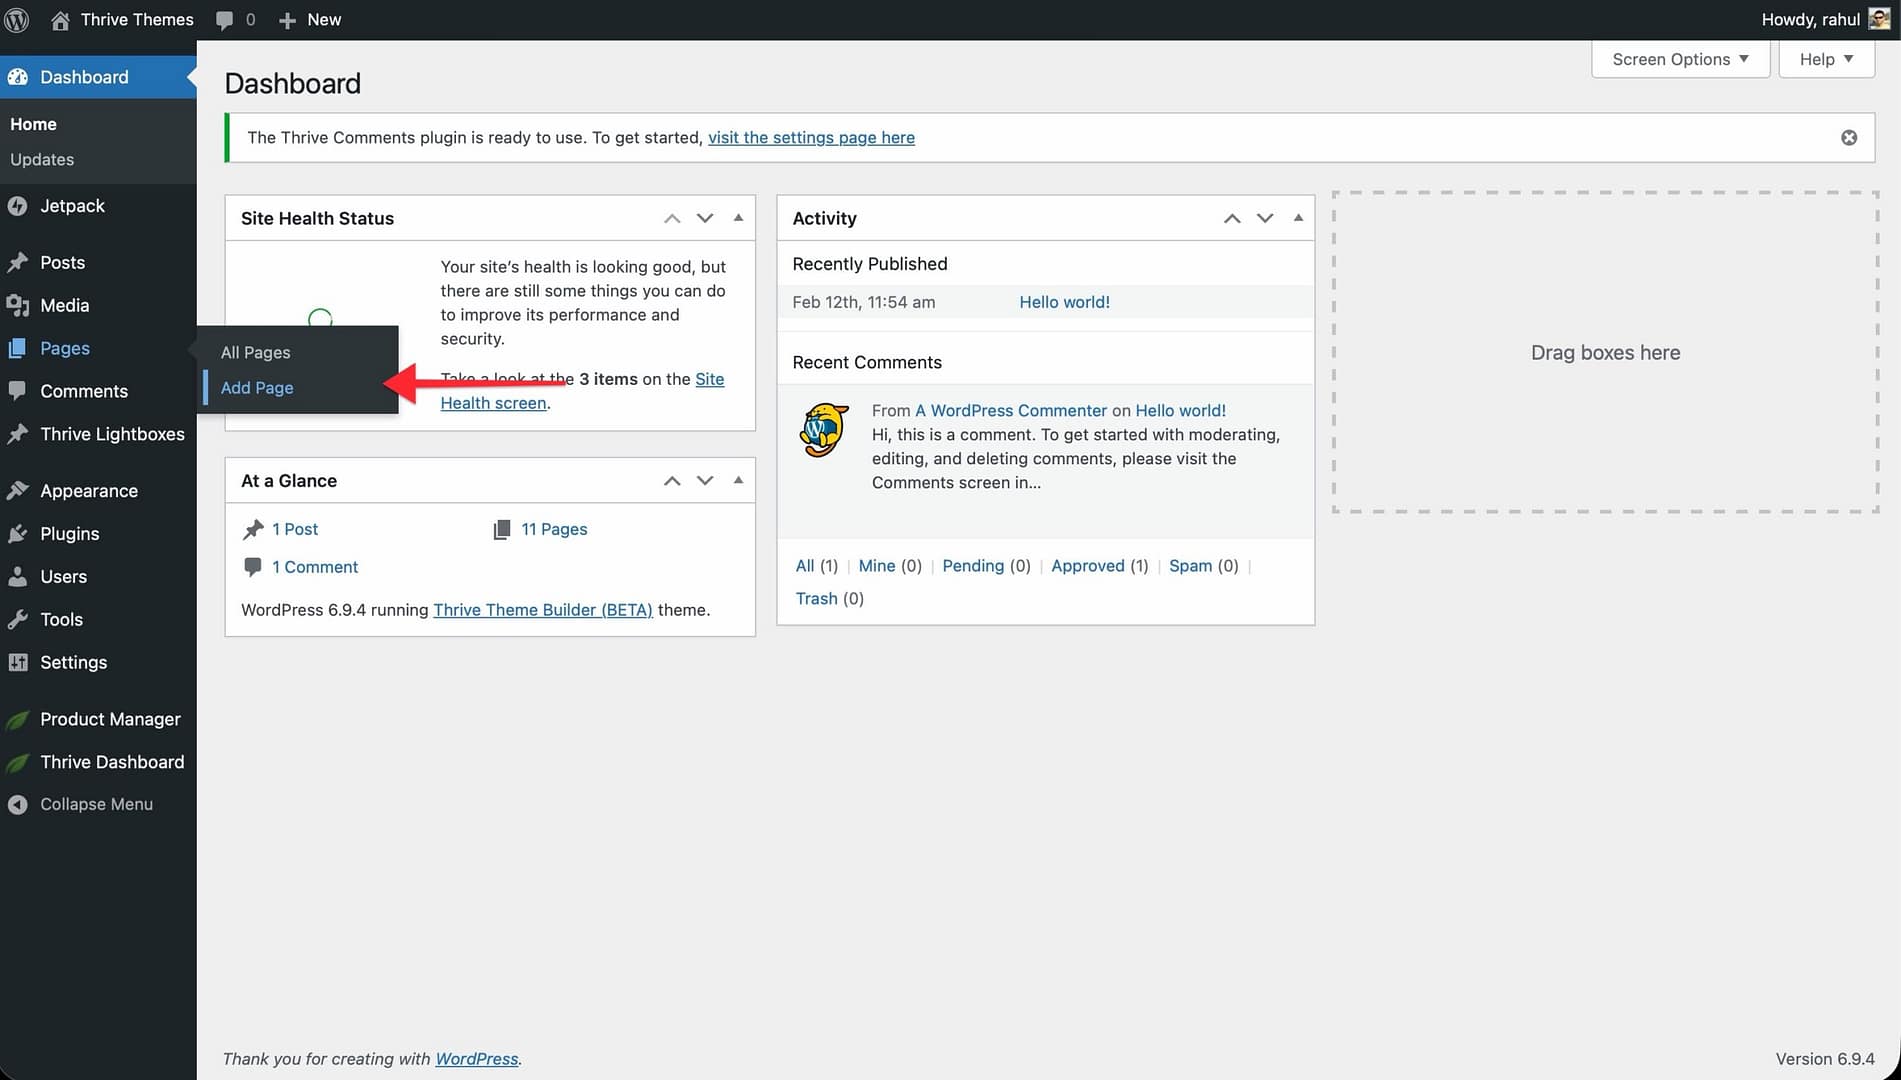
- Enter a title for your page or post.
- Click the Launch Thrive Architect button.
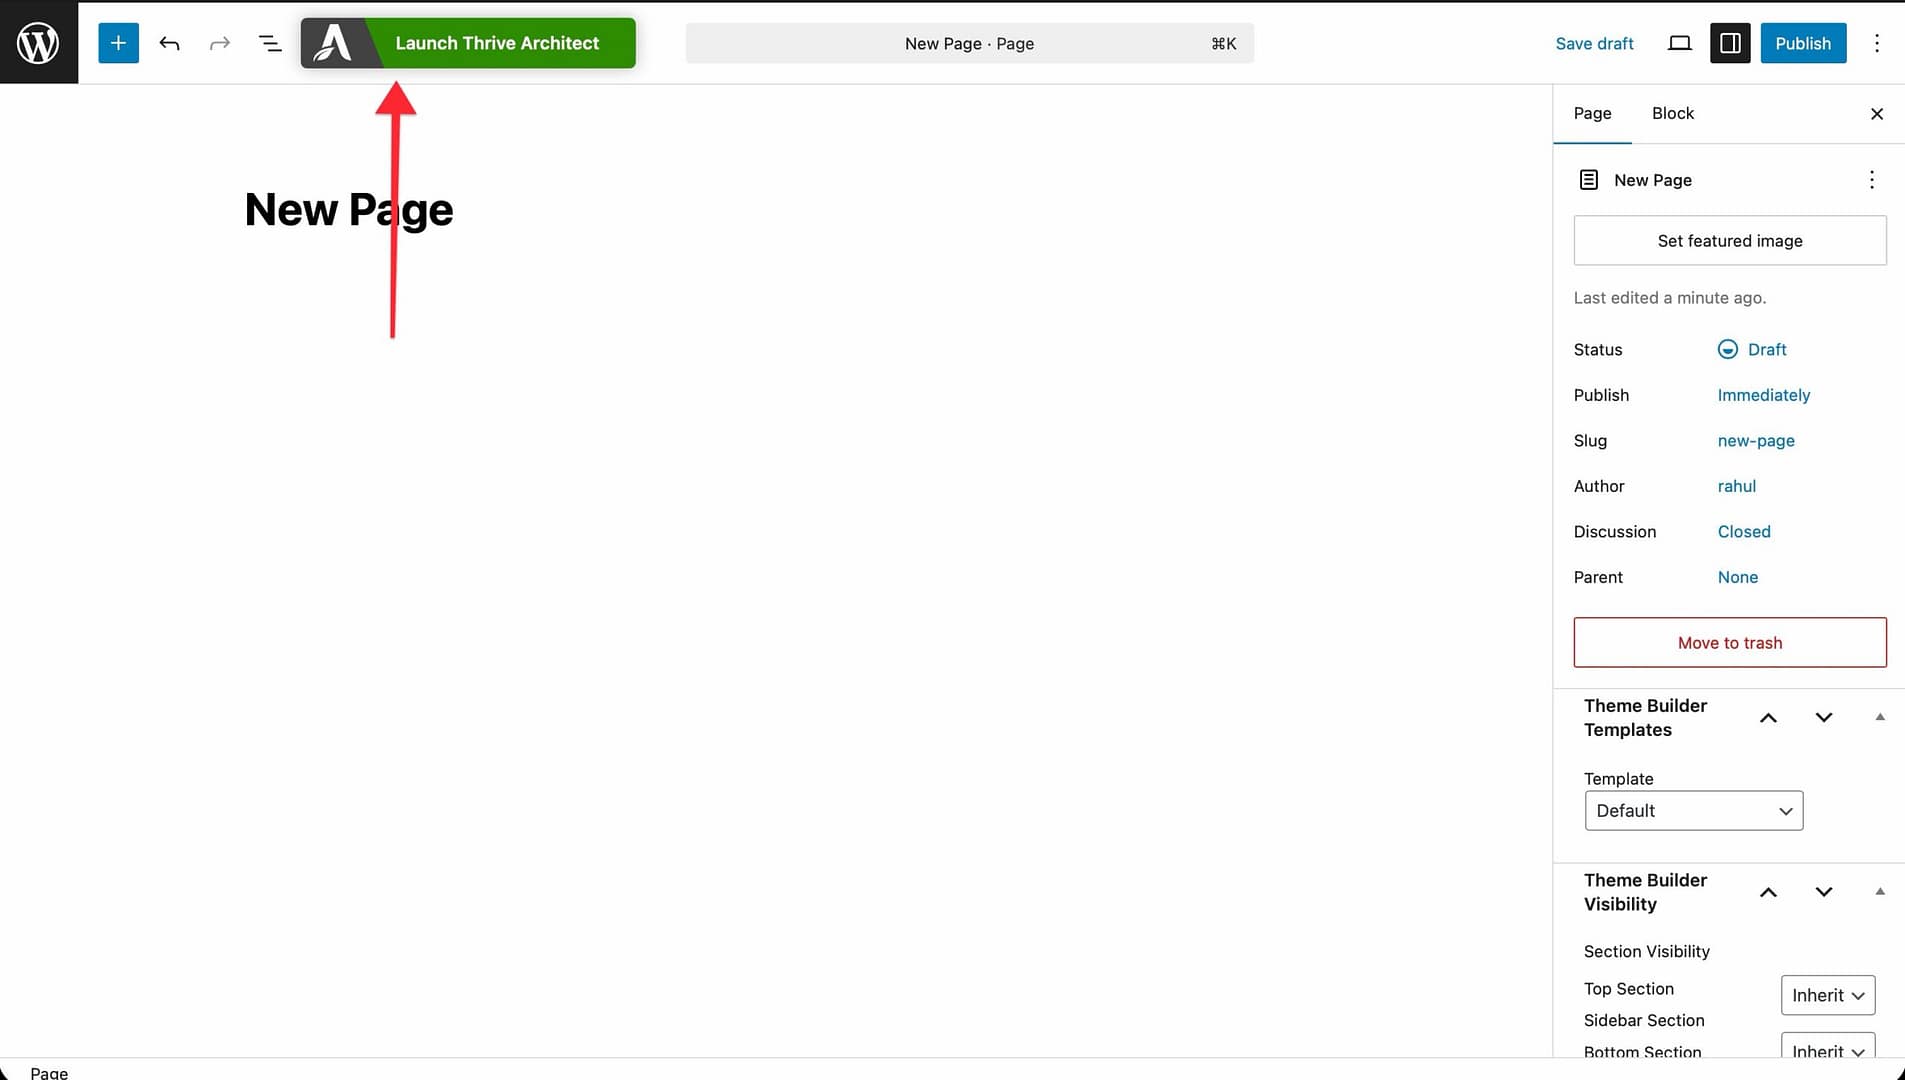
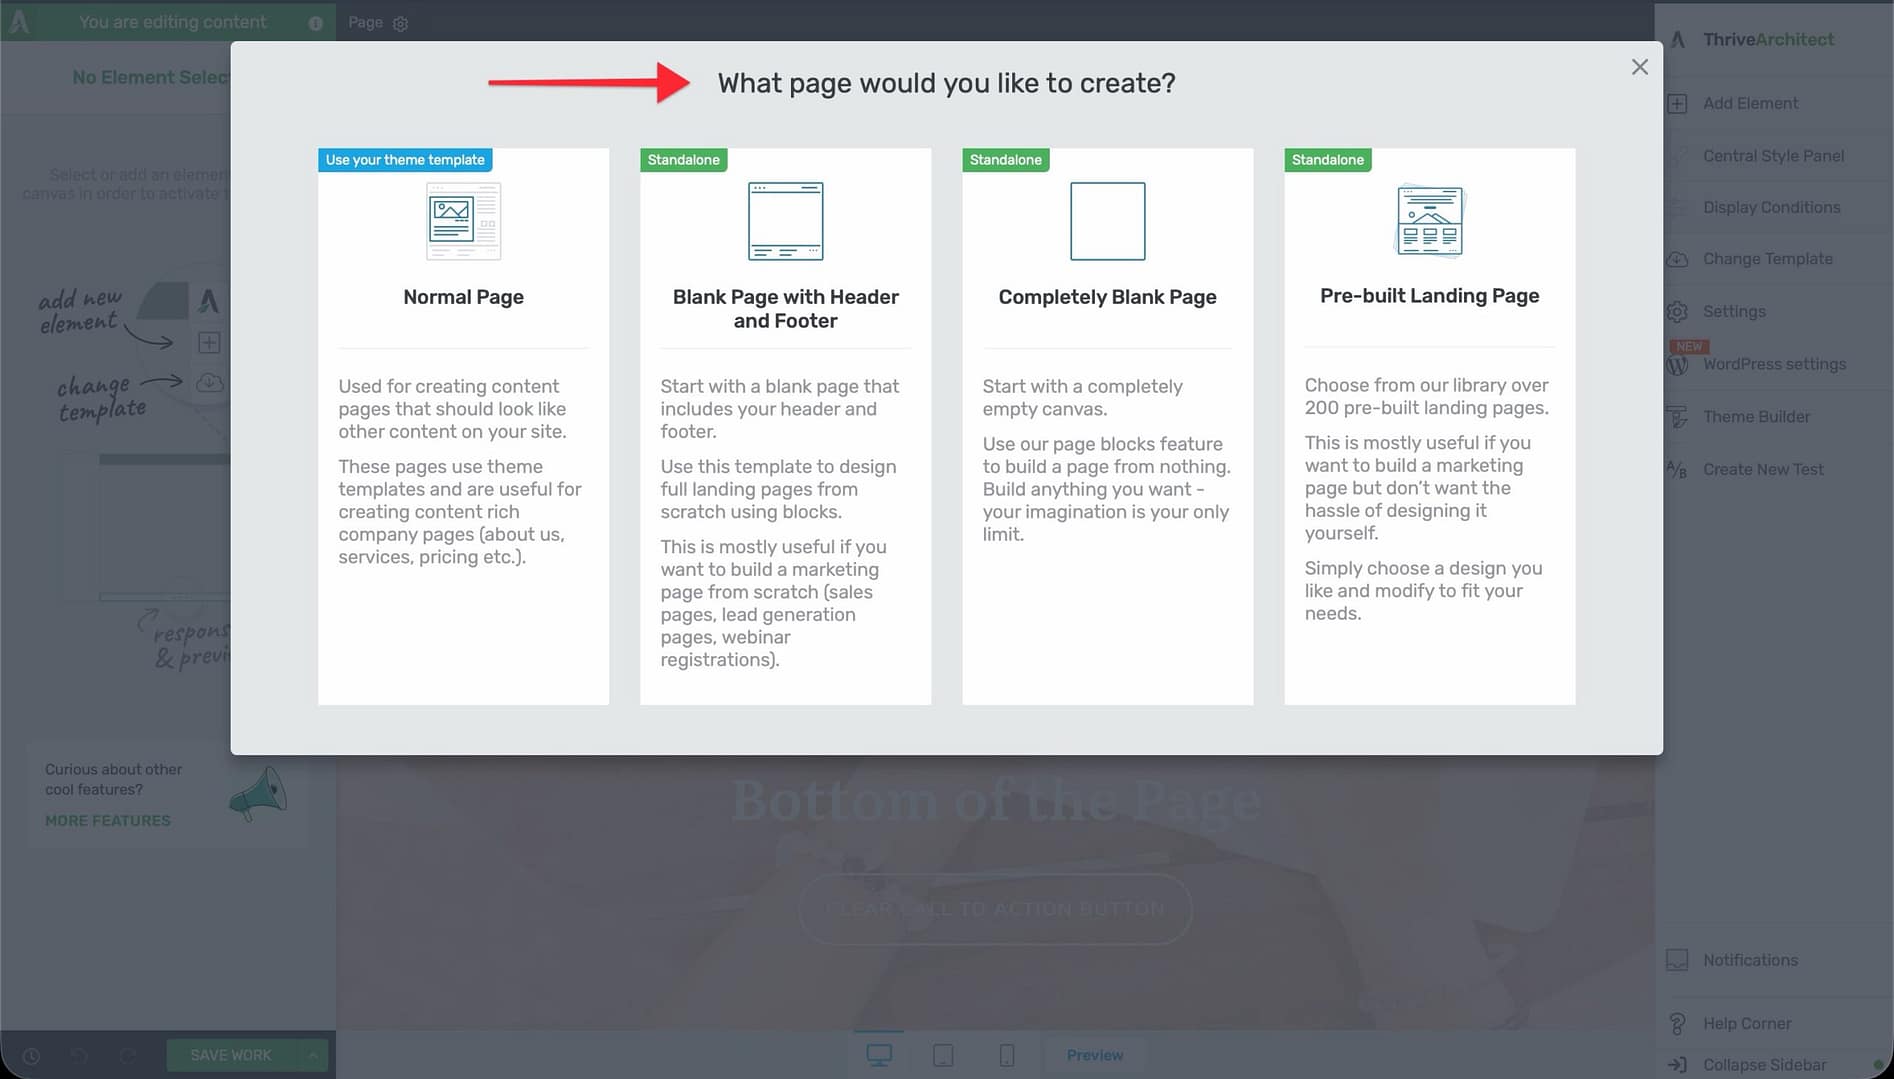
- Choose a page type:
- Normal Page — Start with a blank page that uses your theme’s layout. Best for standard content pages.
- Pre-built Landing Page — Start from a professionally designed landing page template. Best for sales pages, opt-in pages, and other conversion-focused pages.
- Blank Page with Header and Footer — An empty page that keeps your site’s header and footer. Available when using Thrive Theme Builder.
- Completely Blank Page — A fully empty page with no header, footer, or theme elements. Available when using Thrive Theme Builder.
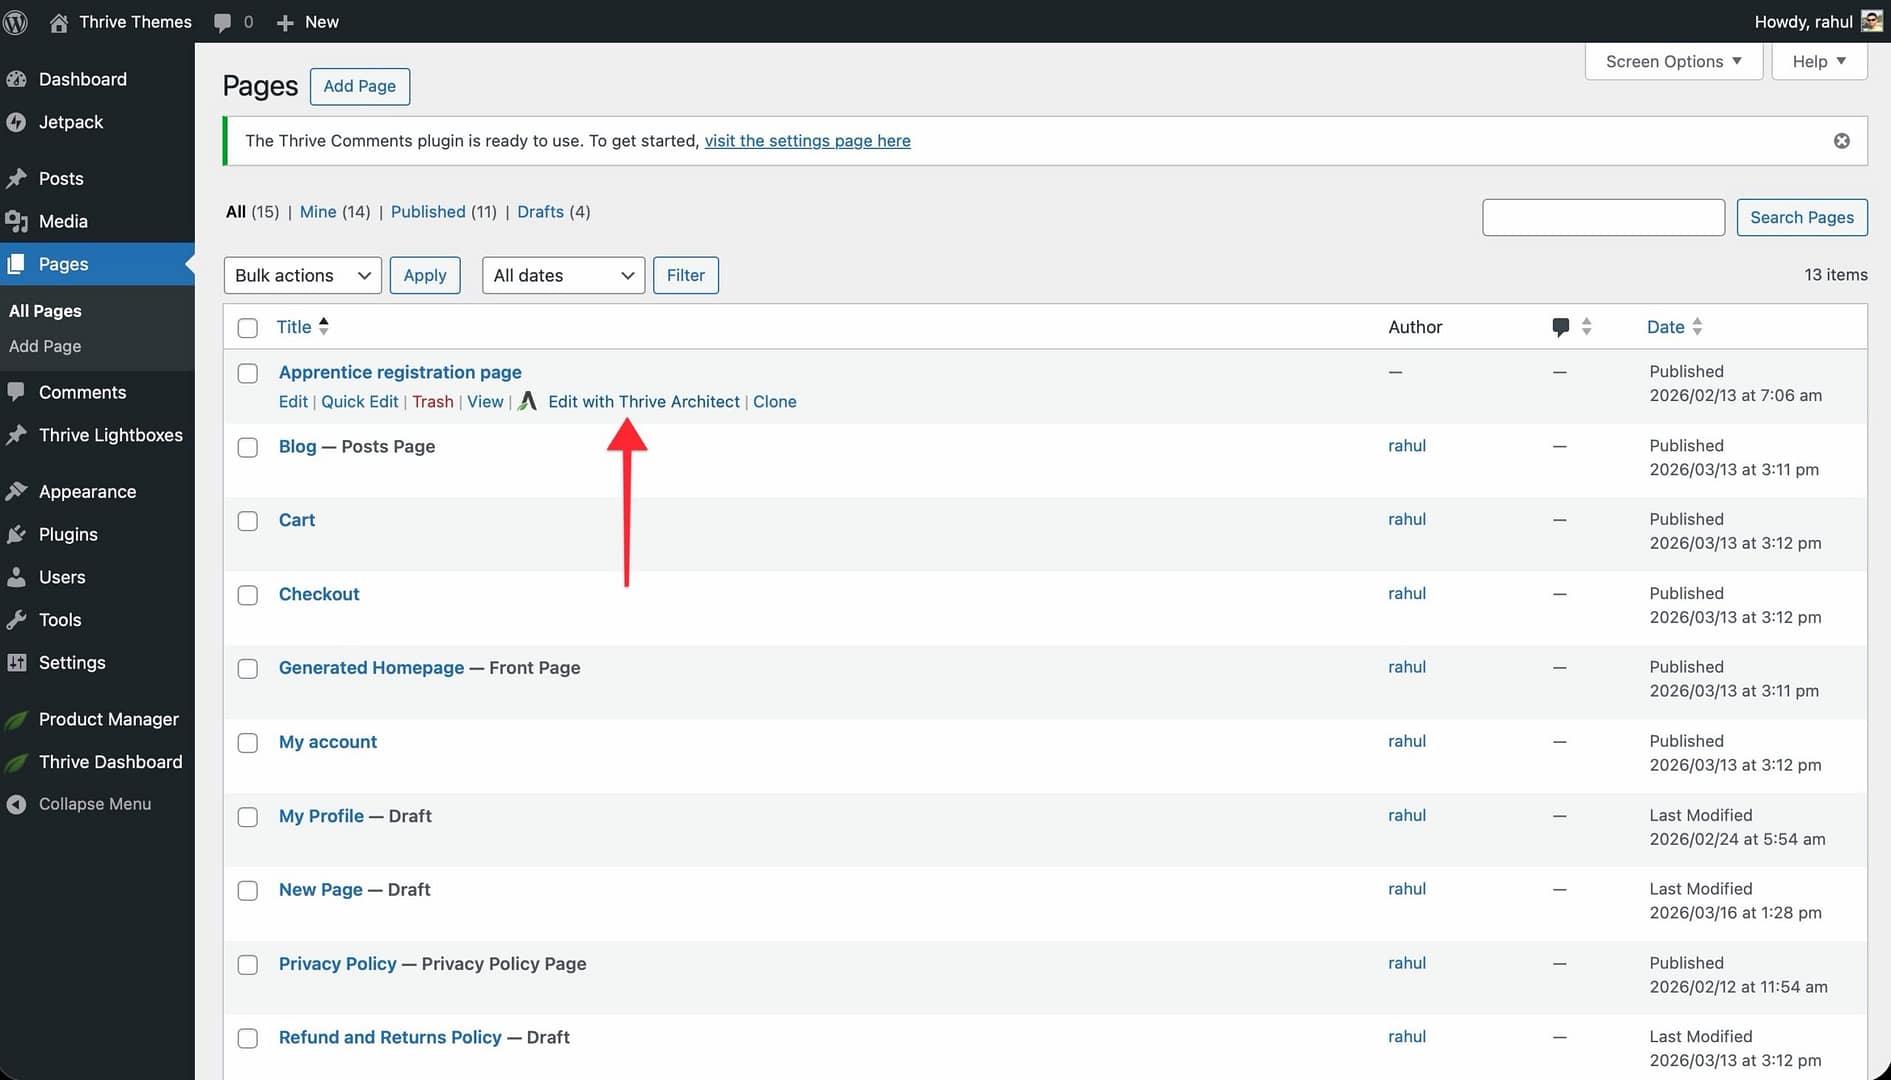
For an Existing Page or Post
- Go to Pages (or Posts) in the WordPress admin sidebar.
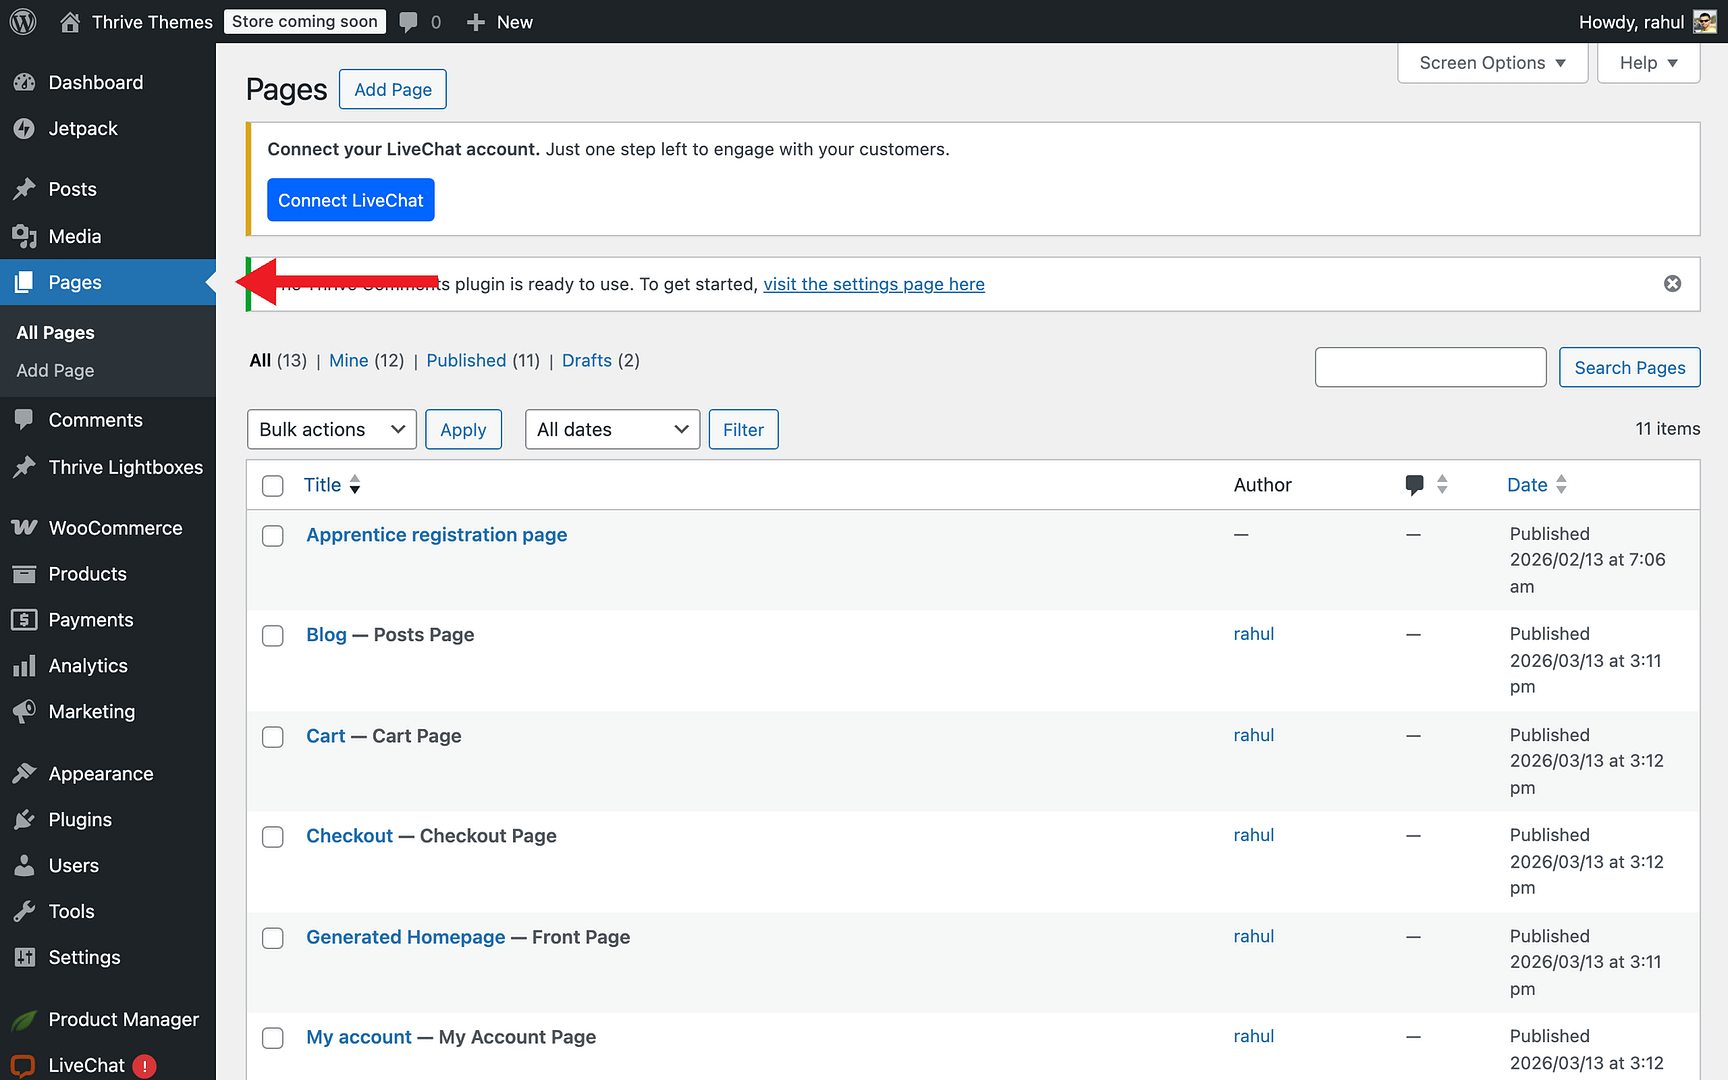
- Hover over the page or post you want to edit.
- Click Edit with Thrive Architect from the hover menu.
Normal Page vs. Landing Page
When creating a new page, you’ll choose between a normal page and a landing page. Here’s how they differ:
- Normal Page — Uses your theme’s design (header, footer, sidebar). You build content from scratch using the element panel. Best for standard content that should match your site’s look.
- Landing Page — A standalone page with its own design, separate from your theme. Starts from a pre-built template. Has its own style panel for global fonts and colors. Best for focused, conversion-driven pages like sales pages, webinars, and opt-in pages.
Editor Layout
The Thrive Architect editor has four main areas:
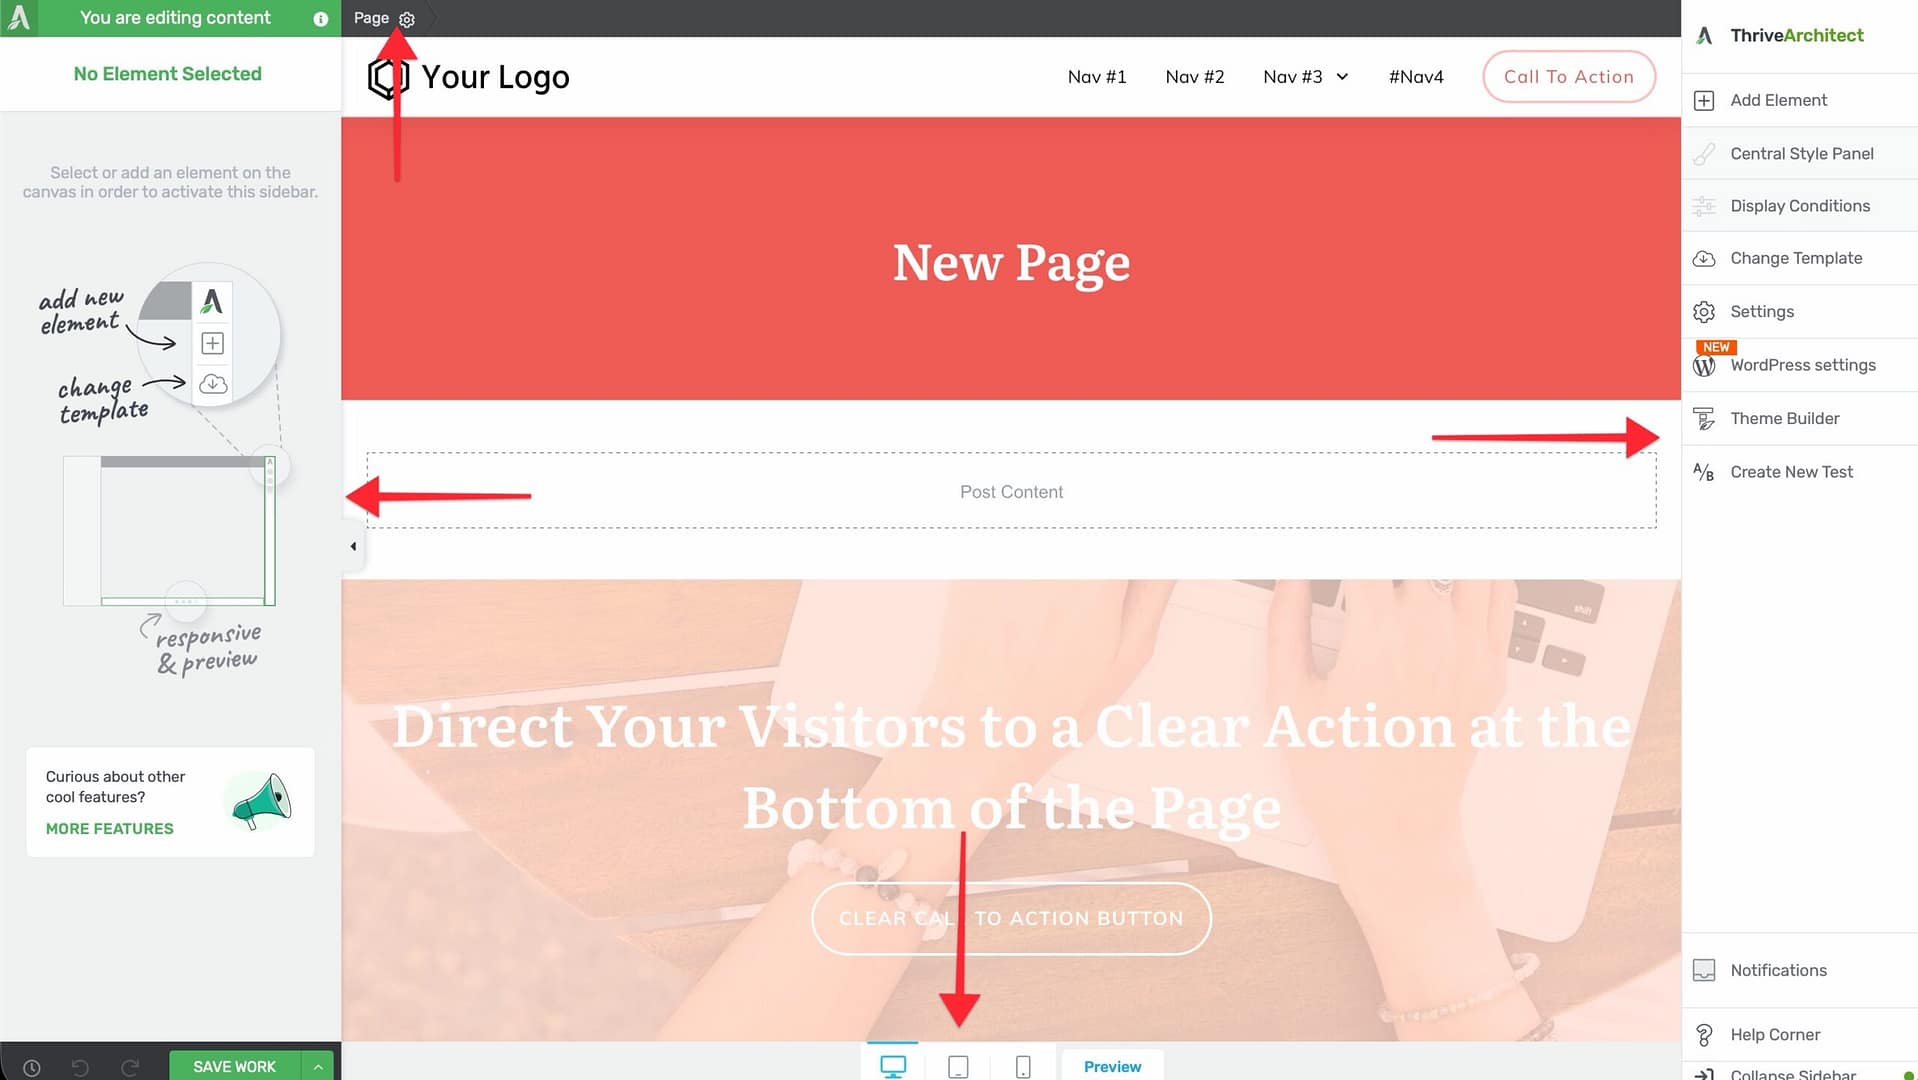
Top Panel (Breadcrumbs)
The breadcrumb bar at the top of the editor shows where you are in the page hierarchy. When you select an element, it displays the element’s parent containers (for example: Page > Background Section > Columns > Column > Text). Click any breadcrumb to select that parent element.
Right Sidebar (Quick Access Icons)
The right sidebar contains icon buttons for key features:
- Add Element (green plus icon) — Opens the element panel to add new elements to the page.
- Central Style Panel — Manage global styles for your landing page.
- Display Conditions — Set up conditional content visibility rules.
- Cloud Templates — Browse and load pre-built templates.
- Settings (gear icon) — Access page-level settings including Advanced Settings (HTML editing, Custom CSS, Export/Import).
- Create New Test — Set up A/B tests using Thrive Optimize.
Left Sidebar (Control Panel)
When you select an element, the left sidebar shows all available options for that element. These include element-specific controls (like text formatting, image source, or button settings) and general styling options (Layout & Position, Background, Borders & Corners, Shadow, and Responsive settings).
When no element is selected, the left sidebar displays a blank state with a prompt to select or add an element.
Bottom Toolbar
The bottom bar contains:
- Save Work button (bottom-left) — Save your changes. Click the arrow next to it for more options: Save and Preview, Save and Return to Post Editor, and Exit without saving.
- Undo and Redo buttons — Step backward or forward through your editing history.
- Revision Manager (clock icon) — View and restore previously saved versions of the page.
- Preview (eye icon, bottom-center) — Open a preview of the page.
- Responsive View icons (bottom-center) — Switch between Desktop, Tablet, and Mobile views.
Adding Elements to a Page
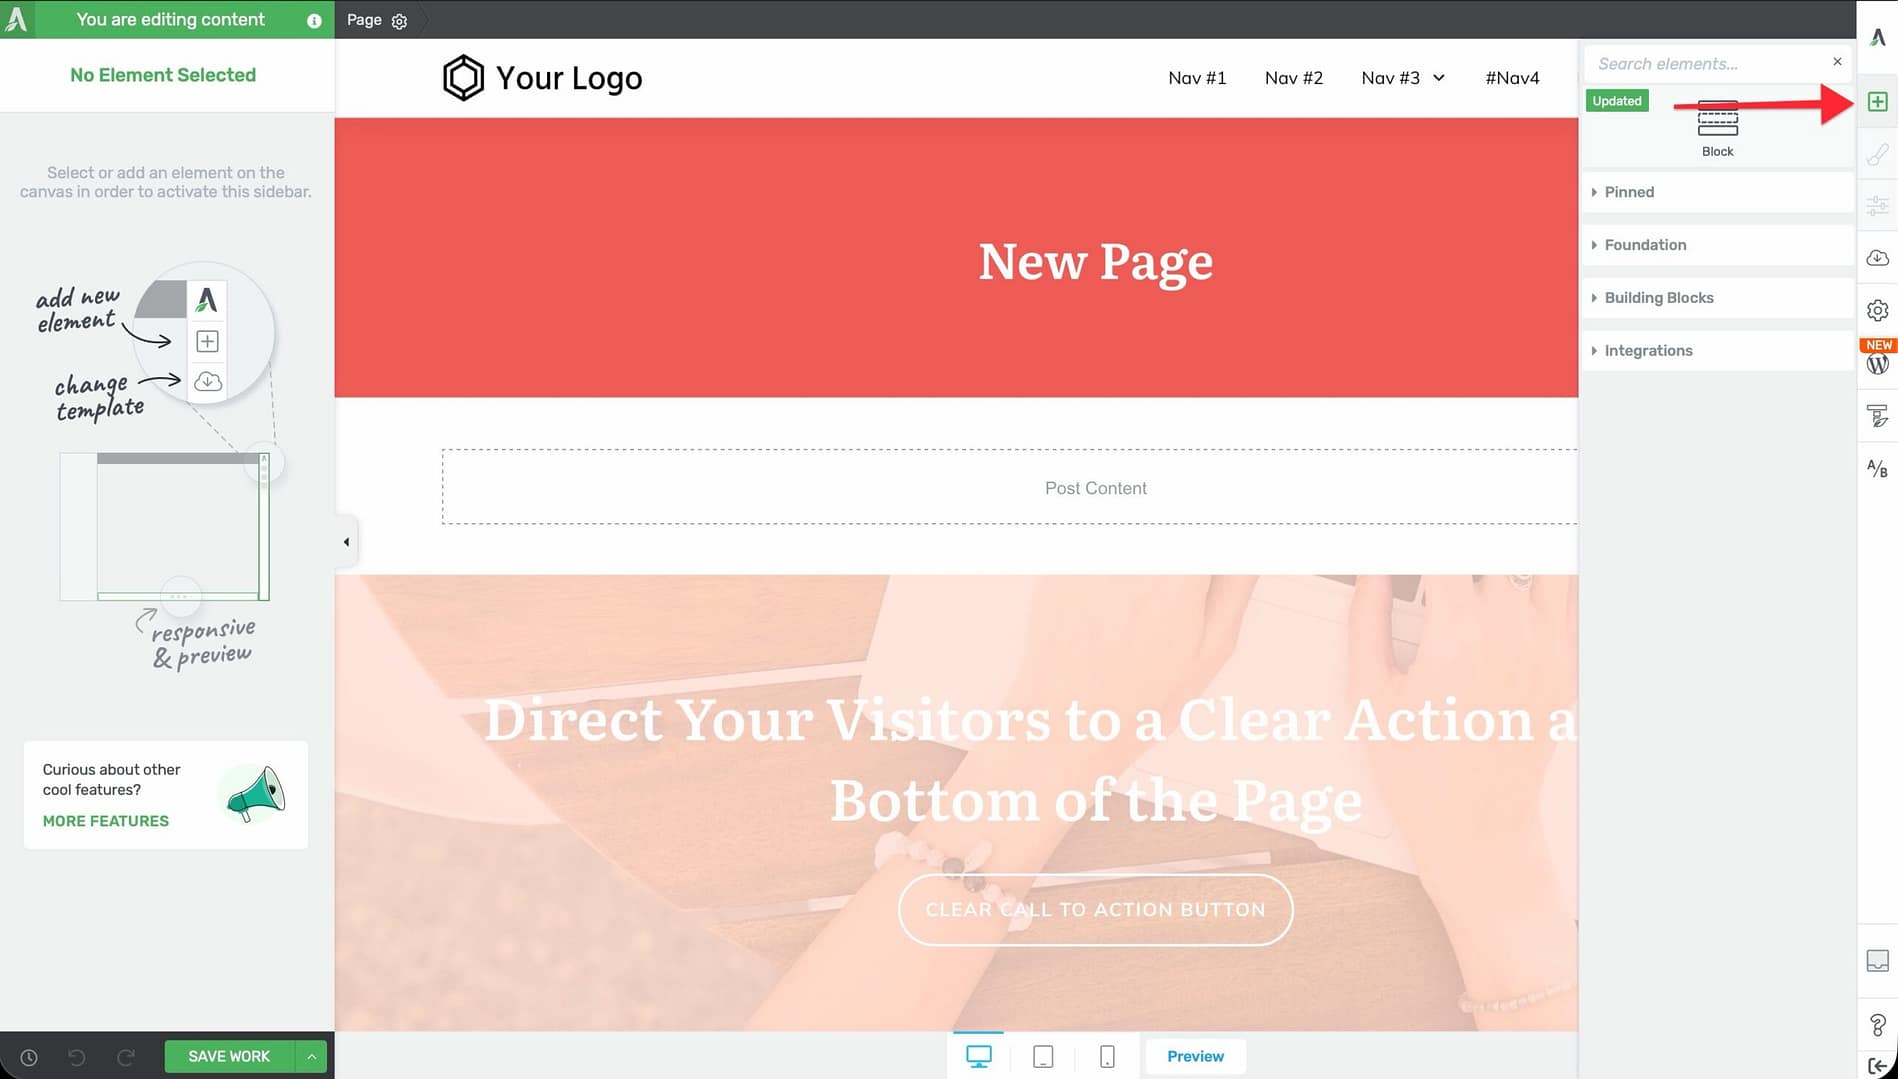
- Click the green plus (+) icon in the right sidebar to open the element panel.
- Elements are organized into sections:
- Pinned — Your favorite elements (pin frequently used ones for quick access).
- Foundation — Core elements like Text, Image, Button, Columns, Background Section, Divider, and more.
- Building Blocks — Advanced components like Lead Generation, Pricing Table, Countdown, Testimonial, and Post Grid.
- Integrations — Third-party integration elements.
- Widgets — WordPress widget elements.
- Drag an element from the panel and drop it onto the page canvas. A blue indicator line shows where the element will be placed.
- You can also use the search field at the top of the element panel to find an element by name.
Customizing Elements
After adding an element, click on it to select it. The left sidebar will show all available options for that element type. Common options include:
- Main Options — Element-specific settings (text content, image source, button action, etc.)
- Layout & Position — Margins, padding, width, alignment, and positioning
- Background — Background color, gradient, image, or video
- Borders & Corners — Border style, width, color, and corner radius
- Shadow — Box shadow and text shadow settings
- Responsive — Device-specific visibility and styling
Tip: To quickly duplicate an element, hover over it on the canvas and click the Duplicate icon. To delete it, click the Trash icon.
Frequently Asked Questions
What is the difference between Thrive Architect and Thrive Architect Lite?
Thrive Architect Lite is a limited version that comes included with Thrive Theme Builder. The full version of Thrive Architect must be purchased separately or accessed through a Thrive Suite subscription.
Can I use shortcodes inside Thrive Architect?
Yes. Use the Custom HTML element or insert a shortcode directly into a Text element to render any WordPress shortcode.
Can I A/B test my pages?
Yes. With the Thrive Optimize add-on, you can create A/B tests directly from the Thrive Architect editor using the Create New Test option in the right sidebar.
Related Resources
- Installing Thrive Architect: Learn how to install and activate Thrive Architect on your website.
- Editing with Thrive Architect: Master the core editing workflows including drag-and-drop, multi-select, and copy-paste styling.
- Landing Pages: Learn the differences between normal pages and landing pages and how to create them.