In this article, you’ll learn how to load, save, import, export, and manage landing page templates in Thrive Architect. You’ll also learn about Smart Landing Pages and their advanced color management features.
Landing page templates give you a head start on your page design. Thrive Architect includes over 130 pre-built templates, and you can save your own custom designs for reuse across your site.
Loading a Landing Page Template
When you create a new page and choose Pre-built Landing Page, the template browser opens automatically. You can also access it from an existing landing page.

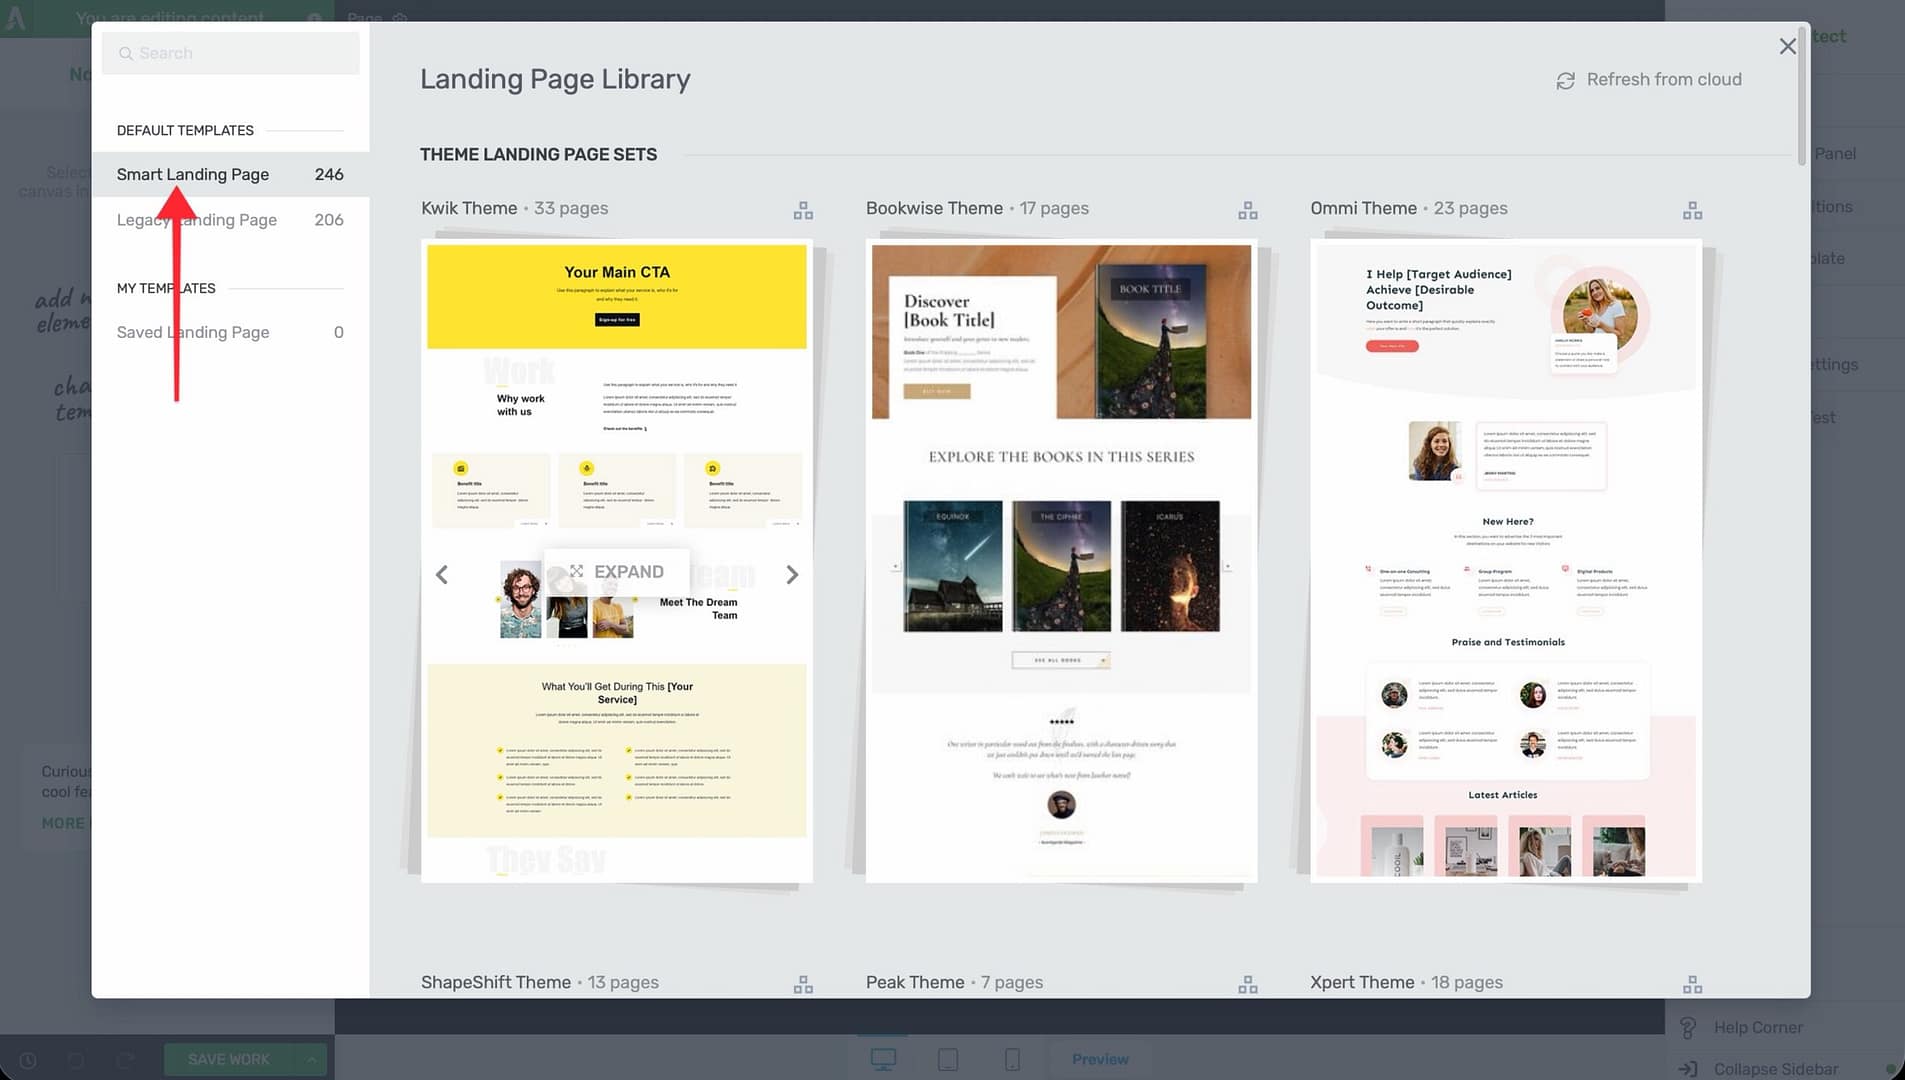
Template Browser Sections
The template browser organizes landing page templates into four sections:
- Default Templates — Pre-built templates included with Thrive Architect, organized by category (lead generation, sales, webinar, coming soon, etc.)
- My Templates — Custom templates you’ve saved from your own landing page designs
- Theme Landing Page Sets — Template sets that match your Thrive Theme Builder theme (available when using Thrive Theme Builder)
- Smart Landing Page Sets — Cloud-based template sets with smart color management and global styling features
Loading a Template on a New Page
- In your WordPress admin, go to Pages > Add New.
- Enter a page title and click Launch Thrive Architect.
- Select Pre-built Landing Page.
- Browse the template sections or use the search field to find a template.
- Click on a template to preview it, then click Apply Template to load it.
Loading a Template on an Existing Landing Page
- Open your landing page in Thrive Architect.
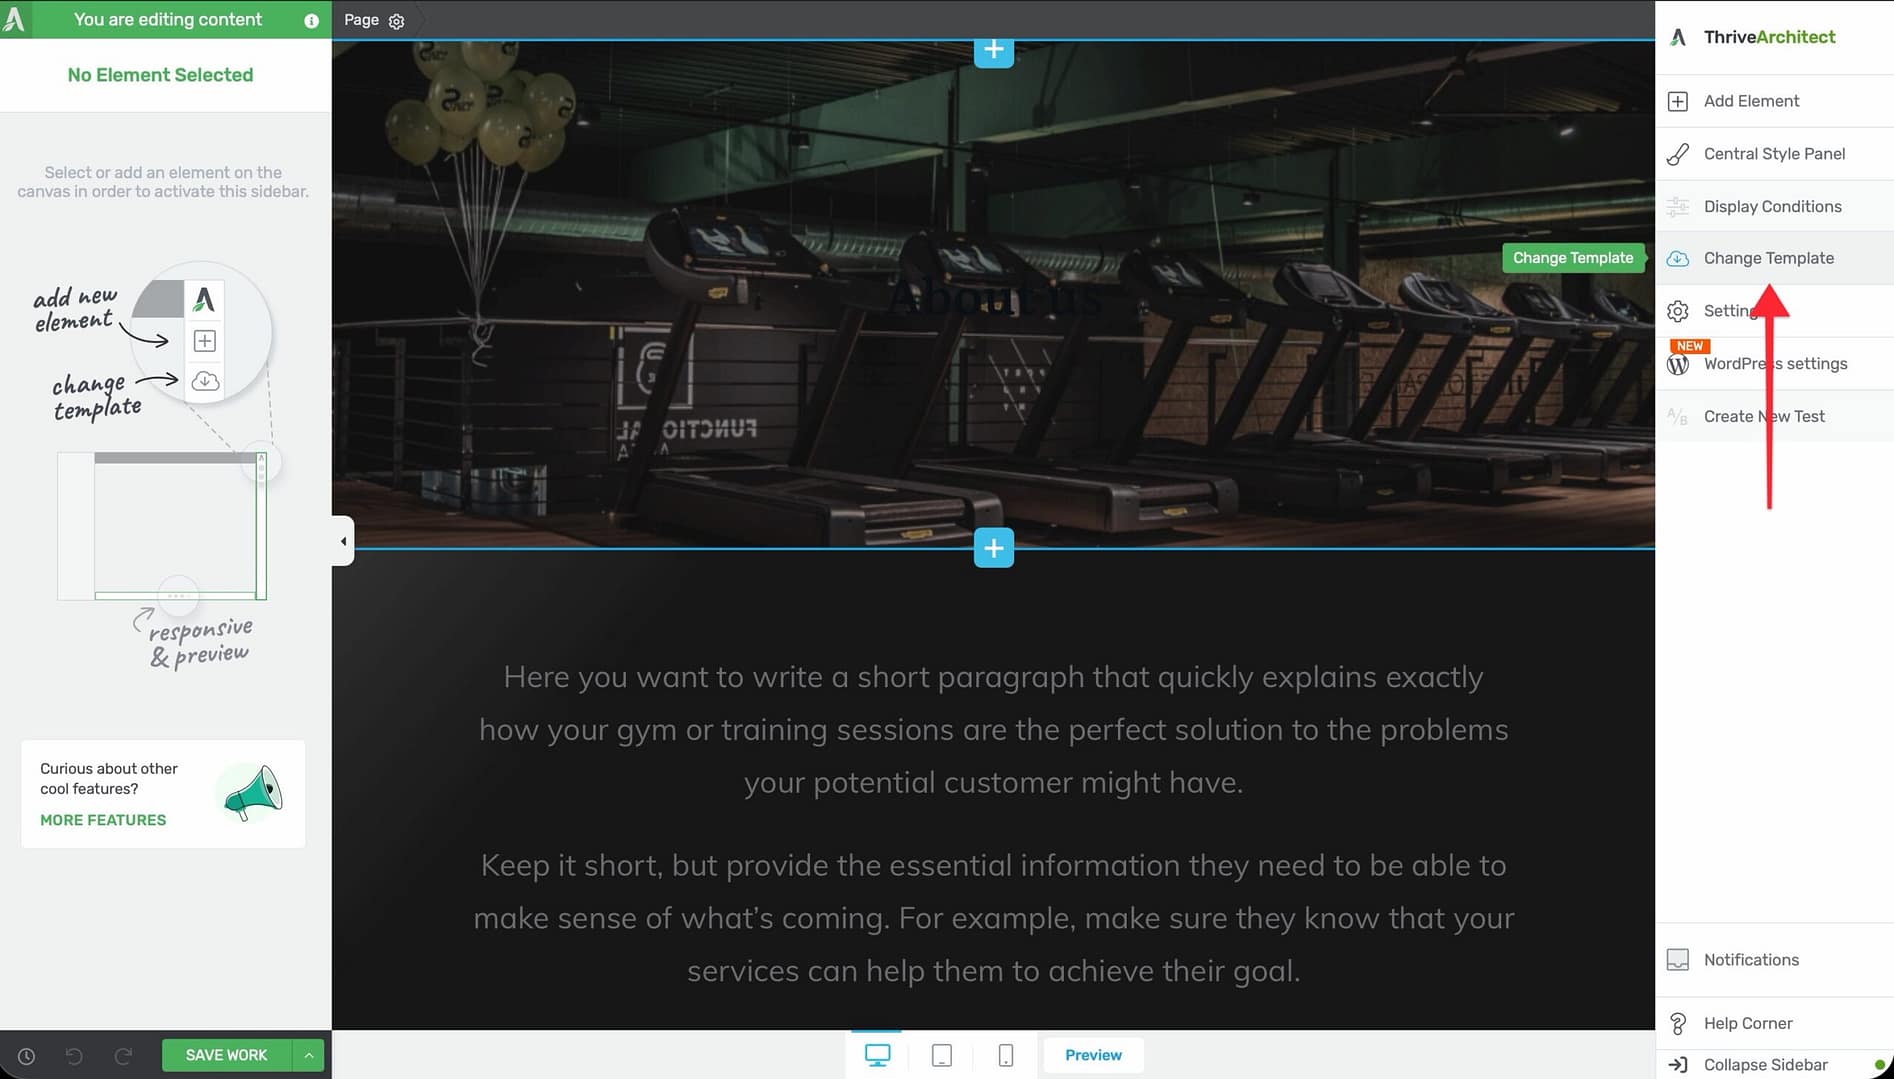
- Click the Settings icon (gear) in the right sidebar.
- In the landing page settings, click Change Template.
- Browse or search for a new template and apply it.
Warning: Loading a new template replaces the current landing page content. Save or export your existing design first if you want to keep it.
Saving Your Own Landing Page Templates
After customizing a landing page, you can save it as a reusable template that appears in the My Templates section.
- Open the landing page you want to save in the Thrive Architect editor.
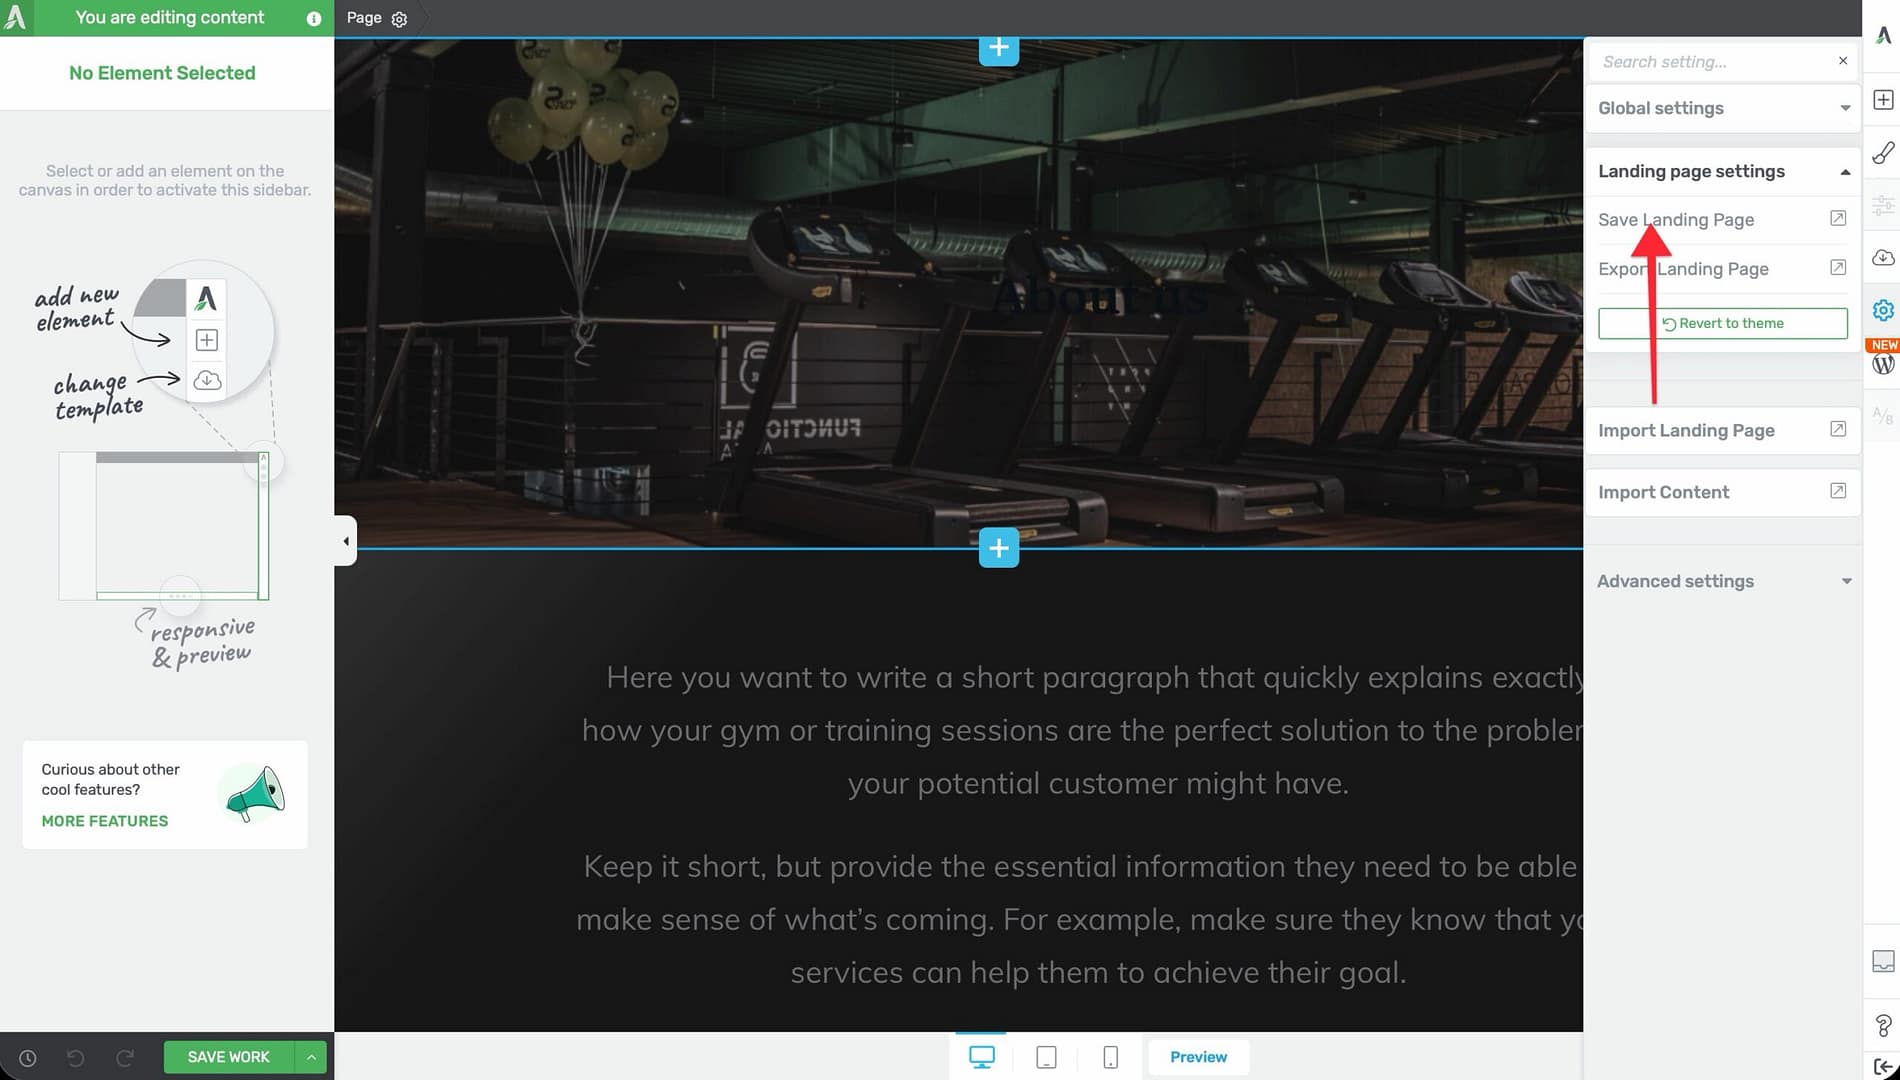
- Click the Settings icon (gear) in the right sidebar.
- Click the arrow next to Landing Page Settings to open the dropdown menu.
- Select Save Landing Page.
- Enter a name for your template.
- Click Save.
Your saved template will now appear in the My Templates section of the template browser whenever you create a new landing page.
Importing and Exporting Landing Page Templates
You can export a landing page design as a file and import it on a different WordPress site. This is useful for transferring designs between sites, sharing templates with team members, or creating backups.
Exporting a Landing Page
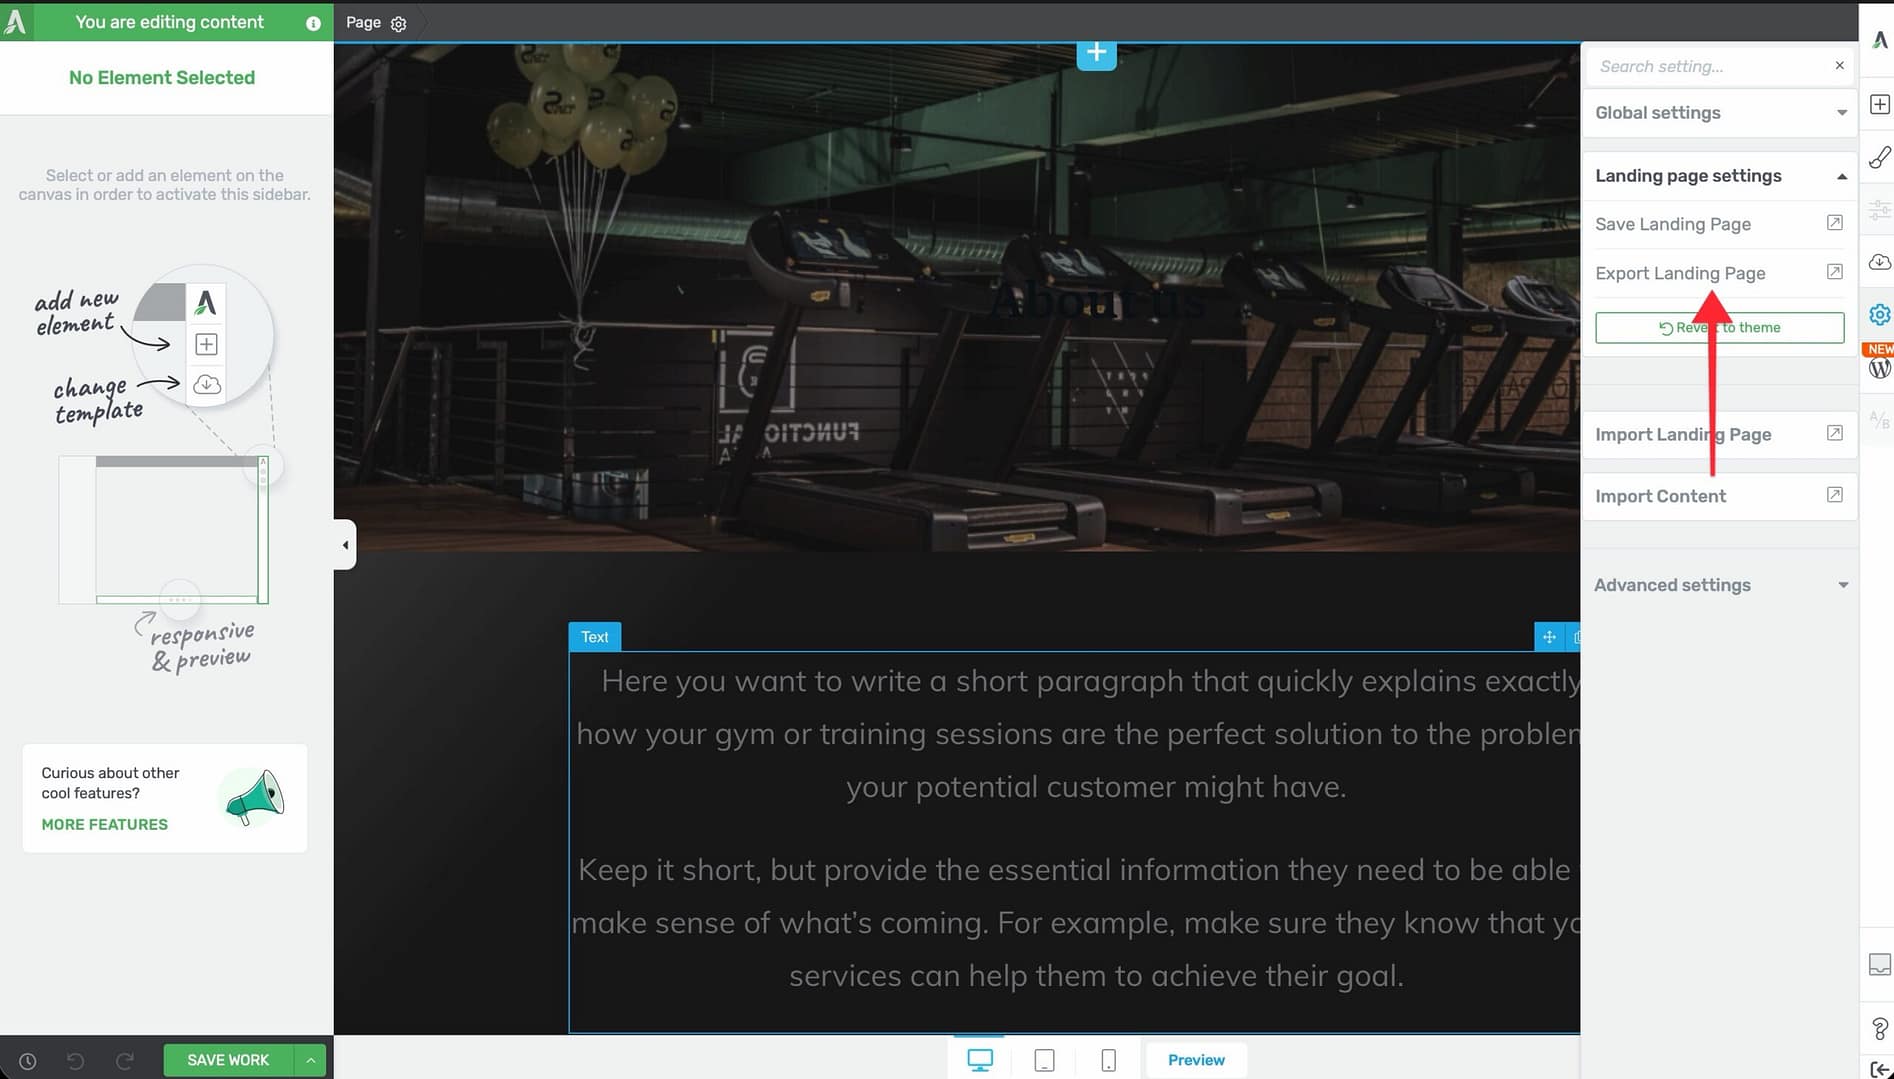
- Open the landing page in the Thrive Architect editor.
- Click the Settings icon (gear) in the right sidebar.
- Click the arrow next to Landing Page Settings to open the dropdown.
- Select Export Landing Page.
- A ZIP file containing the landing page template, content, and associated images will be downloaded to your computer.
Importing a Landing Page
- Create a new page or open an existing landing page in Thrive Architect.
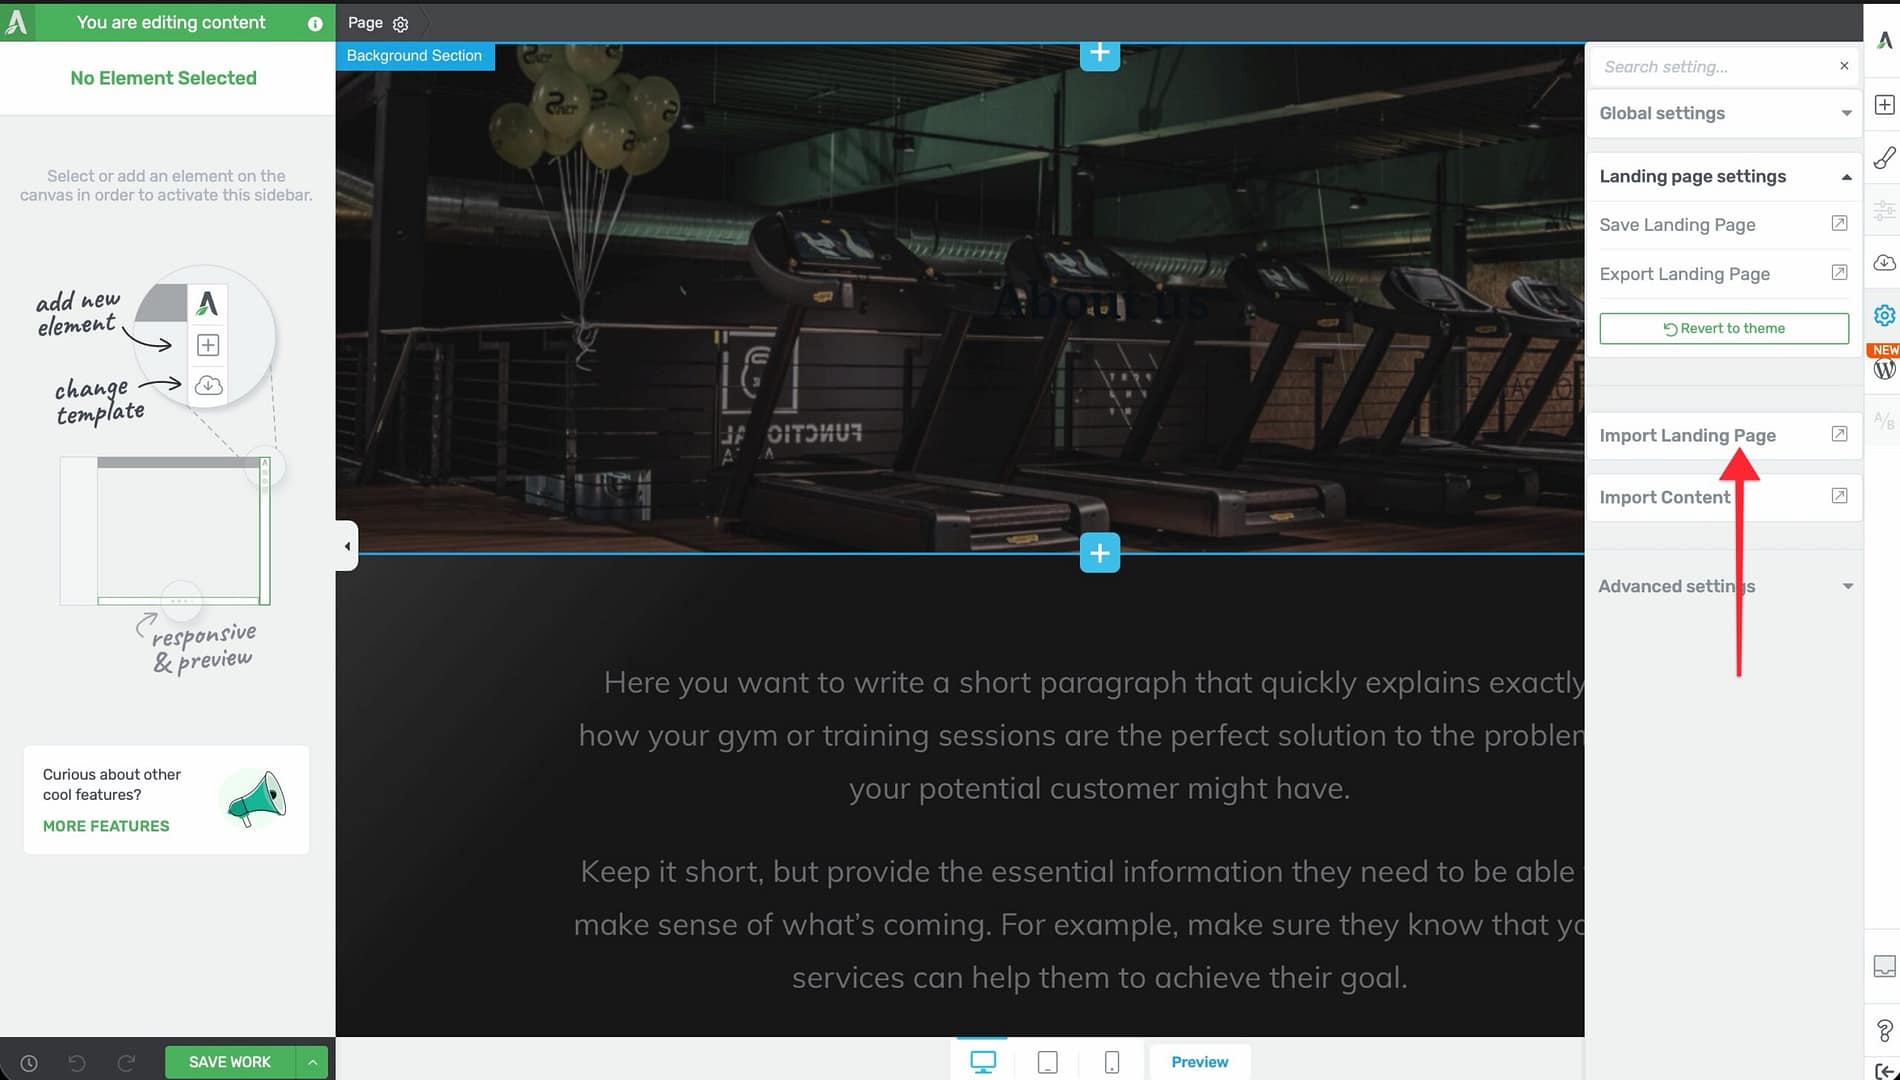
- Click the Settings icon (gear) in the right sidebar.
- Click the arrow next to Landing Page Settings to open the dropdown.
- Select Import Landing Page.
- Upload the ZIP file you exported earlier.
- The landing page design will be applied to the current page.
Note: Imported landing pages include all images and styles from the original design. No additional setup is needed after importing.
Smart Landing Pages
Smart Landing Pages are cloud-based template sets that include advanced color management, global styling, and auto-populated content fields. They are available in the Smart Landing Page Sets section of the template browser.
What Makes Smart Landing Pages Different
Smart Landing Pages go beyond standard templates by including:
- Master Template Colors — A centralized set of colors that control the entire page design
- Color Palettes — Pre-built color schemes you can switch between with one click
- Linked/Related Colors — Colors that automatically update together when you change one
- Global Fields — Content placeholders that auto-populate across the page
- Logo Auto-Display — Your site logo appears automatically in the template
Using Master Template Colors
When you load a Smart Landing Page, the Central Style Panel (accessible from the right sidebar) shows the Master Template Colors section. These are the core colors used throughout the template.
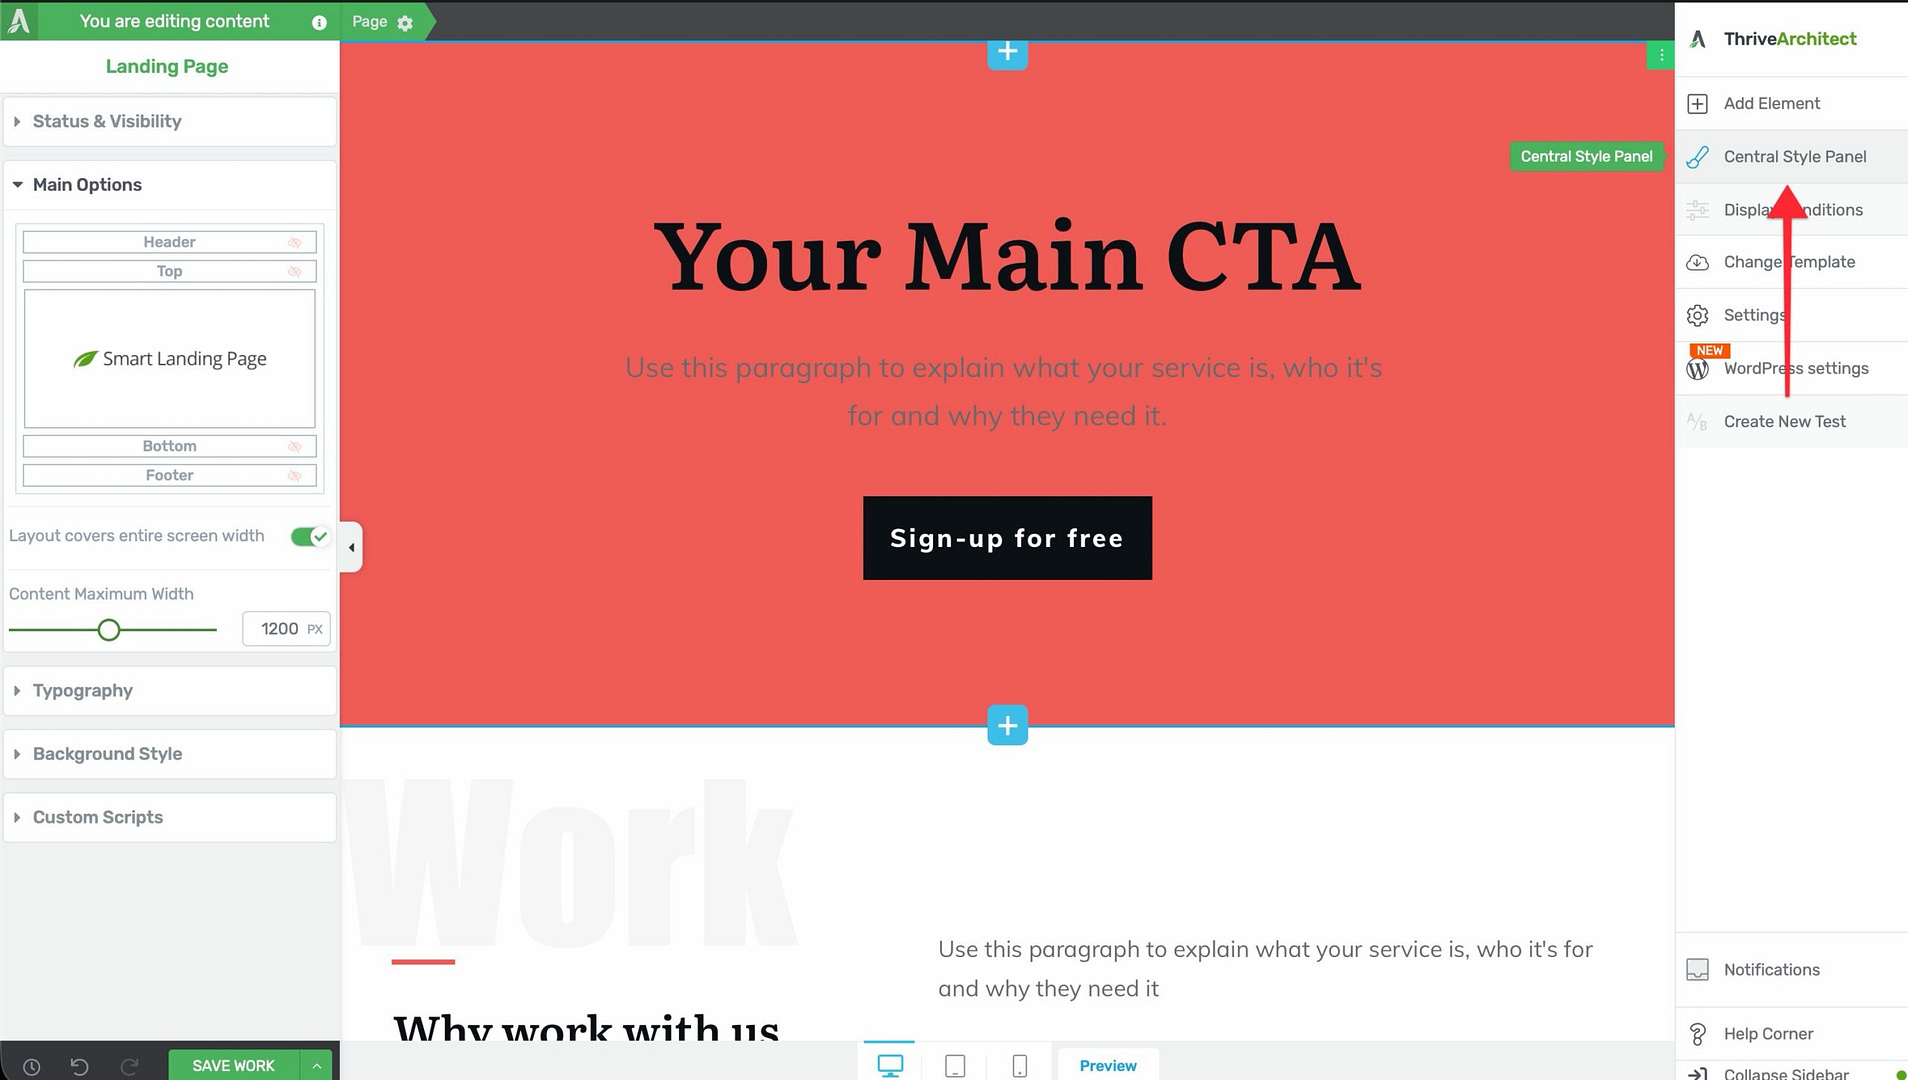
- Click the Central Style Panel icon in the right sidebar.
- Scroll to the Master Template Colors section.
- Click any color swatch to modify it.
- All elements using that color will update automatically across the page.
Switching Color Palettes
Smart Landing Pages come with pre-built color palettes that change the entire page’s color scheme instantly.
- Open the Central Style Panel from the right sidebar.
- In the Color Palettes section, browse the available palettes.
- Click a palette to apply it. All Master Template Colors will update to match the new scheme.
Using the Locate Feature
The Locate feature helps you find exactly where a specific color is used on your landing page.
- In the Central Style Panel, hover over a color swatch in the Master Template Colors section.
- Click the Locate icon.
- The editor will highlight all elements on the page that use that color, making it easy to see the impact of changing it.
Global Fields
Smart Landing Pages include global fields—content placeholders that appear in multiple locations on the page. When you update a global field value, it changes everywhere that field is used.
This is especially useful for values like your company name, phone number, or tagline that appear in the header, footer, and body content.
Frequently Asked Questions
Can I Use My Saved Templates on a Different Site?
Yes. Export the landing page as a ZIP file and import it on the other site. Both sites must have Thrive Architect installed.
Do Smart Landing Page Color Changes Affect My Whole Site?
No. Master Template Colors and color palettes only affect the specific landing page you’re editing. They don’t change your site’s global theme colors.
Can I Save a Smart Landing Page as My Own Template?
Yes. After customizing a Smart Landing Page, you can save it to My Templates using the same save process described above.
Related Resources
- Getting Started with Landing Pages: How to Get Started with Landing Pages in Thrive Architect
- Headers and Footers: How to Use Headers and Footers on Landing Pages
- Scripts and Analytics: How to Add Scripts, Analytics, and Typography to Landing Pages
- Importing and Exporting Content: Importing and Exporting Content in Thrive Architect
That’s it! You’ve learned how to load, save, import, and export landing page templates, and how to use Smart Landing Pages for advanced color management and global styling.