In this article, you’ll learn about the three structural layers that make up a Thrive Theme Builder template—the Content Area, Content Wrapper, and Layout Container—and how to use them to control your template’s layout.
The Three Structural Layers
Every Thrive Theme Builder template is built from a hierarchy of structural containers. Understanding these layers helps you make precise layout adjustments.
From outermost to innermost:
- Layout Container — The outermost structural container.
- Content Wrapper — The container that holds the content area and sidebar.
- Content Area — The region where your page or post content appears.
Layout Container
The Layout Container is the outermost layer of the template structure. It wraps everything—header, content, sidebar, and footer.
What It Controls
- Content width — The maximum width of the template’s content. This determines how wide the main content area and sidebar appear, regardless of the browser window size.
- Background — The background color or image that extends behind the entire template.
- Full-width vs. boxed layout — Whether the content stretches to the full browser width or is contained within a centered box.
How to Access
- In the Thrive Theme Builder editor, click the Layout Container label in the breadcrumbs at the top of the editor. You can also click on the outermost background area of the template.
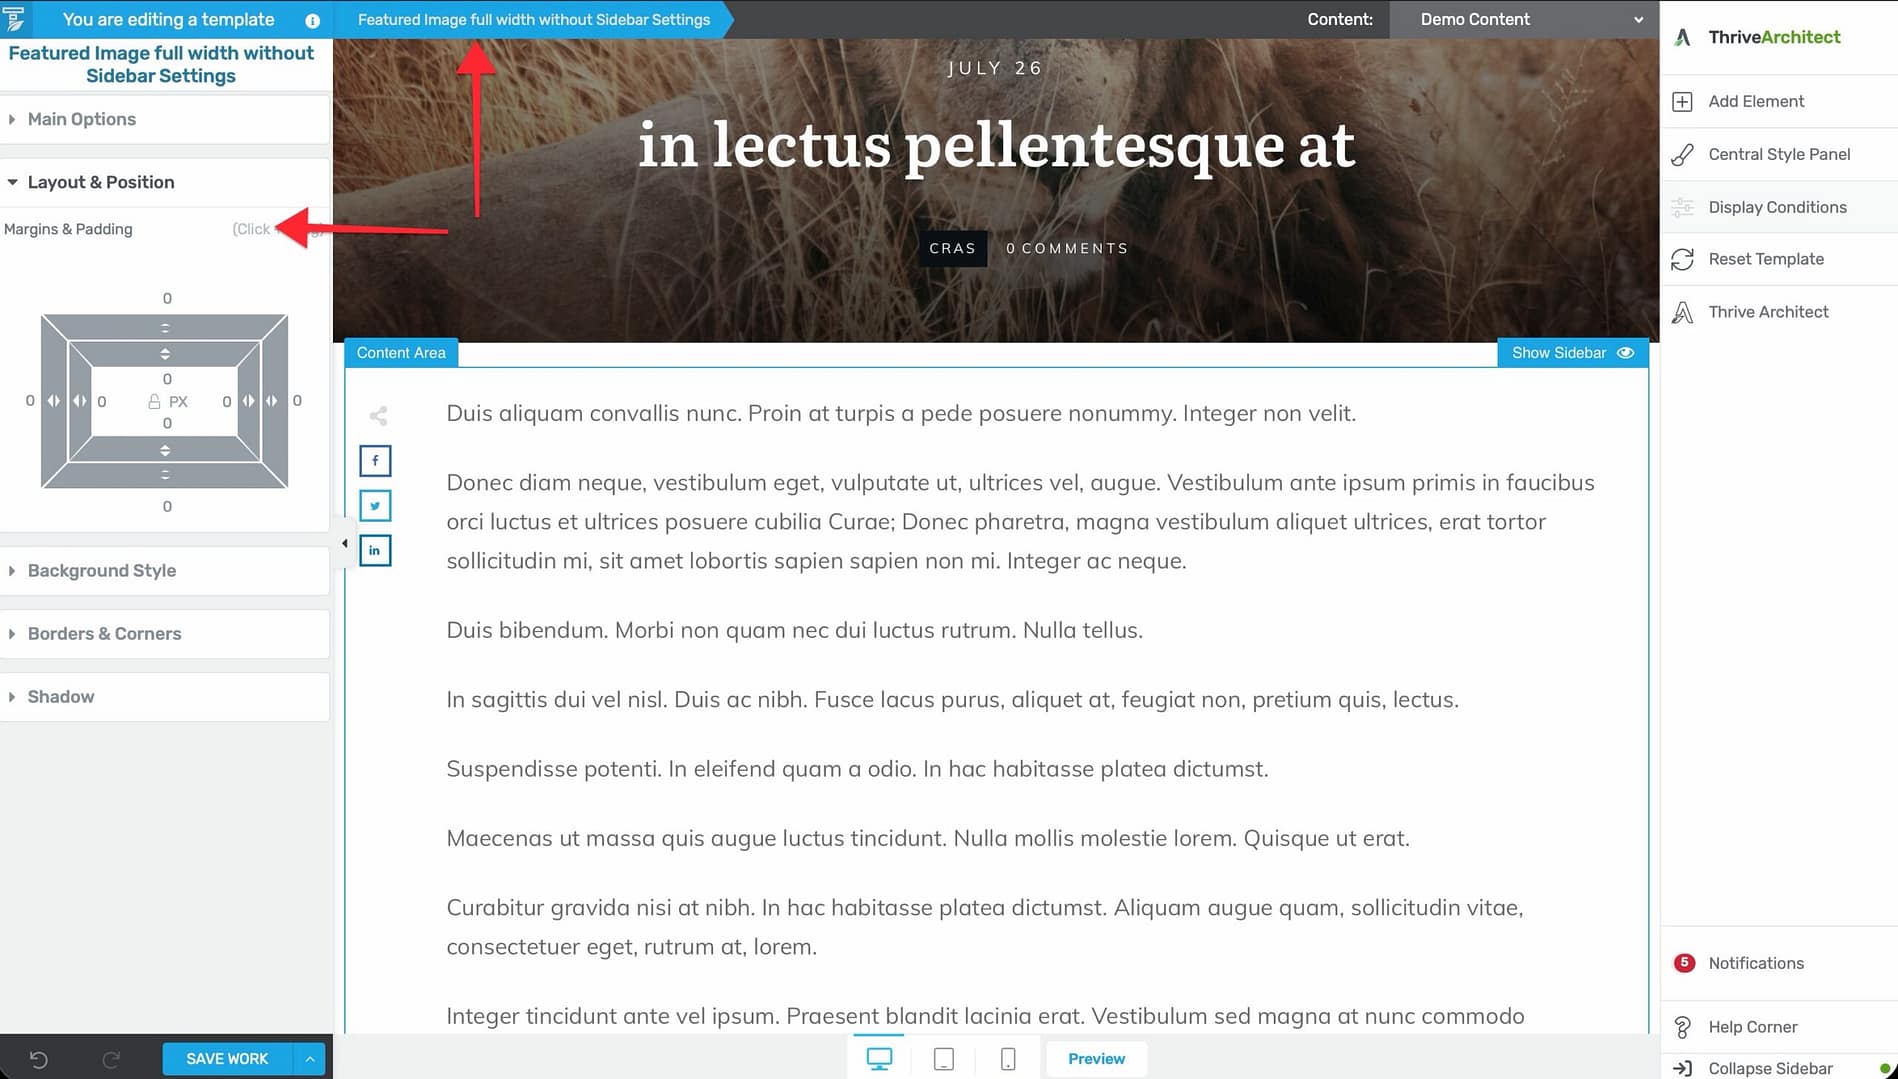
- The left sidebar updates to show the Layout Container’s settings.
Content Wrapper
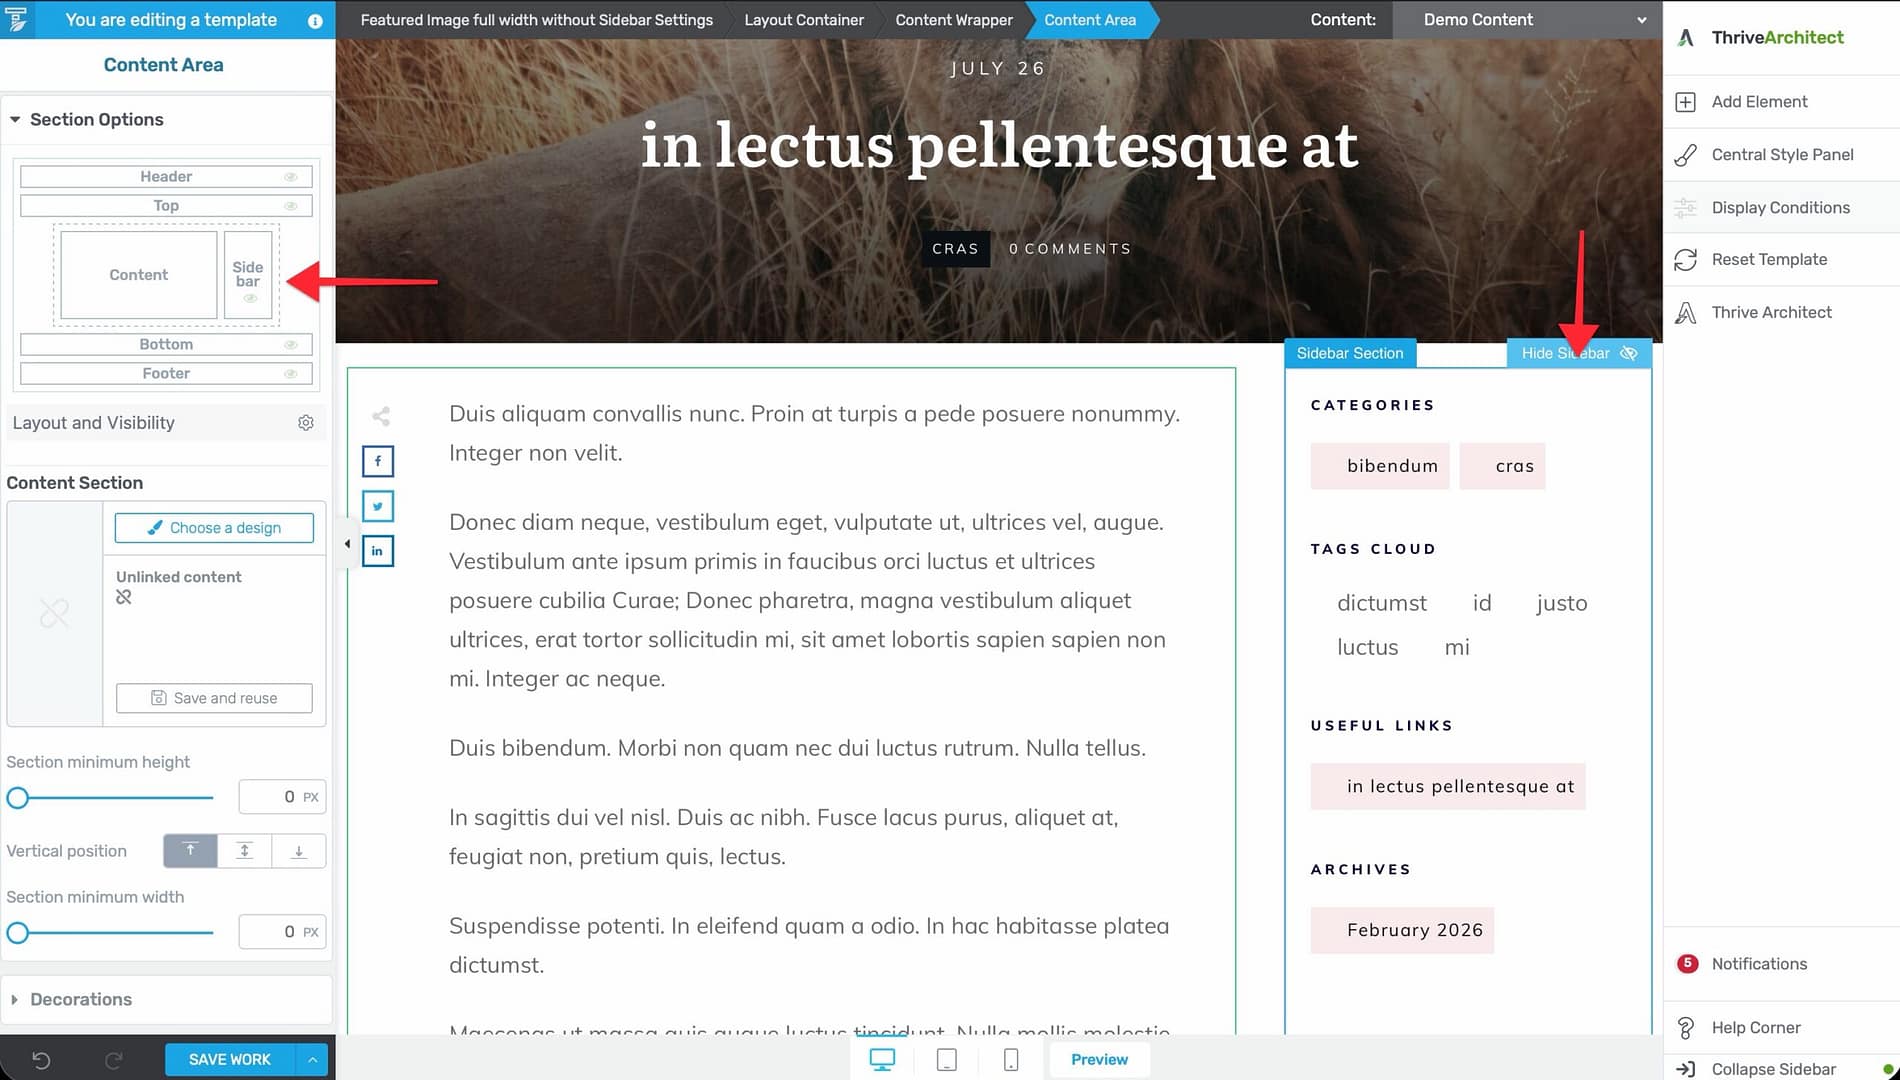
The Content Wrapper sits inside the Layout Container and holds the main content area alongside the sidebar (if present). It controls the relationship between the content and sidebar.
What It Controls
- Sidebar position — Whether the sidebar appears on the left or right side of the content.
- Sidebar visibility — Whether the sidebar is visible or hidden for this template.
- Gutter width — The spacing between the content area and sidebar (adjustable from 0 to 240px).
- Maximum width — The maximum width of the content-plus-sidebar area.
How to Access
- In the breadcrumbs, click Content Wrapper (may also appear as the main container level in the hierarchy).
- The left sidebar updates to show the Content Wrapper’s settings.
Content Area
The Content Area is the innermost structural layer—the actual region where your page or post content appears. When a visitor views a page or post, the content they created in the WordPress editor is rendered inside this area.
What It Controls
- Content styling — Background color, padding, and borders around the content.
- Content width — The width of the content region within the wrapper (separate from the Layout Container’s overall width).
How to Access
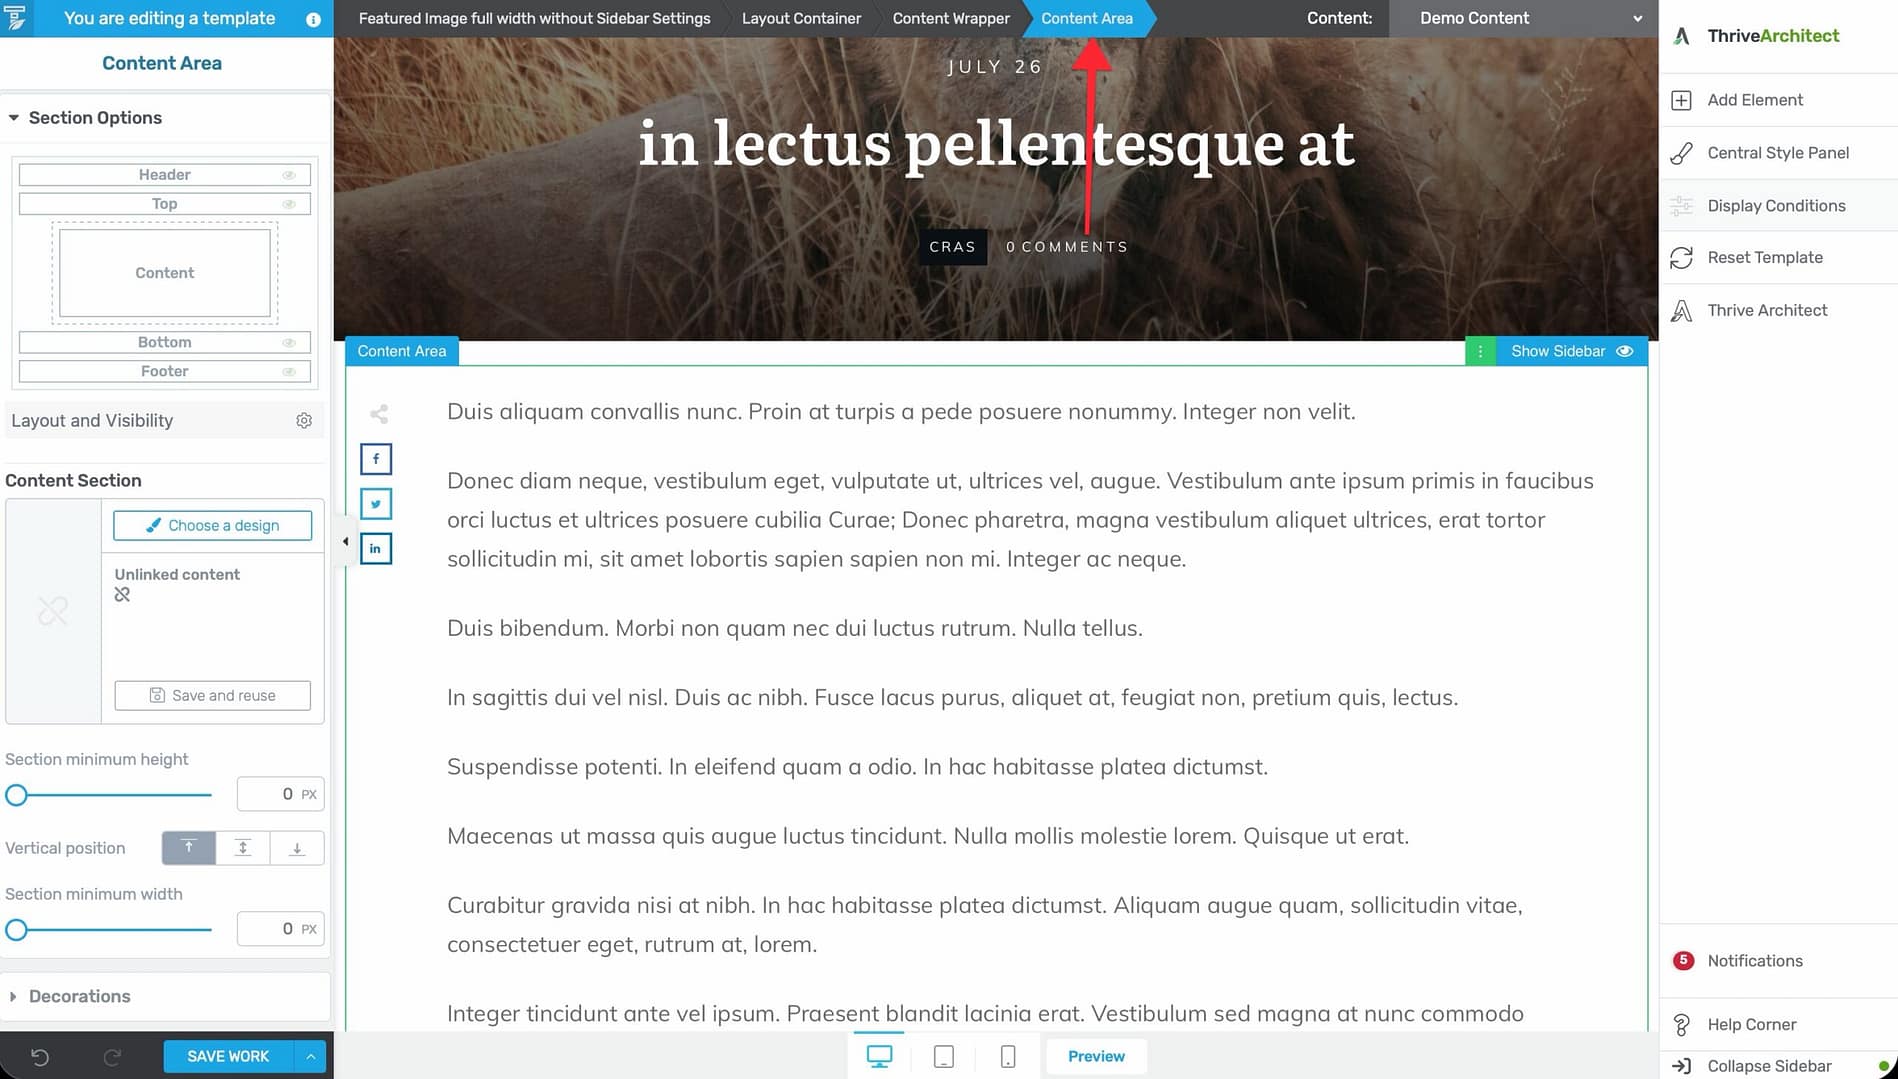
- In the breadcrumbs, click Content Area (may also appear as the section-level element).
- The left sidebar updates to show the Content Area’s settings.
How the Layers Work Together
Here is how the three layers nest together in a typical template:
“ Layout Container (outermost — controls overall width and background) └── Header Section └── Content Wrapper (controls sidebar position and gutter) │ ├── Content Area (where page/post content appears) │ └── Sidebar Section (optional, left or right) └── Footer Section “
- The Layout Container sets the overall maximum width and background.
- The Content Wrapper divides the space between content and sidebar.
- The Content Area contains the actual page or post content.
Practical Example
If you want to create a full-width template with no sidebar:
- Click the Layout Container in the breadcrumbs and set the content width to full-width.
- Click the Content Wrapper and hide the sidebar.
- The Content Area will expand to fill the full width of the wrapper.
If you want a sidebar on the right with the content area taking up most of the space:
- Click the Content Wrapper in the breadcrumbs.
- Enable the sidebar and set its position to the right.
- Adjust the gutter width between the content and sidebar as needed.
Using Breadcrumbs for Navigation
The breadcrumbs at the top of the editor are the easiest way to select and configure these structural layers:
- Click on any element in the template.
- Look at the breadcrumbs—they show the full hierarchy from Layout Container down to the selected element.
- Click any level in the breadcrumbs to select it and view its settings in the left sidebar.
Tip: The breadcrumbs are especially useful when you need to adjust layout-level settings that aren’t accessible by clicking directly on the template canvas.
Related Resources
- Using the Thrive Theme Builder Editor: Learn about the editor tools and interface.
- Template Settings & Defaults: Learn how to configure template settings.
- Customizing the Template Layout: Learn how to customize the template layout.