Have you designed and published a course already using Thrive Apprentice? Adding an assessment will require you to take one extra step to get all set.
If you are new to Thrive Apprentice and are creating your first course with the assessments, you can skip the post here.
How would you know if you should refresh a template?
If at all you see a notice asking you to “reload the lesson list template” while adding an assessment, it means the template in use does not have the information needed to display the assessment.
Therefore, you must reload or refresh the template.
The main templates that you’ll need to update are:
- Lesson List: the ‘assessment’ type is alongside lessons, so lesson lists must be refreshed.
- Assessment Template: this is a new template type introduced with the assessments feature.
To make this easier, there are three ways you can choose from. The method you choose depends on the customization done on the current template.
Re-downloading a New Design
Re-downloading or switching to a new template is the easiest way to get things working without doing much. It can be the most common method when you have negligible customizations on the template.
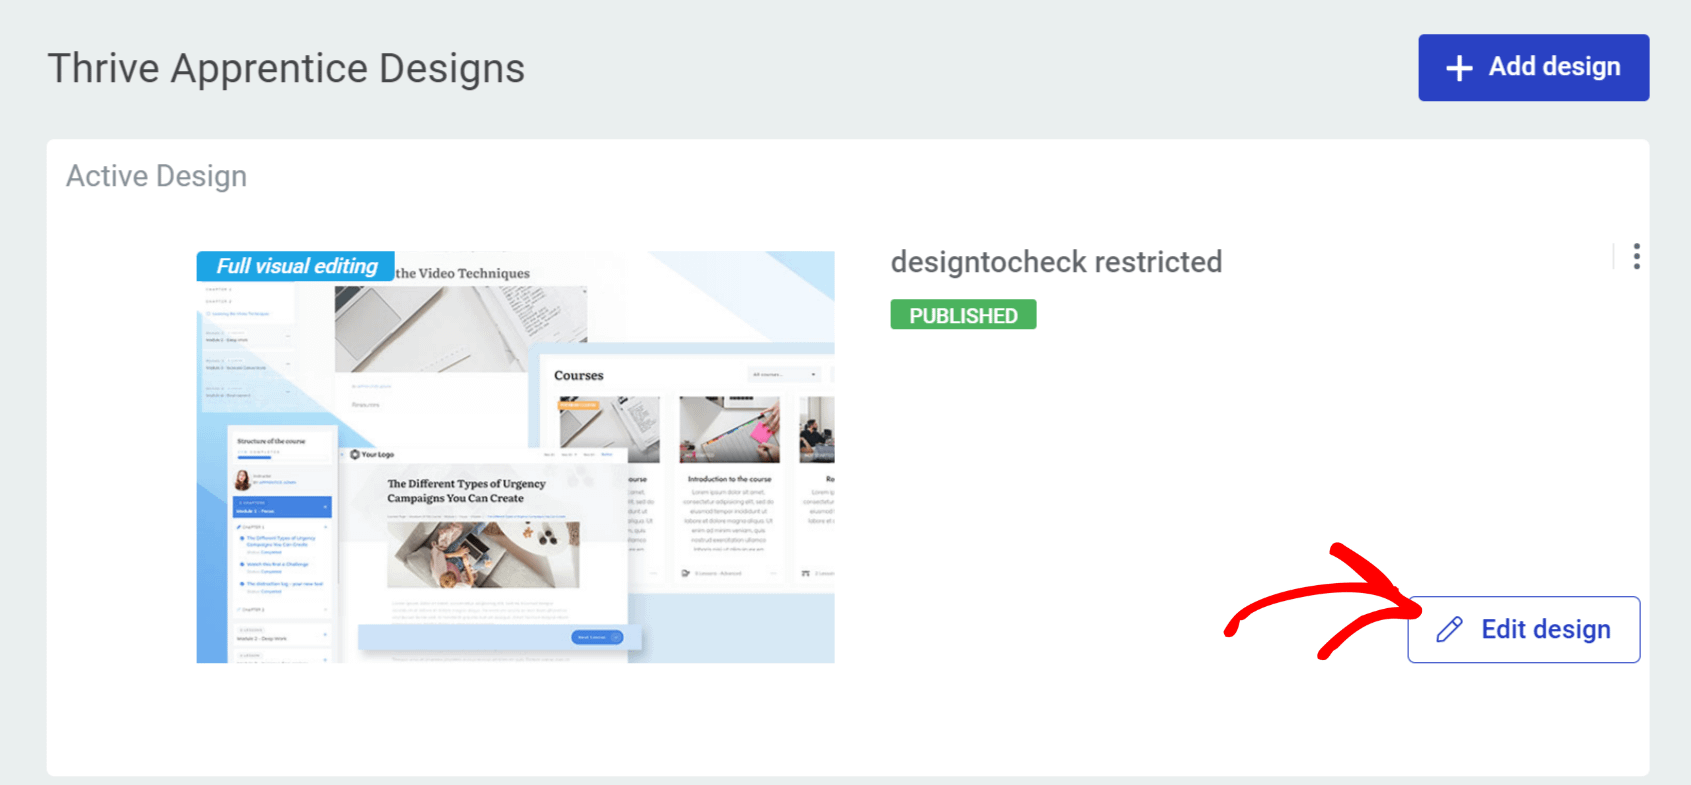
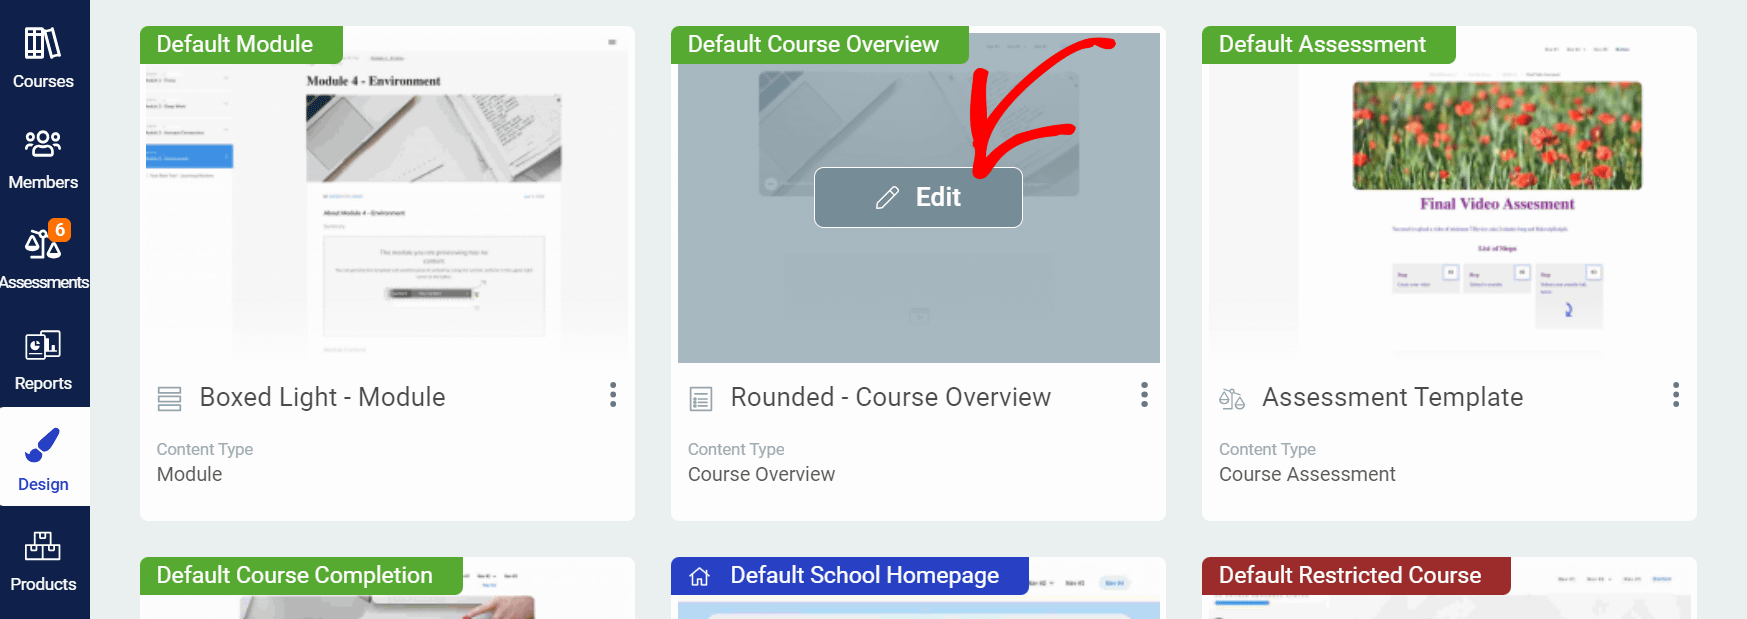
To re-download a template, open your WordPress admin area, navigate to Thrive Dashboard >> Thrive Apprentice, and open the Design page.
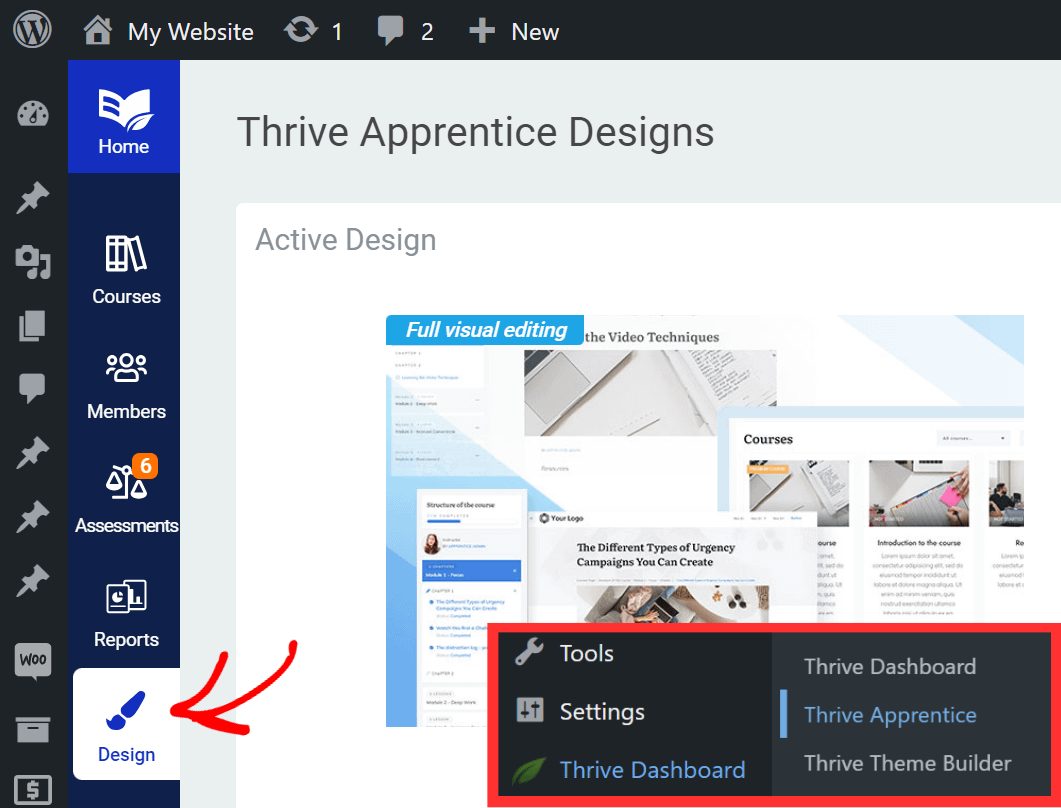
On the Thrive Apprentice Design page, click the +Add design button on the screen’s top right corner.
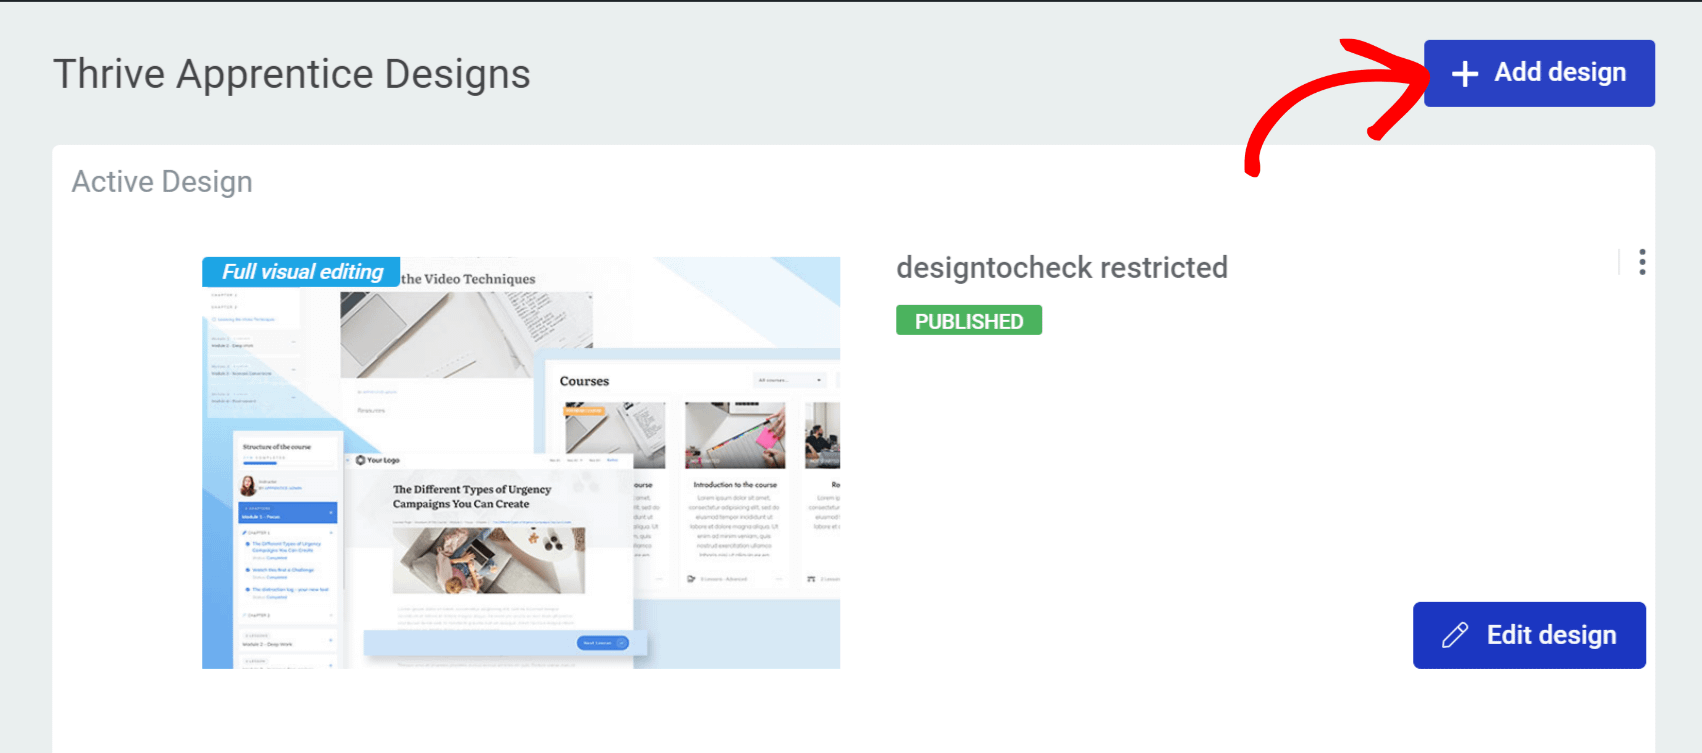
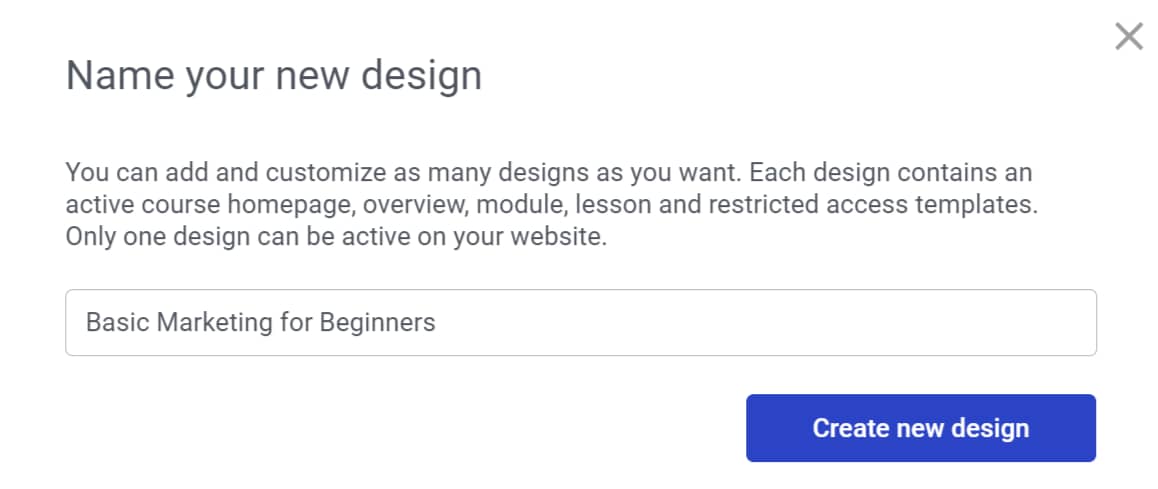
After clicking Add Design, you’ll see a popup where you can name the design and click the Create new Design button to proceed.
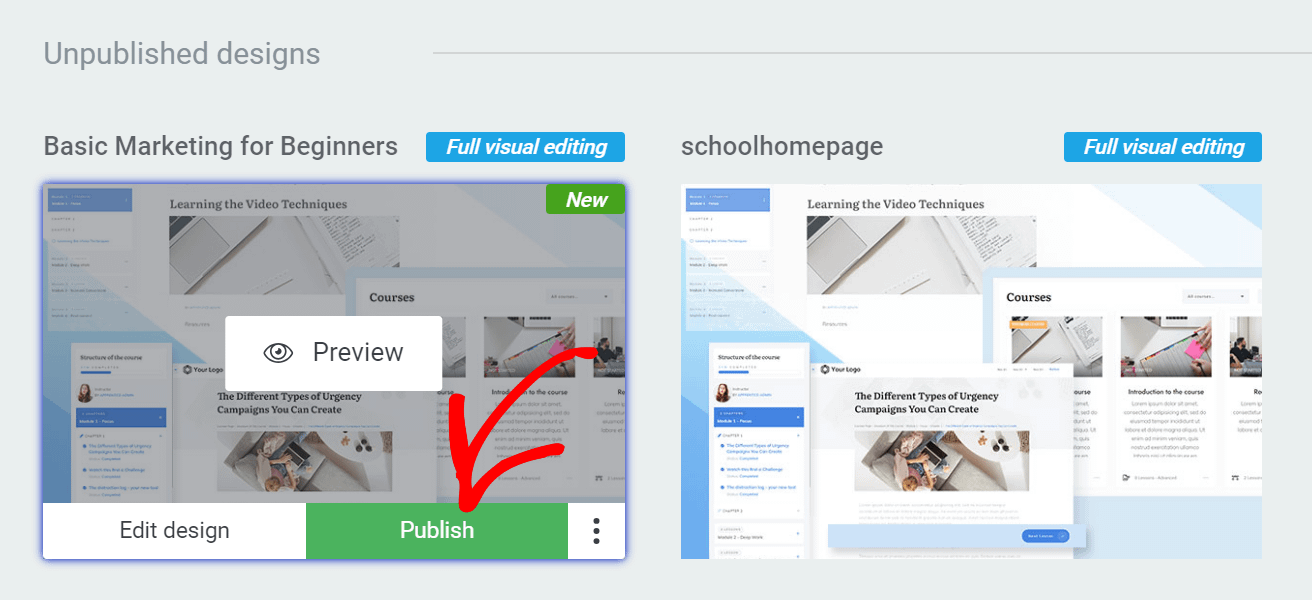
This newly created design will be listed under Unpublished Designs. You can activate this design by hovering over it and clicking Publish.
Updating the Template from the Wizard
If you have customized the current template and are uncomfortable switching to a new one, you can update the template from the Thrive Apprentice Design Wizard.
To update an existing template, open your WordPress admin area, navigate to Thrive Dashboard >> Thrive Apprentice, and open the Design page.
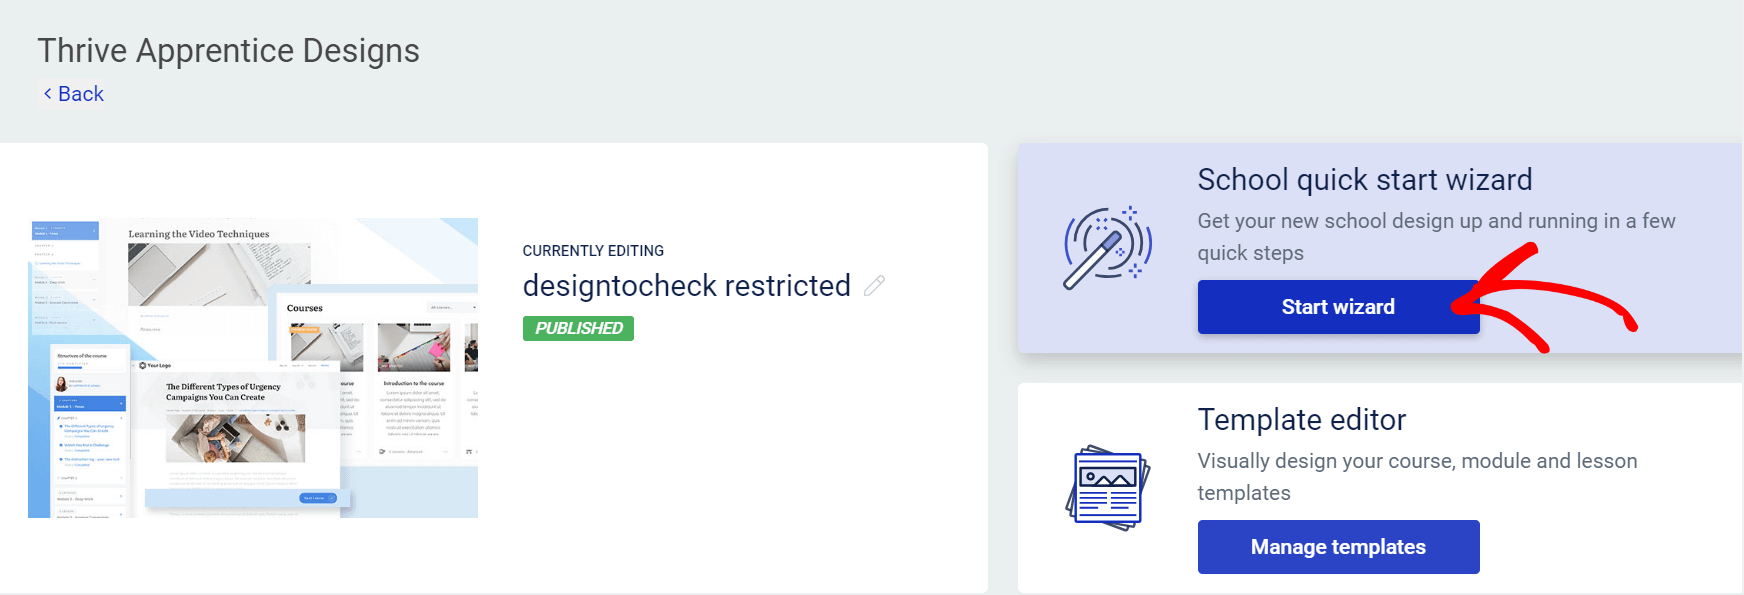
On the Thrive Apprentice Design page, click Edit design to edit the current template.
When you click the Edit design button, you’ll be taken to a page where you click the Start Wizard button under School quick start wizard.
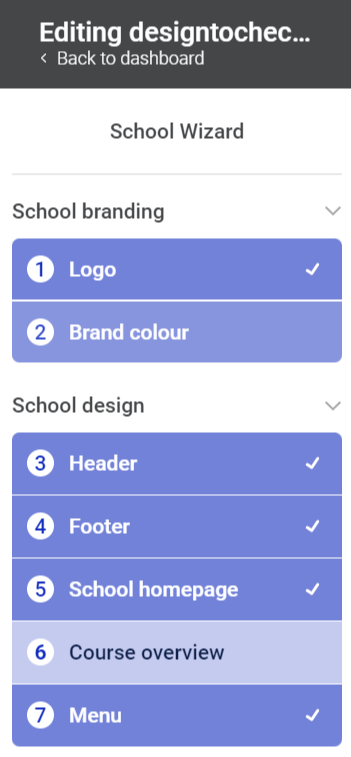
In the wizard, you’ll need to update any template with lesson lists. These include:
- Course Overview
- Module Overview
- Navigation Sidebar
- Assessment
- Course Completion
To update these templates, click on the option in the left panel.
Suppose you pick the Course overview page, select a template from the dropdown on the top right corner, and click Choose.

Similarly, you can update the templates for the other sections in the left panel.
Updating Lesson Lists Manually
Updating Lesson Lists requires you to edit templates manually and can be a little time-consuming. However, this can be the best way to do it if you have many customizations on the template.
To update Lesson Lists manually, first open your WordPress admin area, navigate to Thrive Dashboard >> Thrive Apprentice, and click the Design option in the left panel.
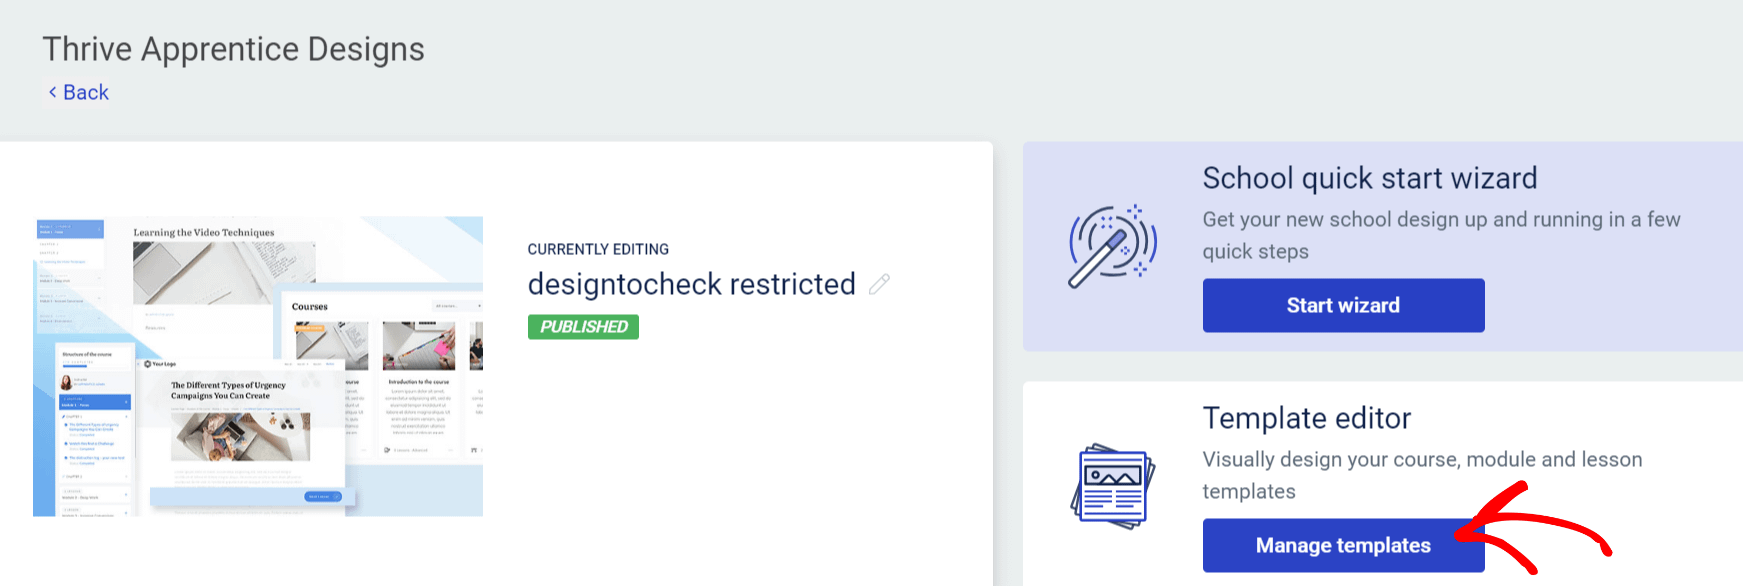
On the Thrive Apprentice Design page, click the Edit design button to edit the current template.
On the next page, click the Manage Templates button under the Template editor.
Clicking on Manage Templates will take you to the Templates page. Here, you can hover on the Course Overview template, and click Edit.
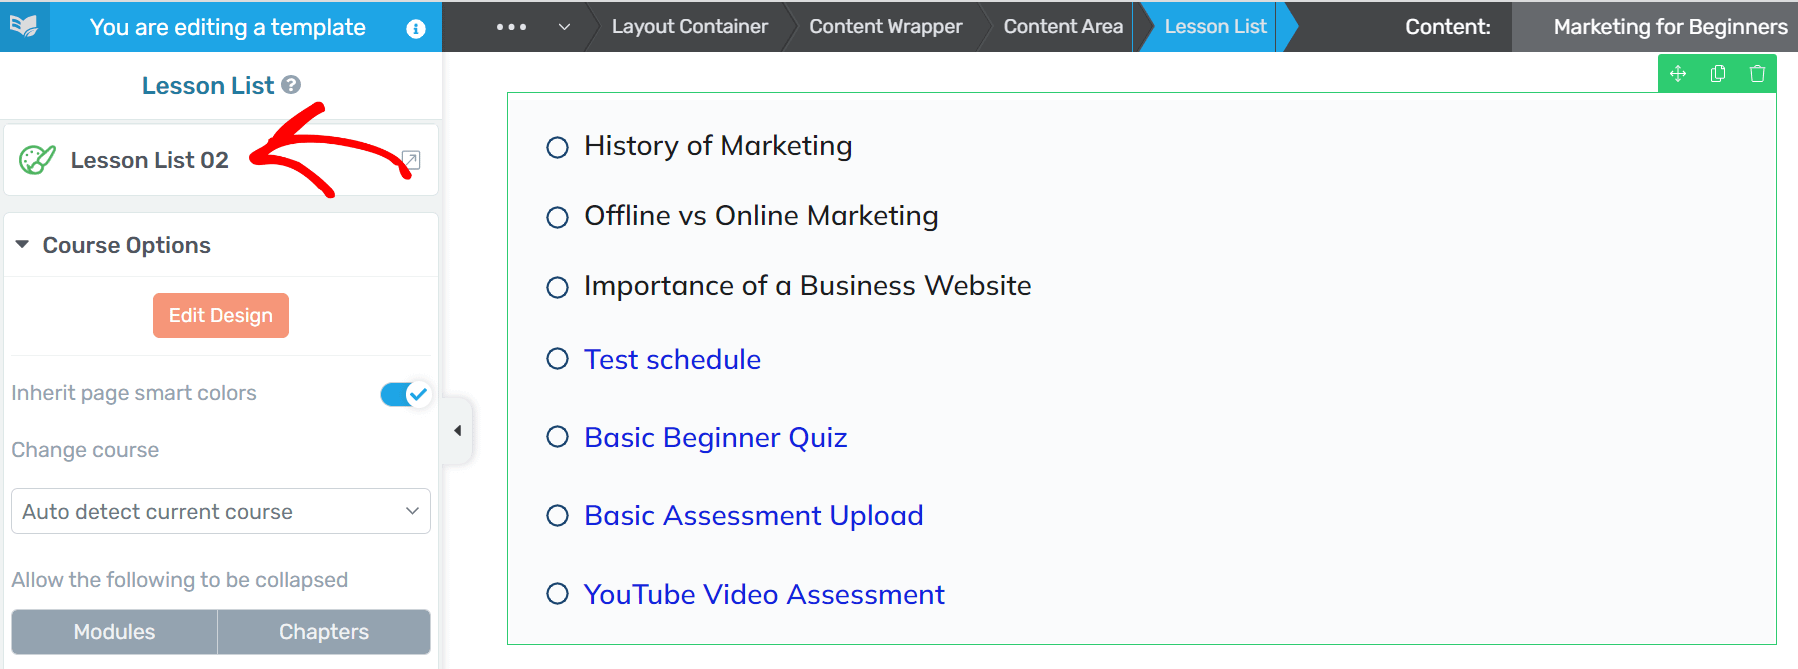
On the template editor page, scroll down and select the lesson list on the template by clicking on it.
When you click the lesson list on the template, you’ll see the lesson list template name appear in the left panel. To edit the lesson list, click on this template name in the left panel.
After clicking the template name, select a template in the popup and click the Replace Template button.
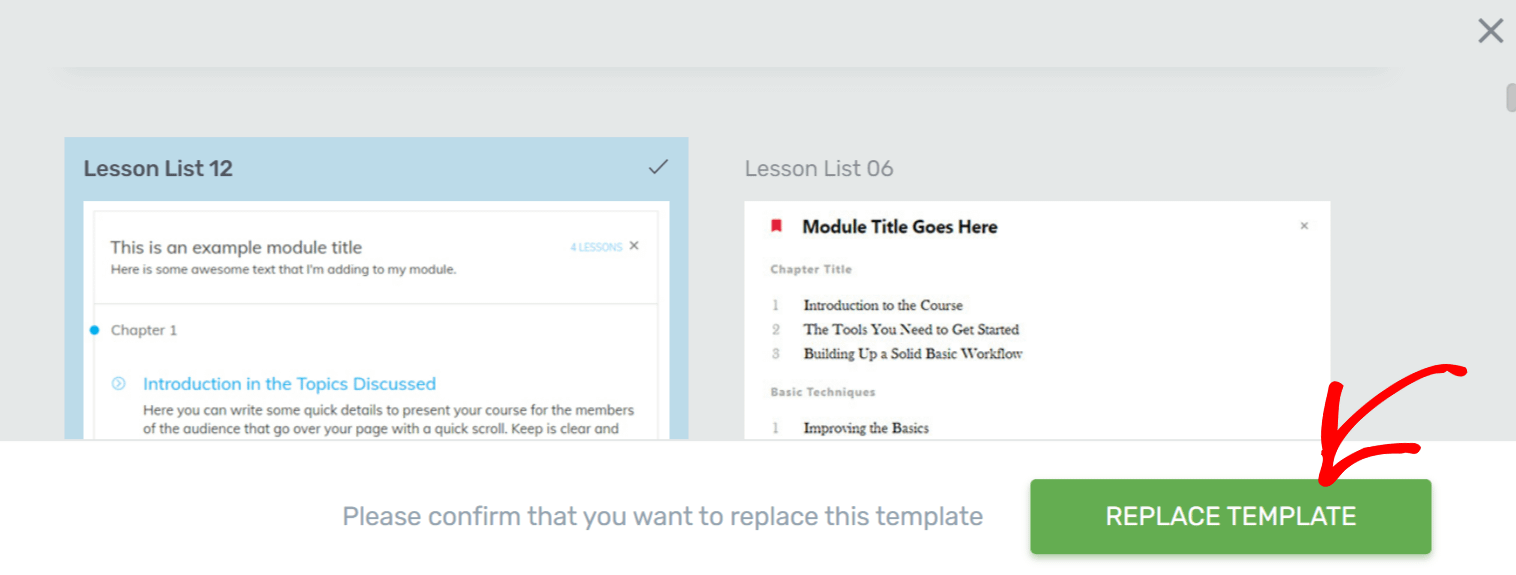
This shows the Assessment under the Lesson List.
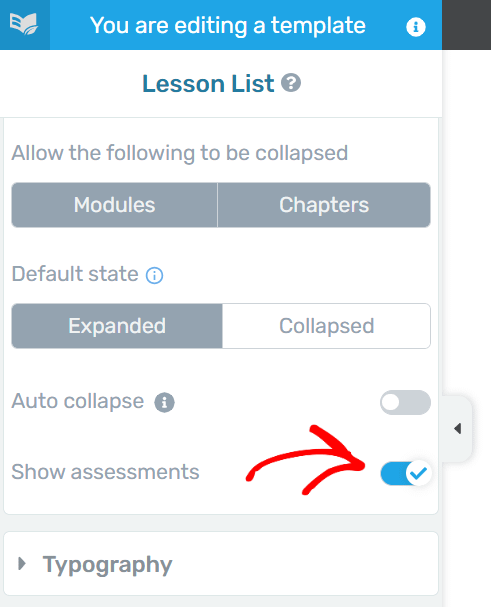
If you’ve done all of this and still don’t see the assessments added to the lesson list, click on the Lesson List in the template and click the Course Options section in the left panel.
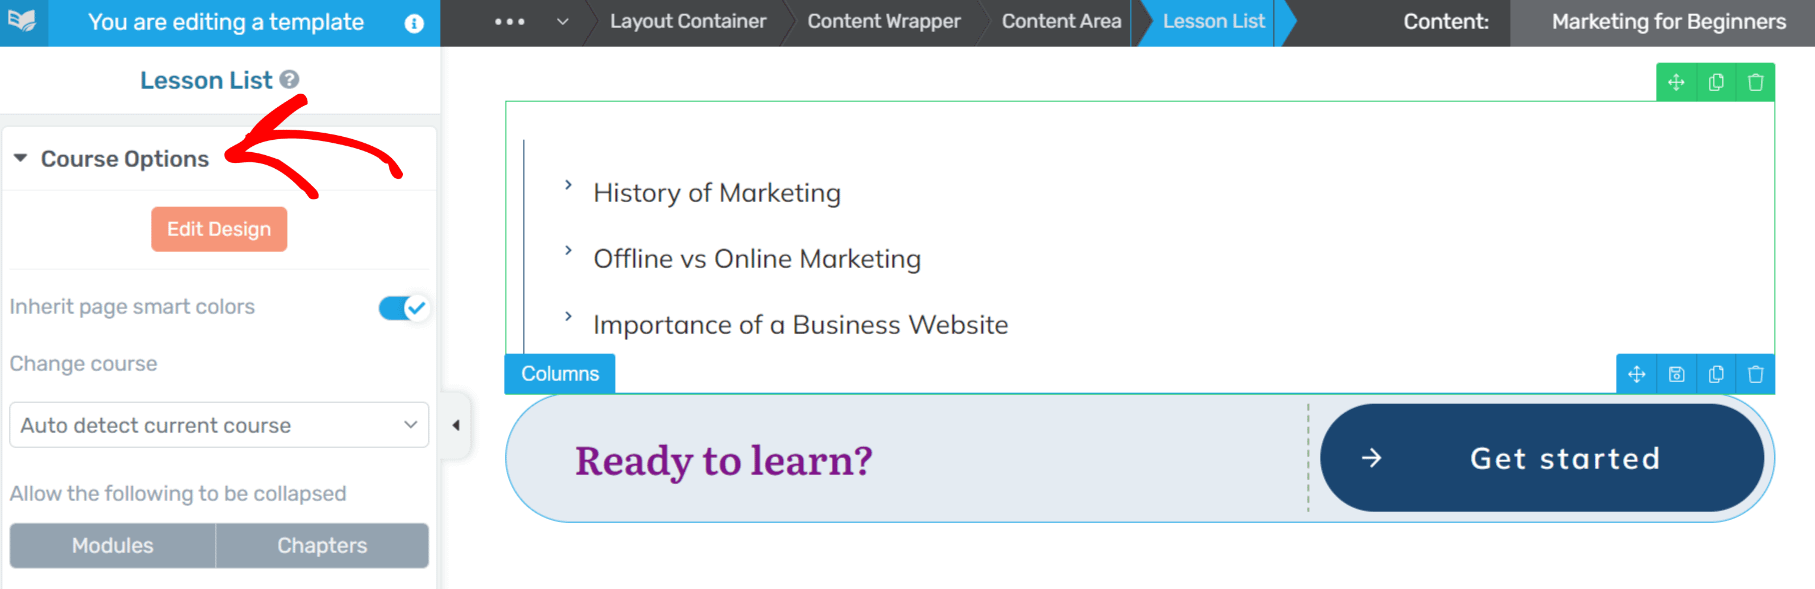
Under Course Options, scroll down and enable the Show Assessments option.
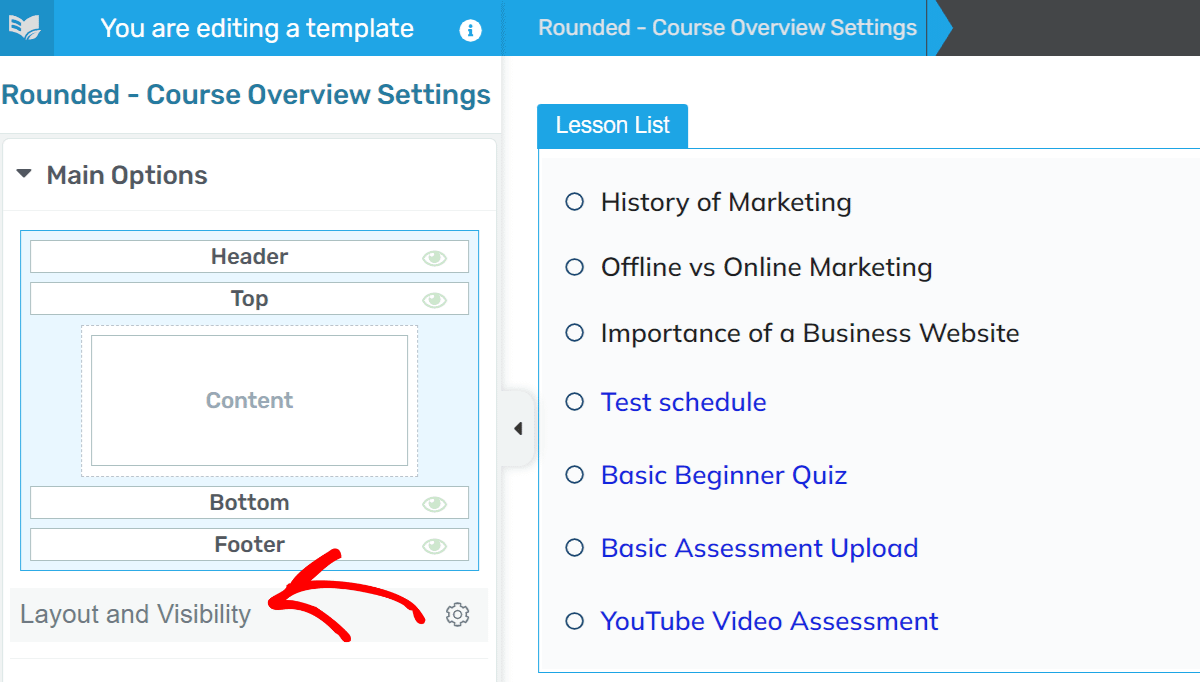
If you’d like the Lesson List to appear in the Sidebar and the assessment included, open the Course Overview page in the template editor, as seen above.
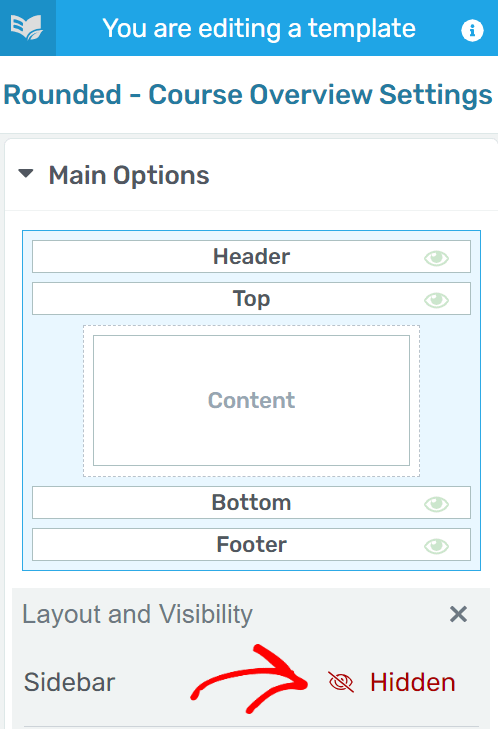
In the left panel, open Main Options and click Layout and Visibility.
Under Layout and Visibility, click Hidden to unhide this template’s sidebar.
After enabling the Sidebar, click Sidebar under Section Options in the left panel.
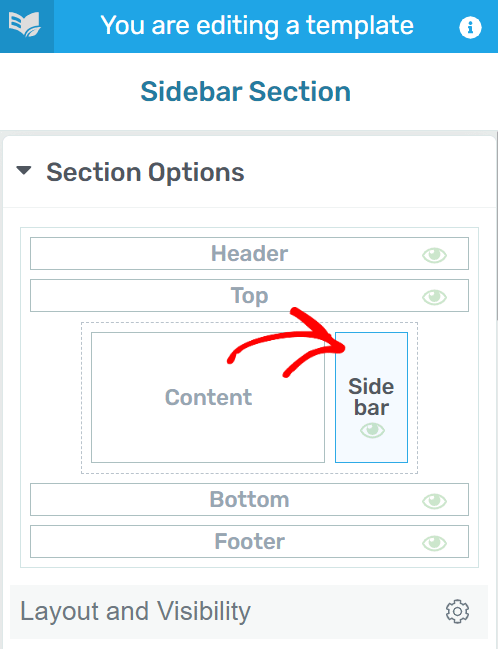
After clicking Sidebar in the layout, click Choose a design button to select a design for your sidebar.
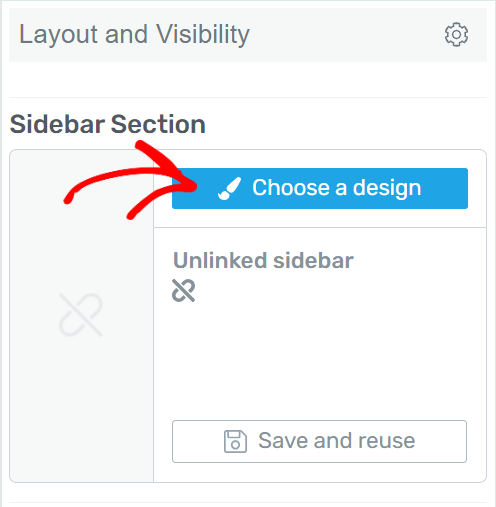
When you click on the button, you can select a design from the popup by simply clicking on it.
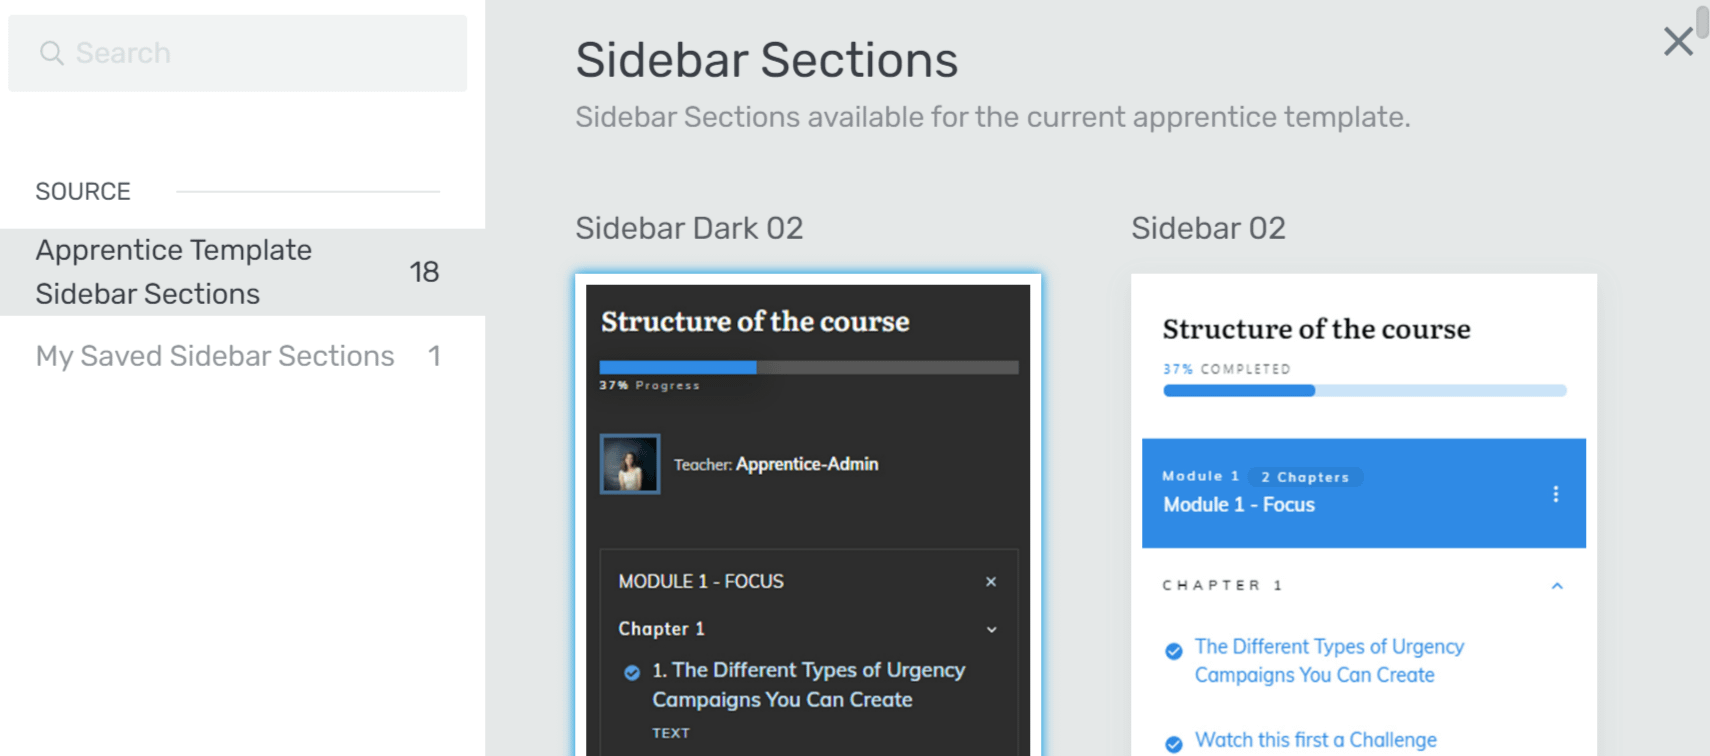
This will update the lesson list in the sidebar.
We’ve just seen how you can implement and display assessments in a lesson list of an existing course.
Next, do you need help using Thrive Apprentice Widget Area? You can read our document here to learn more.