This article will go through the steps needed to be taken in order to automatically create a new page on your WordPress site using the “Send Webhook” action in Thrive Automator.
Here’s the example/use case we will cover:
When someone gets access to a product in Thrive Apprentice, a password-protected page is created on the site, using their username as the title of the page and their email as the password of the page.
This automation can be used to create individual pages for your customers automatically.
However, keep in mind that this is a specific example of automation that can be adapted to fit your own needs.
1. Create an Application Password
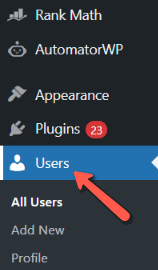
The first thing to be done is to create an application password. This can be done from your WordPress dashboard, in the “Users” section:
Choose your user and click on “Edit”:

Scroll down to the “Application Passwords” section. However, keep in mind that certain plugins (like Wordfence, for example) will automatically disable this option. You’ll need to unblock it in the Wordfence settings, and you can do that from this section directly:

Clicking on “Edit Wordfence Options” will take you to the Wordfence firewall settings, where you’ll see the option to disable application passwords is ticked:
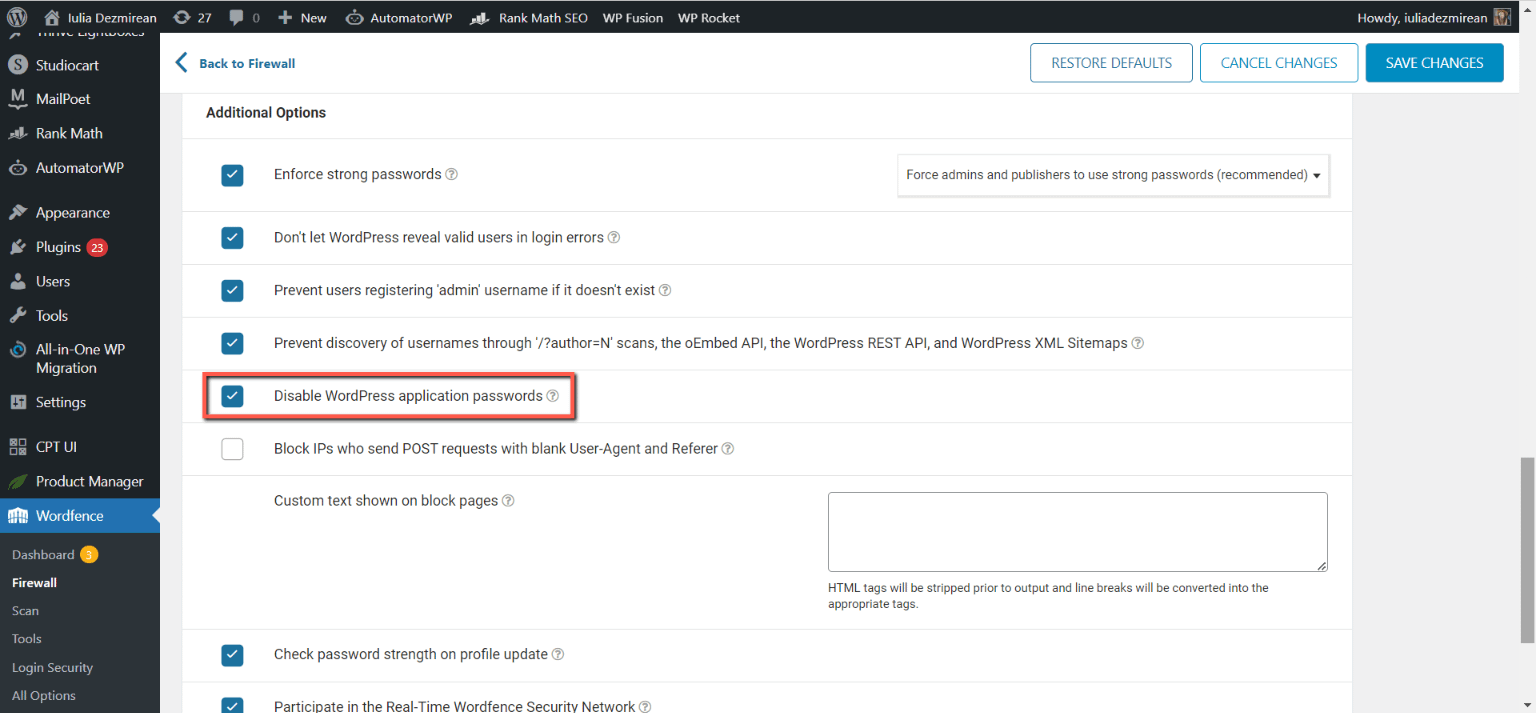
Make sure to un-check it and save the changes:

Once you do that, you can go back and you’ll be able to add a new Application Password name:

You will receive the new application password:

You can add this password in a notepad, as you’ll need it in a moment.
Make sure to click on “Update user”:

2. Encode the Password
As the next step, you’ll need to encode the password. For that, you can go to this website.
In the first field, input the previously generated password, but with the username added in front of it. For example, if the WordPress username is “Michael”, input this structure:
Michael:VIID wEqP RUKf j0n5 R6Tt yCWA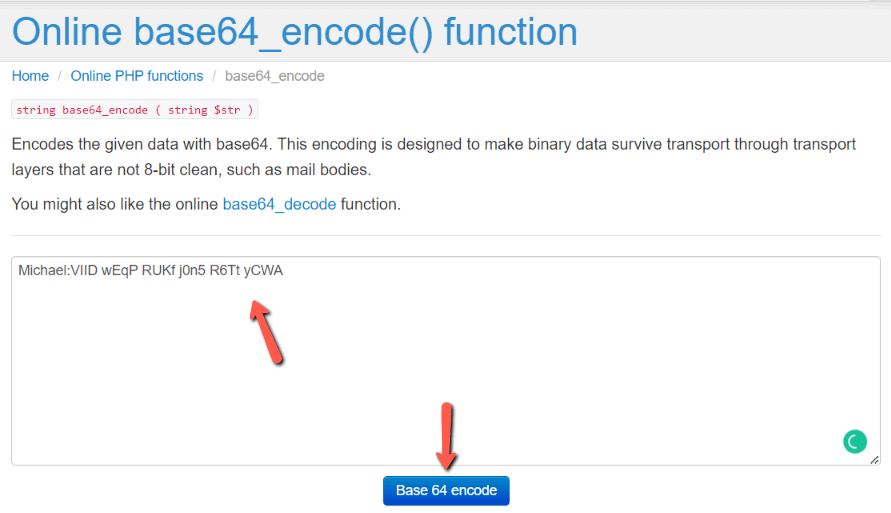
This will give you a result of this form:
TWljaGFlbDpWSUlEIHdFcVAgUlVLZiBqMG41IFI2VHQgeUNXQQ==
Again, save this result, you’ll need it later!
3. Check the WordPress API documentation
As the thirds step, we will need to construct our webhook URL. For that, the WordPress API documentation needs to be checked, which will give us:
In our case, to create a new page, the POST URL is:
/wp/v2/pages- 3.1. Construct the webhook URL
In the next step, when adding the “Send Webhook” action in Thrive Automator, we will have to add a webhook URL. We’ll construct this now.
For the structure of this URL, we’ll use the POST URL from the WordPress API documentation combined with the wp-json syntax and your full website URL.
So the URL will look like this:
https://yoursite.com/wp-json/wp/v2/pages3.2. Find the suitable WordPress arguments
In the WordPress API documentation, you’ll see the arguments that can be used with the “Create a page” action.
We’ll use some of them as fields in our “Send webhook” action.
For example, to publish the page, we will use this argument:

4. Create Your Automation in Thrive Automator
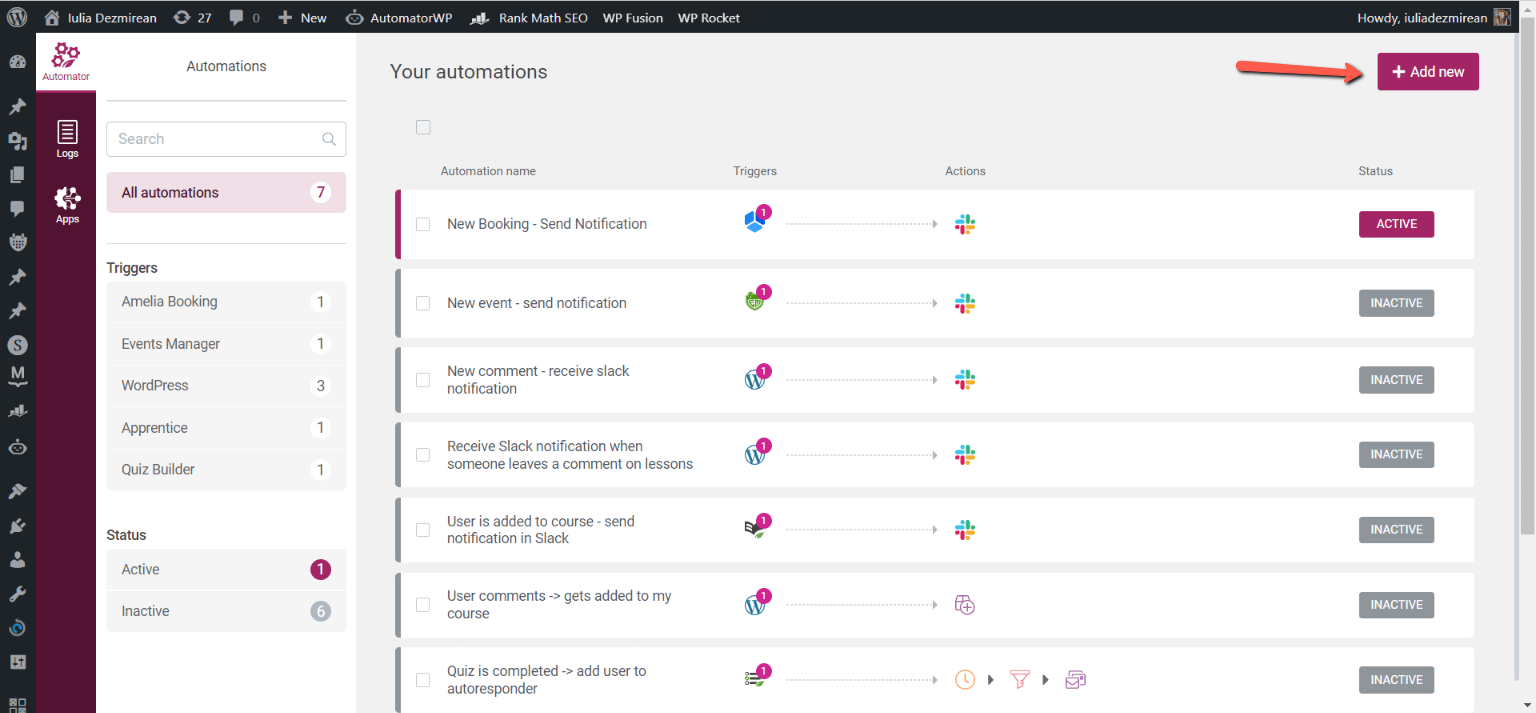
It’s now time to access Thrive Automator and create our automation. For that, access the dashboard and click on the “Add new” option from the top right section:
Choose the start trigger
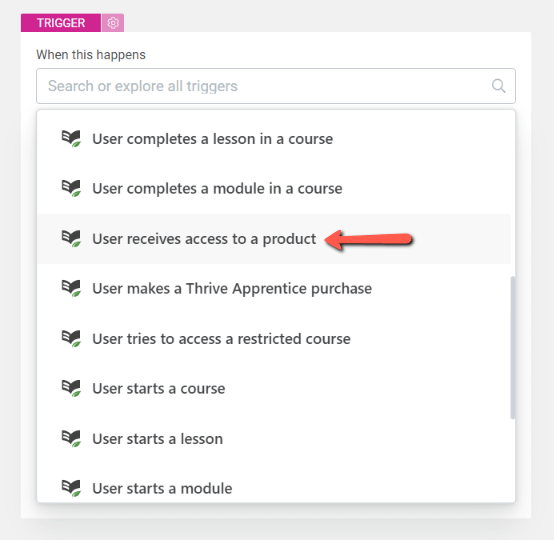
We’ll set the trigger to “User receives access to a product” from the Thrive Apprentice trigger category:
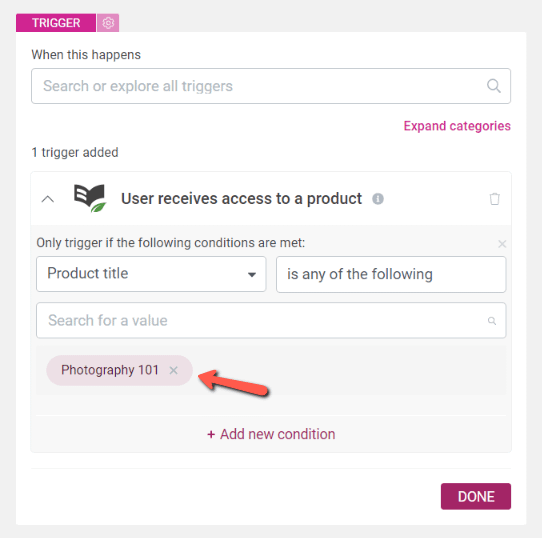
Use the section below the trigger dropdown to filter on the right product name:
Choose the action
As previously mentioned, we’ll use the “Send Webhook” action next:
You can set up the action as such:
- Send webhook: this is where we’ll add the webhook URL constructed in step 3.1.
- Request type: POST
- Request format: FORM
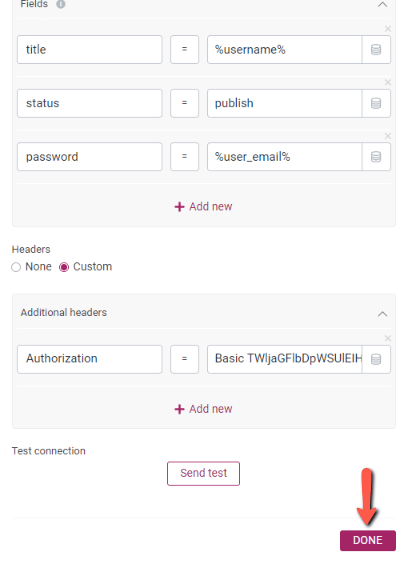
- Fields: this is where you can add the arguments discussed in step 3.2 as fields.
We’ll add the arguments we use in the key value fields and use dynamic data or the expected value in the fields.
In our case, we’ll want to use:
- Title: the title of the page – the WordPress username
- Status: to make sure the page is published
- Password: to add a password protection to the page
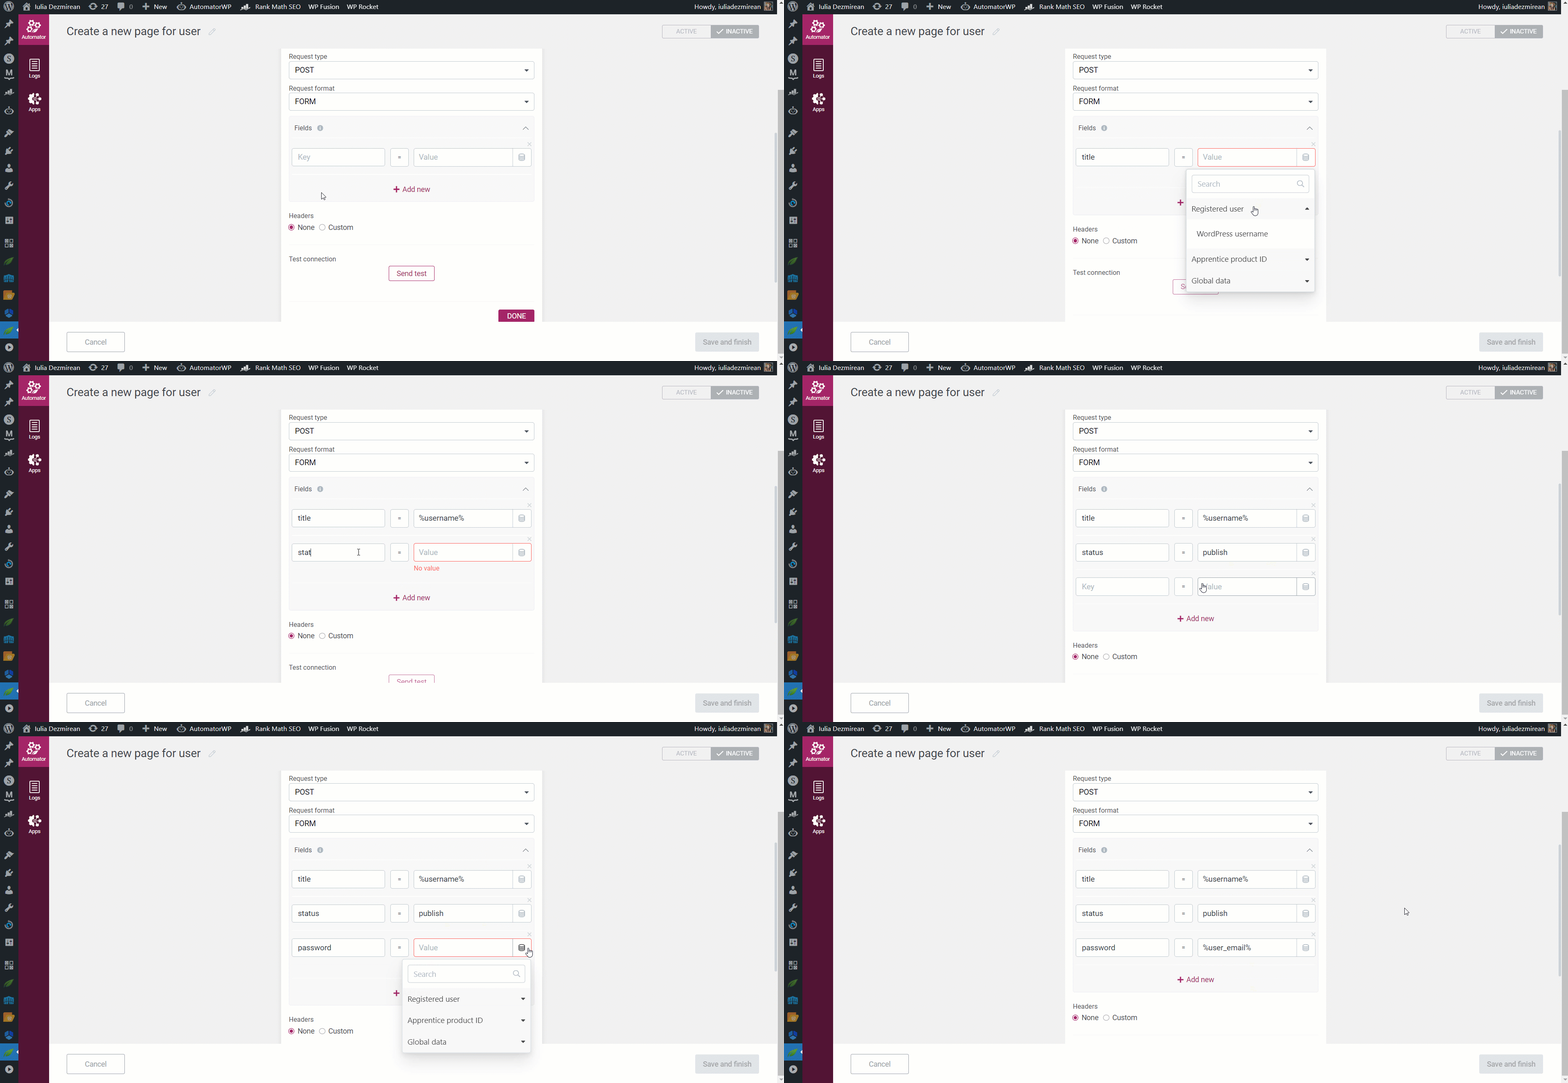
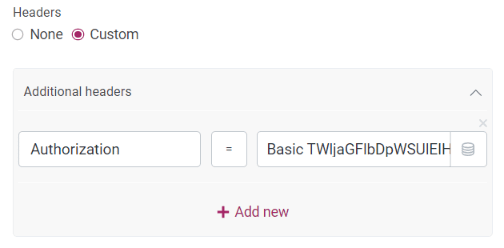
Finally, we’ll need to add the password we created in the header, as security.
To do so, choose “Custom” from the “Headers” section:
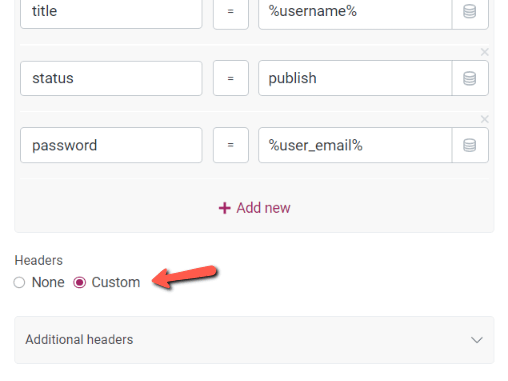
The key-value to be added here will be this one:
Authorization = Basic TWljaGFlbDpWSUlEIHdFcVAgUlVLZiBqMG41IFI2VHQgeUNXQQ==Where the last part will be the encoded password and you will, of course, have to replace it with your own.
Click on “Done”:
5. Save and activate your automation
All there’s left to do is make sure to activate your automation:
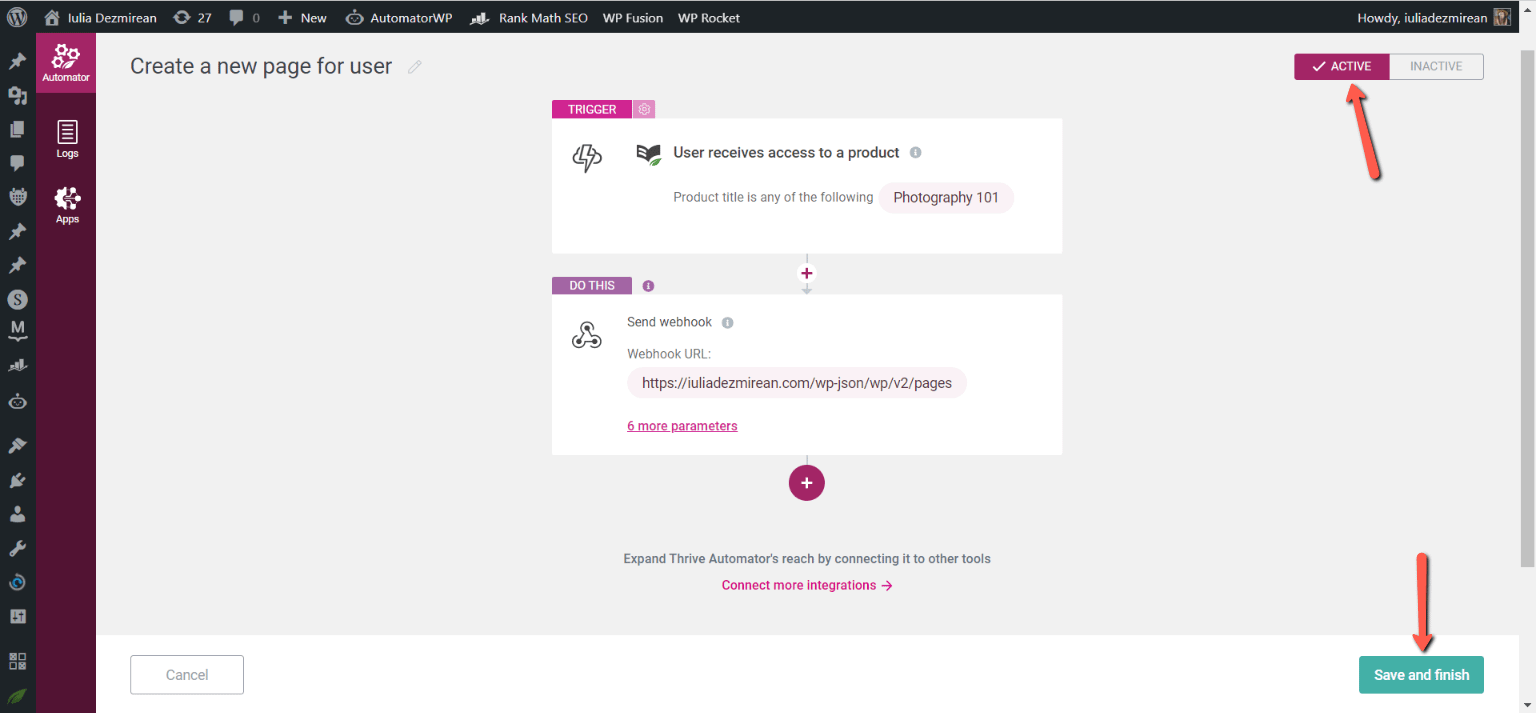
Then, you can quickly test it by manually adding a user to the Apprentice product:
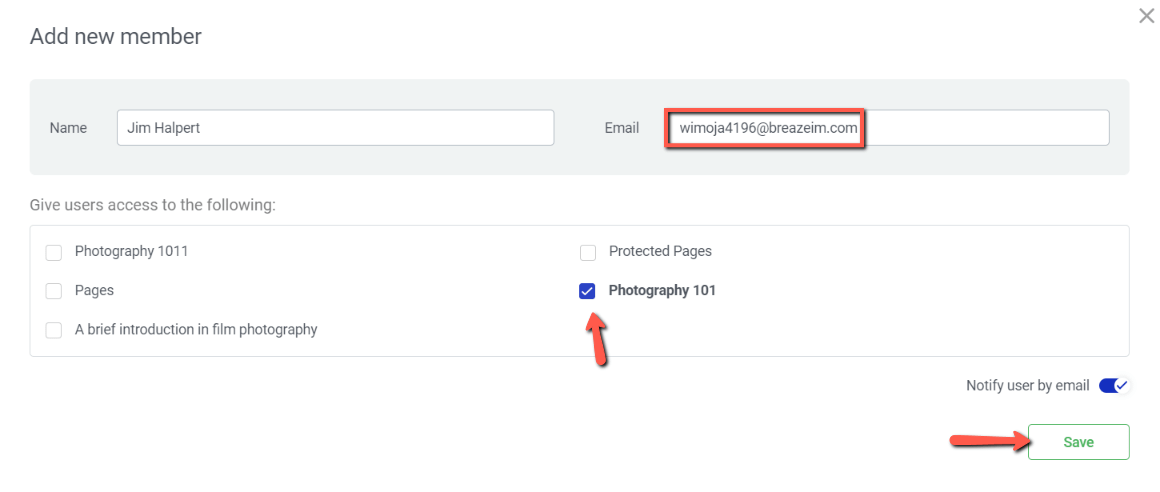
A new page will be created, with the username as a title and the email as the password.