In this article, you’ll learn how to manage day-to-day SendOwl operations—from customizing the checkout experience to managing customers, applying discounts, and troubleshooting common issues.
Managing the Checkout Process
Customizing Checkout Templates
SendOwl provides customizable checkout templates to match your brand. Changing the checkout template will not affect the Thrive Apprentice and SendOwl connection.
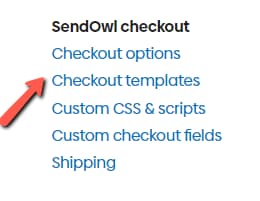
- In your SendOwl dashboard, go to Settings from the left sidebar.
- Look for the Checkout templates section.
- On the checkout templates page, you’ll see all available templates. The one currently in use will have a grayed-out “Use” button.
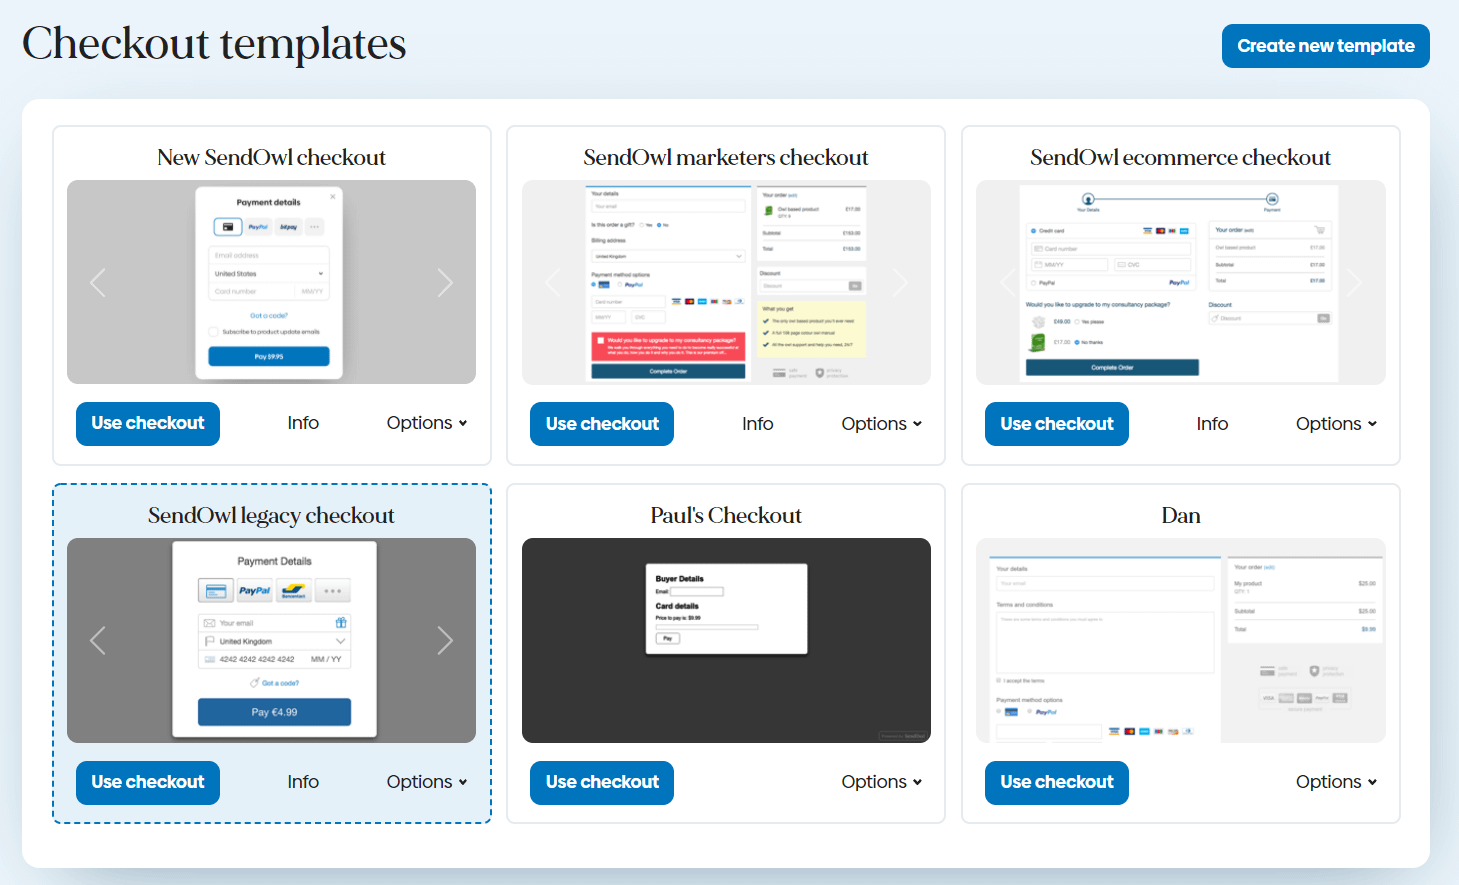
- To change templates, click the Use button on the template you want to switch to.
Sending Customers Directly to Checkout
You can bypass your sales page and send visitors straight to the SendOwl checkout form:
- In SendOwl, open the product you want to link.
- Copy the Direct Checkout URL from the product’s sharing options.
- Use this URL in your buttons, emails, or landing pages to send customers directly to payment.
Configuring the Registration and Thank You Pages
- Registration Page — After purchase, students are prompted to create a WordPress account. Configure this in Thrive Apprentice > Settings > SendOwl > Checkout Settings.
- Thank You Page — Set a custom redirect page in the same Checkout Settings section. This is where students land after completing their purchase and registration.
For detailed setup steps, see the SendOwl Setup Guide.
Managing Customers
Generating a Customer List from SendOwl
To get a list of customers from SendOwl (for example, to import into Thrive Apprentice’s SendOwl Customer List), you need to generate a report:
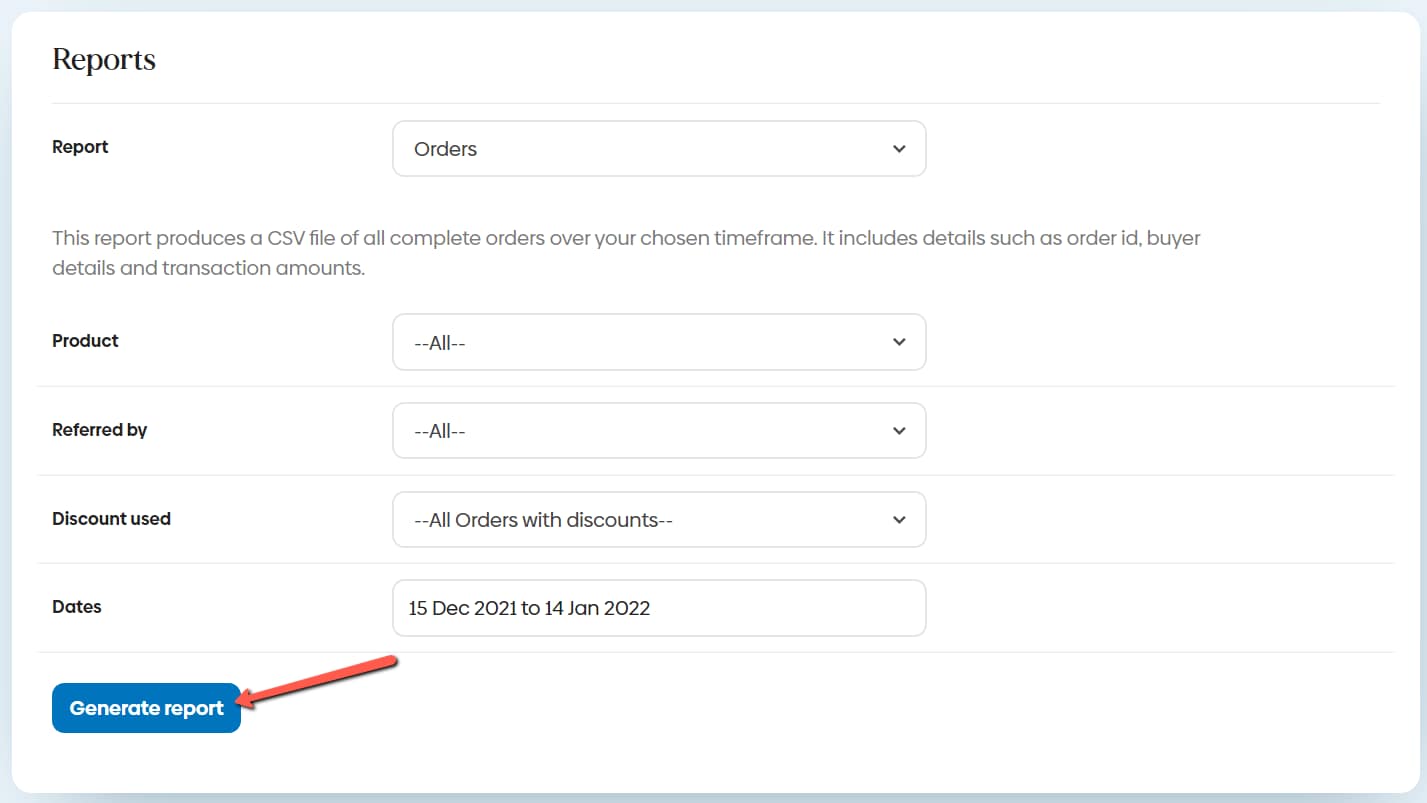
- In your SendOwl dashboard, go to Reports from the left sidebar.

- On the Reports page, click the dropdown arrow in the Report section.
- Select the Orders report type from the dropdown menu.

- Set the date range and any additional filters (such as discount used, product type, etc.).
- Click Generate Report.
- SendOwl will send you an email with a CSV file attached containing your customer data.
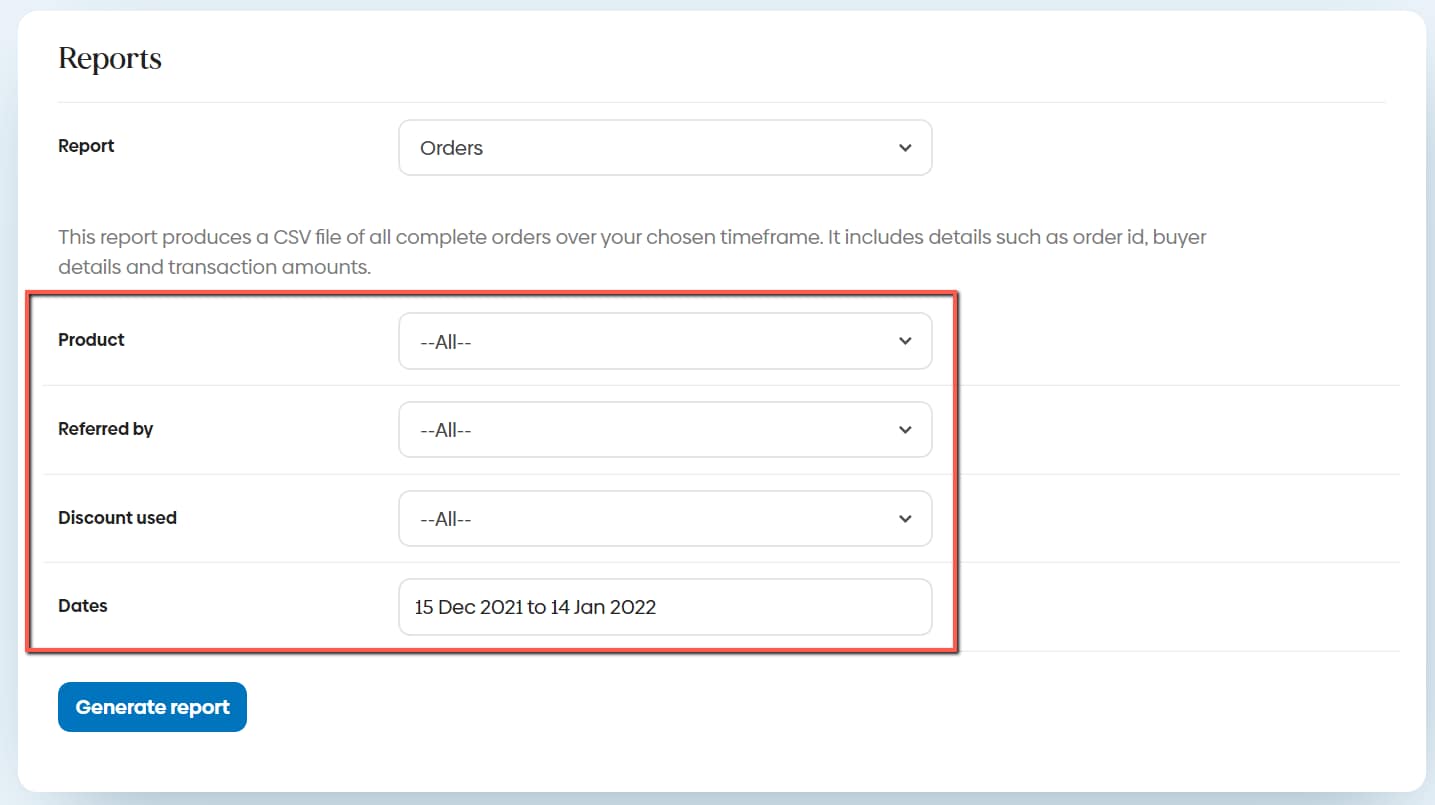
- Download the CSV file from the email and use the Customer Import > CSV file from SendOwl option in Thrive Apprentice to import the customers.
Note: If you use a CSV file other than the Orders report, make sure it includes the “Buyer Email” and “Buyer Name” fields (including the commas). These fields are required for the import to work.
Finding Specific Customers
To locate a specific customer:
- Use the search bar in SendOwl’s Orders section to search by name or email.
- In Thrive Apprentice, go to the Members section and search for the student by name or email to view their course enrollment status.
Customer Login After Purchase
After completing a SendOwl purchase, students need to log in to access their courses:
- The student completes payment through the SendOwl checkout form.
- They are redirected to the registration page you configured in Thrive Apprentice, where they create a WordPress account.
- After registering and logging in, they’re redirected to their course dashboard with access to purchased content.
Tip: Make sure your login and registration pages are correctly configured in Thrive Apprentice > Settings > SendOwl > Checkout Settings so students land on the right pages.
Customer Login After Completing a Course
Students who return after completing a course will see their progress preserved. Course completion status, certificates, and grade data are stored in Thrive Apprentice—independent of SendOwl.
Mailing List Integration
You can automatically add SendOwl customers to your email marketing list:
- In SendOwl, go to Marketing from the left sidebar, then click Mailing list.

- Select your email service provider from the dropdown (e.g., Mailchimp, ConvertKit, AWeber).
- Enter the required API credentials for your email provider (e.g., your Mailchimp API key).
- Select the specific mailing list to add customers to.
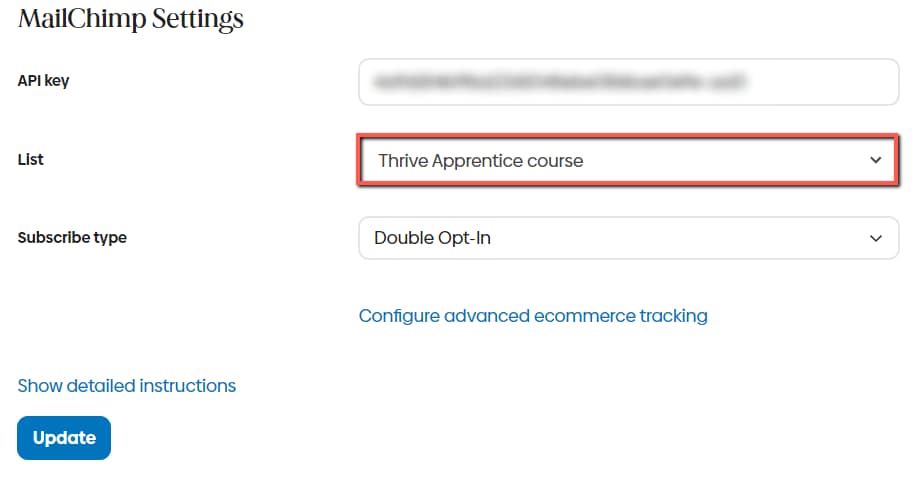
- Optionally, configure per-product mailing lists in each product’s advanced settings to add customers to different lists based on what they purchase.
Applying Discounts
You can create discount codes in SendOwl and apply them to your purchase links:
Step 1: Create the Discount in SendOwl
- In SendOwl, go to Marketing > Discounts.
- Click Add discount.

- Set the discount name, type (percentage or fixed amount), and expiration date.
- Save the discount.
Step 2: Apply the Discount to Purchase Links
- In Thrive Apprentice, go to Settings > SendOwl.
- In the Purchase Links section, select the product or bundle.
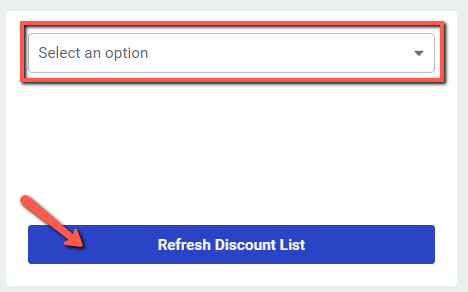
- Select the discount you created from the dropdown.
- Copy the completed discounted purchase link.
- Use this link on your sales pages, emails, or anywhere you want to offer the discount.
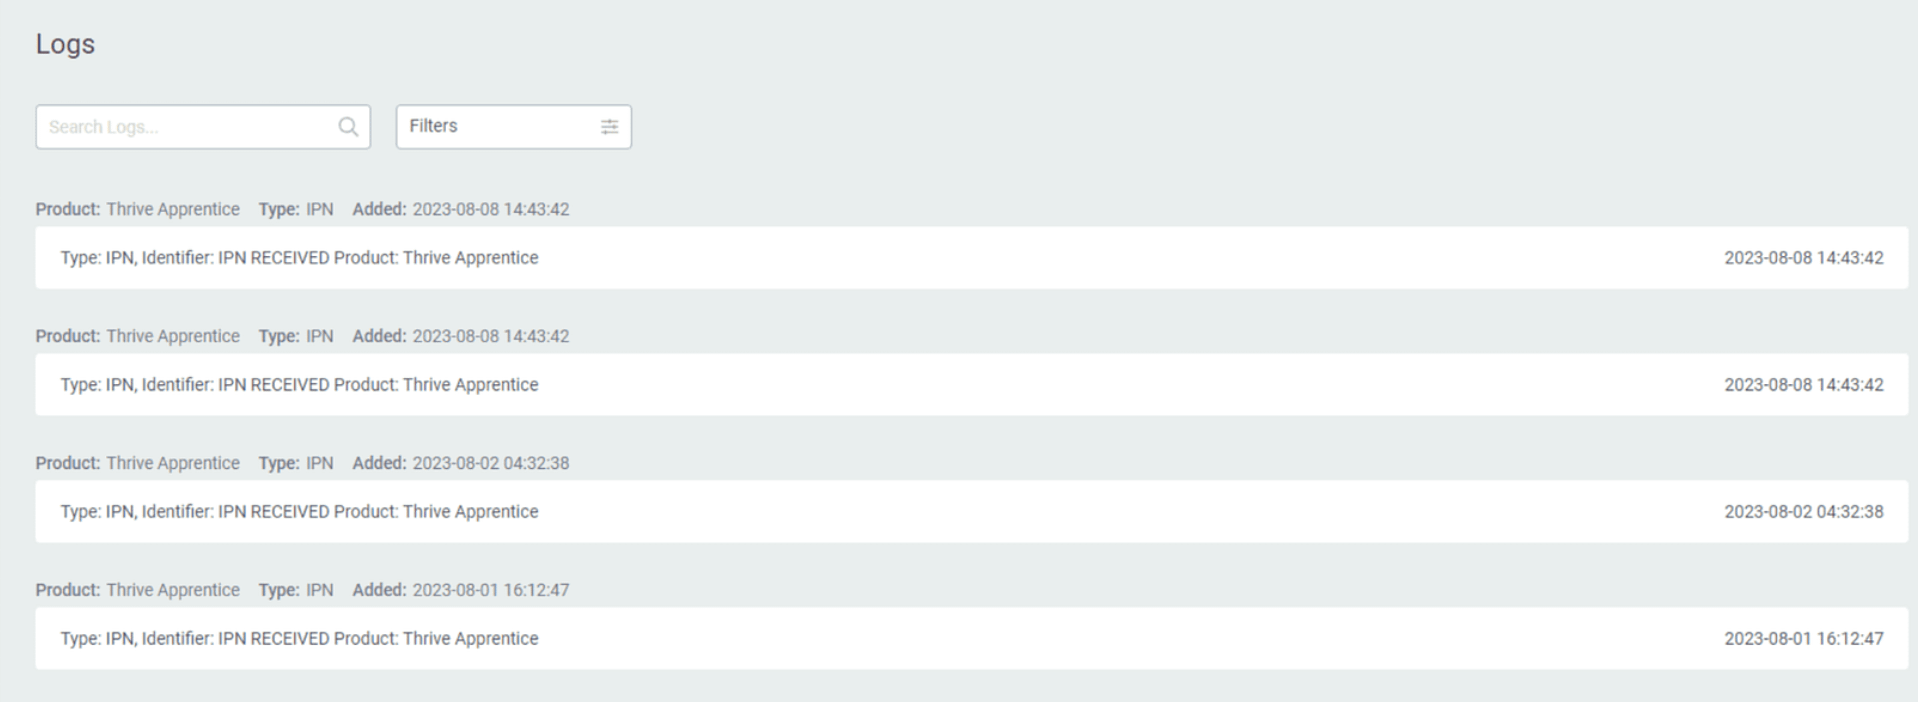
Viewing SendOwl Logs
SendOwl logs track the technical information exchanged between Thrive Apprentice and SendOwl. When a visitor purchases a product, SendOwl sends a webhook to the listener URL, and Thrive Apprentice logs the event.
- In Thrive Apprentice, go to Settings > SendOwl.
- Click on the Logs section to view recent webhook events.
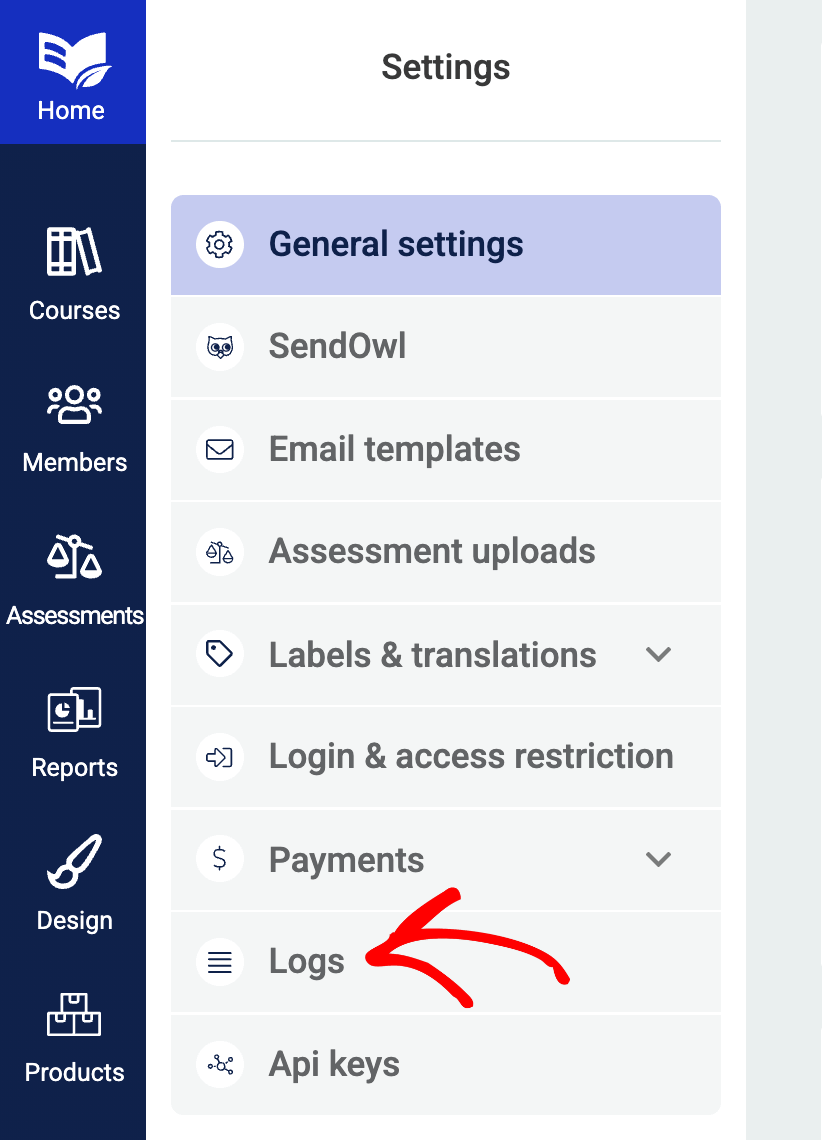
- Each entry shows the timestamp, event type, and whether access was successfully granted or an error occurred.
Selling Subscriber-Only Courses
To sell courses exclusively to existing subscribers or members:
- Create a product in SendOwl for the subscriber-only course.
- In Thrive Apprentice, assign the course to this product and set access rules so only users with the correct product access can view the course.
- Share the Direct Checkout URL only with your subscriber list through email campaigns.
- Non-subscribers who visit the course page will see the access restriction message you’ve configured.
Troubleshooting Common Issues
- Student can’t access course after purchase — Check the SendOwl logs in Thrive Apprentice for webhook errors. Verify the student’s email matches their WordPress account. If needed, manually grant access in the Members section.
- Webhook not firing — Confirm the Listener URL in SendOwl matches the one shown in Thrive Apprentice settings. Test with a $0 product to verify the connection.
- Duplicate orders — Check for duplicate webhook entries in the logs. SendOwl occasionally retries failed webhooks, which can create duplicate access records.
- Checkout page not loading — Verify your SendOwl subscription is active and the product is published.
- Customer CSV import fails — Ensure the CSV file contains the required “Buyer Email” and “Buyer Name” fields. Files missing these fields cannot be imported.
That’s it! You’ve learned how to manage SendOwl operations including checkout customization, customer management, discounts, and troubleshooting for your Thrive Apprentice integration.
Related Resources
- SendOwl Setup: Review the initial configuration in the SendOwl Setup Guide (Legacy).
- Modern Alternative — Stripe: Migrate to native payments with the Stripe Integration Guide.
- Modern Alternative — WooCommerce: Use WooCommerce for checkout with the WooCommerce Integration Guide.
- Managing Members: Learn about member management in the Managing Members guide.