Are you looking for a creative way to make your image carousels more visually engaging and interactive? Adding black and white images that change to color on hover is a great way to capture attention
In this article, we’ll show you how to set up this image effect for the carousel on your website using Thrive Architect.
- Adding an Carousel Styled Image Gallery on Page
- Adding a Greyscale Effect to the Images
- Editing the Hover Effects of the Images
Adding an Carousel Styled Image Gallery on Page
The first requirement of this display is that you’ll need to have a carousel styled image gallery on your page.
To do so, first, add an Image Gallery element on the page and select the gallery type as Carousel.
Adding a Greyscale Effect to the Images
When you’ve added an image gallery and enabled a carousel style for it, in the Thrive Architect editor, click on the Image Gallery element to open its settings in the left column.

In the left column, under Main Options, click the Edit Design button.
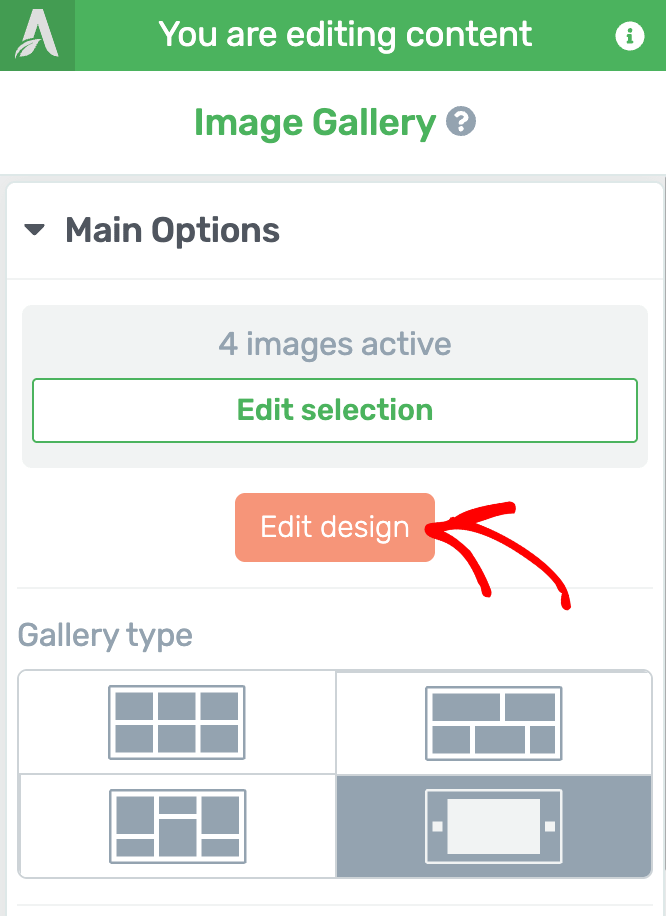
Clicking the Edit Design button opens the Image Gallery in the Edit Mode.

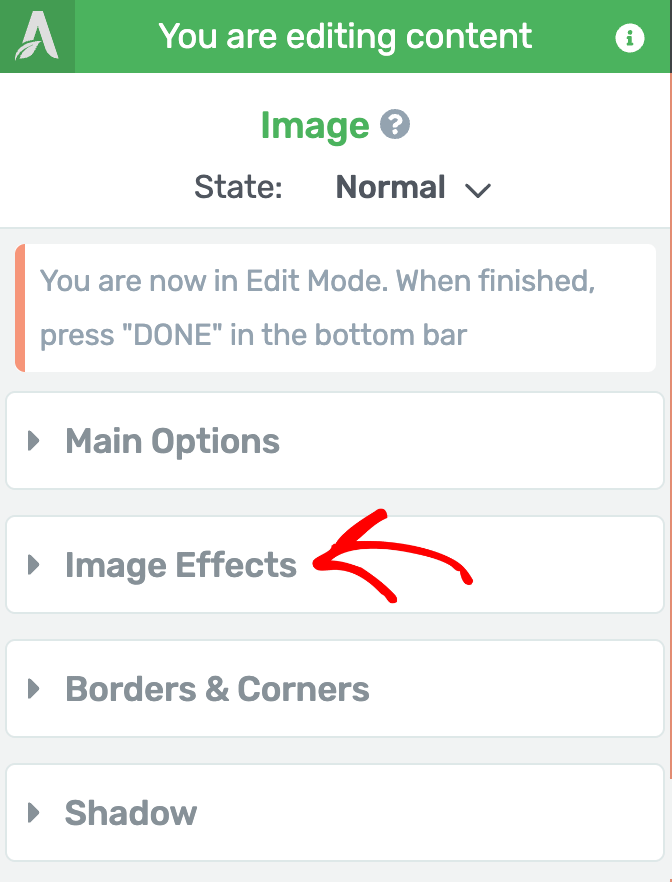
In the edit mode, an image to open the settings in the left column.

In the Image settings, click to open the Image Effects tab.
Under the Image Effects, use the Greyscale option to change the image to a black and white version.
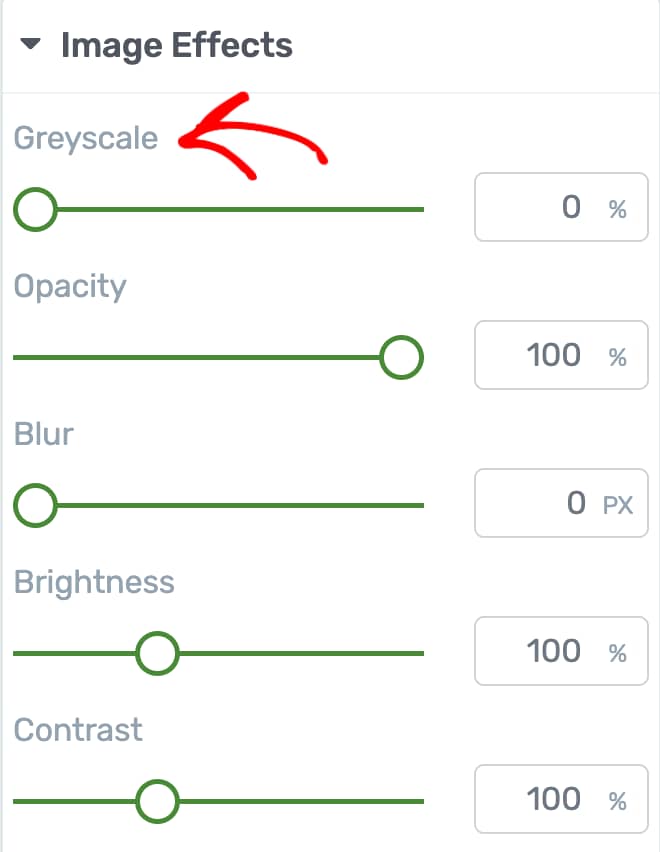
To convert the images inside the image gallery to their black and white versions, use the slider or the input box to set the Greyscale to 100.
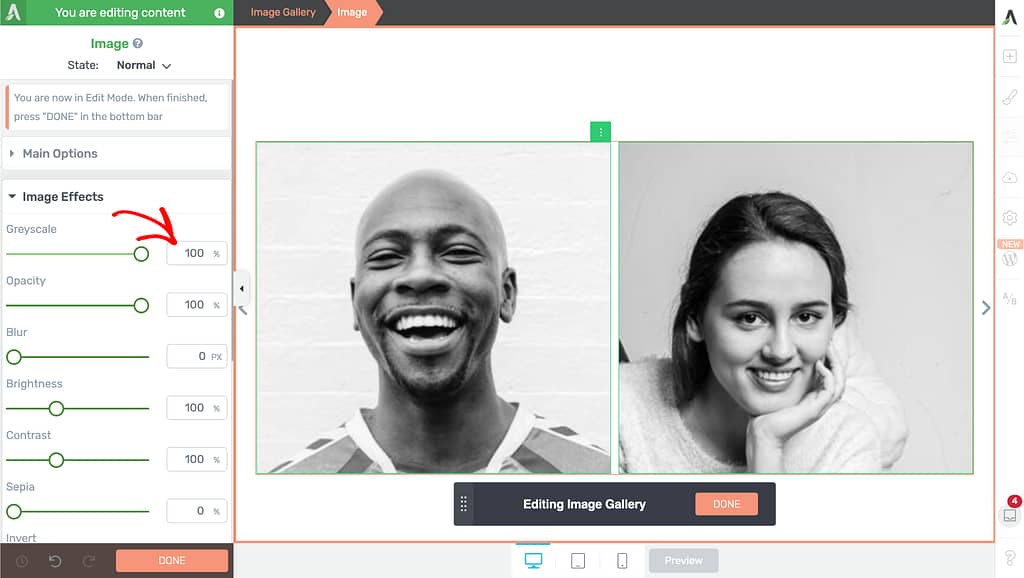
This setting will ensure the images in the gallery will be shown in black and white in their normal state.
Editing the Hover Effects of the Images
After you’ve converted the images to their black and white versions in their normal state, the next step is to add an hover effect so that a user sees the original colored image when he hovers over it.
To add a hover effect of an image in an image gallery, first ensure you’ve opened the Image Gallery in its Edit mode and click on an image in the gallery to open its settings in the left column.
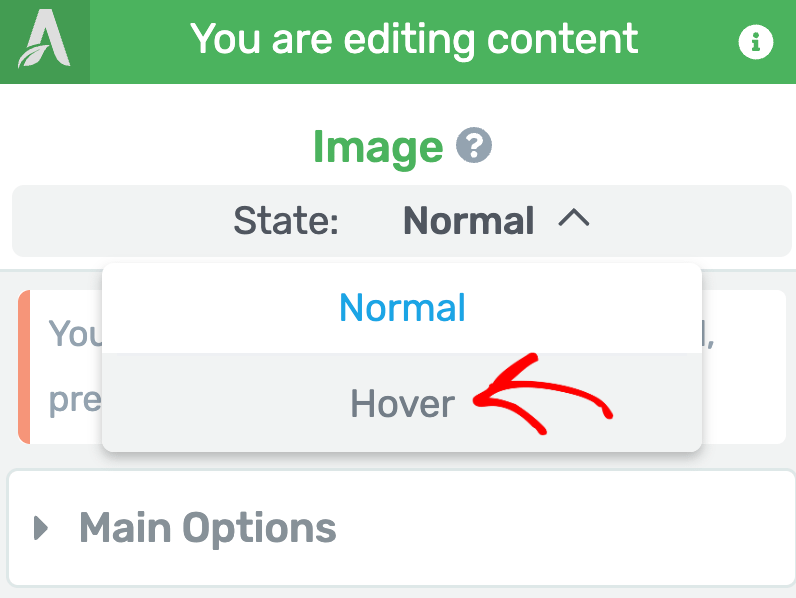
To change the image state, in the left column, click on the down arrow beside Normal to change the state.
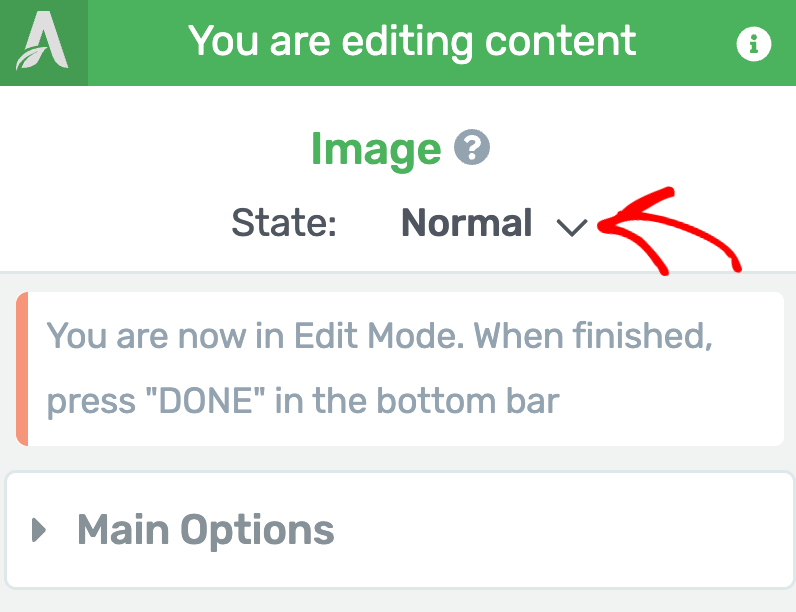
Clicking the arrow will open the available states. To change the image state, click on Hover.
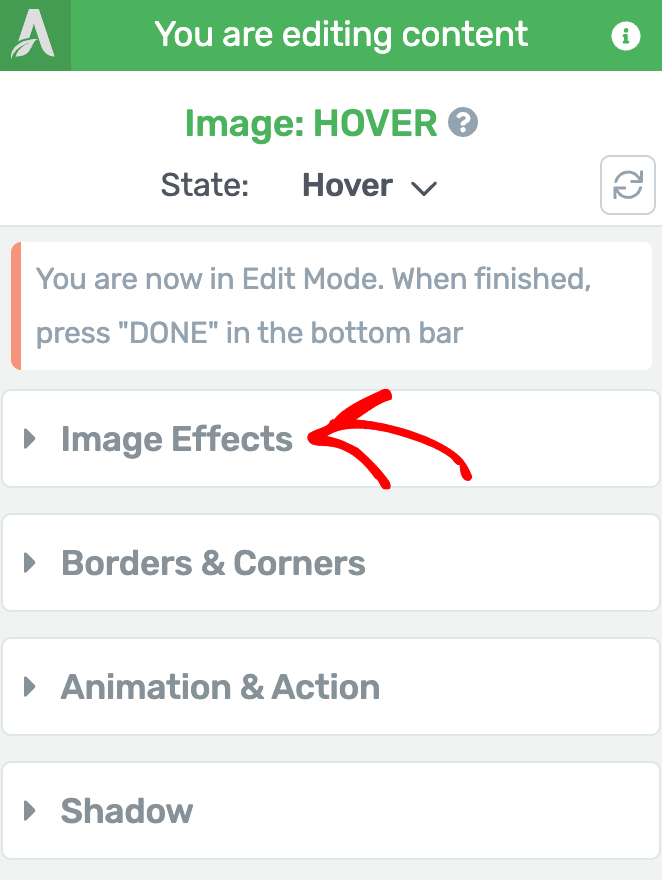
When you change the image state, you’ll see the settings you can manage for the hover state of the image. In these settings, click to open Image Effects.
Under Image Effects, use the Greyscale setting to manage the image version.
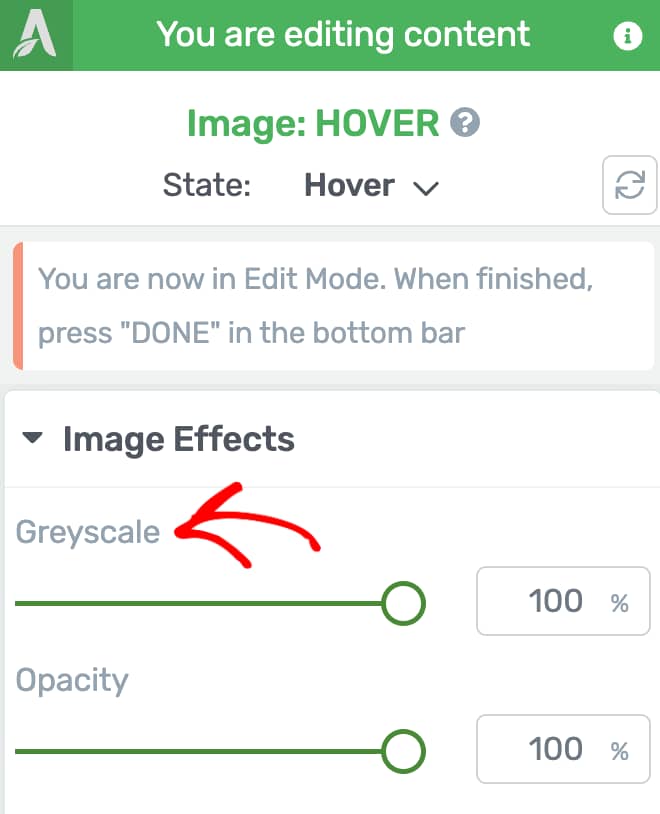
To disable the black and white version of the image on hover, set the Greyscale value to 0.

After you finish setting this up, click on the Done button to save the changes and exit the edit mode.

When you exit the edit mode, click the Save Work button in the bottom left of the screen.
This will ensure that all the images in the Image Gallery will be displayed in black and white and switched to their original form when a user hovers over them.

Want to watch a video showing this? Here’s one that will help.
Next, just like the Image element, you can add and customize hover effects for different Thrive Architect elements. To learn more, read our document here.