This is a short guide with the purpose of explaining the steps in which you can apply a WooCommerce template to one of your products or pages (for example shop/checkout page etc.).
After you create and customize all of your WooCommerce templates, you will have to apply them to your content. They can be applied to your WooCommerce products, or to certain pages (shop/cart/checkout, etc.)
Apply a Product Template to a Product
The way to do this has also been described in more details here, but here are, in short, the steps in which you can apply a Product Template to a product:
1. Open the Product in the Thrive Architect editor
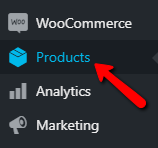
In your WordPress admin dashboard, click on “Products”, in the left sidebar:
Then, locate the product on which you want to apply the Product Template to, and click on “Edit with Thrive Architect”:

2. Access the “Product” settings
Once the product opens in the Thrive Architect editor, click on “Product”, in the breadcrumbs, to open some settings in the left sidebar:

3. Open the Product Template Settings
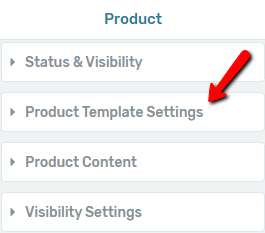
Some sections will appear in the left sidebar. Click on the “Product Template Settings” section to expand the options from here:
4. Activate the Product Template of your choice
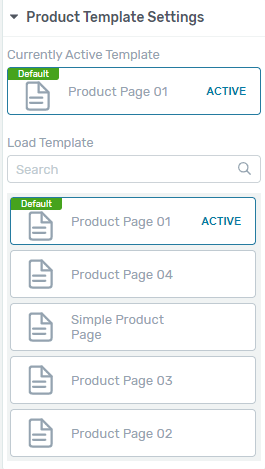
A list with all the available Product Templates will appear here. You will see the active one, as well as all of the other templates:
If you need more information about these options, please check out this article. From the list of templates, find the one that you want to apply to the product you’re editing, hover over it, and click on “Activate”:
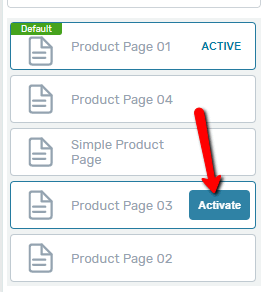
The template will then be applied to your product.
Apply other WooCommerce Templates to your Pages
The way to apply a Shop Template, for example, to a “Shop” page, is a bit different than the way to apply a Product Template to a template.
Note: I will use a Shop Template as an example, and apply it to a “Shop” page, but keep in mind that the process is the same in case you are trying to:
-
apply a Cart Template to a “Cart” page
-
apply a Checkout Template to a “Checkout” page
-
apply an Account Template to an “Account” page
1. Set up your pages
First of all, you need to make sure that you have set up all of these pages, from the WooCommerce settings.
We have created articles in which we have explained how to set up these pages, and you can find them here:
2. Set the Default Templates
Since you cannot have two “Shop” pages, for example, (meaning that you cannot set multiple pages as the “Shop” page in the WooCommerce settings), applying a template to one of these will mean that you change the default template, from the “Templates” section of Thrive Theme Builder.
For that, in your Thrive Theme Builder dashboard, access the “Templates” section:

Then, a list with the Core Templates will open. Click on “Core Templates”, so that you can select to preview all of the WooCommerce Templates:
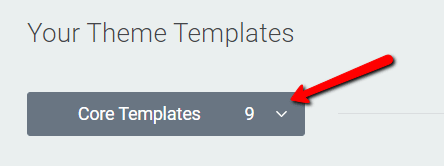
Then, click on “WooCommerce”, under the “Custom Post Templates” group:

You will now be able to preview all of the WooCommerce templates.
As mentioned earlier, in this case, applying another template to the “Shop” page means that you need to change the Default Shop Template, and set the template that you want to apply to the page, to be the default one.
For that, find the template that you want to apply to the “Shop” page.
As an example, in this case, “Simple Shop 1” is set as the Default Shop Template, and I want to apply the template called “My Shop Template” to my “Shop” page:
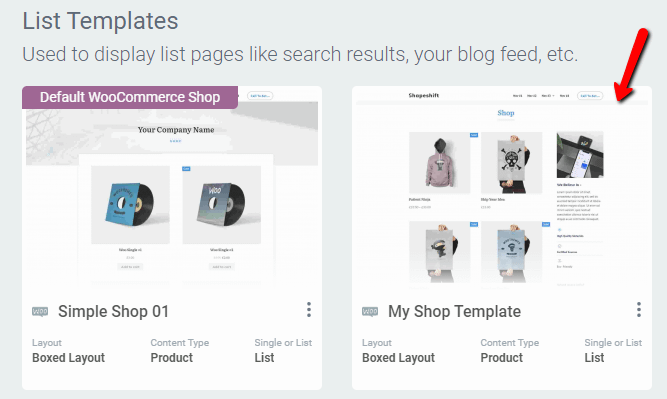
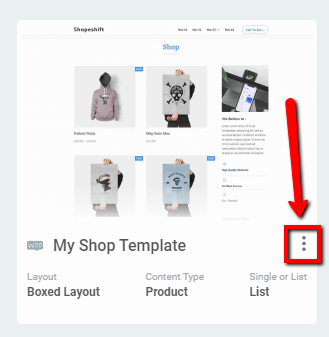
Once you have located the template, click on the three dots icon, next to its name:
Some options will open. Click on “Set as Default”:
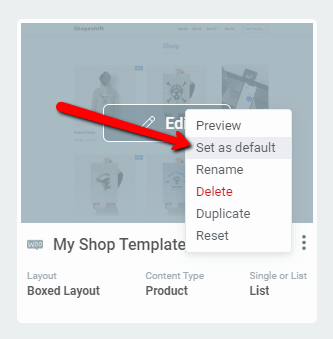
The Default Shop Template will then be changed:
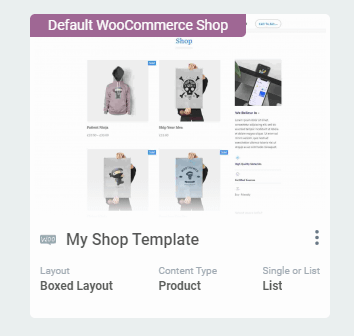
This means that the new template has been applied to the “Shop” page and this page will now have the design of the current Default Shop Template.
These were the ways in which you can apply WooCommerce templates to products or pages. If you need more information about WooCommerce and Thrive Theme Builder, please check out this section of our knowledge base.
I hope this article was useful for you. If that’s the case, please rate it with a smile below 🙂