In this article, we’ll show you how you can capture testimonials on your website using Thrive Architect, WordPress shortcodes, Thrive Lead forms and social media.
Picking the Source of Testimonials in Thrive Ovation
To begin capturing testimonials using Thrive Ovation you have to first select the source.

Clicking on Capture Testimonials will open a sub menu where you need to select the source through which you want to capture testimonials.
- Capturing Testimonials Using Thrive Architect
- Capturing Testimonials Using WordPress Shortcodes
- Capturing Testimonials Using Thrive Leads
- Capturing Testimonials Using Social Media

Capturing Testimonials Using Thrive Architect
To capture testimonials using a Thrive Architect element, you need to ensure you have Thrive Architect and Thrive Ovation installed and activated on your website.
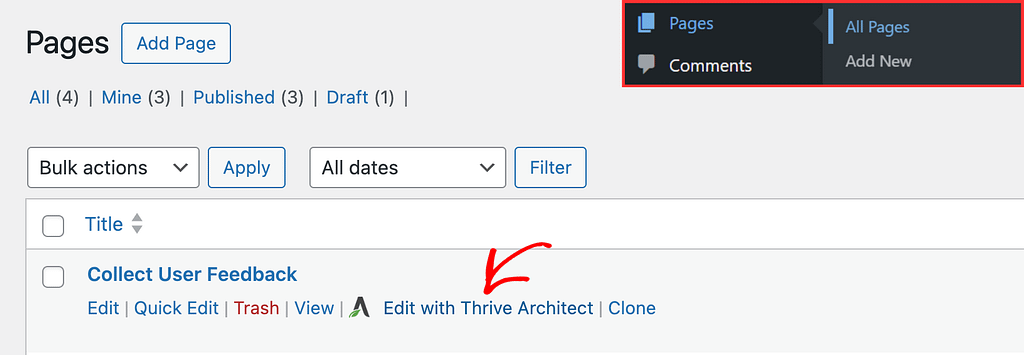
To begin, open the page you want to capture the testimonials through in the Thrive Architect editor. To do so, open your WordPress admin area, navigate to Pages >> All Pages, hover on the page title, and click on Edit with Thrive Architect.
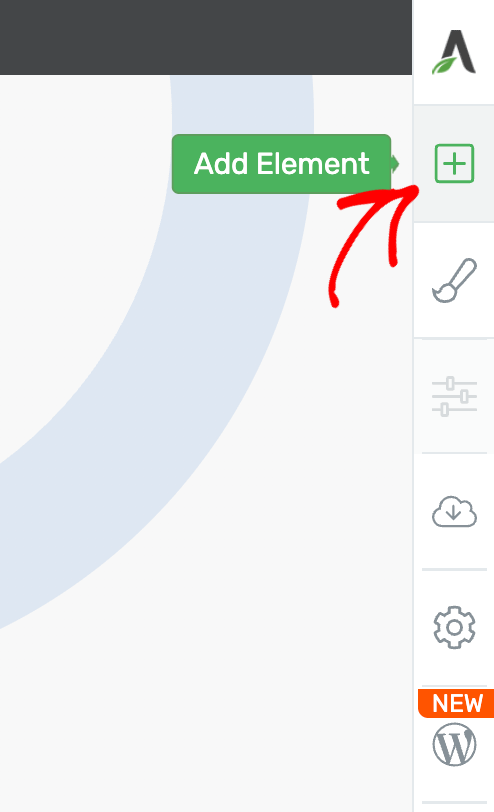
In the Thrive Architect editor, move to the right panel and click on the plus (+) icon to add an element.
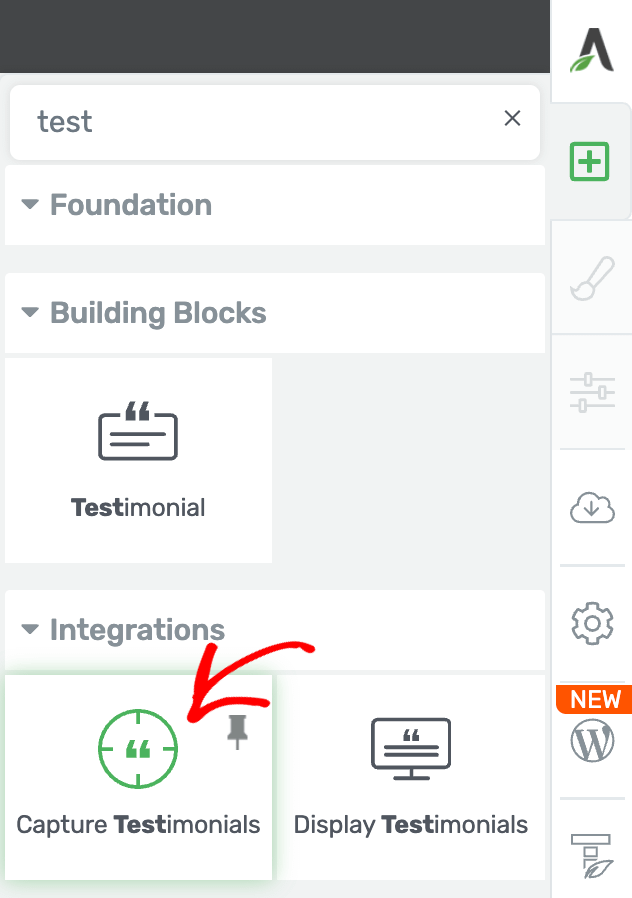
After clicking the plus icon, drag and drop the Capture Testimonials element on the page.
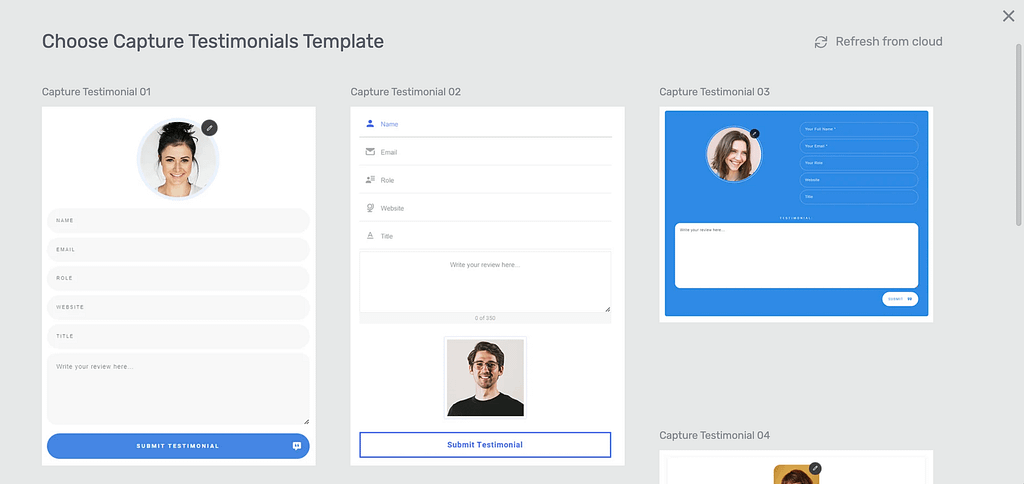
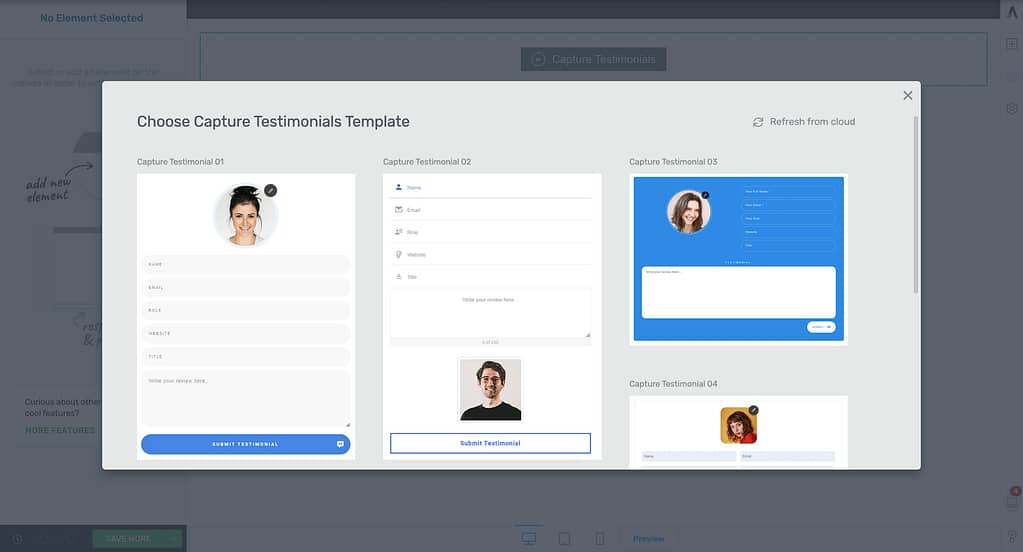
Dragging and dropping the Capture Testimonials element on the page will open a popup with templates for this element. Here, select the template you want to use.
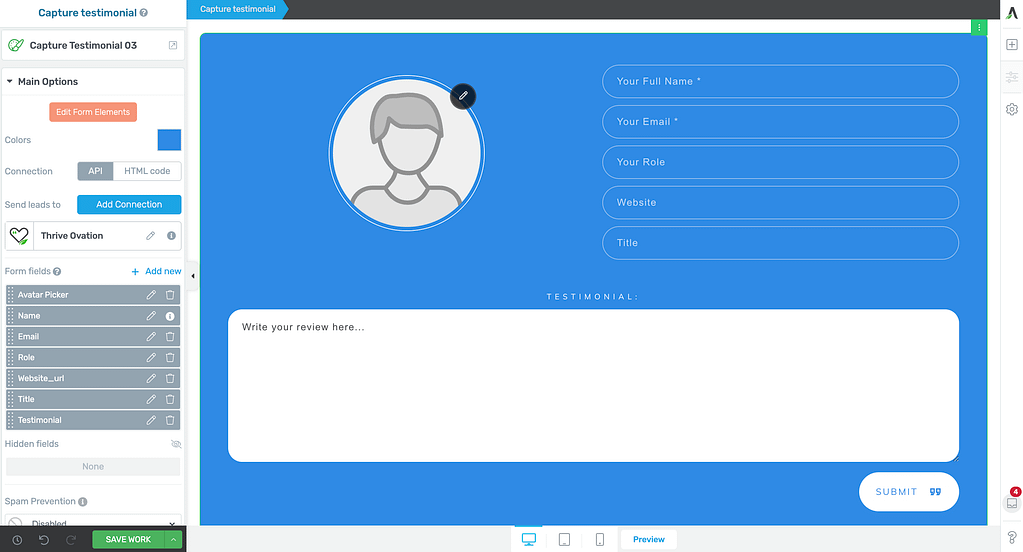
After selecting the template, you’ll see the Capture Testimonials element added to the page and its options open in the left column. This is where you can form elements, fields, manage connection, etc.
To know how to use the Capture Testimonial element efficiently, we recommend referring to our document here.
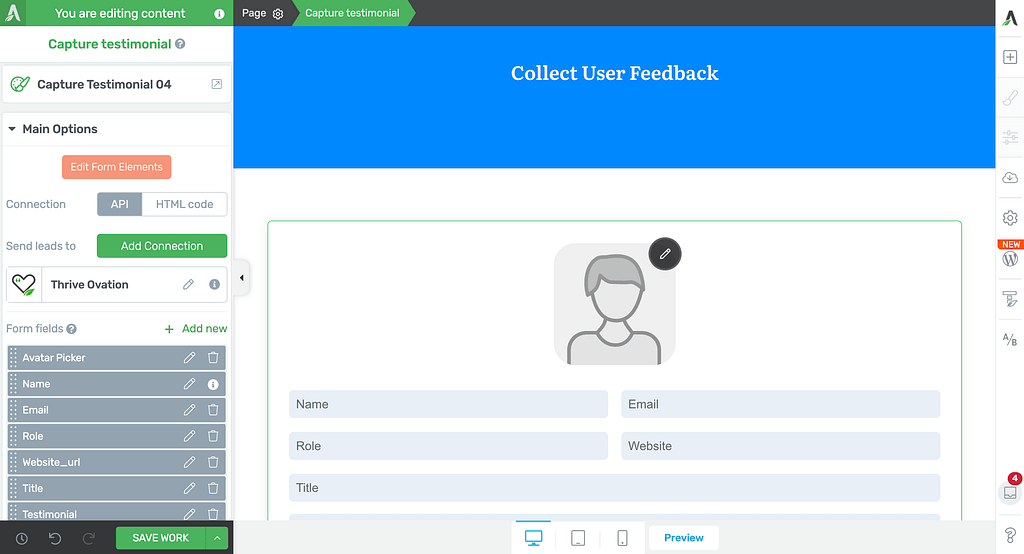
Once you finish editing the element and the page, click the Save Work button in the bottom left.
Capturing Testimonials Using WordPress Shortcodes
To capture testimonials using WordPress shortcodes, open your WordPress admin area, navigate to Thrive Dashboard >> Thrive Ovation, click on Capture Testimonials in the top row and select Capture using WordPress Shortcodes.

When you choose to capture testimonials using WordPress shortcodes, you’ll be taken to a page where you can create a New Capture shortcode by clicking the given block.
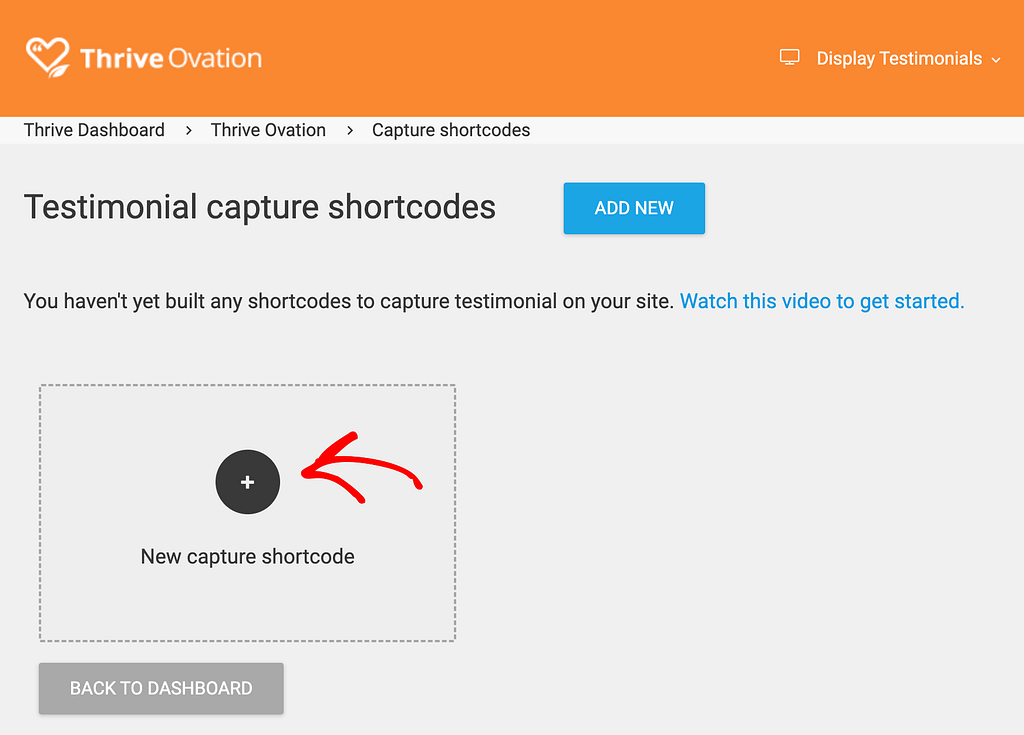
Clicking to add a new capture shortcode will open a popup where you enter the shortcode name you want to use.
After you enter the shortcode name, click the Save and Continue button.
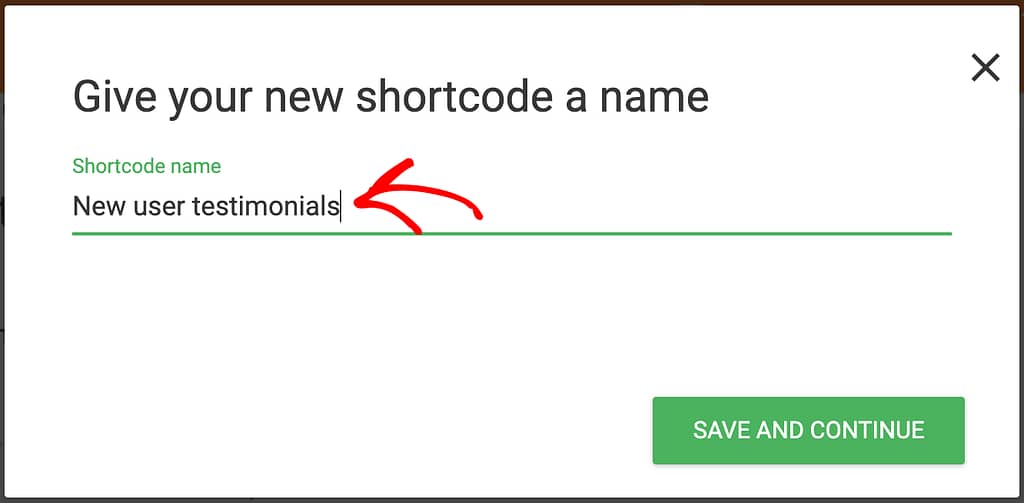
When you click the button, you’ll see the new capture shortcode added to the Thrive Ovation dashboard.
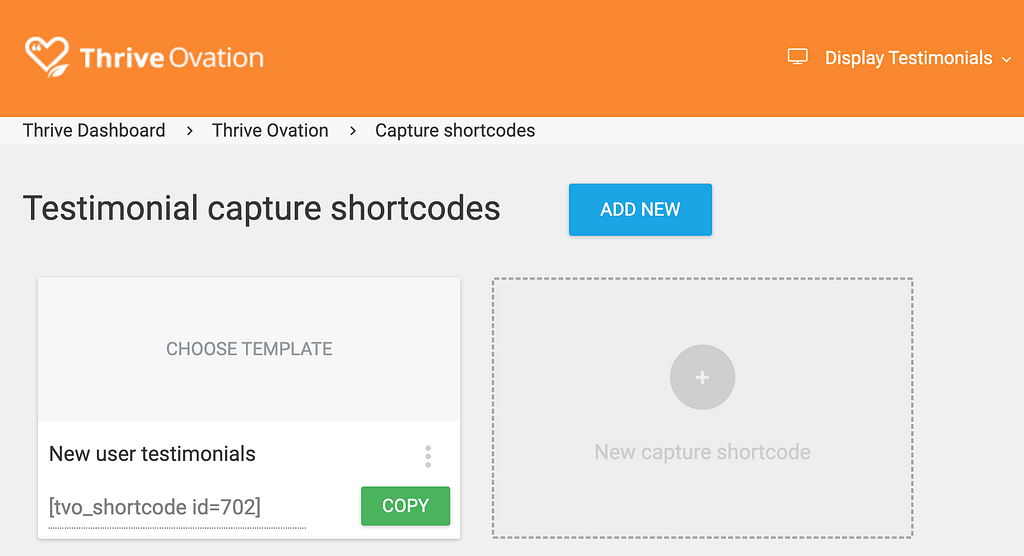
The Thrive Ovation dashboard has a list of testimonial capture shortcodes that you can use. Each of these allow you to:
Choose a template
After creating a new capture shortcode, you can pick a template you want to apply here.
To pick a template, open the Thrive Ovation dashboard, hover on the shortcode block and click Choose template.
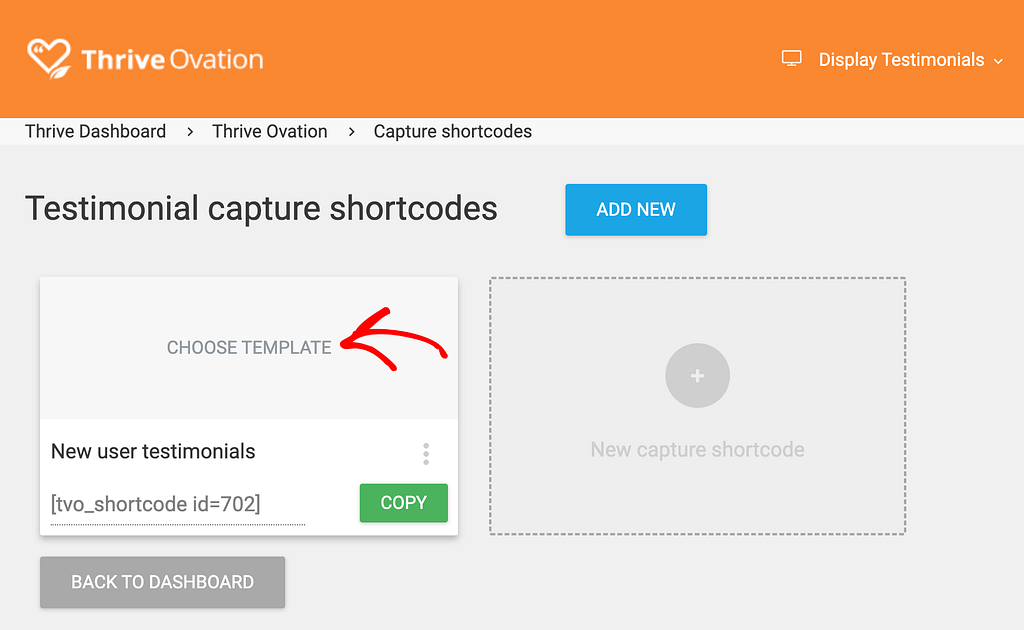
Clicking Choose Template will take you to the Thrive Architect editor where the Capture Testimonial element is added on the page and you see a popup where you select the template.
Selecting a template will add it to the page and you’ll see its options open in the left column.
To know how to use the Capture Testimonial element efficiently, we recommend referring to our document here.
Once you finish editing the element and the page, click the Save Work button in the bottom left.
Edit the shortcode title
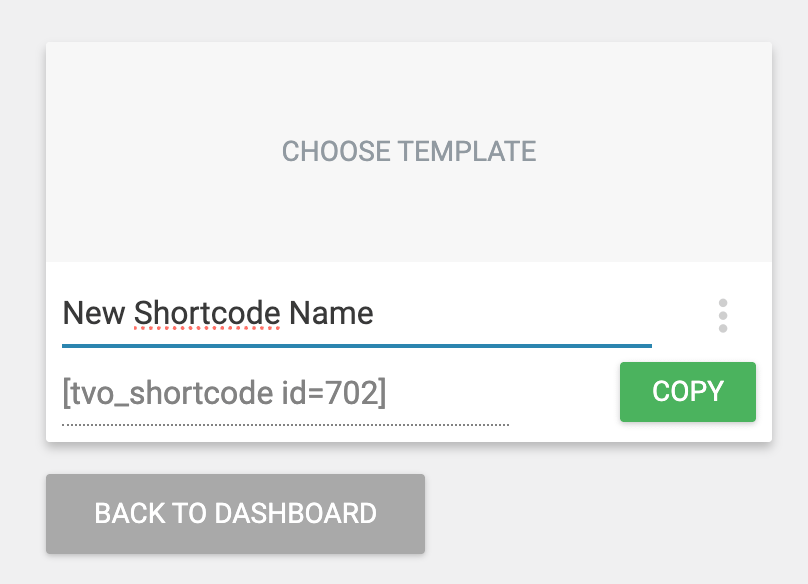
Many times you may want to change the shortcode after creating it. To do so, open your Thrive Ovation dashboard, click on the three dots you see on the shortcode block and click Edit Title.
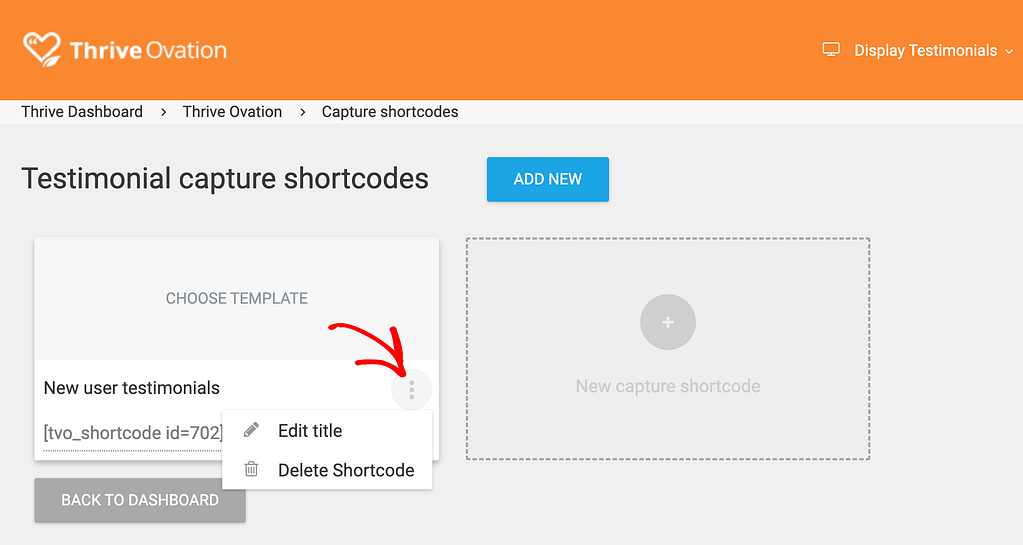
Clicking Edit title will let you edit the shortcode title inside the block.
Delete the shortcode
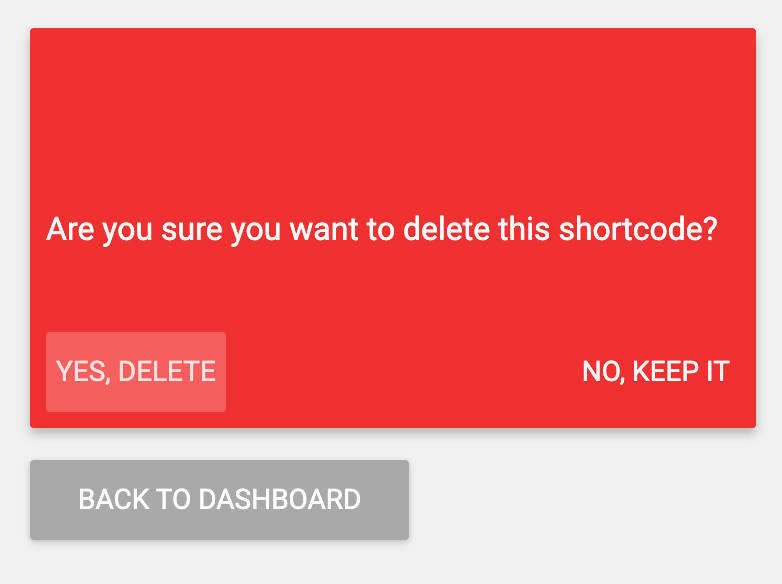
Thrive Ovation allows you to delete a created shortcode. To do so, open your Thrive Ovation dashboard, click on the three dots you see on the shortcode block and click Delete shortcode.

Clicking Delete Shortcode will display a confirmation message. To continue, click Yes, Delete.
Using the Shortcode in a Page/Post
A new capture shortcode created in Thrive Ovation can be used on any post or page of your website.
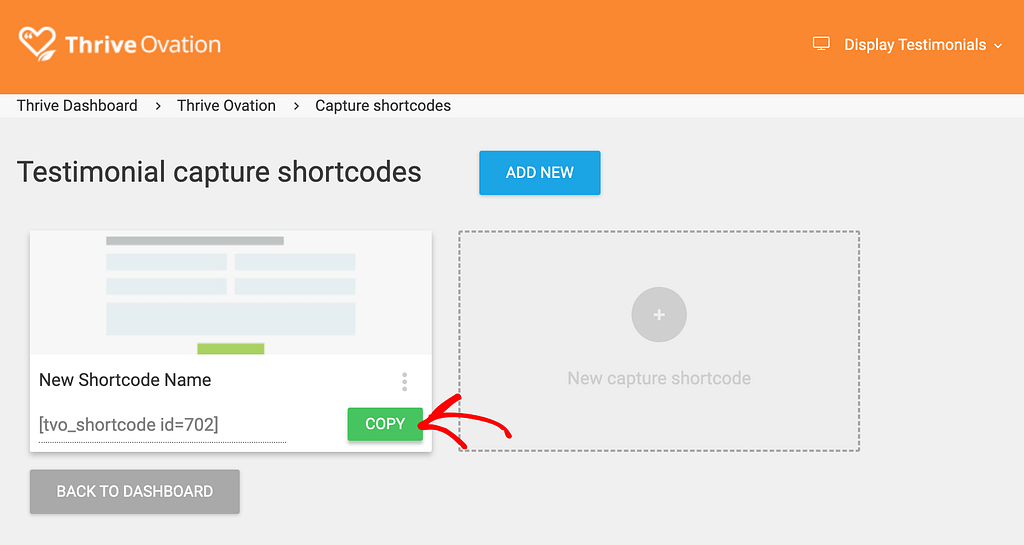
To use the shortcode on a page or post, start by opening the Thrive Ovation dashboard and click the COPY button beside the shortcode you want to use.
Once you copy the shortcode, open a page or post where you want to use it.
In this example, I will open a post in the WordPress editor. In the editor, add the shortcode block where you want to add the shortcode to capture testimonials.
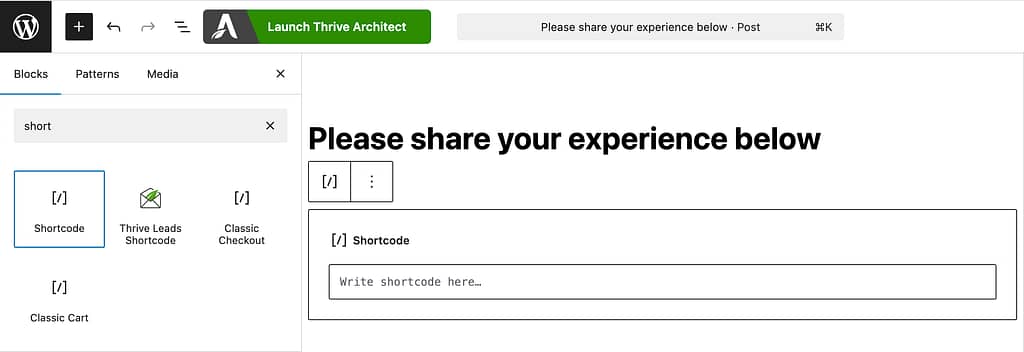
When on the page, paste the shortcode inside the Shortcode block.

After you add the shortcode and make required changes, save and publish the page or post.
This will ensure you see the testimonial capture form on the page or post you added the shortcode to.
Capturing Testimonials Using Thrive Leads
To capture testimonials using Thrive Leads, you need to ensure you have Thrive Leads and Thrive Ovation installed and activated on your website.
To begin, open the Thrive Leads form where you want to capture testimonials. To do so, open your WordPress admin area, navigate to Thrive Dashboard >> Thrive Leads, and click on a Lead Group that contains the form you want to edit.

When you click on a Lead Group, it’ll display the form types created under it. To connect a specific form type, click on the “Pen” or Edit icon seen on the right side of the form name.
We are referring to the Widget form type in this example.

When you choose to edit the form type, it’ll take you to a page where you’ll see the form/forms created under this form type.
On this page, click on the pen or edit icon seen on the right side of the form name.

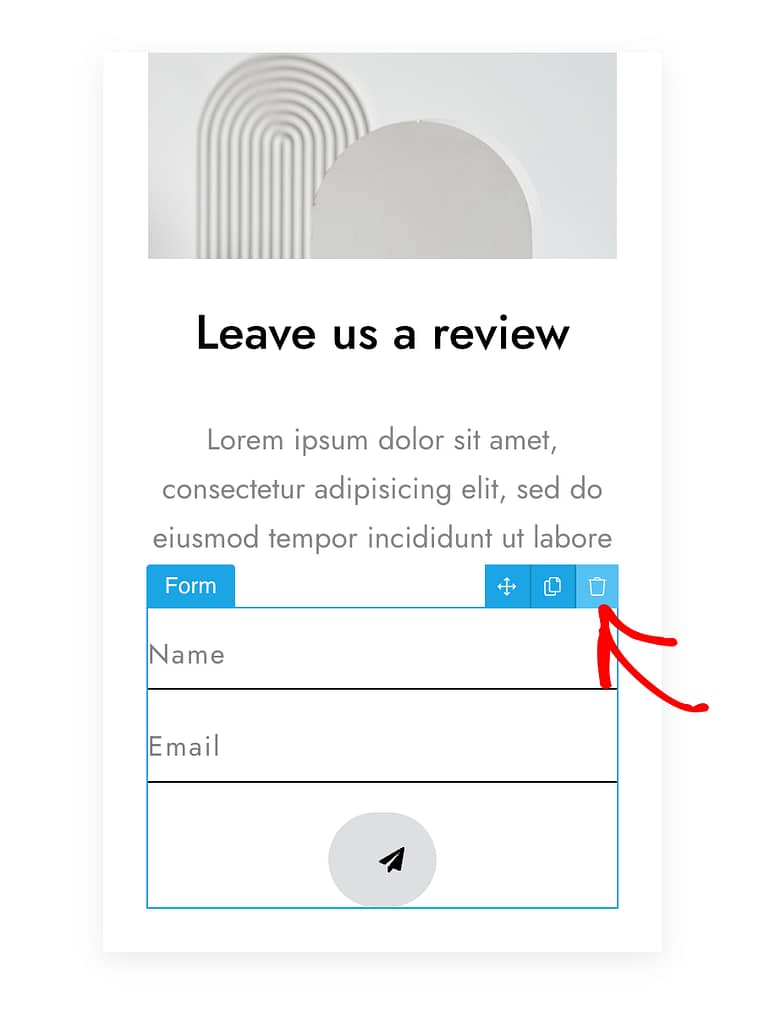
In the editor, hover on the form inside the widget and click the trash can icon to delete the form.
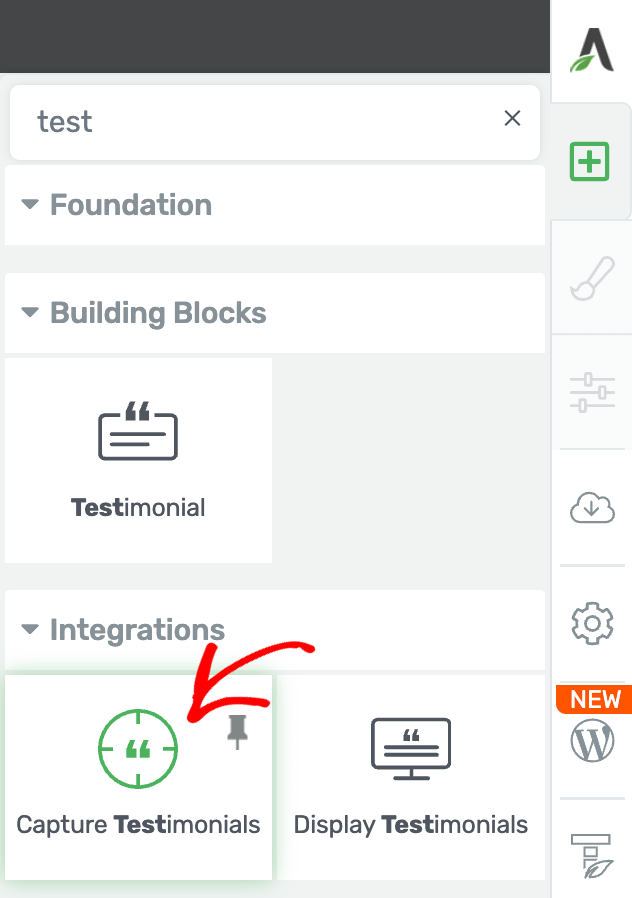
After deleting the form, click the plus (+) icon in the right column and drag and drop the Capture Testimonial element on the widget.
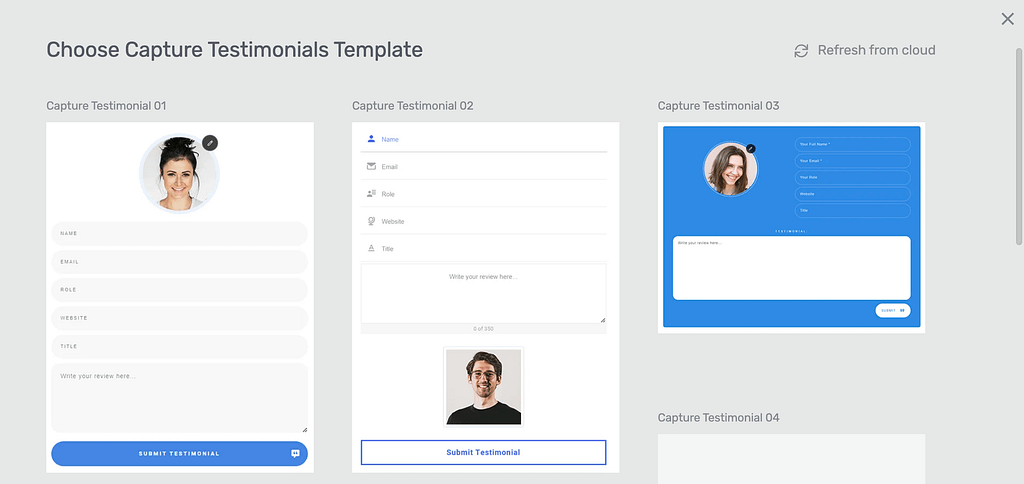
When you drag and drop the Capture Testimonial in a Thrive Leads form, select a template you want to use from the popup that appears.
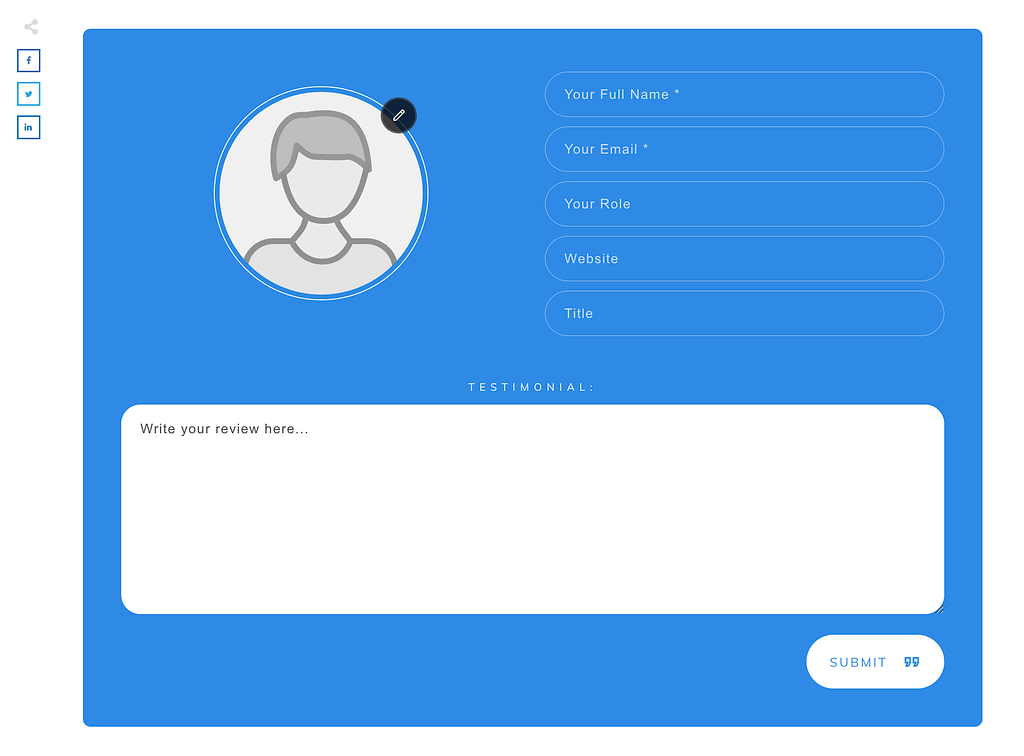
After selecting the template, you’ll see the Capture Testimonial form added in place of the Thrive Leads form.
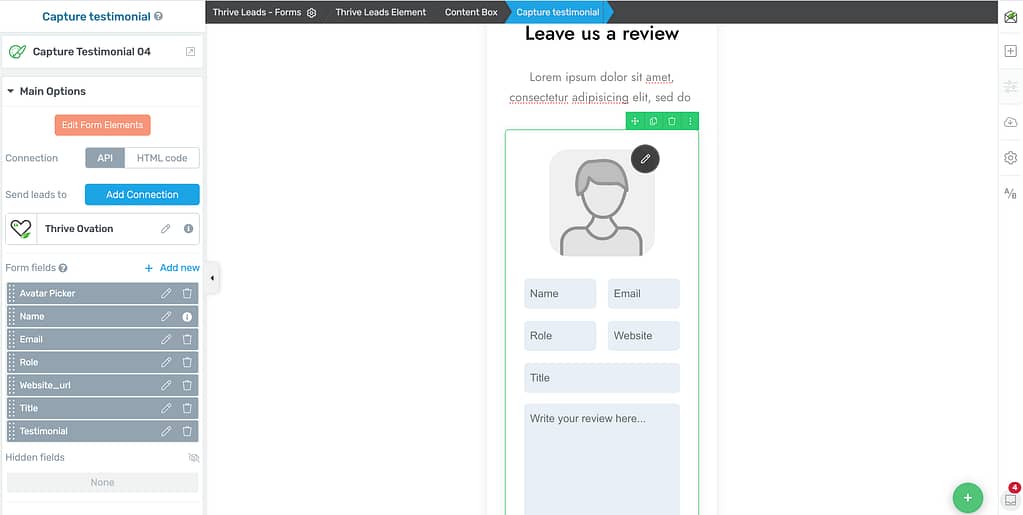
To know how to use the Capture Testimonial element efficiently, we recommend referring to our document here.
Once you finish editing the element and the page, click the Save Work button in the bottom left.
Capturing Testimonials Using Social Media
Just like capturing testimonials through the website, Thrive Ovation allows you to capture testimonials through social media too.
For an in-depth and step by step guide on how you can capture testimonials through social media, we’d recommend you to refer to our document here.
We’ve just seen how you can capture testimonials using Thrive Ovation on your website.
Next, do you want to label the testimonials you capture? Read our document that will help you do that on your website.