1. Home
  2. Knowledge Base
  3. General Help & Support
  4. Troubleshooting
  5. Configuring the CSS and JavaScript Exclusions in the LiteSpeed Cache Plugin

Configuring the CSS and JavaScript Exclusions in the LiteSpeed Cache Plugin

Sometimes it might happen that your caching plugins interfere with other Thrive products, and prevent them from working the way you’ve set them up.

A situation like this might occur if you are using a lazy loading plugin, such as LiteSpeed Cache and a Thrive Leads form.

When JavaScript and CSS minification is enabled for the LiteSpeed Cache plugin, it minifies the already minified CSS/JavaScript files in other Thrive products, and thus, it might create a conflict. For example, your Thrive Leads forms might not display correctly.

If you have noticed this when building your website, then this article might be useful to you.

There are several steps you can take in order to prevent this from happening on the pages on which you’ve set up Thrive Leads forms.

First, in your WordPress admin dashboard, hover over the LiteSpeed Cache plugin in the left sidebar, and select “Page Optimization” from the submenu that opens:
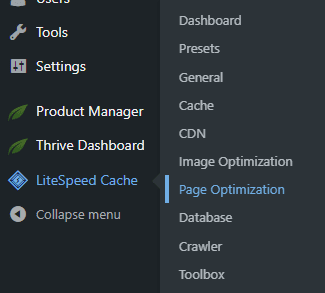
Page Optimization option in the LiteSpeed Cache plugin sidebar menu

In the new dashboard, click on the “Tuning” tab:

Here’s where you will have to add several exclusions in the “JS Excludes” fields:
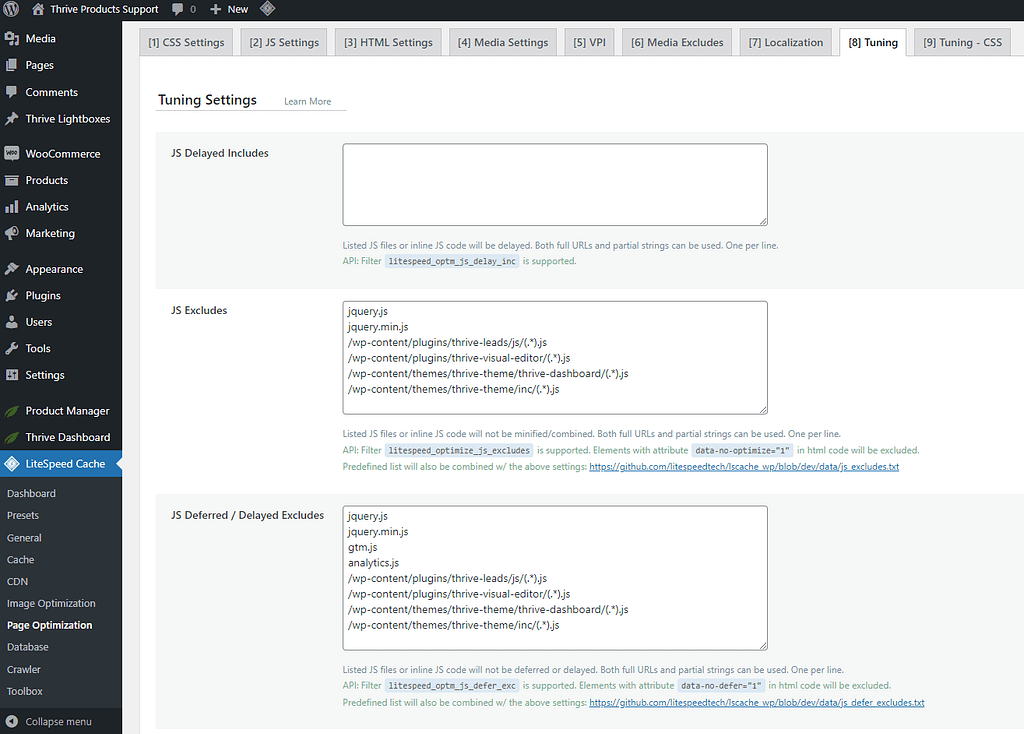
Tuning tab in LiteSpeed Cache Page Optimization settings

Then, click on the “Tuning – CSS” tab:

Here’s where you will have to add several exclusions in the “CSS Excludes” fields:
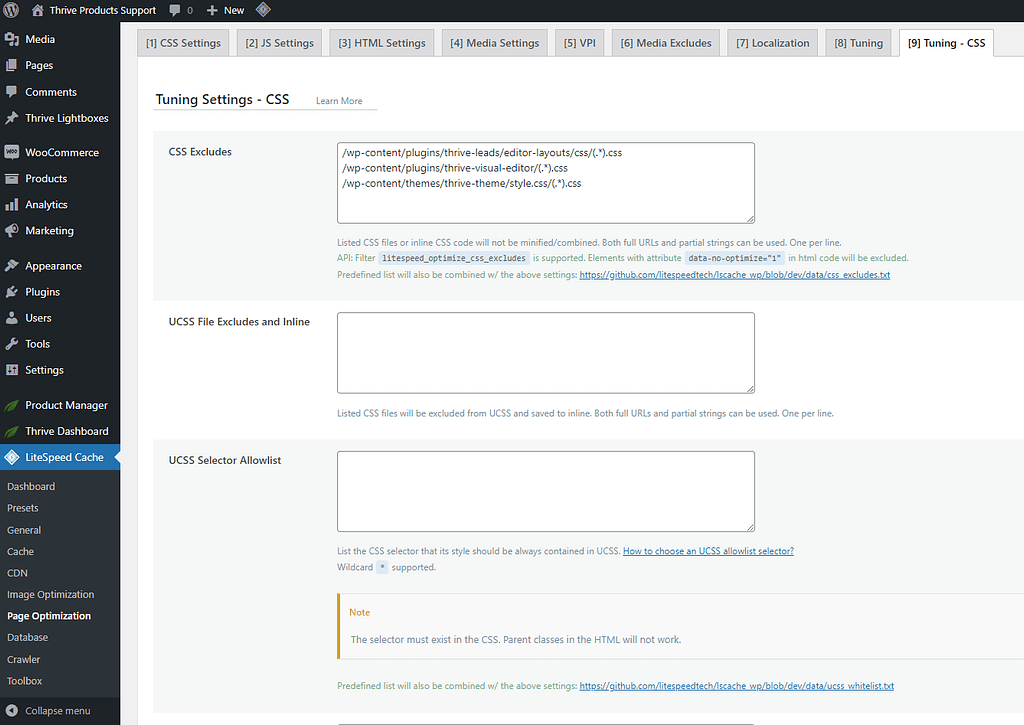
Tuning – CSS tab in LiteSpeed Cache Page Optimization settings

The following exclusions are recommended:

CSS Excludes

/wp-content/plugins/thrive-leads/editor-layouts/css/(.*).css

/wp-content/plugins/thrive-visual-editor/(.*).css

/wp-content/themes/thrive-theme/style.css/(.*).css

JavaScript Excludes

/wp-content/plugins/thrive-leads/js/(.*).js

/wp-content/plugins/thrive-visual-editor/(.*).js

/wp-content/themes/thrive-theme/thrive-dashboard/(.*).js

/wp-content/themes/thrive-theme/inc/(.*).js

/wp-content/plugins/thrive-leads/js/frontend.min.js

/wp-content/plugins/thrive-visual-editor/editor/js/dist/modules/general.min.js

After you paste them into the corresponding fields, don’t forget to save your changes:
Save Changes button in LiteSpeed Cache Tuning settings

With these exclusions set up, your Thrive Leads forms should now display correctly throughout your website.

This is how easily you can prevent the Lite Speed Cache plugin from interfering with your Thrive Leads forms.

I hope this article will prove to be useful to you. If you want to read more troubleshooting articles like this one, don’t hesitate to check out the dedicated section from our knowledge base.

LiteSpeed’s Object Cache and Stale Thrive Plugin Data After an Update

LiteSpeed Cache’s Object Cache setting can cause a similar kind of problem to the CSS/JS minification conflict described above, but it’s a distinct LiteSpeed feature and shows up differently. Instead of a display or styling issue, Object Cache can keep serving outdated plugin data after you update a Thrive product – even though the update itself completed successfully.

Note: A typical symptom is a setting, option, or dropdown value that’s missing or not reflecting your update. For example, after updating Thrive Apprentice, an option that should appear in a dropdown (such as a video source choice in a lesson’s Edit Details panel) may not show up until the cache is cleared, since LiteSpeed’s Object Cache is still serving the plugin’s pre-update data.

If you run into this after updating a Thrive plugin, there are two ways to fix it:

This is the permanent fix, since it takes care of this automatically for every future update.

  1. In your WordPress admin dashboard, hover over the LiteSpeed Cache plugin in the left sidebar, and select “Page Optimization”
  2. Click on the “Purge” tab
  3. Turn on “Purge All On Upgrade”
  4. Click Save Changes
Purge All On Upgrade setting turned on in LiteSpeed Cache Page Optimization Purge settings

With this enabled, LiteSpeed Cache automatically purges the cache whenever any plugin, theme, or WordPress core is updated, so you won’t run into stale Thrive plugin data after future updates.

Fix 2 (Manual/One-Time): Run “Purge All”

If you’ve already updated a Thrive plugin and are seeing this issue right now, you can resolve it immediately with a manual purge:

  1. In your WordPress admin dashboard, hover over the LiteSpeed Cache plugin in the left sidebar
  2. Click “Purge All”

This clears the Object Cache (along with the rest of LiteSpeed’s cache) right away, so the plugin’s updated data is served correctly.

Tip: After updating any Thrive plugin, it’s a good habit to run Purge All if you notice a setting or option isn’t reflecting your update – this rules out cache-related causes before troubleshooting further.

Was this article helpful?

Related Articles

>