Do you want to enable users to upload files through a Lead Generation form on your website which then gets saved in a Google drive? This is possible when you build an API connection between the Thrive Dashboard and the Google drive you want to use.
In this article we’ll show you how you can build an API connection between Thrive Dashboard and Google Drive, and how you can use the drive to save files that users upload through lead generation forms.
- Obtaining the Google Drive Client ID and Secret Key
- Building an API Connection Between Thrive Dashboard and Google Drive
- Connecting a Lead Generation Element with Google Drive
Obtaining a Google Drive Client ID and Secret Key
A Google client ID and secret key is the medium through which you can build a secure API connection between your Google account and the Thrive Dashboard on your website.
There are a few steps you’ll need to follow to obtain the client ID and secret key.
Enabling the Google Drive API
To begin enabling the Google Drive API, login to your Google account and open the Google APIs Console.
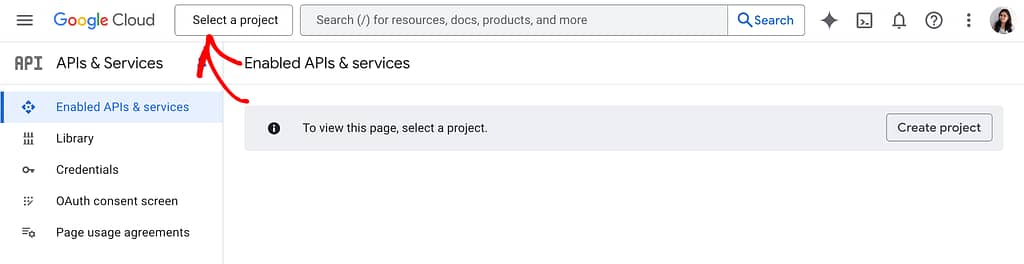
Clicking on this link will open the APIs and Services page. On this page, you can either choose to select a project you’ve created or opt to create a new one.
If you already have a project that you want to use, you can ignore the project creation steps and click Select a Project.
After you click Select a Project, you’ll see a popup where you can click the project name you want to open.
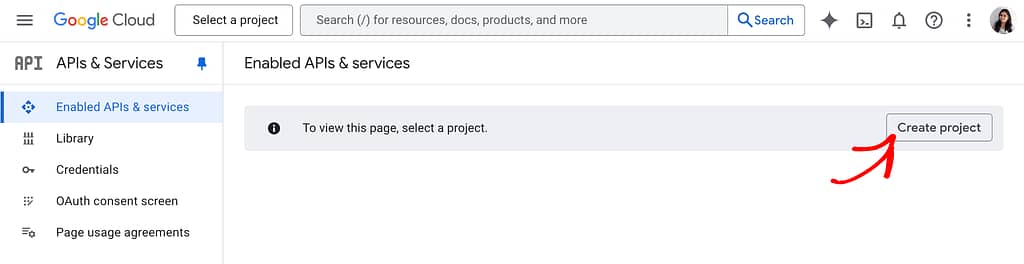
To create a new project, click the Create Project button on the top right.
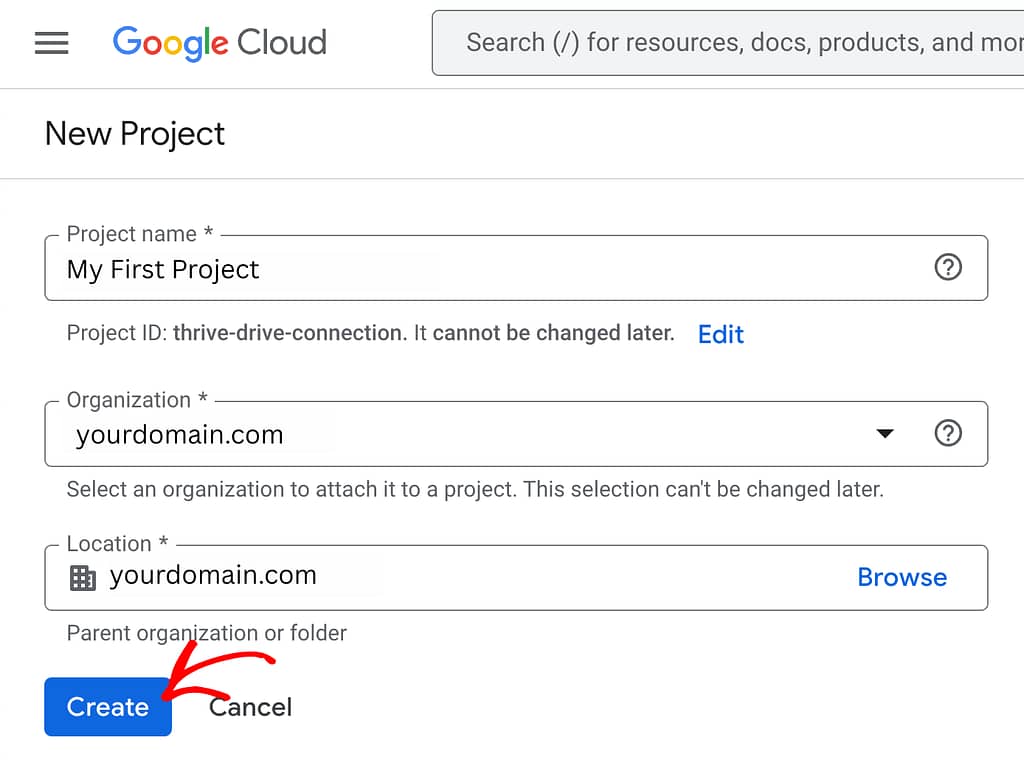
When you click Create Project, you’ll be taken to a page where you’ll be asked to enter the Project name, Organization, and Location. To proceed, enter this information and click Create.
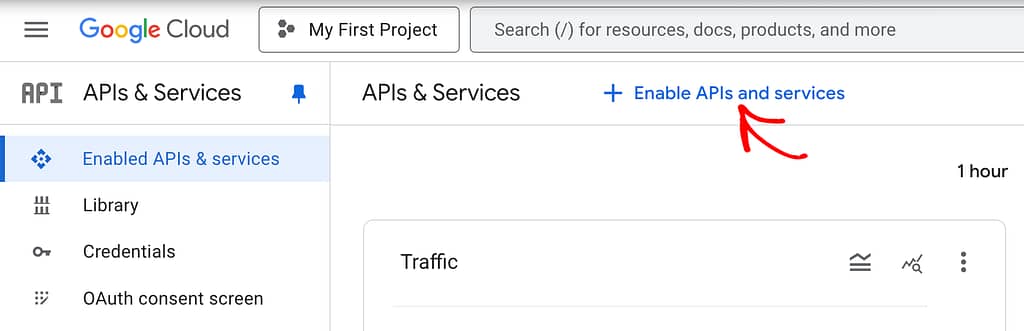
On the project page, click +Enable APIs and services.
Clicking +Enable APIs and services will take you to the Google API page where you can scroll down to Google Drive API, or use the search bar to search Google Drive in it.
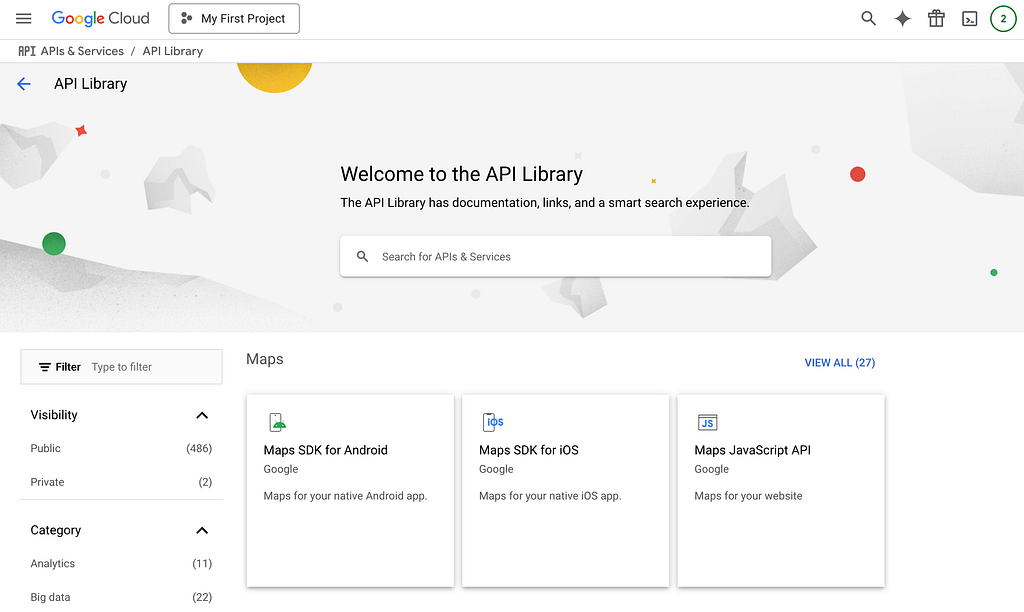
When you search Google Drive API, click on it.
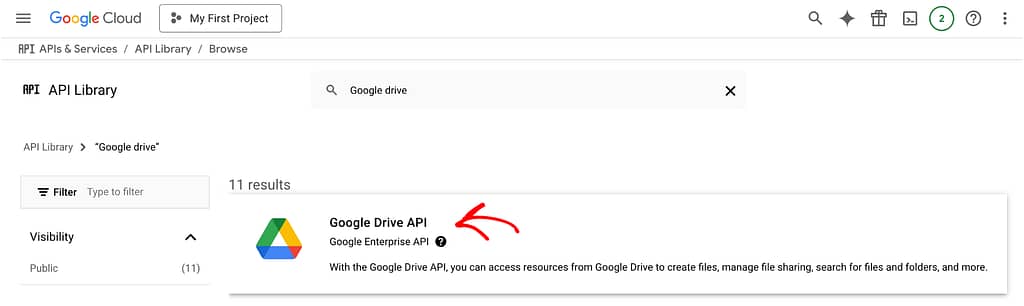
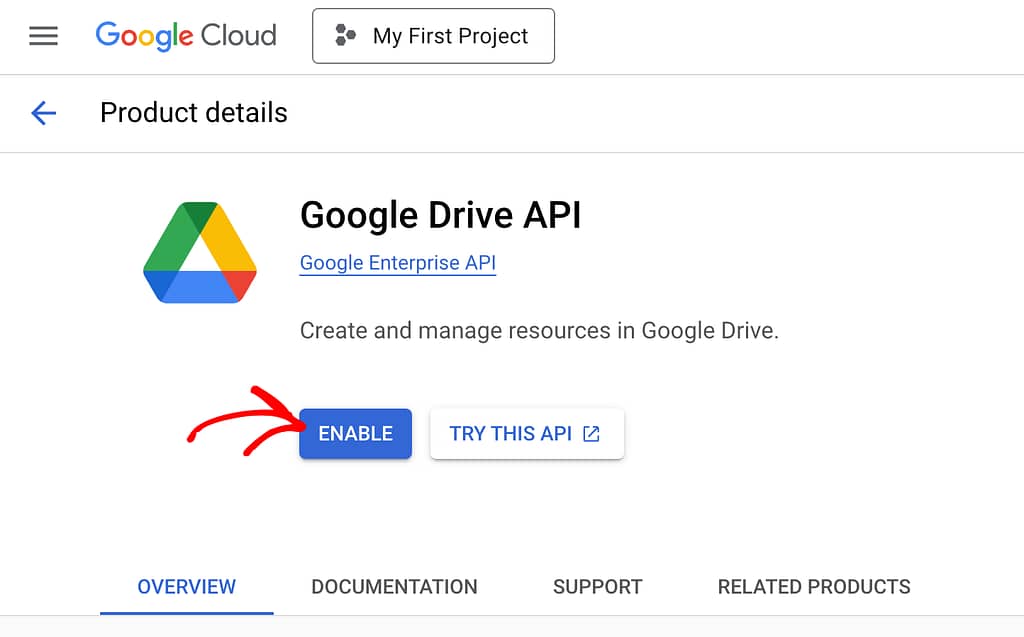
Clicking on the Google Drive block on the API page will take you to the Google Drive API page. On this page, you’ll see two options that’ll allow you to either enable the Google Drive API for the project or try it once.
To enable this API, click the Enable button.
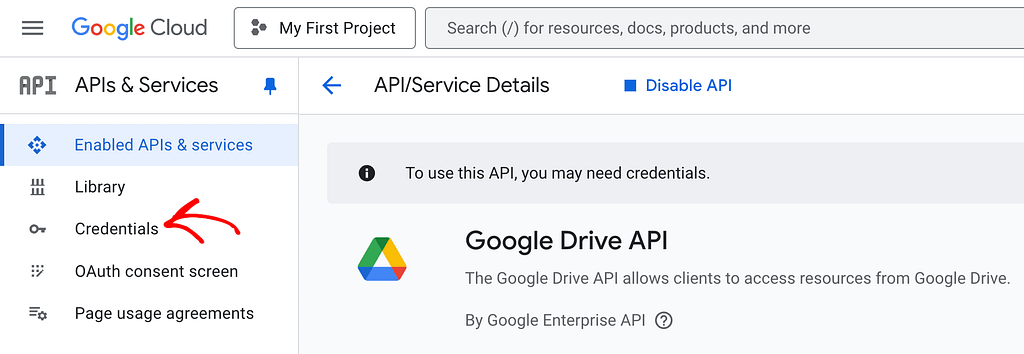
Once enabled, you will be taken to the project page where you will see the Google Drive API enabled.
Enabling the Google Drive API does not mean you can use it as of yet. You’ll need to follow the steps below to obtain the client ID and Secret key for this API.
Configuring the OAuth Consent Screen
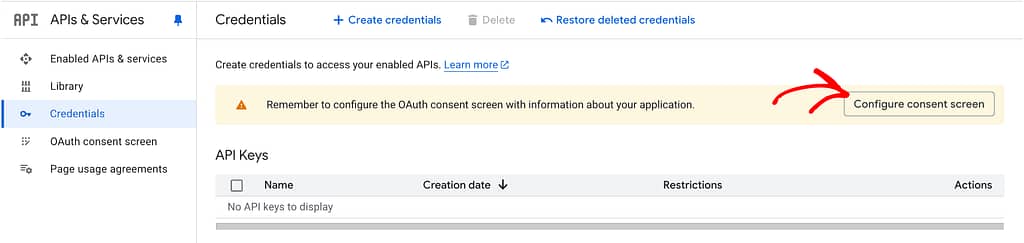
Once Enabled, you’ll need to proceed setting up credentials. To do this, click Credentials in the left column.
Before you are able to create the Google API credentials, you’ll need to Configure the OAuth Consent Screen.
If you haven’t done so yet, you’ll see a notice on the Credentials page asking you to Configure the OAuth Consent Screen by clicking the button.
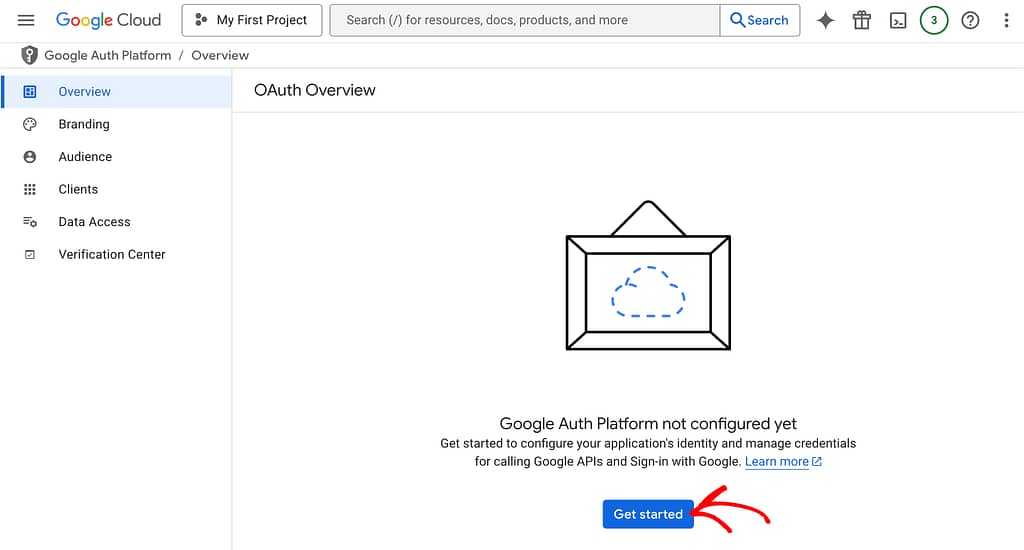
To proceed, click Configure Consent Screen.
Clicking the Configure consent screen button will take you to a page where you’ll be informed that the Google Auth Platform is not configured yet. To do this, click Get Started.
When you click Get Started, you’ll be taken to the Project Configuration page where you begin by entering the requested App Information, such as the Application name and your email address.
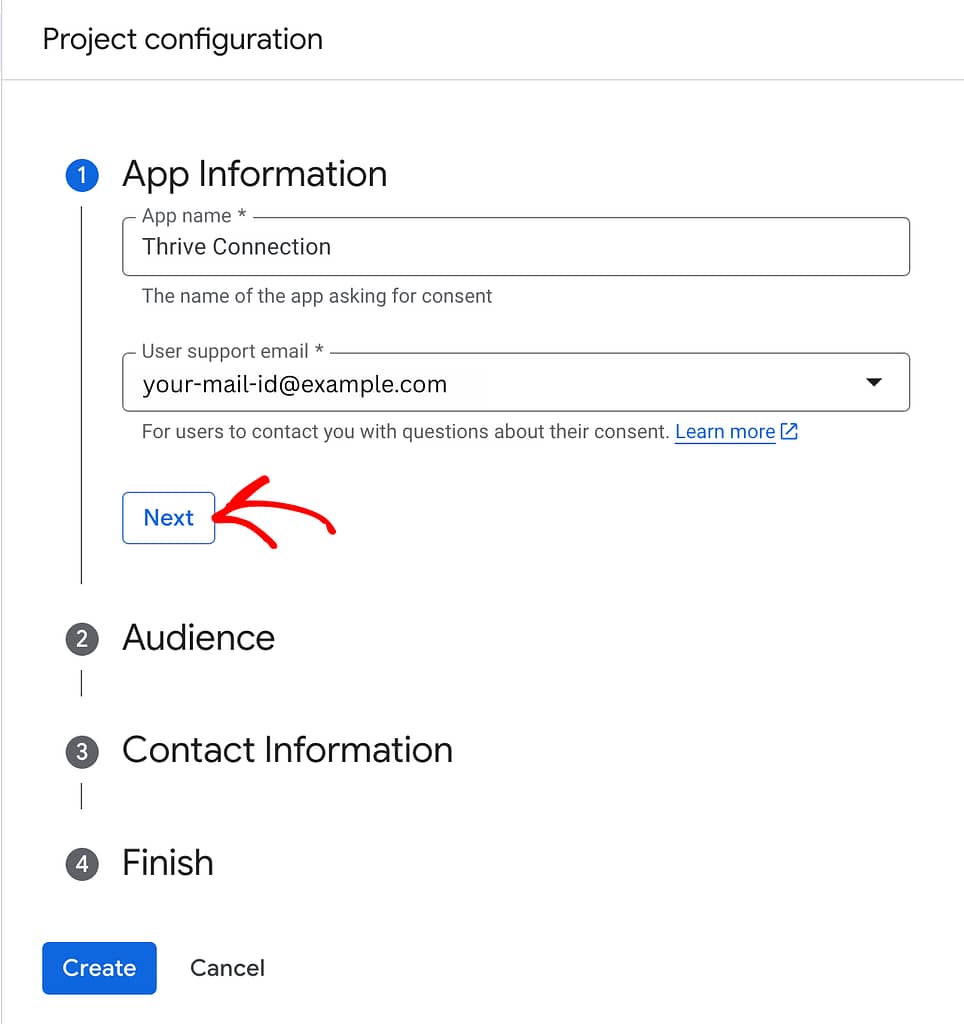
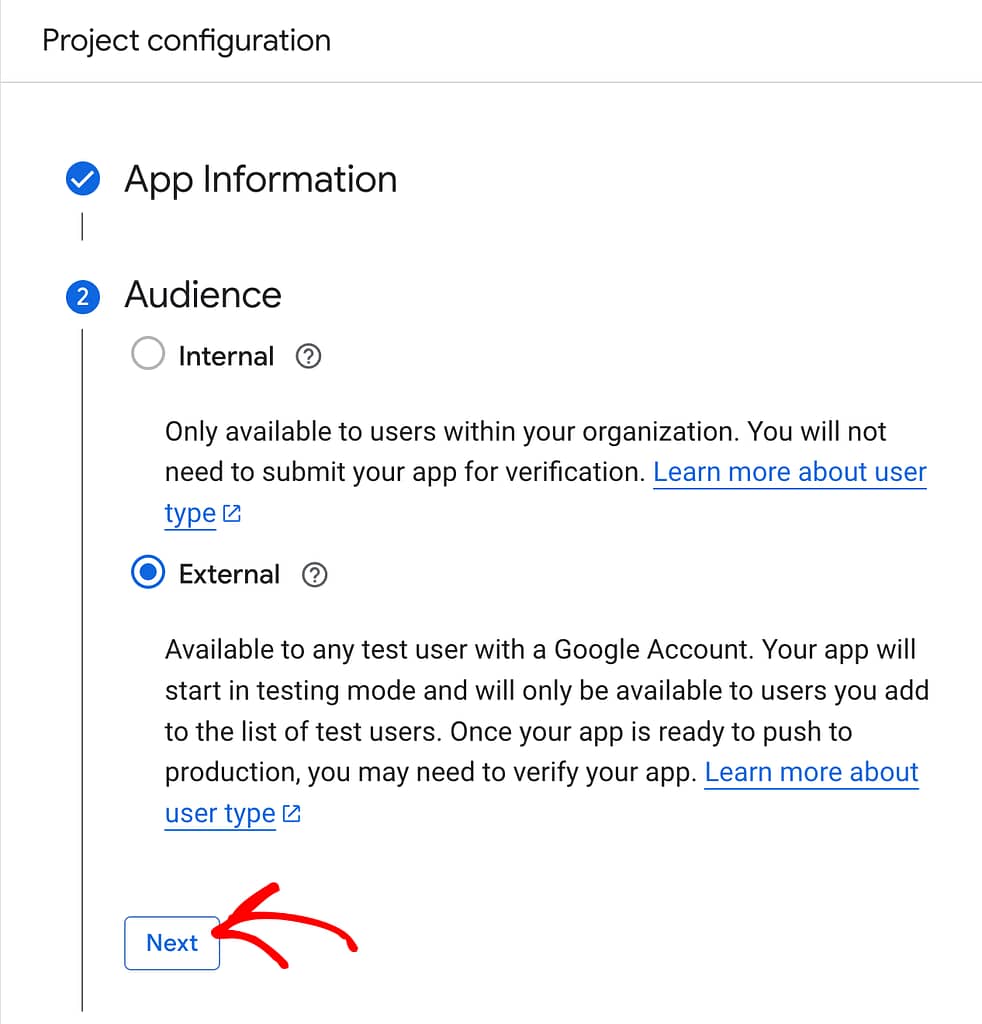
After the application information, select the audience you want this application to be accessible to. Here, select External and click Next.
Once you select your audience, you’ll have to enter your contact information. These is/are the email IDs you’d want to receive important notifications in case there are any changes in your application.
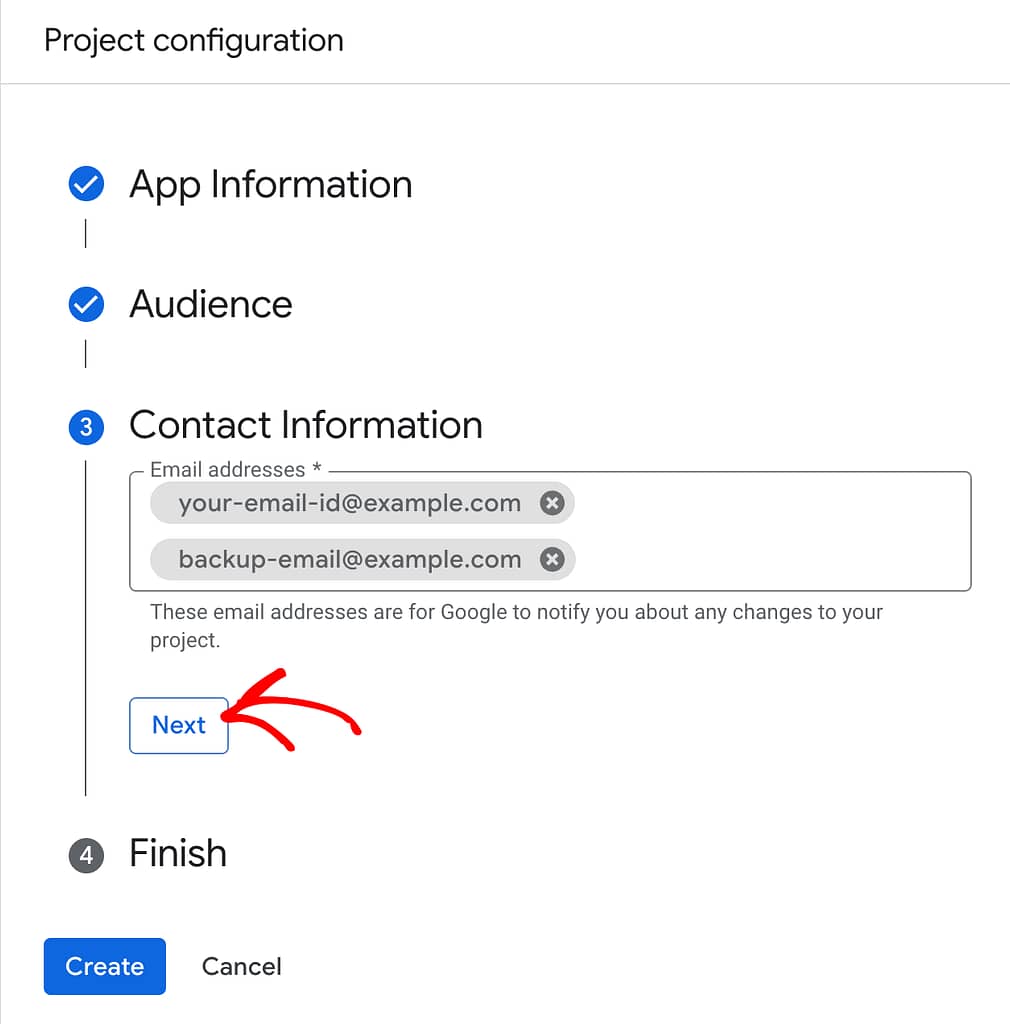
After you enter your contact information, you must click the checkbox to agree to Google API and services data policies, and click Continue.
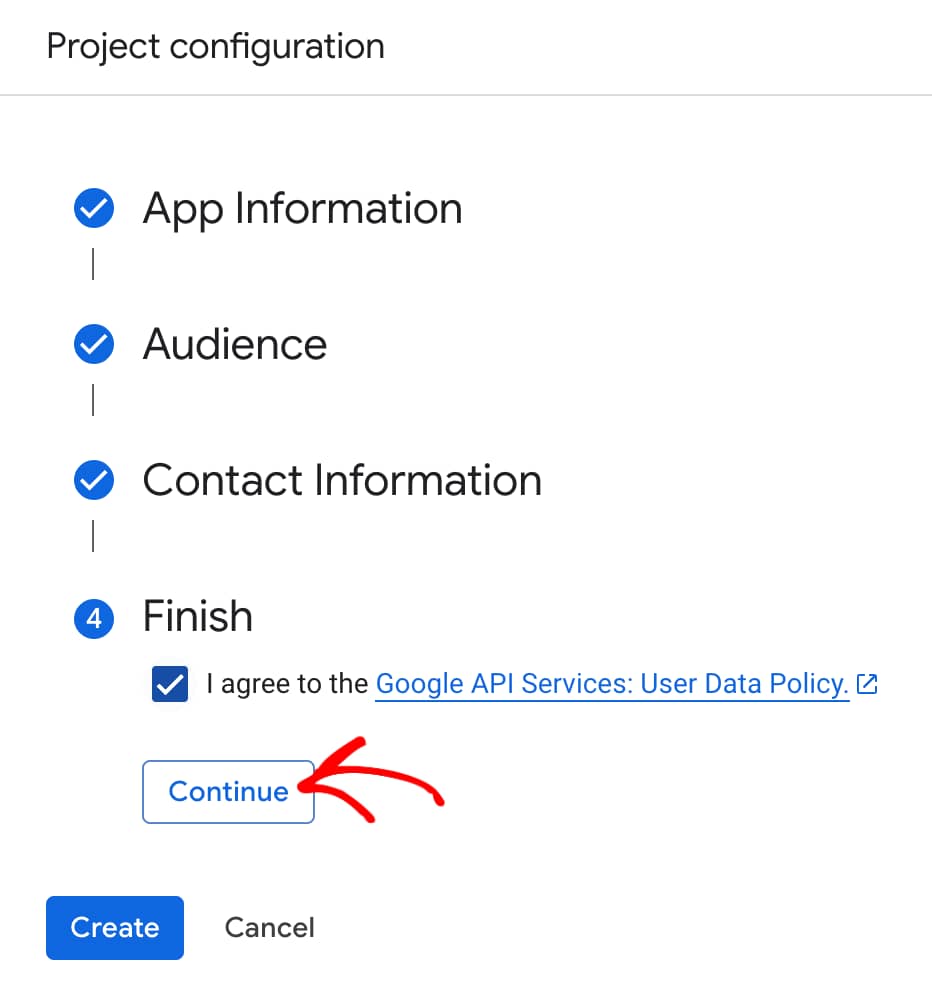
Once you click Continue, you are done with all the information required here. To proceed, click Create.

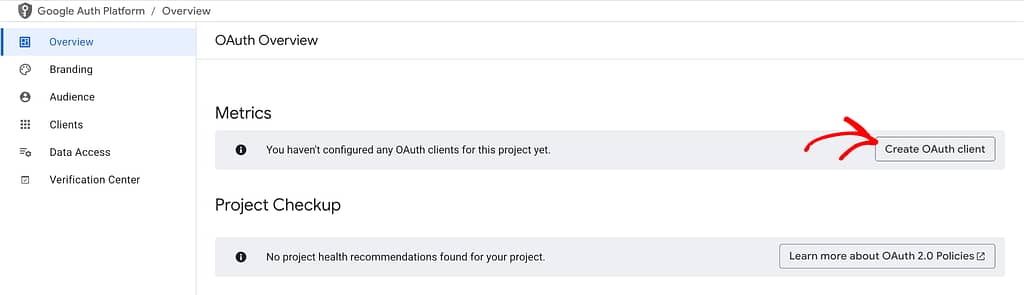
Now that you have configured the OAuth Consent screen, the next step is to generate the OAuth Credentials.
Generating the OAuth Credentials
When you configure the OAuth consent screen, you’ll be taken to the OAuth Overview page where you see an option to create an OAuth client. To do so, click the Create OAuth Client button.
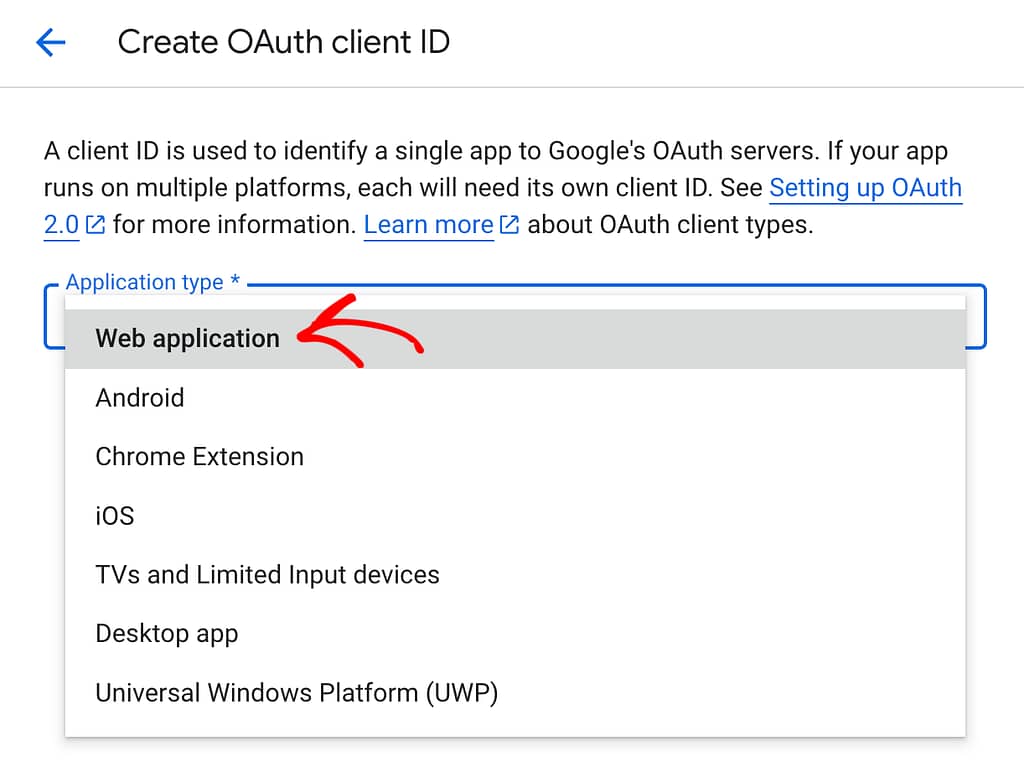
Clicking the button will take you to a page to create the OAuth Client ID. Here, begin by entering the Application type. To set an application type, select Web application in the dropdown field.
After selecting the application type, you can change the default name used for this client ID.
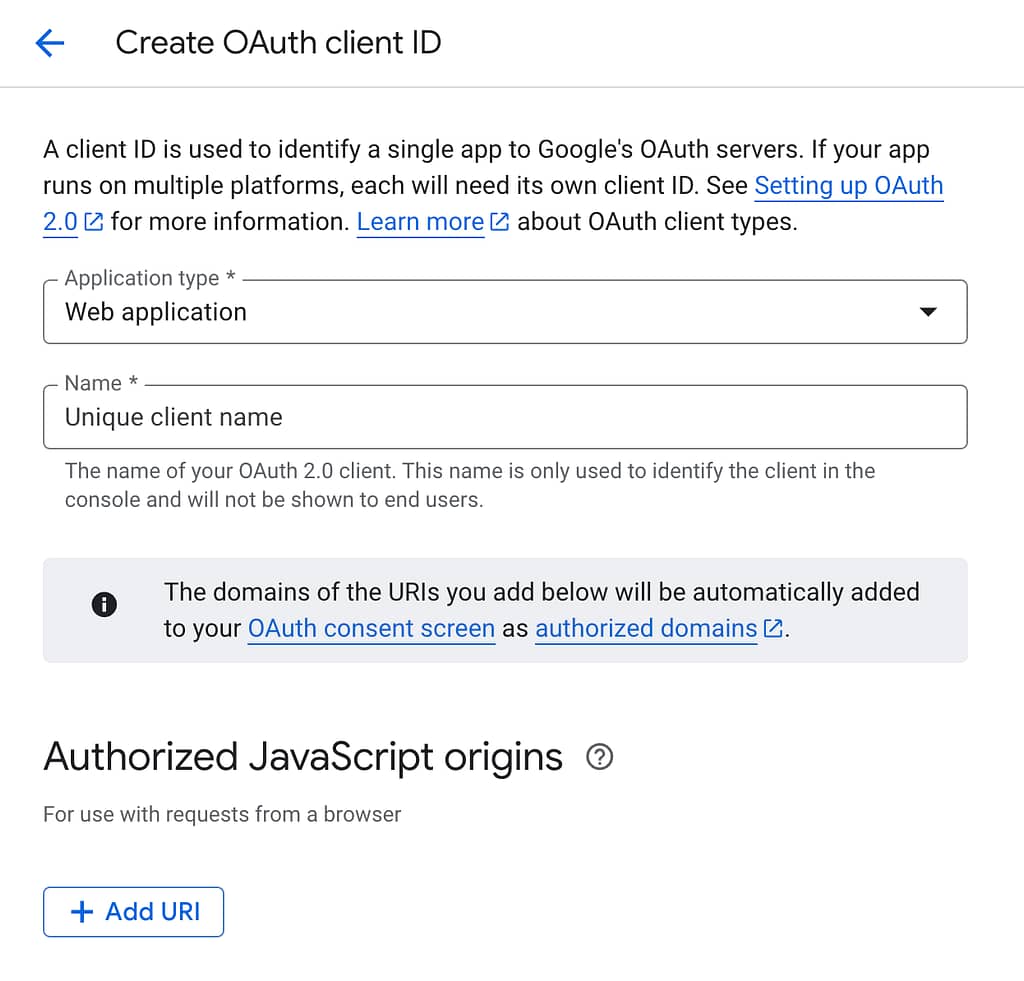
Once you are done with these basic settings, what’s important is to set the redirect URLs.
To set the redirect URLs for this application scroll down to the Authorized Redirect URL section and click the + Add URL button.
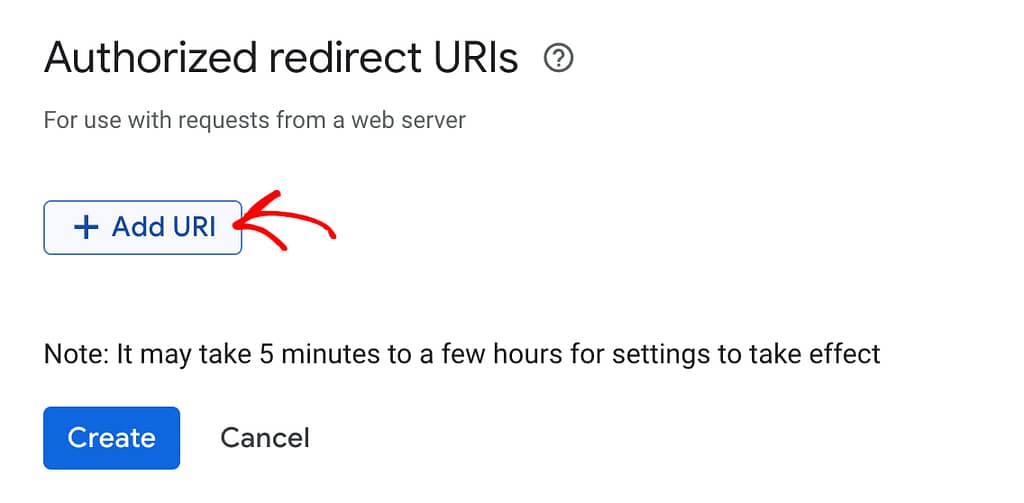
When you click the Add URL button, you’ll see an input field to enter the URL.
In this field enter the following URL by replacing “YOUR-SITE” with your domain name, and click Create.
https://[YOUR-SITE]/wp-admin/admin.php?page=tve_dash_api_connect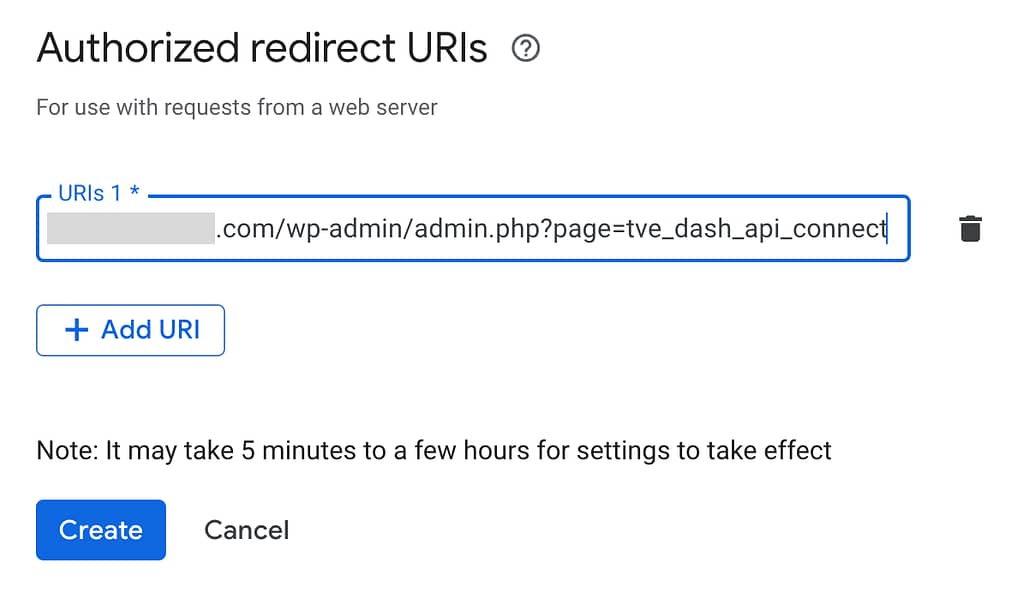
Clicking create will create the OAuth client and display the Client ID and Secret Key in a popup.
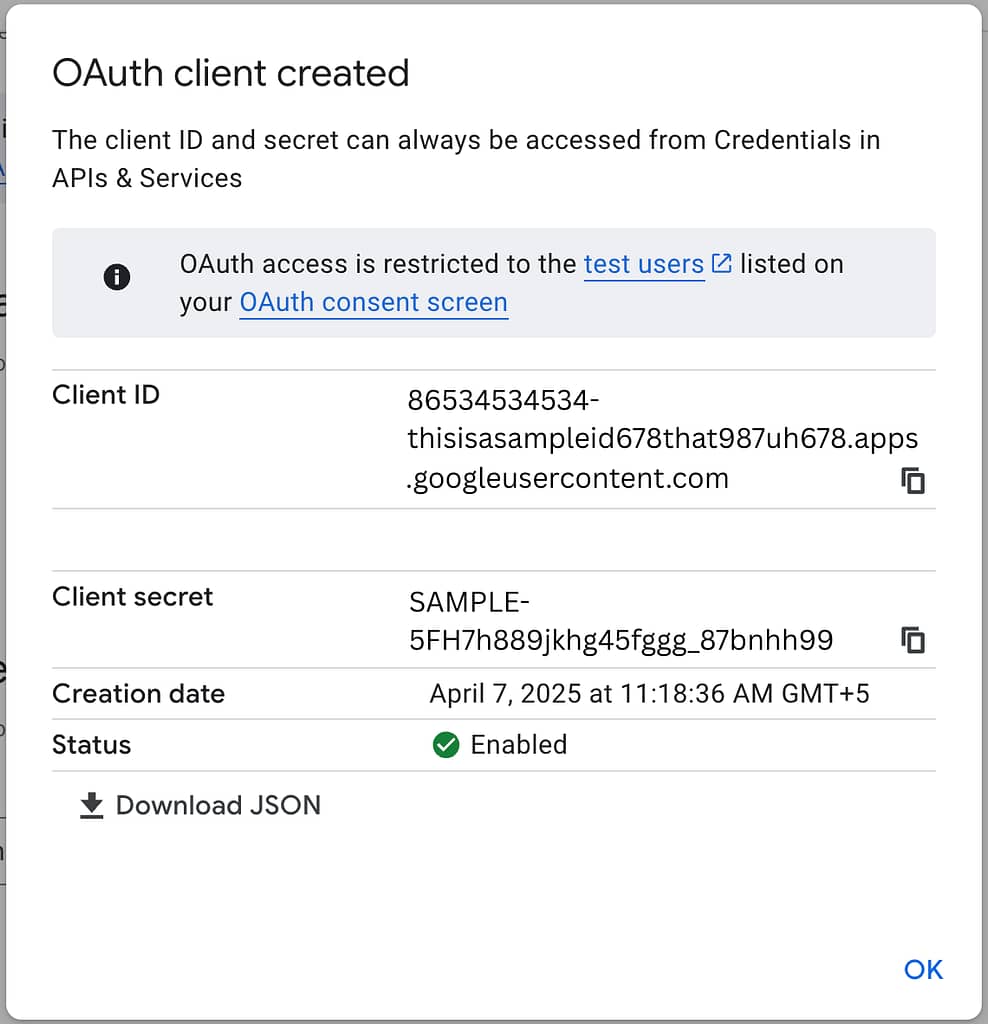
The Client ID and the Secret Key that you get here will be needed when you are connecting your Thrive Dashboard to Google Drive. Therefore, copy and save this for further use.
Building an API Connection Between Thrive Dashboard and Google Drive
After you’ve configured the OAuth Client and Credentials in Google API and services, you can move forward to integrate your Thrive Dashboard with Google.
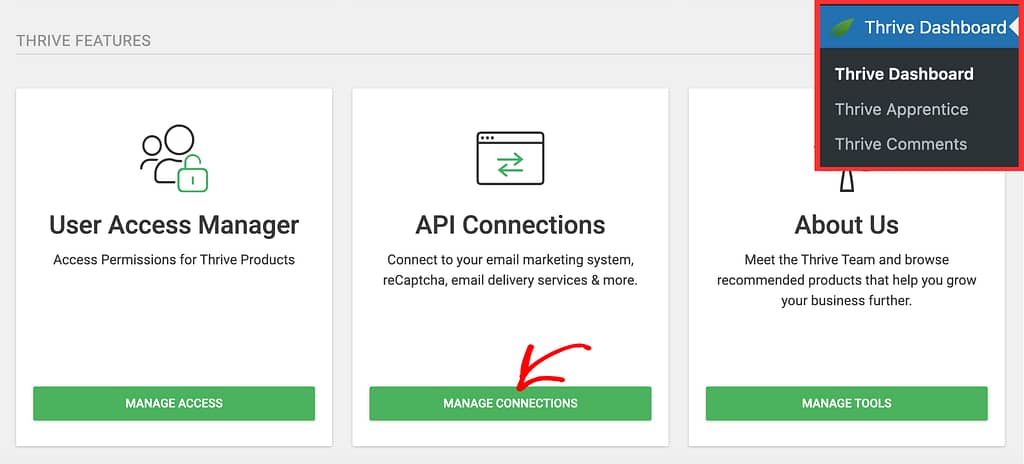
To begin, open your WordPress admin area, navigate to Thrive Dashboard >> Thrive Dashboard, scroll down to API Connections and click the Manage Connections button.
On the API Connections page, click Add Connection.
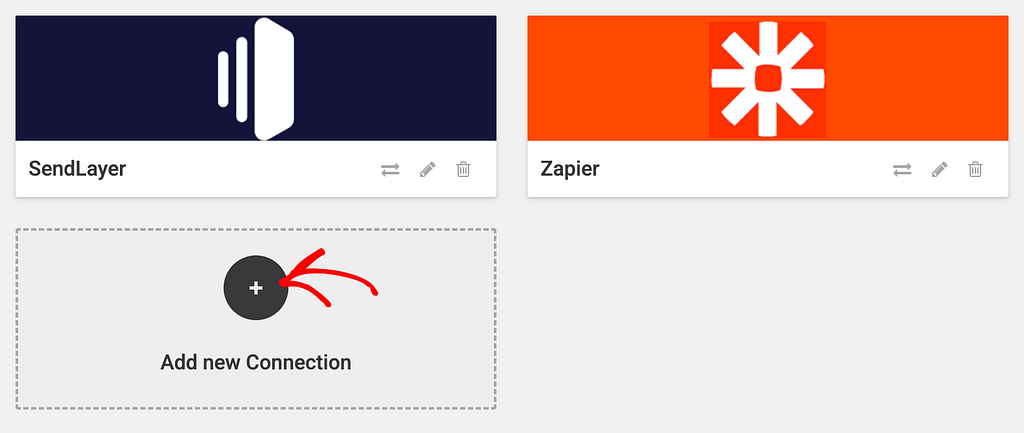
When it asks you to select the application you want to connect, select Google Drive in the dropdown.

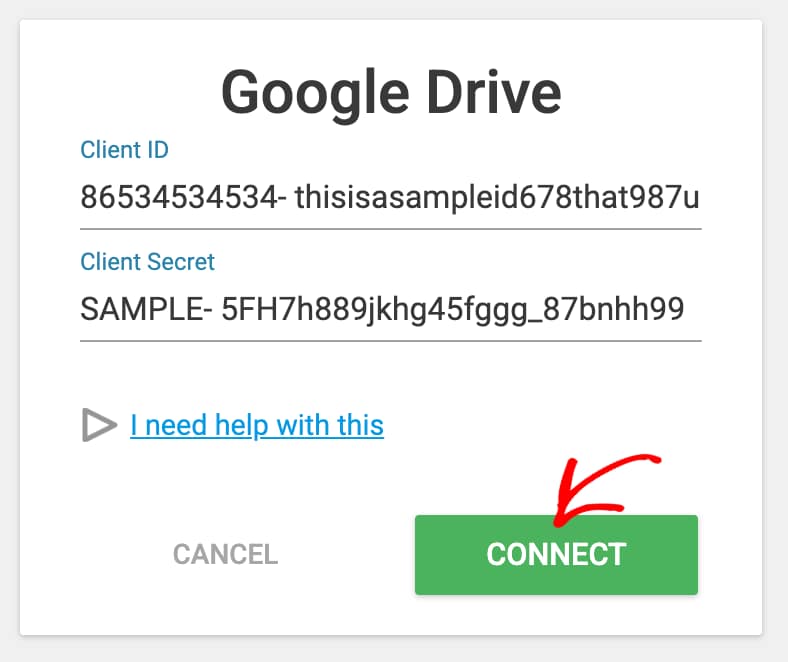
When you select Google Drive, enter the Client ID and Secret Key in the respective fields and click Connect.
To finalize the connection, you’ll need some permissions from the selected Google account. This will take you to a page where you need to select the Google account you want to use.
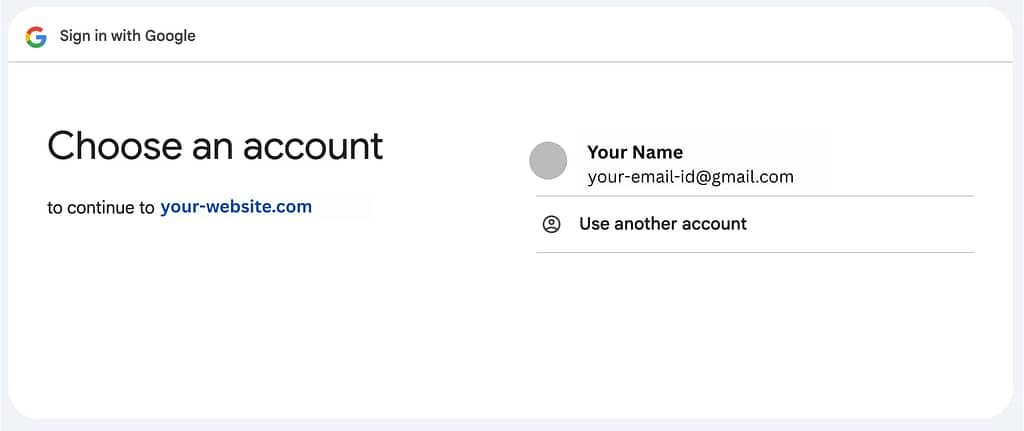
When you select your Google account to be used, you’ll see another popup asking you to grant some permissions. On this popup click Allow.

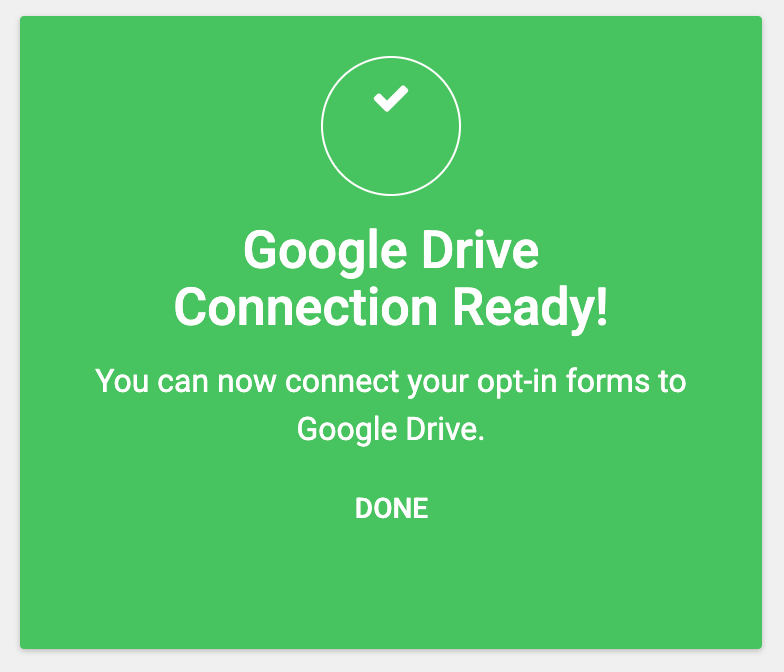
Once you click Allow, you’ll be taken back to the API connections in Thrive Dashboard with a success message saying the integration with Google drive is established.
Connecting a Lead Generation Element with Google Drive
Once you’ve connected your Thrive Dashboard with the Google Drive, you can now use it in a lead generation element on your website.
To be able to follow the steps below, please ensure you’ve added and set up a lead generation element on a Thrive Architect page. You can read more on using and setting up a Lead Generation element in our document here.
- Setting Up a File Upload Field
- Setting Up Allowed File Types
- Setting Up the Maximum Number and Size of Files
Setting Up a File Upload Field
To let users upload files through a Lead Generation element, please ensure you’ve added the File Upload field to the Lead Generation form.
To set things up, first open the page in the Thrive Architect editor.
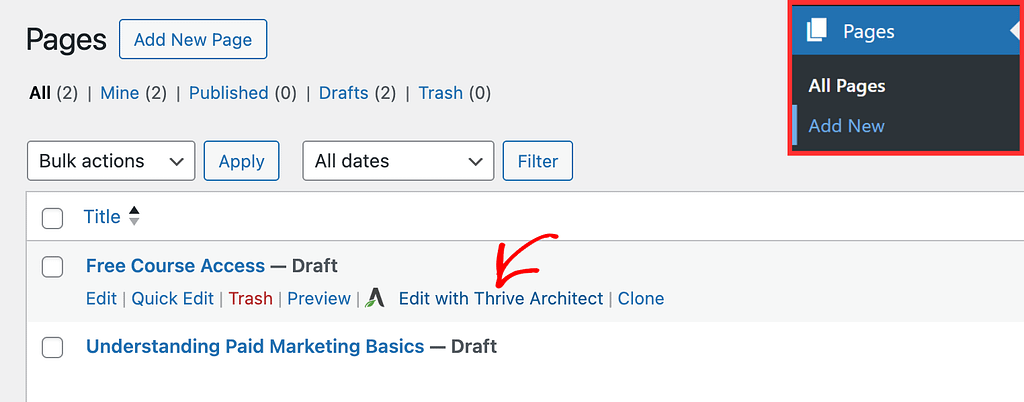
When the page is opened in the Thrive Architect editor, click on the Lead Generation element added to the page. This will open the Form options in the left panel.
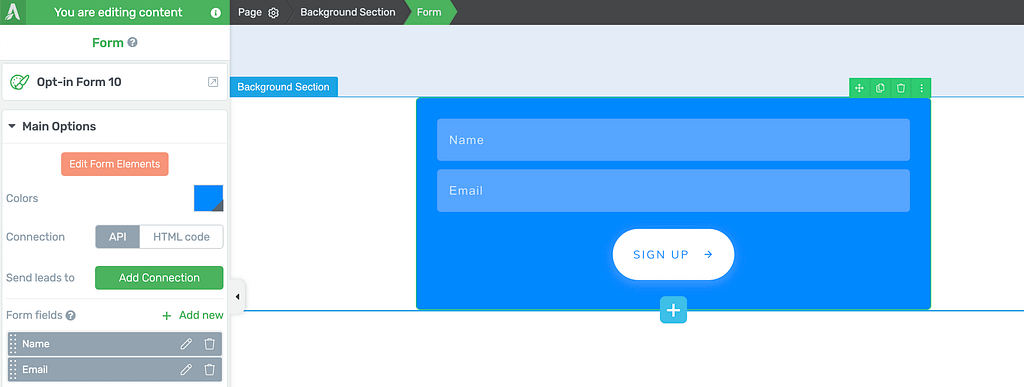
In the left panel, under Form Fields, click + Add New.

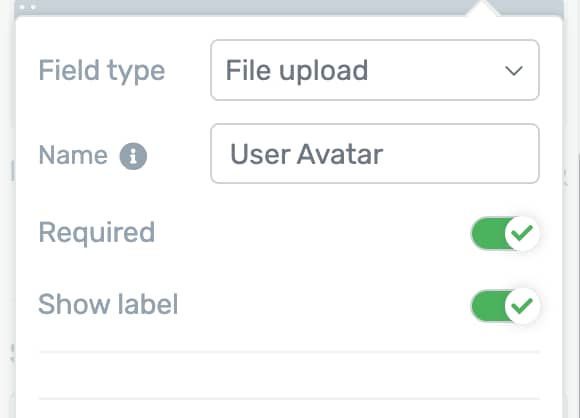
After clicking Add New:
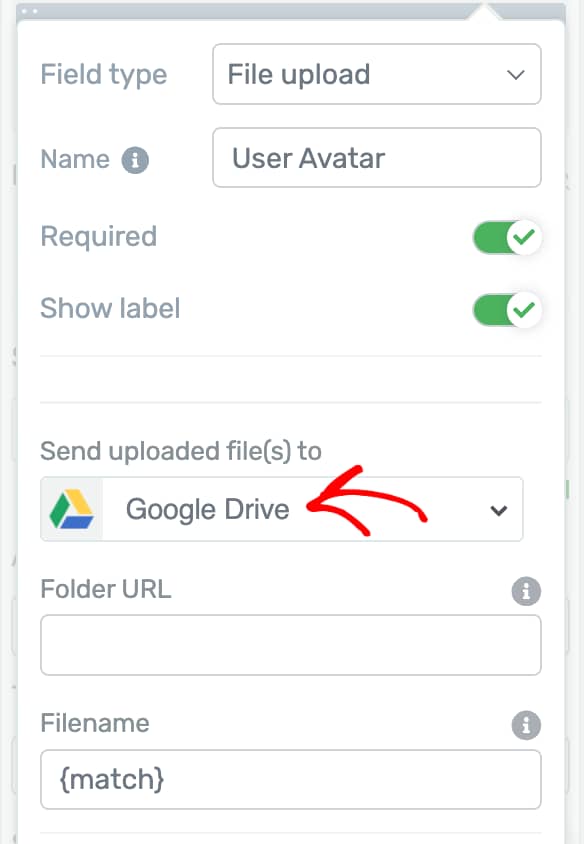
- Select the Field type as File Upload
- Enter the name of the field (optional)
- Select whether you want to make this field mandatory. This means enable the Required option if you want the users to upload a file for successful form submission.
- Decide whether you want to display a label with this field.
Once you fill in these details, the next field lets you select where you want to send the uploaded files to. This is where you select Google Drive in the dropdown.
When you select Google Drive as the destination to send uploaded files, enter the folder URL in the next field. You can refer to our document here that’ll help you find the Google Drive Folder URL you want the files to be uploaded to.
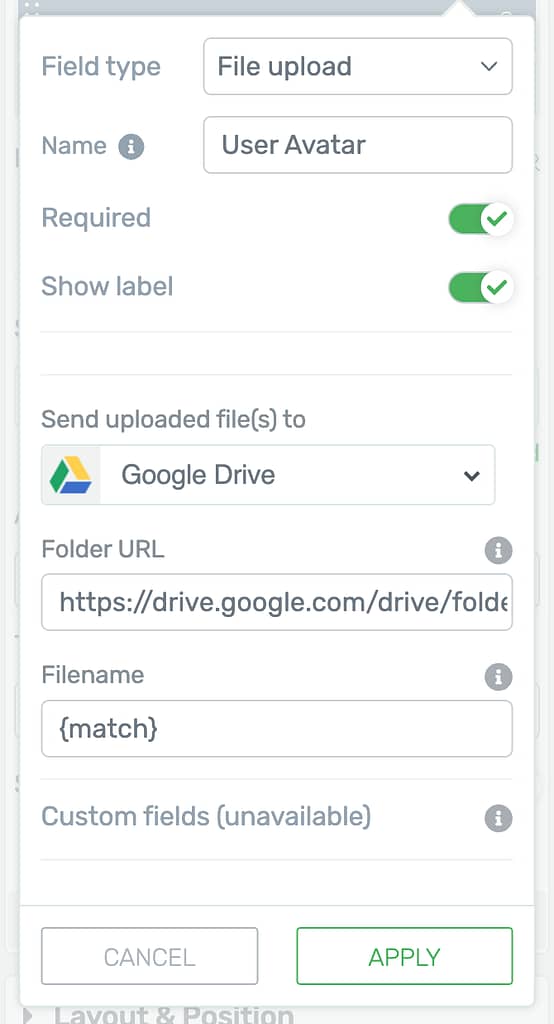
After you enter the Google Folder URL, the next field allows you to set what the filename should be. This field will determine the filenames of those that users upload using this field.
In the Filename field you can use static text or use any one or a combination of the following shortcodes.
- {email} – The filename will be the email address of the user who uploaded the file.
- {date} – The filename will be the date on which the file was uploaded.
- {time} – The filename will be the time when the file was uploaded.
- {match} – The filename will be the same as the file that was uploaded.
For example, if you enter the following in the field “Image_{email}_{date}” the filename of the one a user uploads will be something like this: “[email protected]_dateOfUpload”.
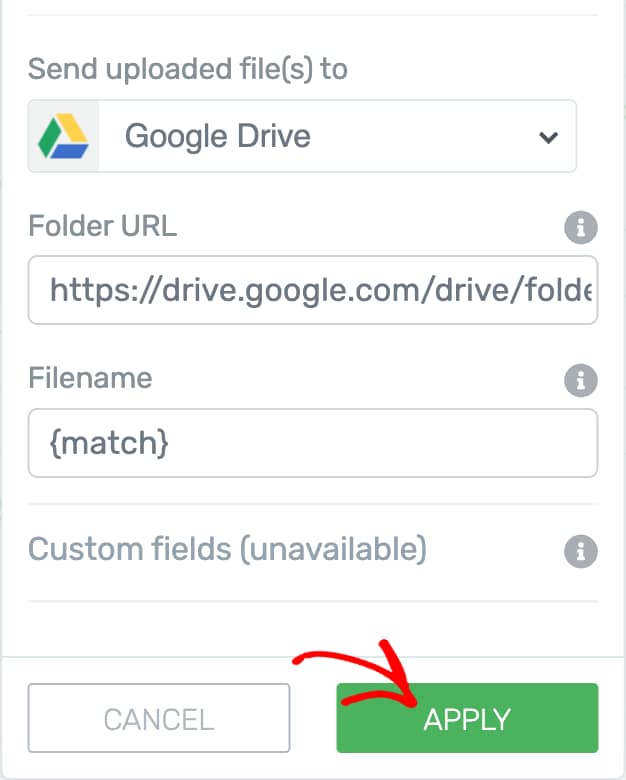
When you finish setting up the field, click Apply.
Setting Up Allowed File Types
After you’ve added the File Upload field in the Lead Generation element, it’s time you select the file type you want to allow here.
To fix the file types you want to allow through the File Upload field, click the form on the page, in the left panel click, under Main Options, click the Edit Form Elements button.
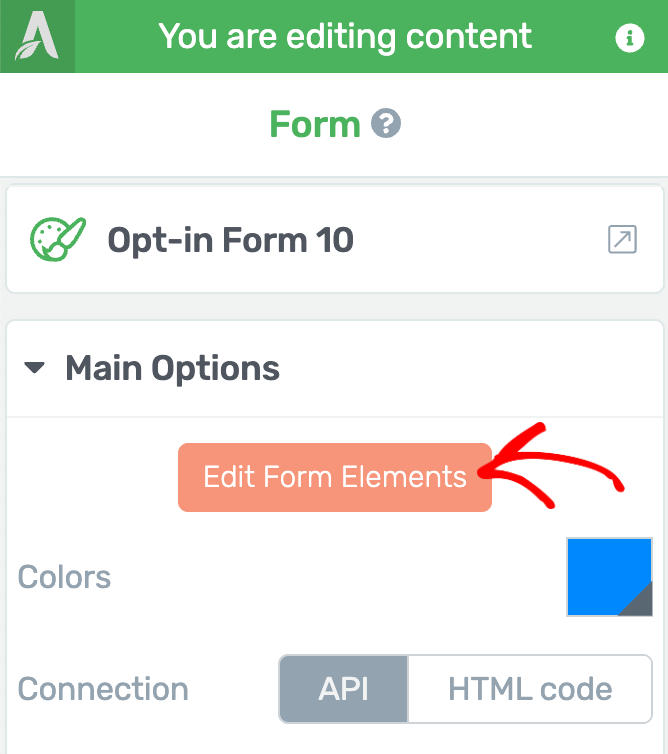
Clicking the Edit Form Elements button will open the form in an editor allowing you to edit the elements you see in there.
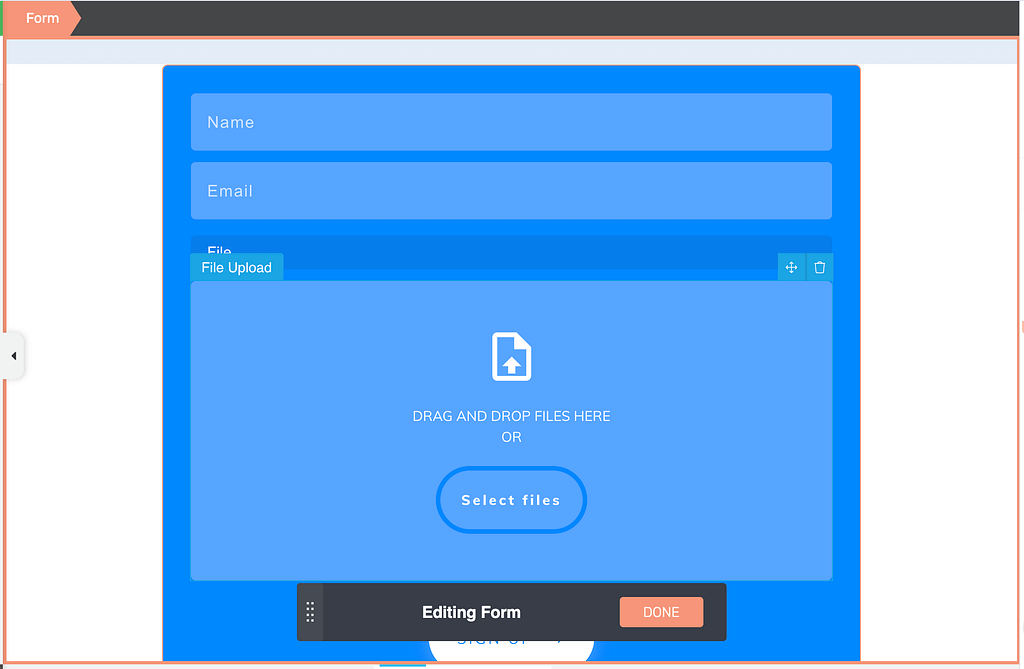
While in the Form Elements editor, click the File Upload element and see the options open in the left panel.
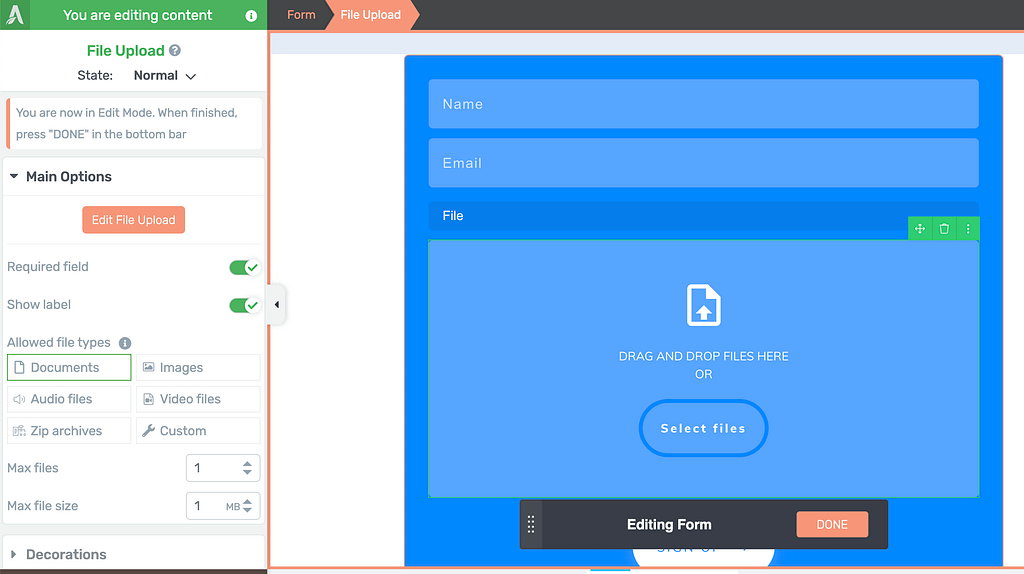
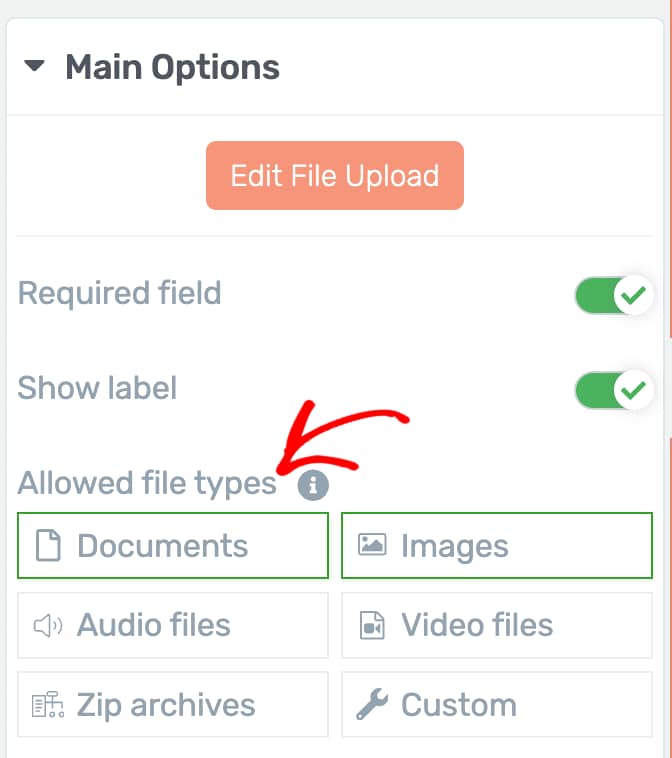
In the left panel, scroll down to the Allowed File Types option to select the file type or types you want to allow. You can select a single or multiple file types here.
Once you select the file types and finish all the other settings for the form, click Done to exit the Edit Mode.

Setting Up the Maximum Number and Size of Files
Now that you have the File Upload field set with the allowed file types, you can also set the maximum number of files a user uploads and the maximum file size you want to allow.
To do so, click the form on the page, in the left panel click, under Main Options, click the Edit Form Elements button.
Clicking the Edit Form Elements button will open the form in an editor allowing you to edit the elements you see in there.
While in the Form Elements editor, click the File Upload element and see the options open in the left panel.
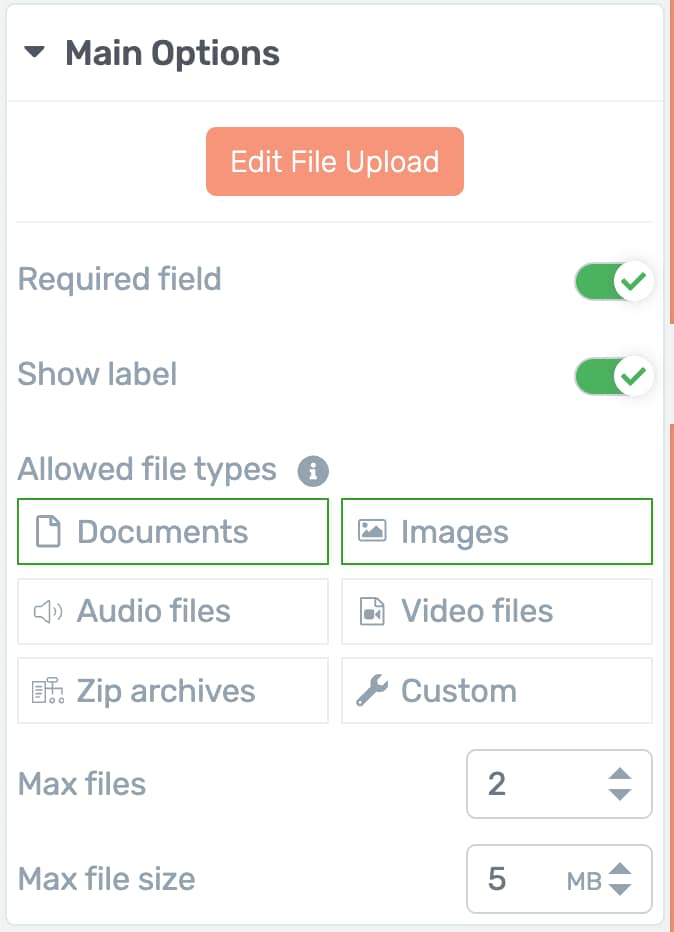
In the left panel, scroll down to the options that say Max Files and Max File Size. This is where you can enter the maximum value you want to set for each of them.
Once you select the maximum number of files and the maximum file size allowed and finish all the other settings for the form, click Done to exit the Edit Mode.
After all of this please ensure you click the Save Work button while the page is open in the Thrive Architect editor. This will save all the changes you’ve made to the page, the Lead Generation element, the form and the File Upload field you just added.
We’ve just seen how you can connect your Thrive Dashboard to Google Drive and use it with a Lead Generation element on your website.
Next, do you want to add an email connection to your Lead Generation element? You can refer to our document here for step by step instructions on how to do it.