This article will show you how to achieve the following use case:
Someone fills in a form from your site to subscribe to your newsletter. They receive an email, where they have to click on a link (that directs them to one of your pages) to confirm their subscription. As they do that, an automation is triggered and a new user account is created for them.
To do this, I will use an autoresponder (ActiveCampaign), as well as Thrive Automator. And, of course, to build the confirmation page, I will use Thrive Architect.
In ActiveCampaign, I will create two automations:
- one that will send out an email after the form has been filled in;
- one that will start when someone clicks on the confirmation link in the email and will send the incoming data to Automator through an Incoming Webhook;
In Thrive Automator, I will create one automation:
- this will start when the user data is sent over from ActiveCampaign and will create the account;
Let’s get started!
Configure the opt-in form
We can start by configuring the opt-in form on which you want the users to fill in their information and sign up. The form can be added to any Thrive Architect page/post and it can be customized as explained in this article.
It is important to make sure we connect the form to ActiveCampaign (as shown here).

Once you’ve configured and set up the form, make sure you save the page.
Create the confirmation page
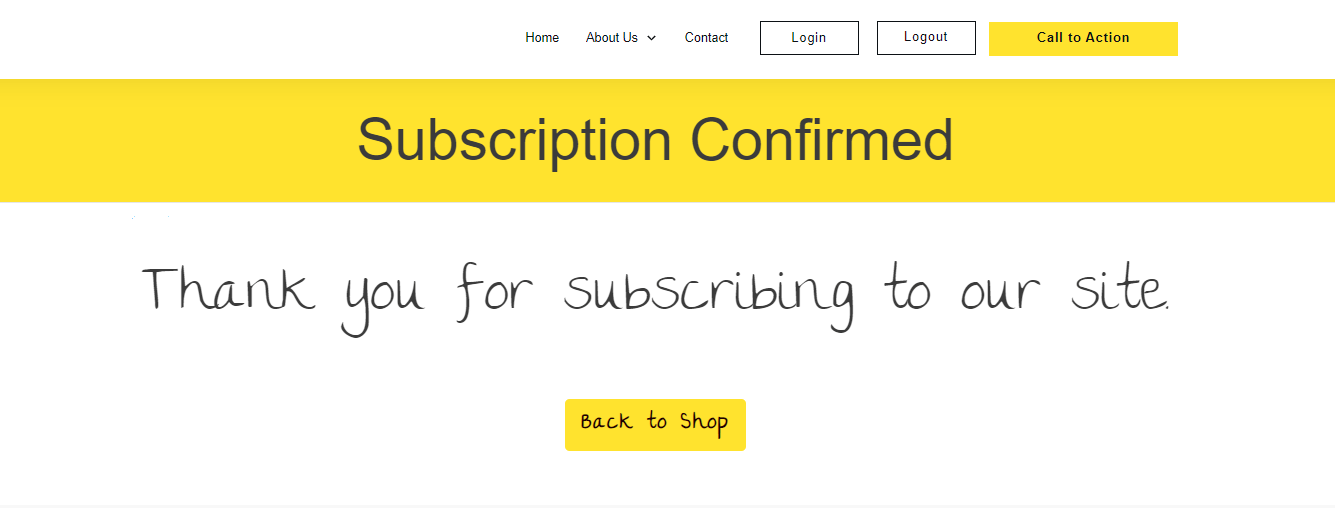
In this example, the users will have to confirm their subscription by clicking on a link they receive via email. In my case, I want this to be a confirmation page. This should be a simple page that will notify the users that the subscription has been made.
For that, I will create a new page from my WordPress admin dashboard and customize it using Thrive Architect:

Of course, this can be any page you’d like, according to the end result you’re trying to achieve.
Set up the first ActiveCampaign automation
Once you’re done with the form and the confirmation page, you can head over to the autoresponder, which, in my case, is going to be ActiveCampaign.
The first automation that I will create here is the one that will send the confirmation email once the user fills in the form from my site. Here’s what the structure of the automation will look like:
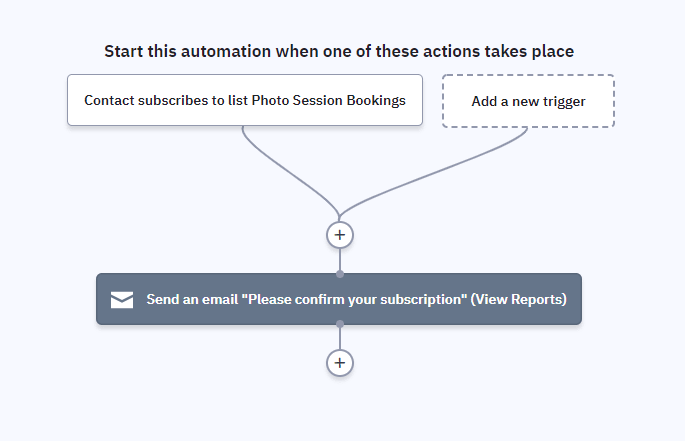
Start trigger – Contact subscribes to a list
The start trigger chosen for this automation is “Contact subscribes to a list” and, of course, the list is the same one chosen when setting up the form:
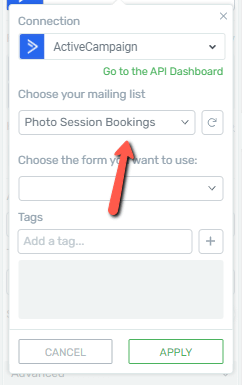
When someone fills in the form, they are added to this mailing list. For this reason, I chose this start trigger, so that the automation will start as soon as someone fills in the form, therefore is added to the mailing list.
Action – Send an email
The only action that I will choose here is the “Send an email” one. Of course, I will also set up the email to be sent once someone fills in the form.
This email will contain the link to the confirmation page I have created:

Make sure you set the automation to “Active”:

And we’re finished with this one, we can move on to the second automation.
Set up the second ActiveCampaign automation
The second automation has the purpose of signalling that the user has confirmed the subscription via email.
We can send this information to our website via a webhook. The automation in ActiveCampaign can send out the webhook, and the automation in Thrive Automator can receive it, alongside all the user information needed in order for the new account to be created.
This automation will have the following structure:
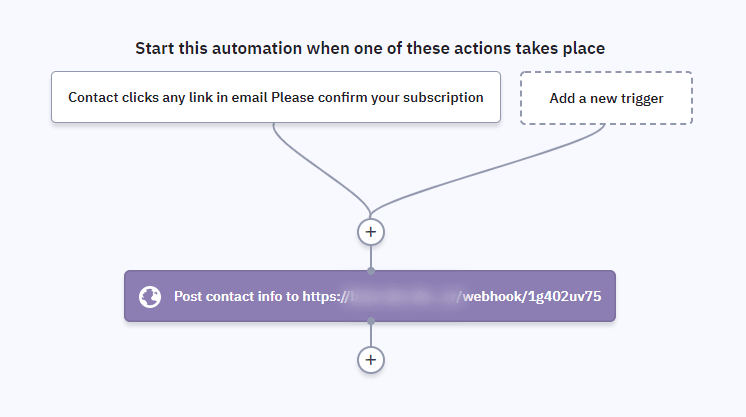
Start trigger – Contact clicks any link in email
The trigger that I want to start this automation will be the “Contact clicks any link in email” one. This way, when someone confirms the subscription using the link in the email.
Action – Webhook
For this automation, the action is going to be the “Webhook” one. The webhook URL is going to be generated by Thrive Automator, so you can go ahead and access the plugin from your Thrive Dashboard:
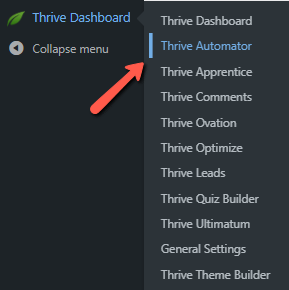
Set up the Thrive Automator automation
Start trigger – Incoming Webhook
The automation from Thrive Automator should start with the Incoming Webhook trigger:
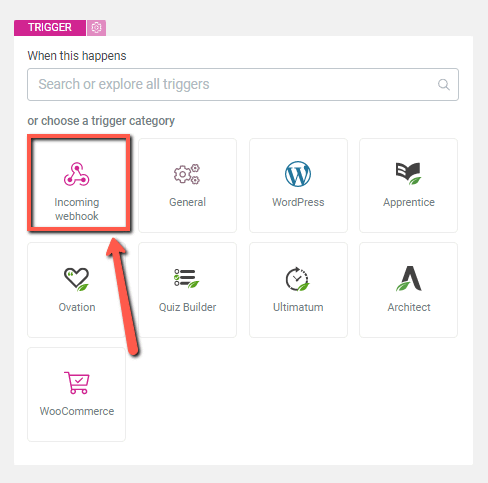
You can create a test/simulate a form submit in order to use the “Listen” mode and populate the incoming data fields with the information you want to be parsed through the automations:
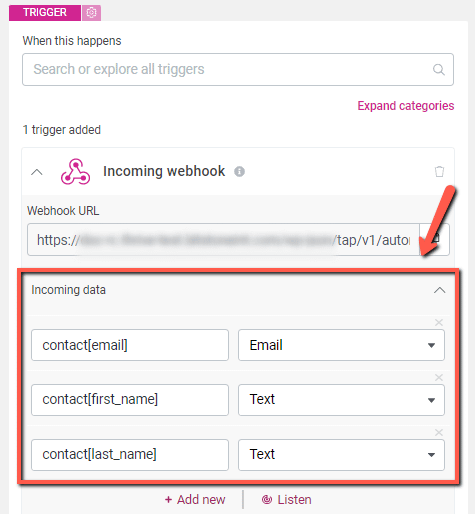
And make sure you correctly map out each field so that the information will be correctly sent and the account can be successfully created.
You can go back to ActiveCampaign to add the webhook URL from Thrive Automator there and activate the automation:

You’re all set with ActiveCampaign, you can head back over to Thrive Automator and finish the third automation by adding the next action:
Action – Find or create user
Click on the plus sign to add a new action and choose the “Find or create user” one:
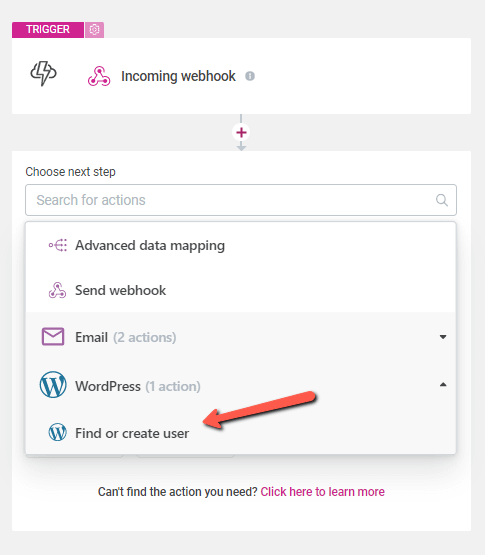
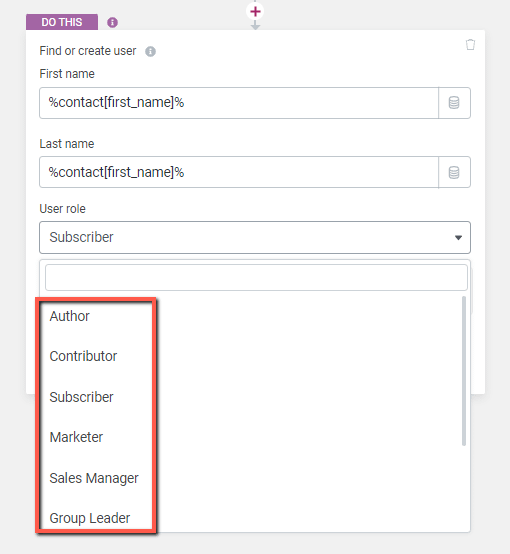
Using the webhook data, you can map out the first and last name of the user and choose which WordPress role should be granted to them when the account is created:
The automation is ready, make sure you save it and activate it.
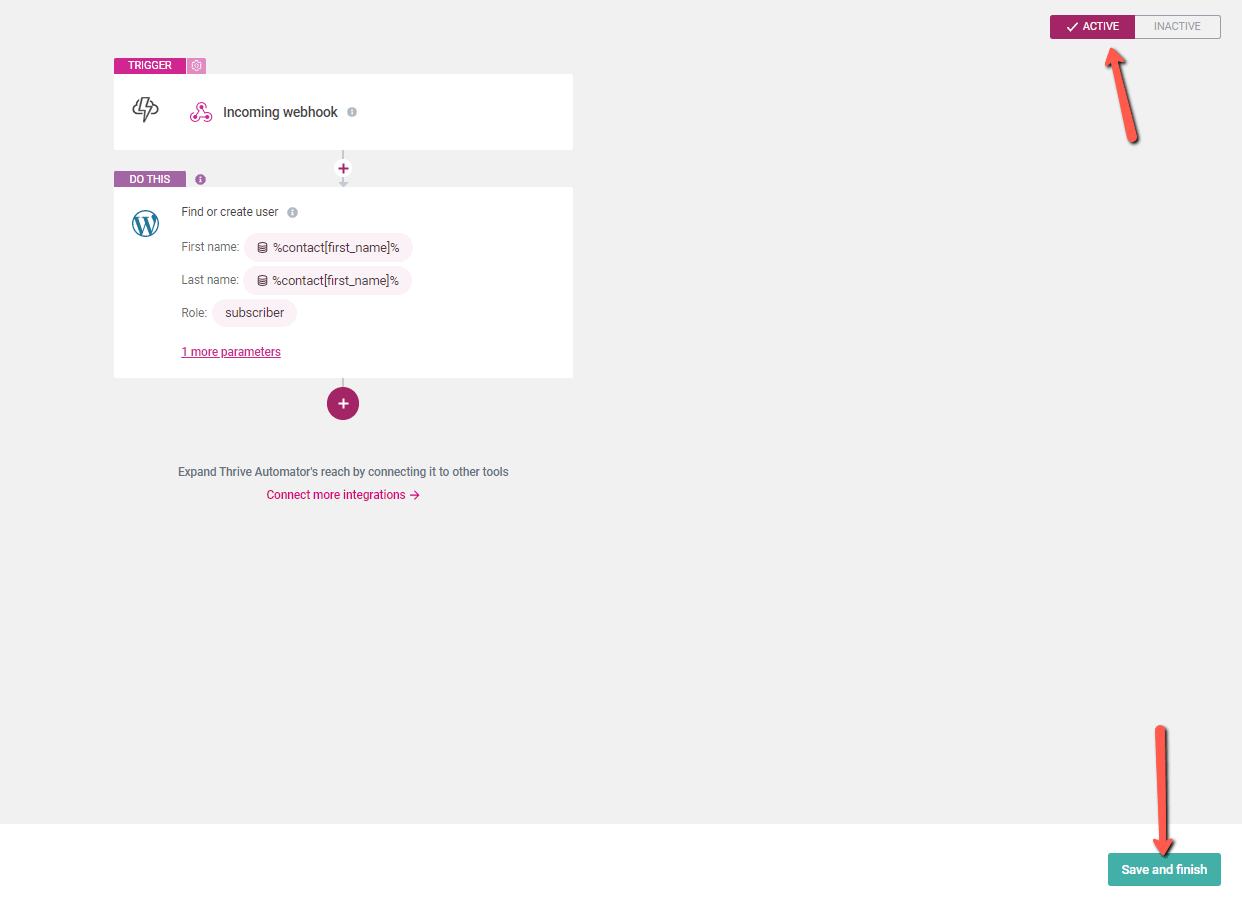
As an end result, if someone fills in your form and confirms the subscription via email, an account will be created for them.