This article will guide you through the steps of creating your very first automation in Thrive Automator.
An automation is a workflow with the help of which you will be able to connect Thrive Products and create different actions in between them. You can read more about automations and what they are in this article.
Each automation consists of a start trigger and one or more actions to follow. In between the actions, you can place various filters and/or delays.
After creating the workflow, you will be able to publish the automation and it will run the action/s that you have set up every time the trigger event occurs.
As an example, I will create an automation that starts each time a visitor of my site completes a quiz. Two hours after they fill in the quiz, I will add them to my autoresponder, and as a result, they will be sent an email to invite them to take the next quiz.
Here is how to create such an automation:
1. Access Thrive Automator and add a new automation
From your Thrive Dashboard, access Thrive Automator. Once it launches, go to the right side of the Thrive Automator dashboard and click on “+Add new”:

This will open the new automation canvas, and you can start setting up the workflow.
2. Name your automation
This step is not mandatory, but it will come in very handy once you create multiple automations. You can name each one so that it will be easier for you to manage them later on.
In order to rename the automation, which will have the default “New Automation” name, all you have to do is go to the top left side of the canvas and click on the pencil icon next to the default name:
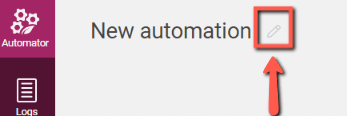
Rename the automation by entering the desired name in the field, and then you can click anywhere outside the field to save the new name:

3. Set the start trigger
The start trigger is the specific event that will start the entire automation. This is the very first step, where you get to decide when the workflow should begin.
You will see the trigger box on the automation canvas:
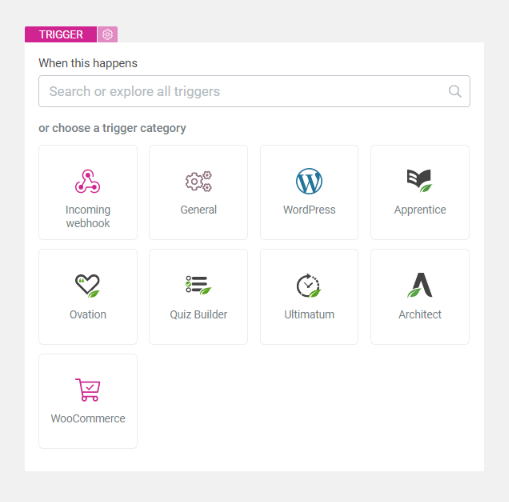
Click on the “Search for a trigger” field, to open a list of available triggers (or choose a trigger category from the section below the search box):
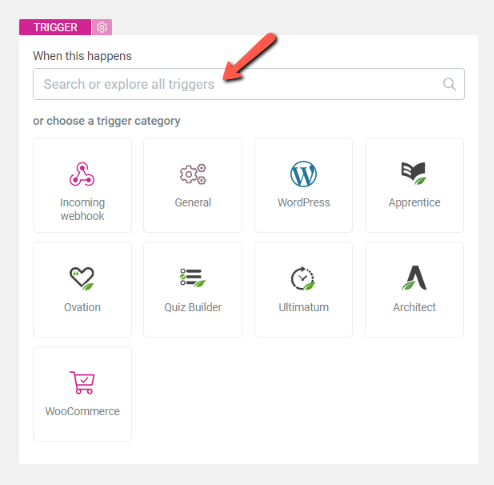
Choose the one that is relevant to the automation you are trying to achieve:

In order to achieve the above-stated example, I have chosen “User completes quiz” as my start trigger.
|
Important! You can add more than one start trigger, and they will function on an “OR” basis, meaning that at least one of the events has to occur in order for the automation to start:  |
Next, go ahead and select which conditions need to be met in order to set off the trigger:
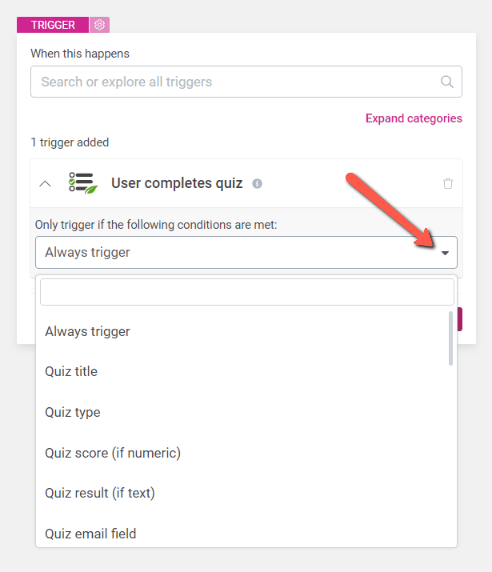
For this example, I’ll select the “Quiz title”, since I only want to run the automation only for a particular quiz from my site.
Naturally, you’ll next have to also look up the name of the quiz in the following field:
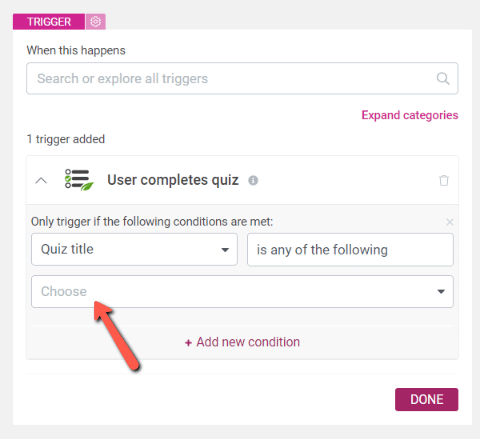
Once everything is ready, click on “Done” and then move on to setting up the first action. The plus sign will link the actions in between each other, so each time you want to add a new action, click on it:
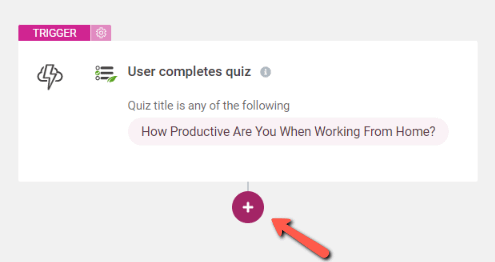
4. Set up the action
- Action #1
Clicking on the plus sign will add a new section to the automation, from where you can start setting up what happens next:
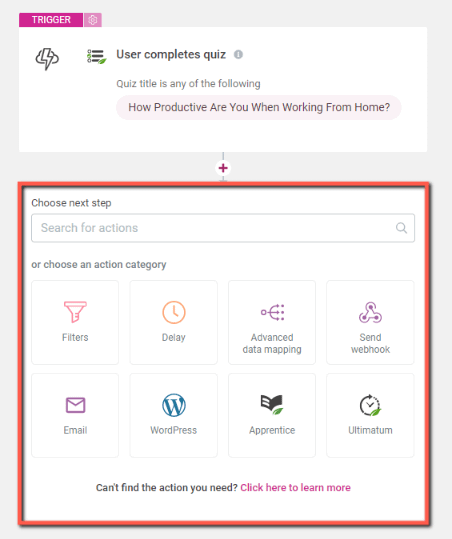
You can choose one of the quick actions, or click on the “Search for actions” or “View all” sections, both of which will open the list with available actions that you can choose from.
To continue with the given example, I will choose the “Delay” action, as I said that I want the email to be sent to the users two hours after they complete the quiz:
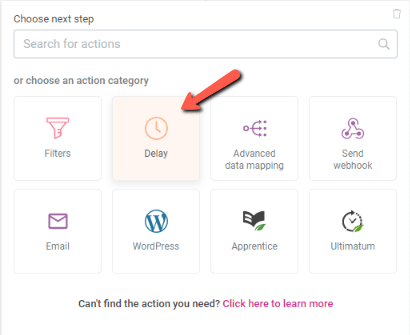
When setting up a delay, you will have to insert a numerical value in the first field, and choose the unit of measurement in the second one:
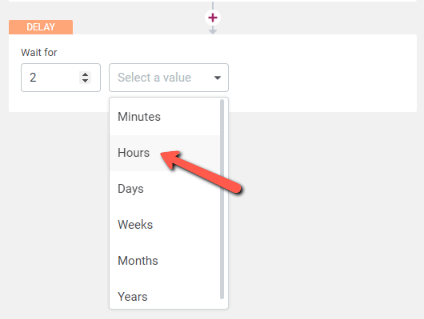
Click on “Done” to save the delay.
And we can move on to setting up the next action, and you will have to click on the plus sign below the delay to add a new action:
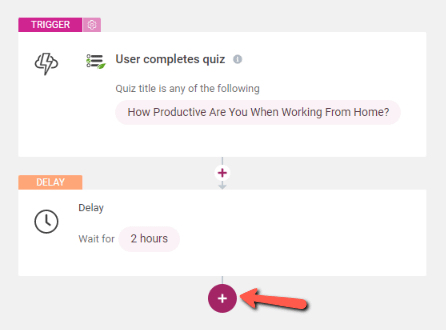
- Action #2
Again, you can set up the action as you wish, and add as many as you want. The new actions can be set in the same way as the first one:
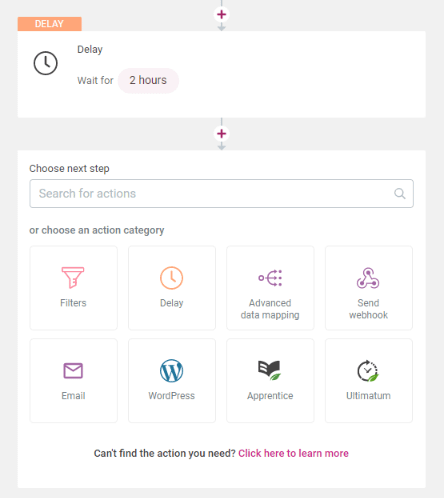
To continue with our example, I will choose the “Add user in autoresponder” option next, by opening the full list of actions:
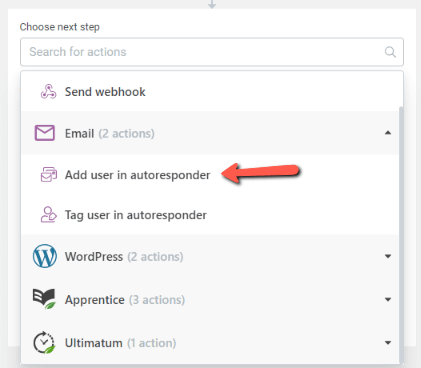
You will be able to set it up, and the first thing you should choose here is the autoresponder service of choice. To do that, click on the “Choose service from your list of registered APIs to use” field:
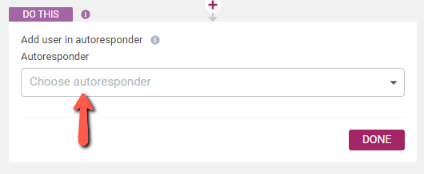
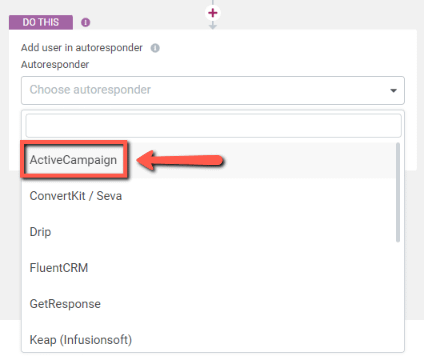
A list will open, with all of the available options. Click on the autoresponder you want to add the users to. In our case, we’re going to send the users to ActiveCampaign:
|
Note: The list will only be populated with the autoresponders that you have previously set up in your Thrive Dashboard. You can find the list of all of the available integrations here, alongside the tutorials on how to set them up. In my case, I only have four available options because, besides the email one (which is available by default), these are the only active connections from my Thrive Dashboard:  |
Depending on the autoresponder that you choose, you might have to choose the tag to be added, the list in which the users should be included, and so on. Click on “Done” when finished.
|
Note: When you add the tags, make sure you hit “Enter” on your keyboard after each one, so that it will be added. |
At the moment, the automation looks like this:
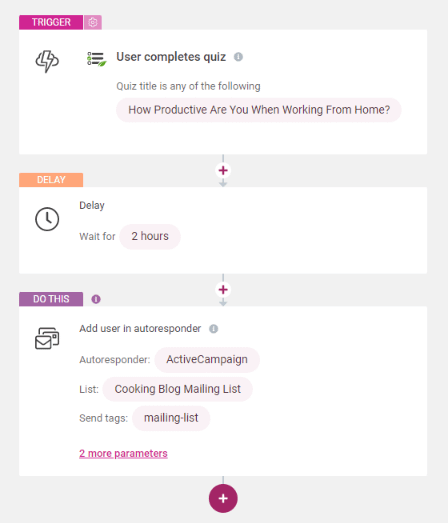
You can, of course, continue with adding more actions or filters, or you can stop here and save & publish the automation.
5. Switch automation to “Active”
To save all the modifications, click on “Save and finish” from the bottom right side of the workflow canvas:

This will take you to the page that lists all of your automations. However, the one that you have just saved will be disabled/inactive:

In order for the automation flow to start and be available, you will have to make it active. You can do so by simply clicking on this button:

You can also publish the automation from the top right corner of the page in which you’re creating it:
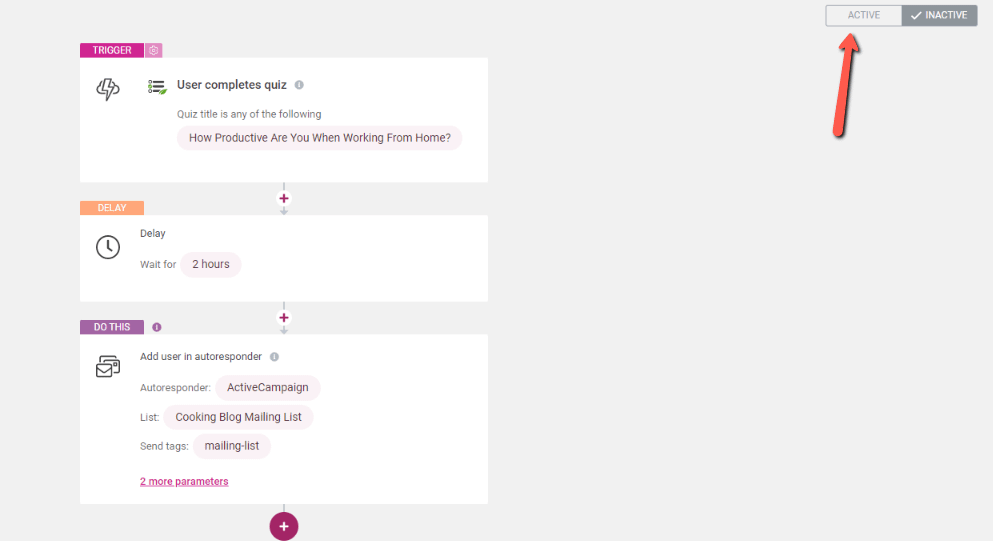
The automation is now up and running, and once the start trigger event occurs, the flow will start.
This is how you can create and publish an automation using Thrive Automator. Hopefully, this article was useful to you. For more information about Thrive Automator, be sure to check out these resources: