After you have connected Slack through your API dashboard, you can start using a few specific actions in Thrive Automator, that will allow you to create automations for Slack.
An example of such an automation is one that sends a slack notification each time someone enrols into a course, for example.
Here’s how to do that:
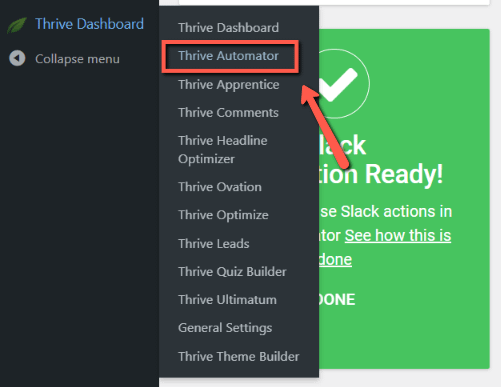
Once you’ve created the integration with Slack, you can access your Thrive Automator dashboard:
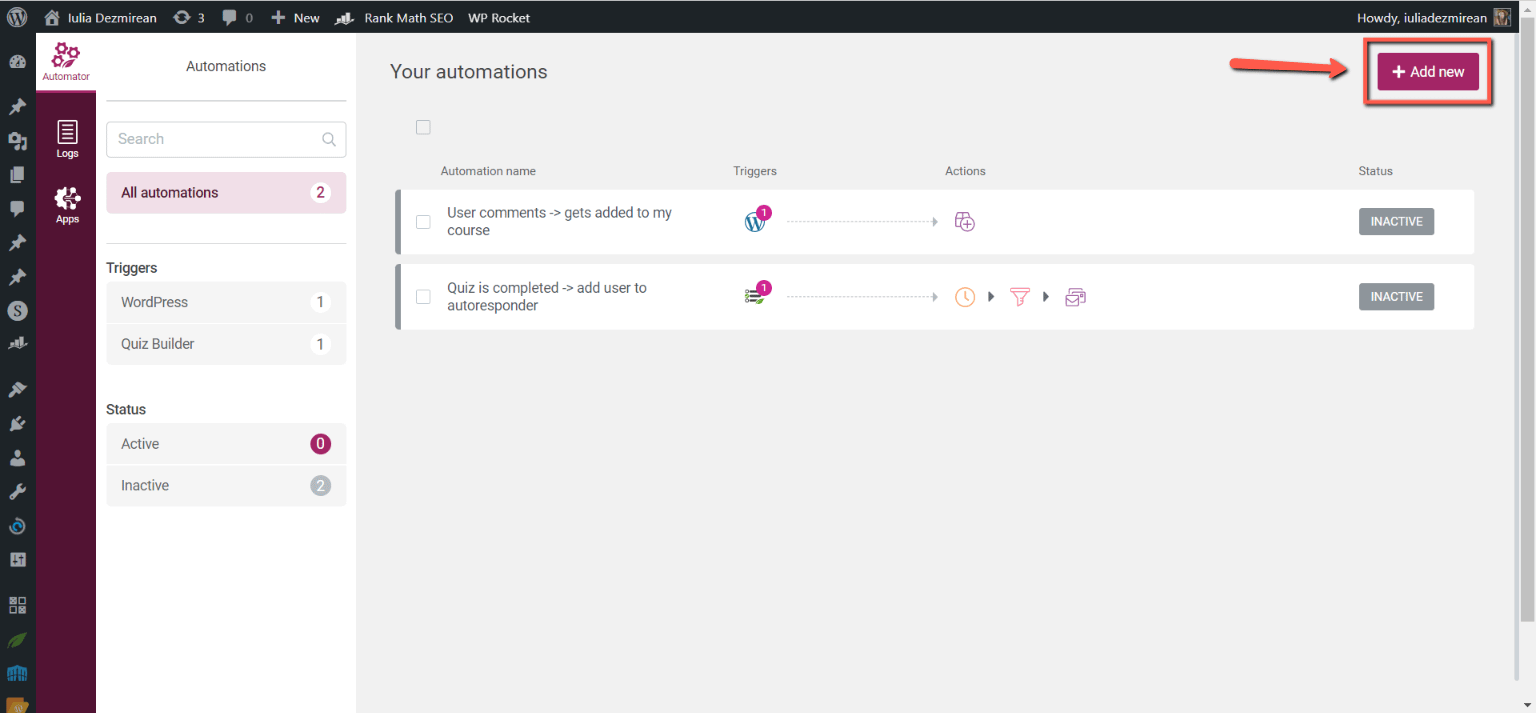
In the dashboard, click on the “Add new” button from the top right corner:
Choose a start trigger
In the automation canvas, you can start by naming your automation, and then move on to choosing a start trigger:
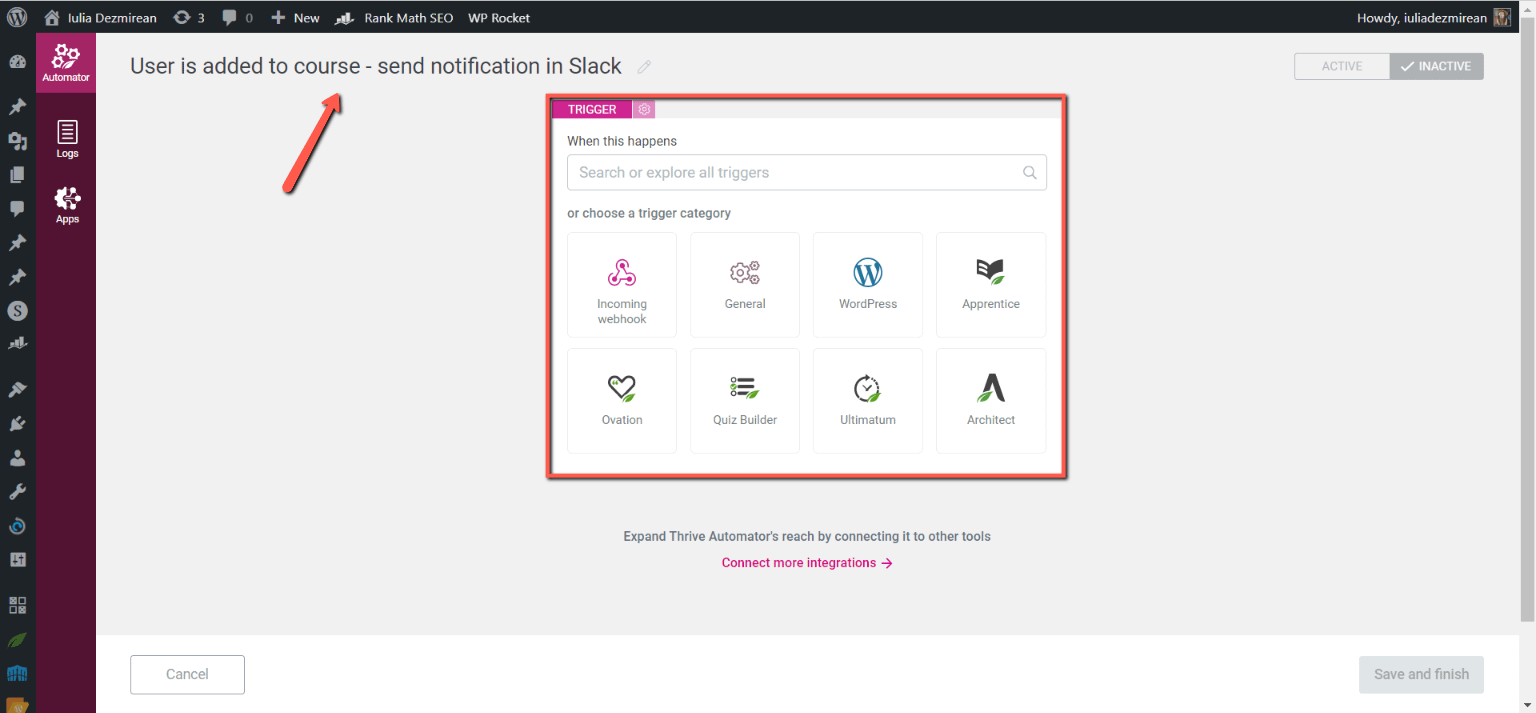
In this case, I’ve chosen to start the automation when someone starts a specific course. Then, it’s time to choose the action:
Choose the “Send a notification” Slack action
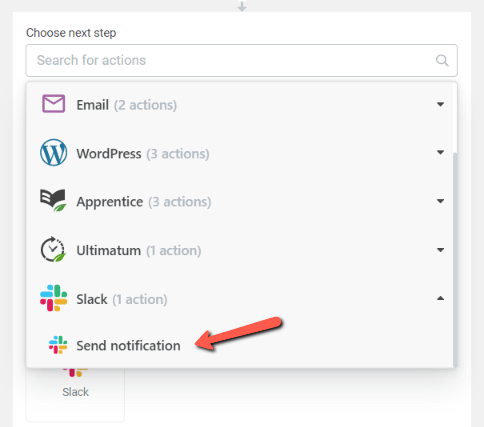
Since you’ve connected Slack through API, you will have the “Slack” action category available here:
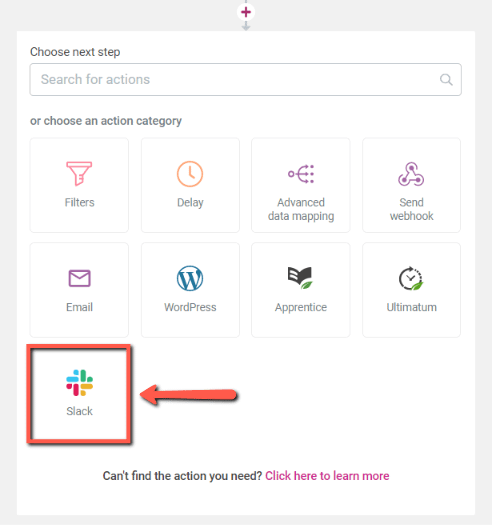
If you click on it, the available Slack actions will be listed. Click on “Send notification”:
As you do that, you will be able to set up the notification:
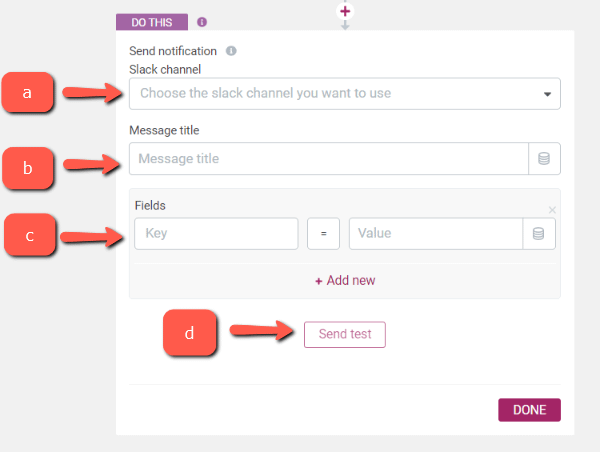
a – Slack channel: Choose the channel in which you want to post the notification,
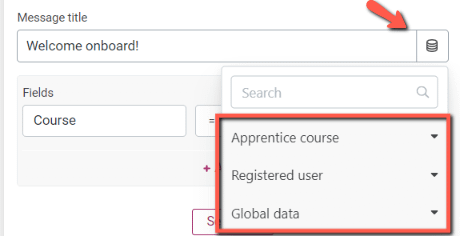
b – Message title: Here you can write the message title for the notification.The title can be either static or dynamic. Clicking on the button next to the field will allow you to insert dynamic information:
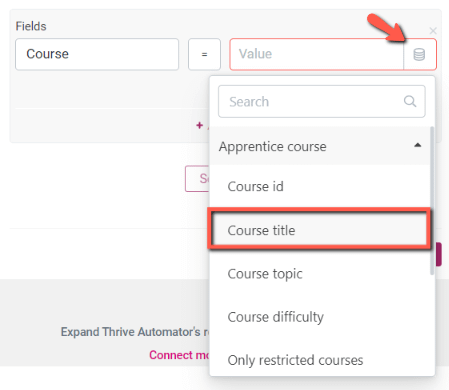
c – Fields: In case you want to also send some field data through this notification, you can enter text in the “Key” field and choose a value for the field using the “Dynamic” option:
d – Send Test: You can use the “Send test” button to send test data to Slack to see if your connection is working. This will send a test notification:

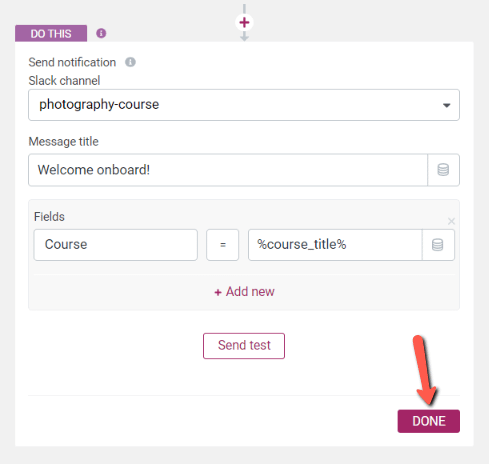
When you’re finished setting up the notification, click on “Done”:
You can either stop here with the automation, or keep going, this is up to you and the result you’re trying to achieve.
When you’re done, don’t forget to activate the automation and save it:
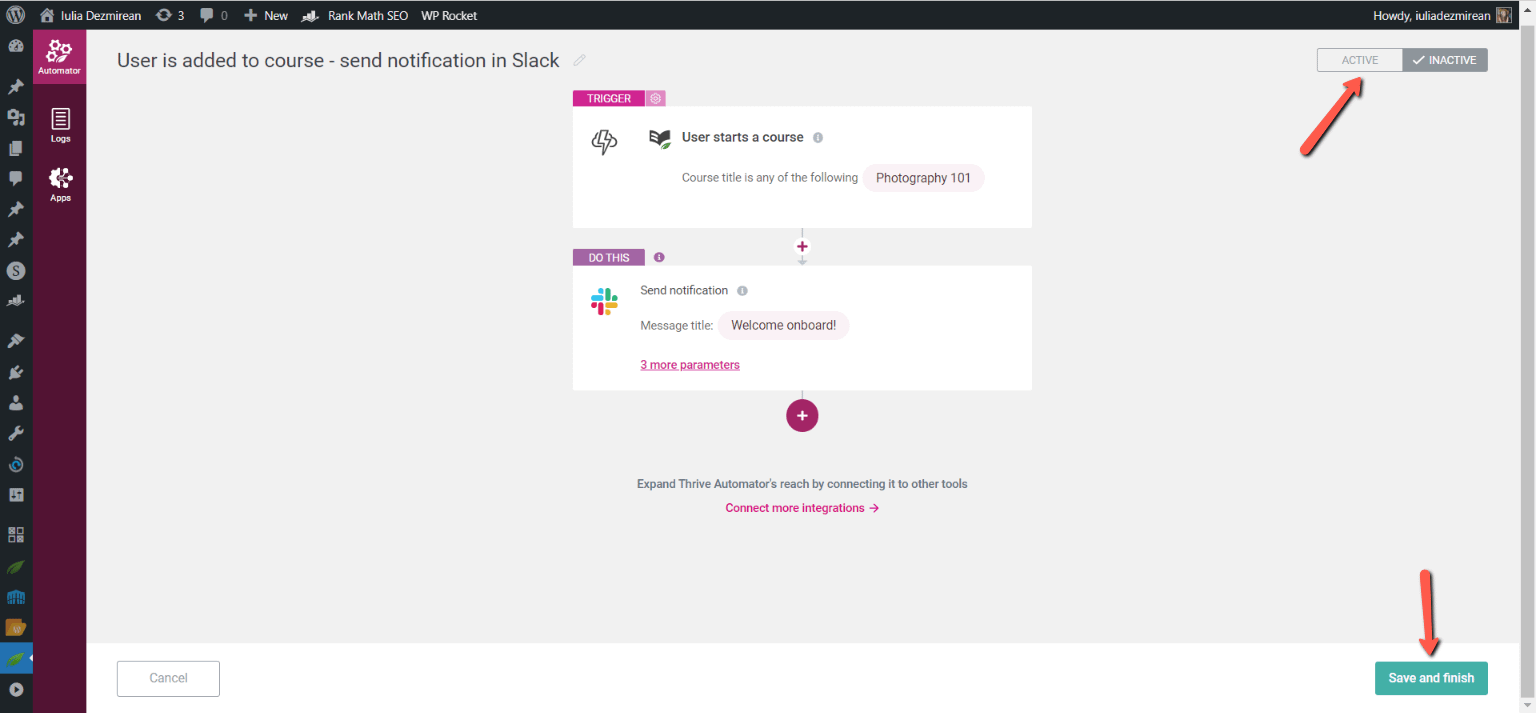
This is how you can easily create an automation that sends out a notification in Slack to the users that have started a course.
Remember that this is just an example and you can play around with the available triggers and actions to configure very specific automations. We have an entire knowledge base section dedicated to examples of automations, you can find it here:
Hopefully, this article was useful. Don’t forget to check out our knowledge base if you need more information on how to use Thrive Automator or any other Thrive Themes plugins.