Find out in this article how you can create an automation in which every visitor that completes a certain quiz from your website will be automatically enrolled into one of your Thrive Apprentice courses.
In order to turn your website’s visitors into WordPress users that have access to your online school, you need to make sure that you set up a WordPress account connection in your workflow.
The easiest way in which you can do that is by setting up an opt-in gate to your quiz, that has an active WordPress account connection.
1. Create Your Quiz
Head over to Thrive Quiz Builder and create the quiz you would like to use for this automation:
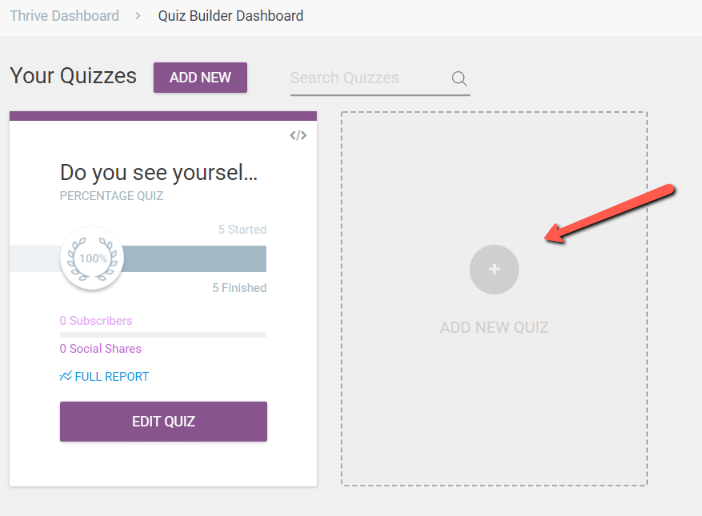
If you already have one, you only need to make sure that it has an opt-in gate, as this page will be the one helping you to gather your visitors’ email addresses.
Set up an Opt-in Gate
This is the overall structure of the quiz I’ve set up for this example:
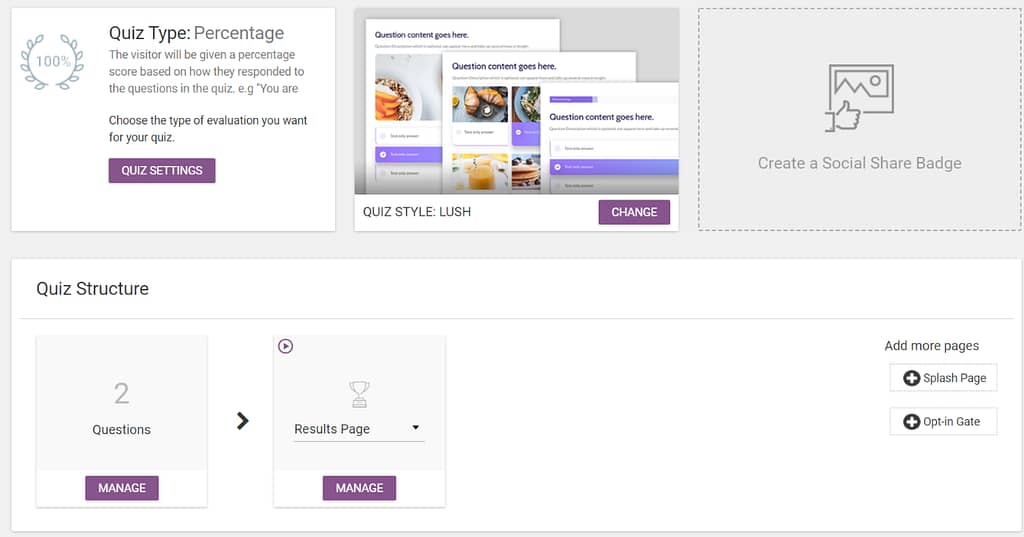
Now, in order to make sure that I’m getting the most out of it, I will set up an “Opt-in Gate”:

The “Opt-in Gate” from Thrive Quiz Builder is a means of gathering your visitors’ emails, by asking them to fill out a form before seeing the results page. For the form, you will have to set up a WordPress account creation, and thus, collect a visitor’s email with each form submission:
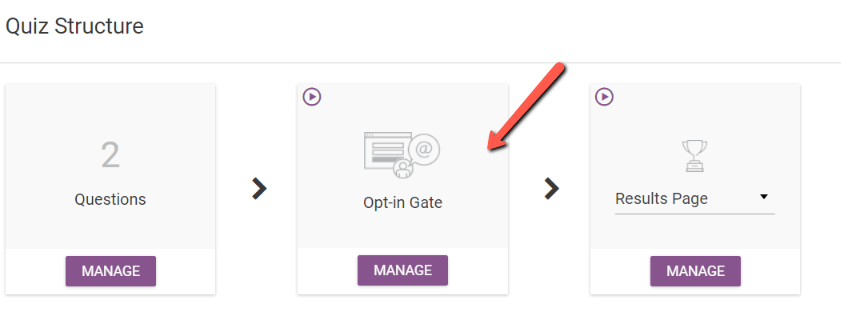
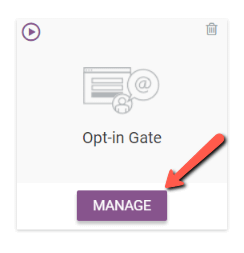
Next, click on “Manage” and then open the Thrive Architect editor in order to customize your opt-in gate page:
The page will have a lead generation form added to it by default:
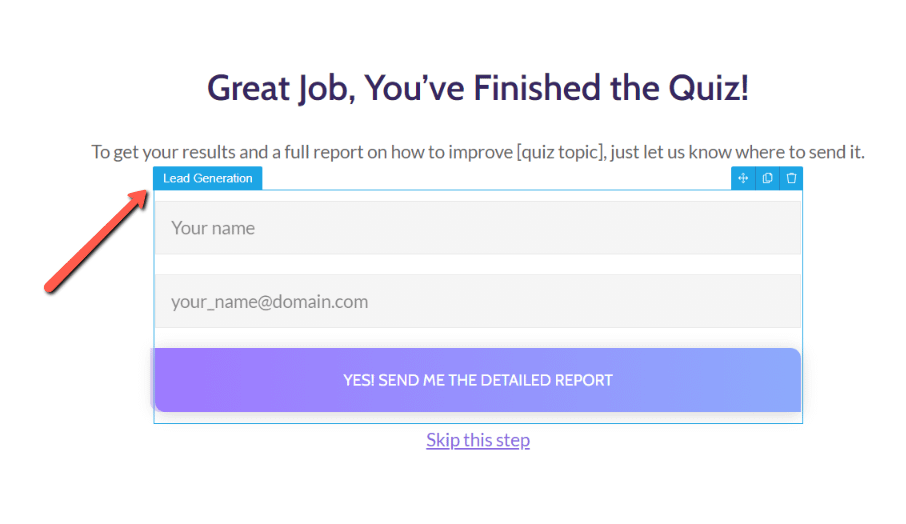
After you click on it, head over to the left sidebar options and set up “WordPress account” connection:

This article from our knowledge base goes into the step-by-step process for doing just that, so please check this out if you want to learn more about it:
Next, after you’ve set up the connection and the type of role you would like to assign to your new users, you can proceed with customizing your form fields.
The form will have by default a “name” and “email” field, the latter being also mandatory. However, for this automation to work and properly collect data, you will also have to add a “password” field here:
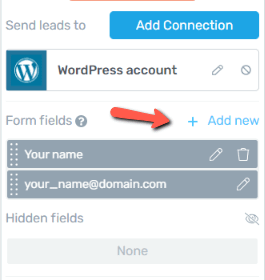
Simply click on the “+Add new” option, select the “Password” field type and also make it a mandatory field by activating the toggle next to “Required”:
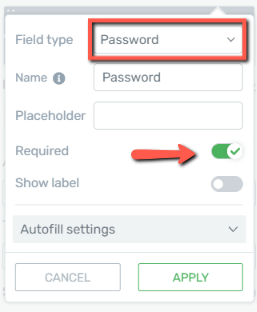
As simple as that, you’ve managed to set up the WordPress connection and now you can proceed with setting up the remaining details of your automation.
2. Set up Your Automation
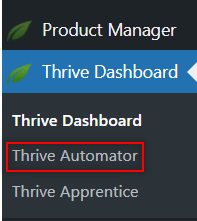
Access Thrive Automator from your Thrive Dashboard:
Here, click on “+Add New” in order to create your automation:

You’ll next have to select the trigger that will set off the automation. For this example, I will use “User completes quiz”:
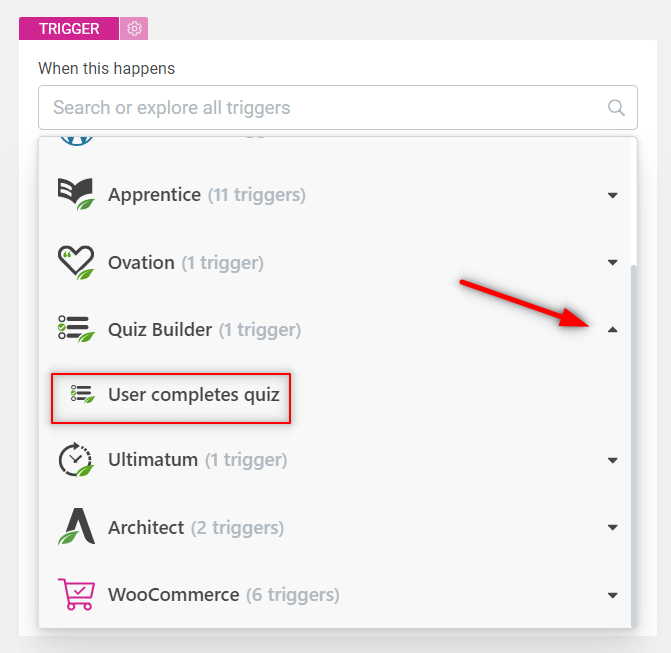
Now, you’ll have to specify which of your Thrive Quiz Builder quizzes needs to be completed by the visitor, in order to get access to your course. Otherwise, this trigger will be applied to all your published quizzes.
To do that, you will have to add a condition:
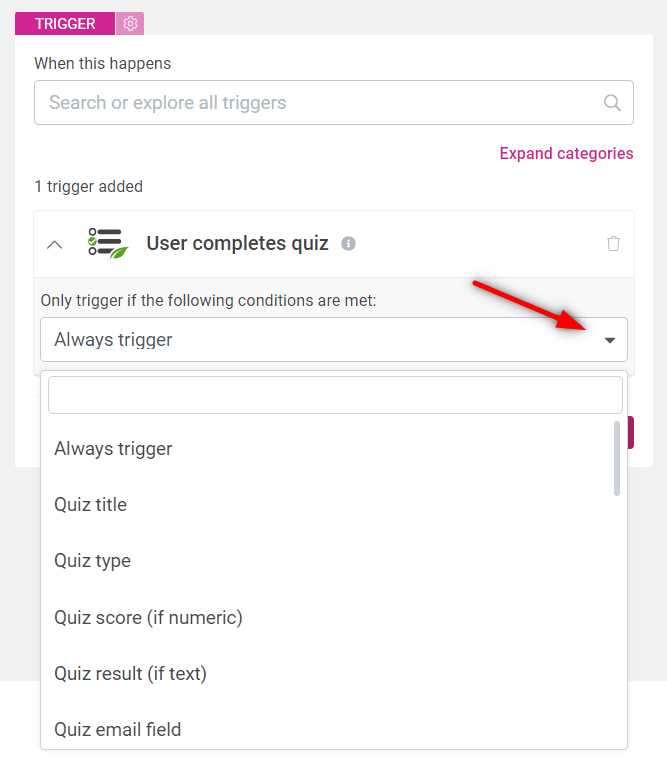
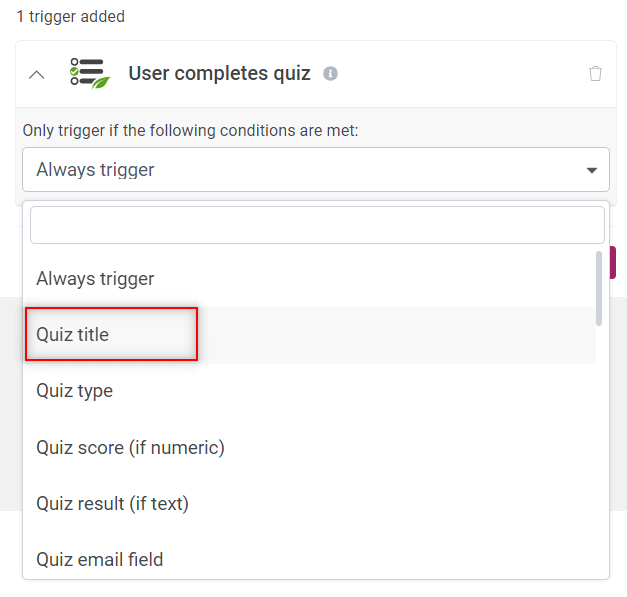
Here select “Quiz title”:
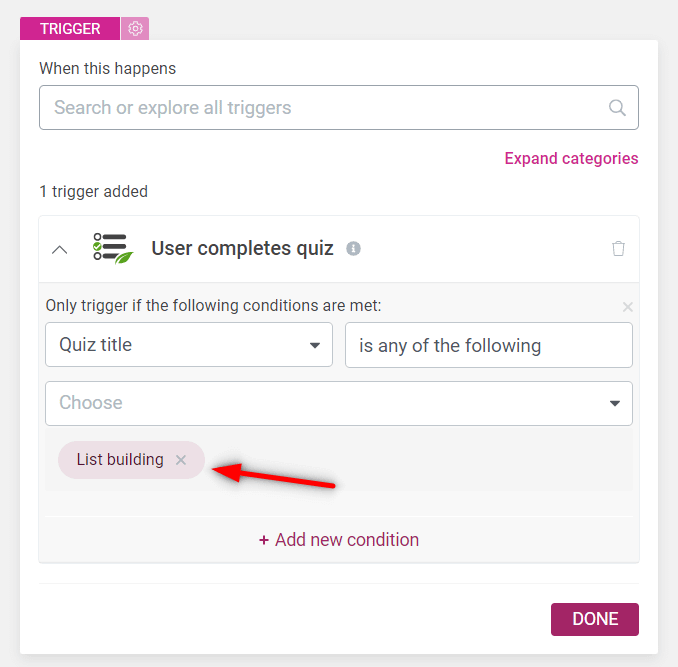
Now, type in the name of the quiz you’ve just created or browse the list and look for it. Once selected, it will appear right under the search field. With this configured, click on “Done”:
Lastly, you will have to set up the action that will be performed, once the trigger is set off. To do that, click once more on the plus sign and then select the “Grant access to product” action from the list:
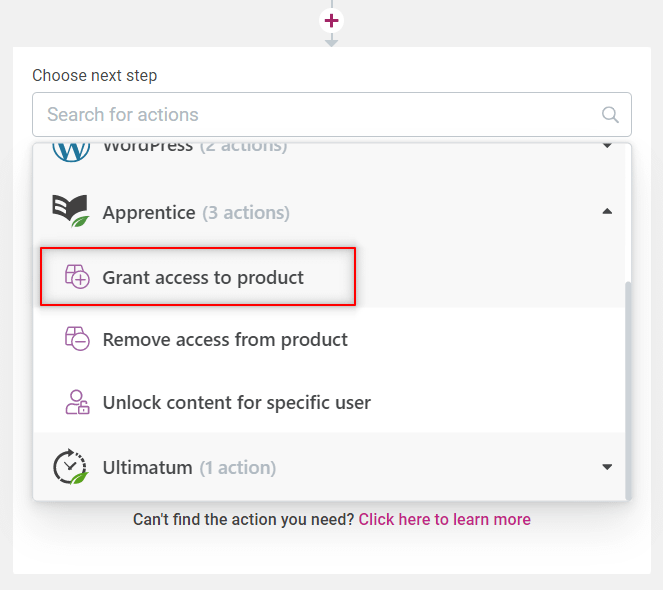
You will next have to decide to which product the users get access. It has to be the same product to which your Thrive Apprentice course is tied. Simply select the one that you want by opening the drop-down list:
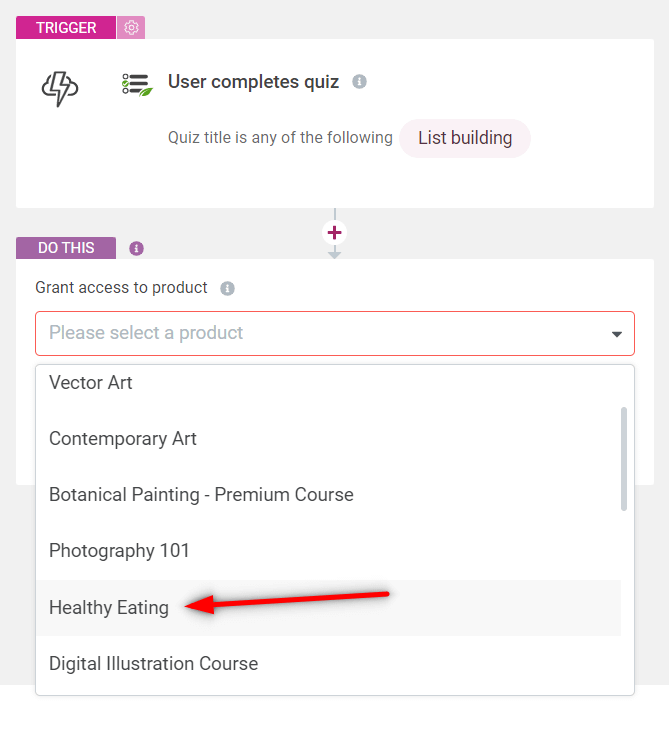
And lastly, after you do that, click on “Done” and your workflow is ready:
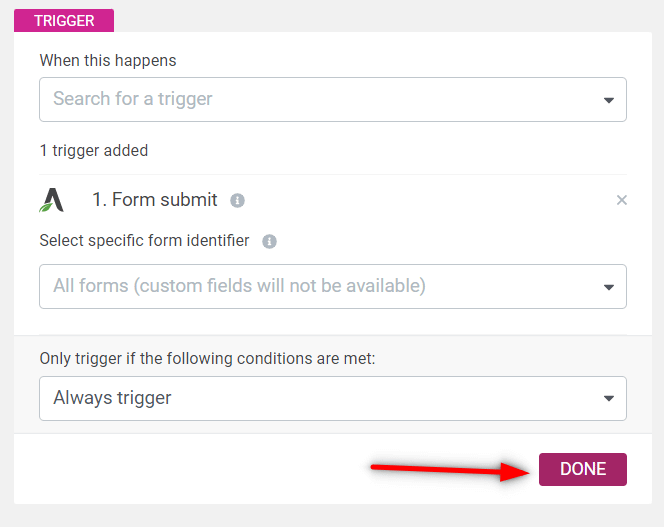
The entire automation should look something like this:

Now, anyone completing this quiz from your website will be automatically get access to the product that you have configured in Thrive Apprentice.
There are numerous types of automation you can create using all the available triggers and actions. Feel free to use them in order to get the most out of Thrive Automator.
Hopefully, this quick tutorial was useful to you. If you enjoyed reading this article, then you might find this one useful as well: