In this article we will have a look at how you can create multiple custom user roles on your website and grant them access to different courses.
If you want to increase your conversion rates, you can offer courses free of charge to those visitors who register on your website for a subscriber role, for example.
However, if you have multiple courses, on multiple topics, all new visitors that register on your website for a subscriber role will be granted access to all those courses.
And since these courses might focus on different topics, you might also want to split the subscribers based on their needs. If course A is about digital marketing, and course B is about fitness, there’s a high chance that the users who sign up for the digital marketing course do not want to also be included in the fitness course.
So what we have to do is to create a custom role per course and protect each course with one separate custom role, specifically created for that course.
Each Thrive Apprentice course will have its own registration page. The visitor landing on the course A registration page will automatically register for a custom user role that’s specifically made for course A; the visitor landing on the course B registration page will be assigned the custom user role corresponding to course B, and so on.
Create Custom User Roles
For creating custom user roles I will use a third party plugin called Members, by MemberPress.
Start by installing the plugin on your website, just like you would normally do with any other plugin.
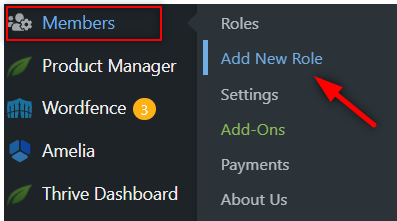
Once installed, access it from the WordPress admin dashboard and create a new role:
Give it a name:

Then, set the capabilities of this new role. I’ve only allowed reading capabilities (this setting comes by default, when you install the plugin):

Lastly, add the role:
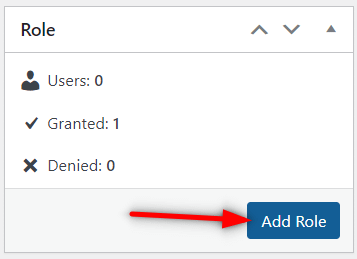
You’ll create here custom user roles for all free courses for which you want to set up this type of automation:

Tie a Thrive Apprentice Course to a Product
Next, continue with adding your Thrive Apprentice courses to products. Each course will be tied to one product:
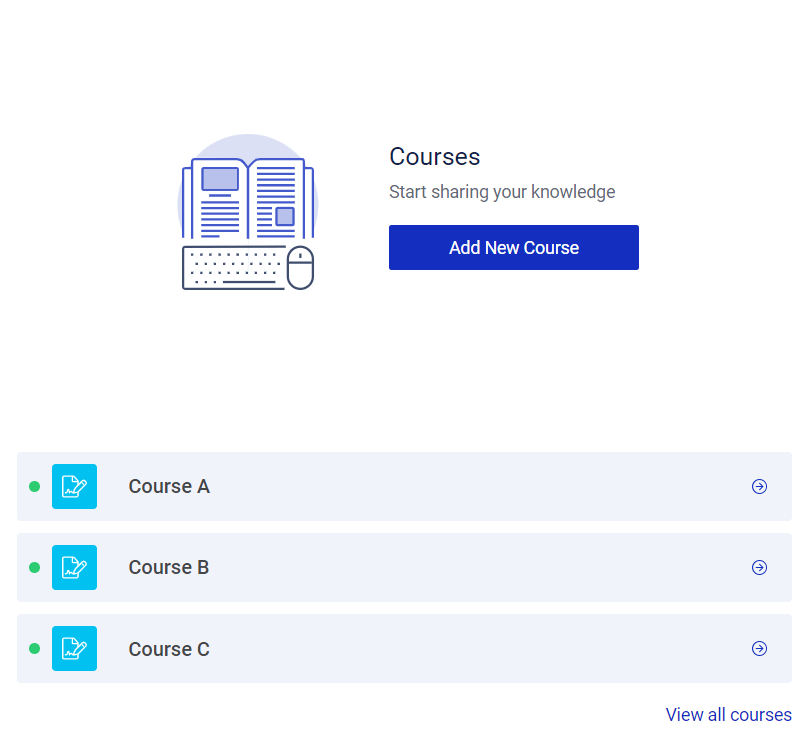
Access the first course and create a product based on it:
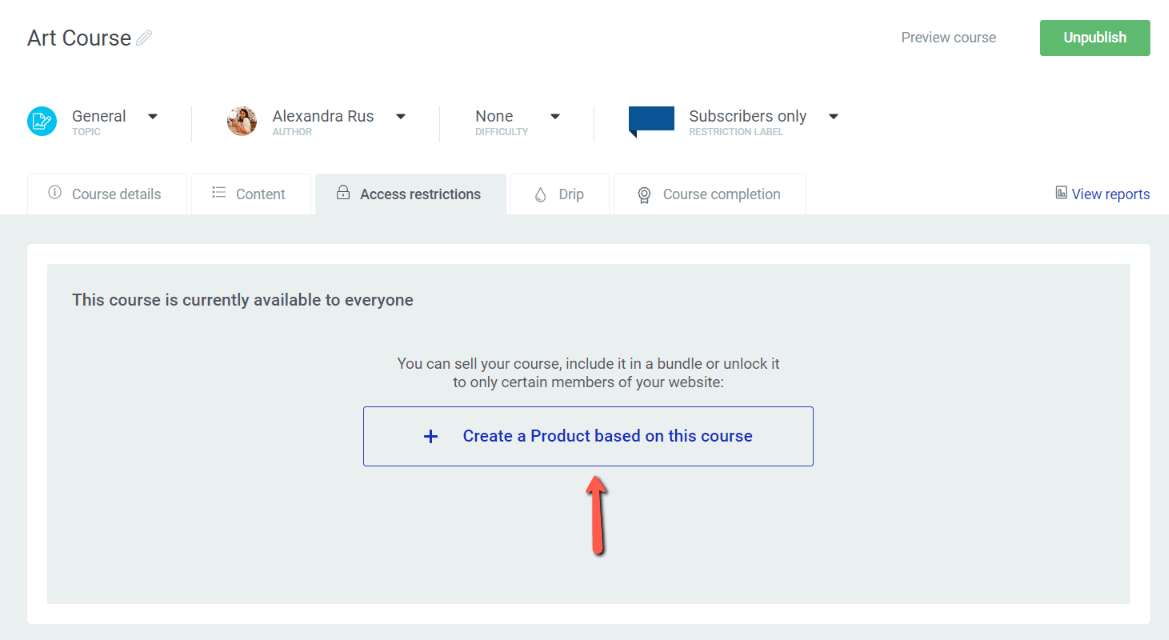
The settings page at product level will open next, and here you can set up various access restrictions and requirements:
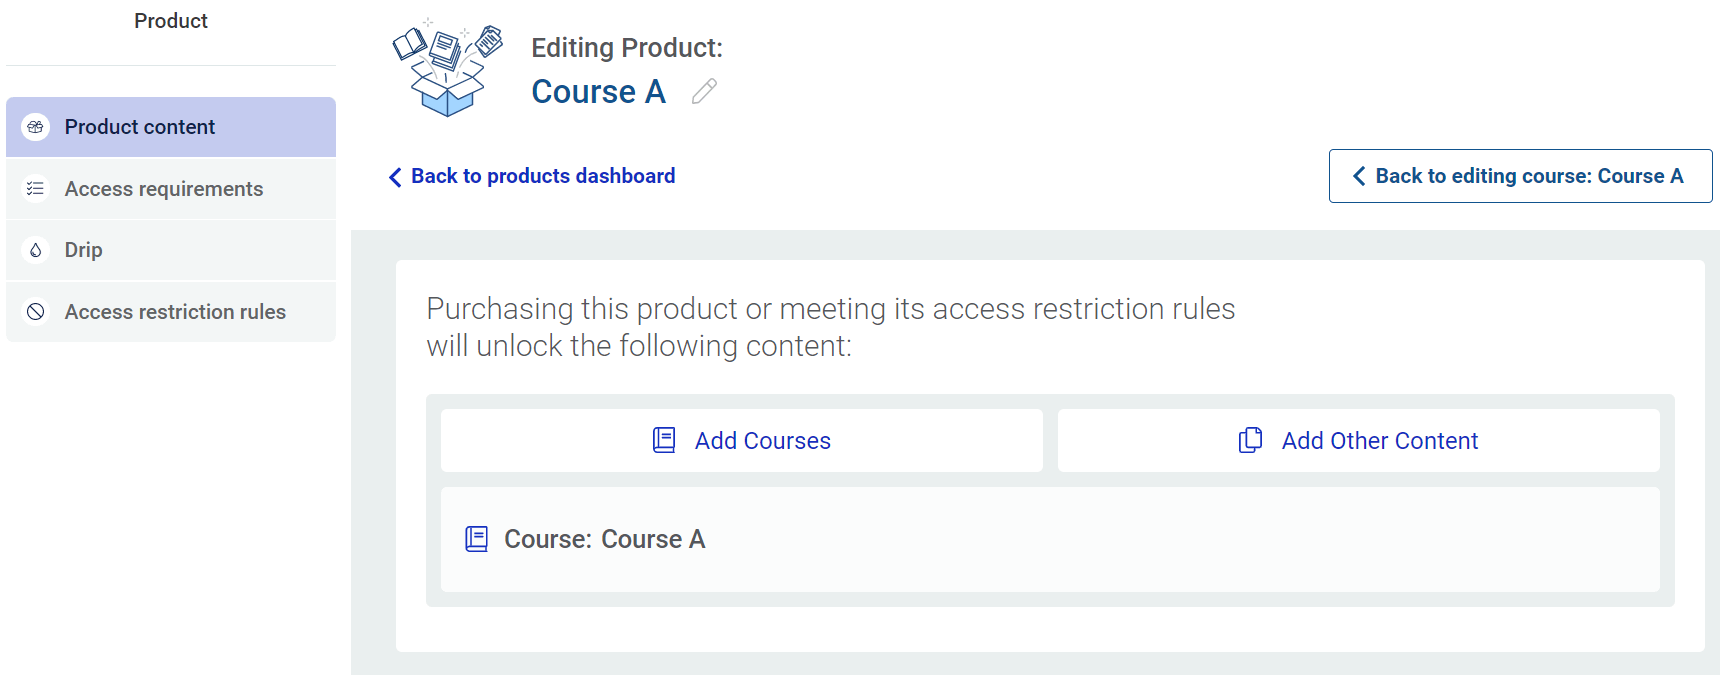
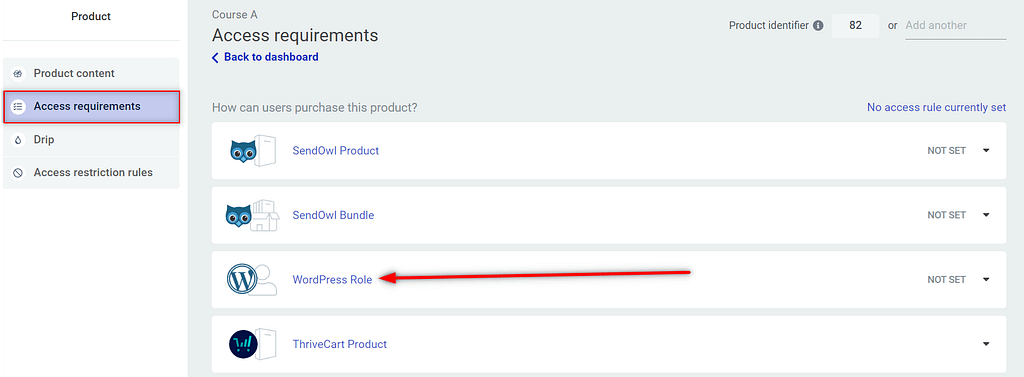
Here, swipe over to the “Access requirements” tab and look for the “WordPress Role” section:
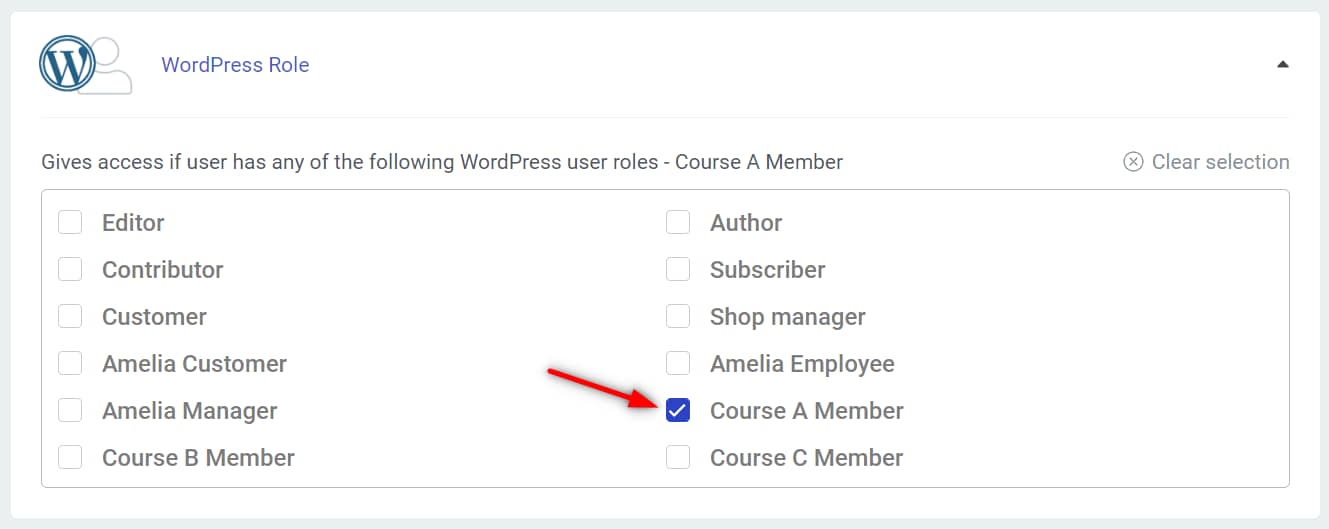
Expand it and tick the box next to the custom user role made for this course:
Save your changes and proceed to the next step, which is setting up the restriction rules.
Click on the “Access restriction rules” tab:
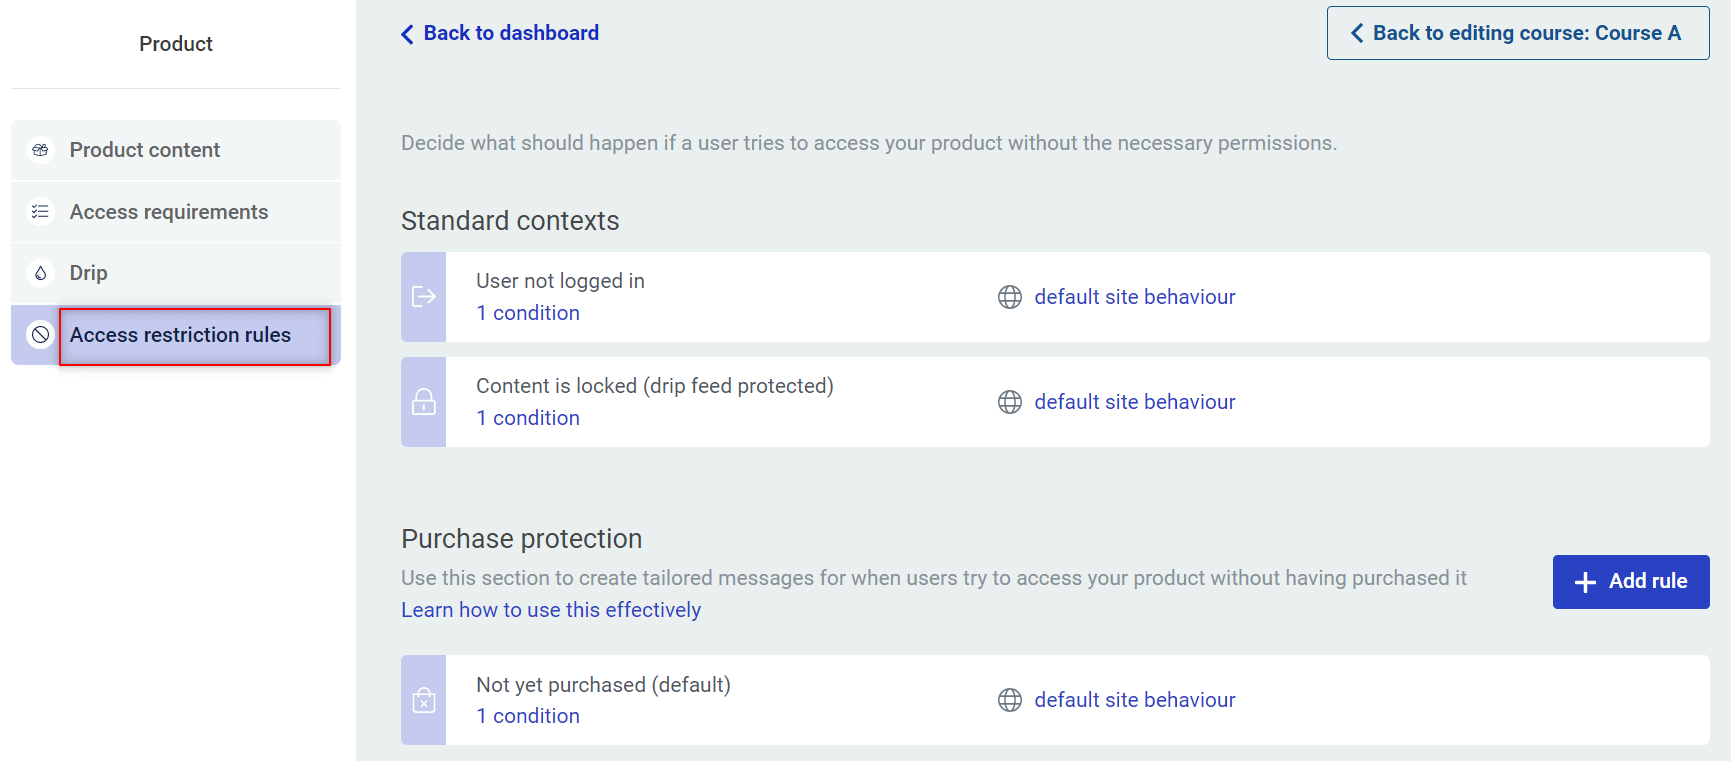
Here we will focus on the “User not logged in” context. At the moment is set to the default site behavior, which is redirecting the visitor to the general “Login & registration” page:

The plan is to have a separate login and registration form for each course instead of the general registration page. So for that, you can use the “Redirect to custom page”:
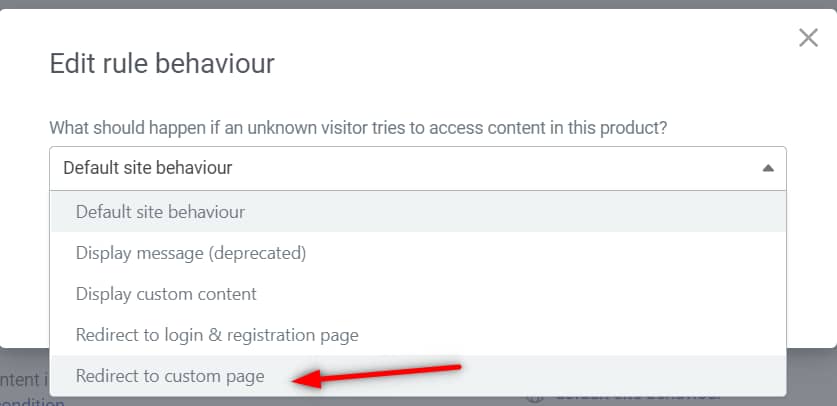
You can create a new page directly form this view:
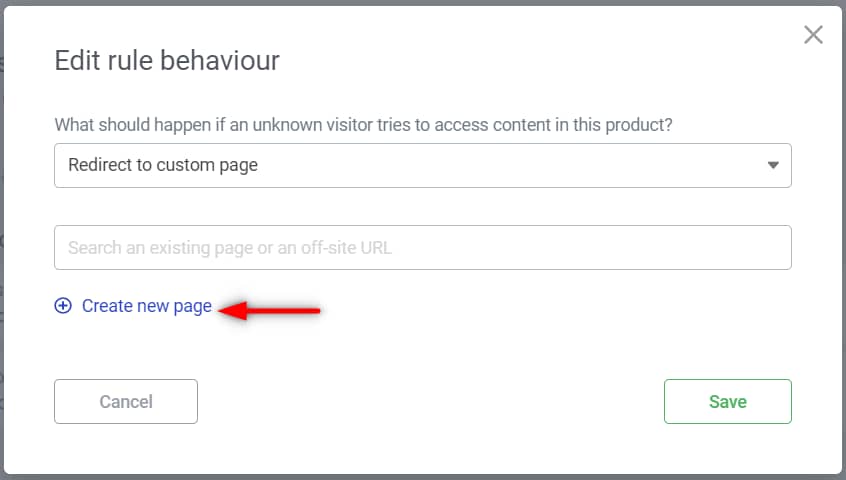
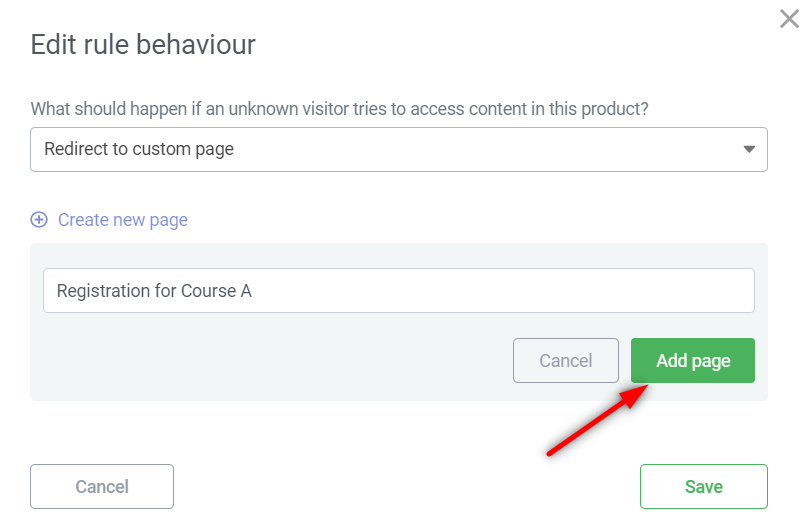
Give it a name and click on “Add page”:
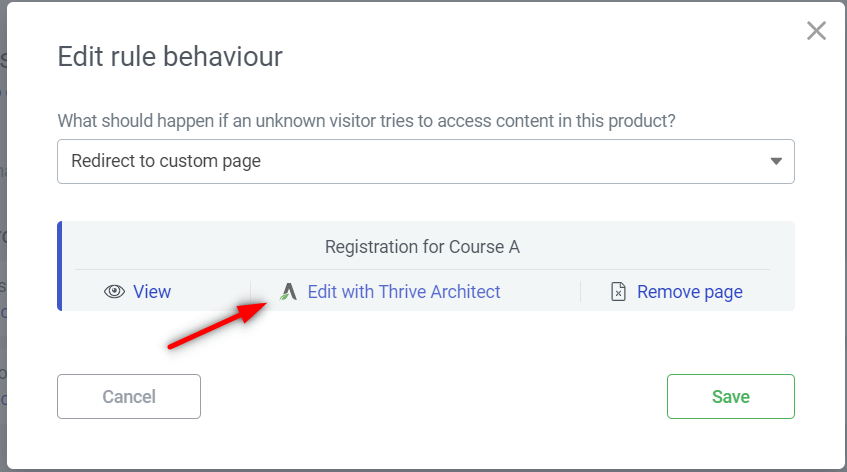
And then access the Thrive Architect editor:
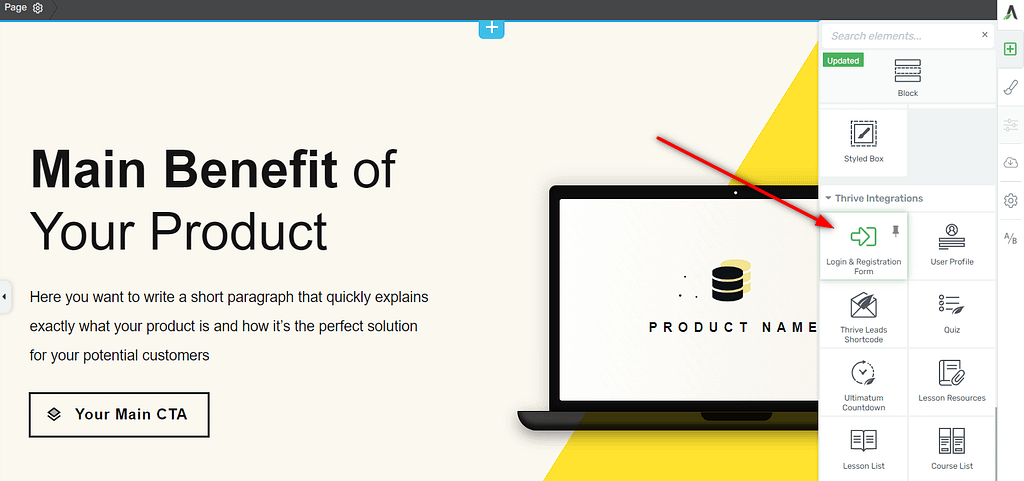
I’ve picked a predefined template, and now the next step is to add a “Login & Registration Form” element to it:
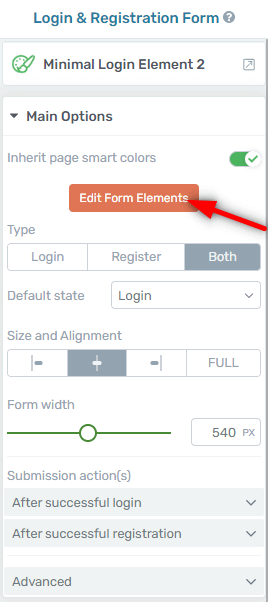
Once the form is added to the page, you can start using the left sidebar options to set it up. Click on the “Edit Form Elements” button:
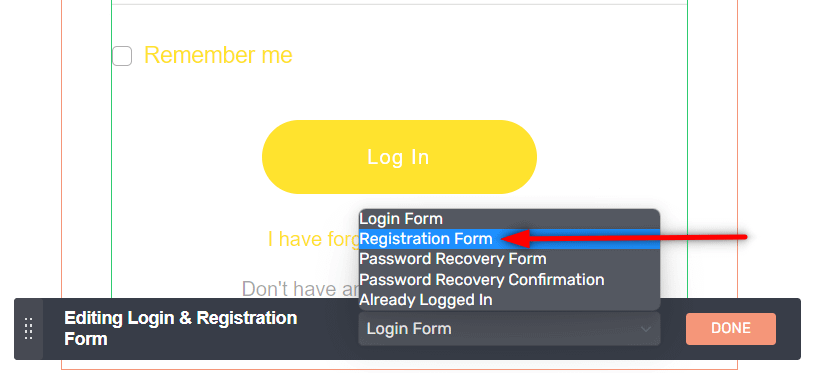
Then select “Registration Form” from the state panel that appears in the lower side of the page:
Here, start editing the WordPress connection:
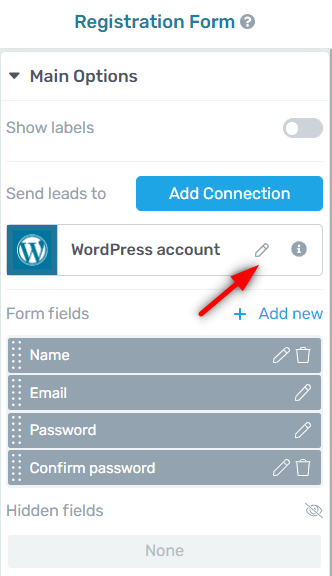
Your form should be connected to WordPress by default, but in case you want to learn how to do that, here’s an article that explains more about how to connect your form to WordPress:
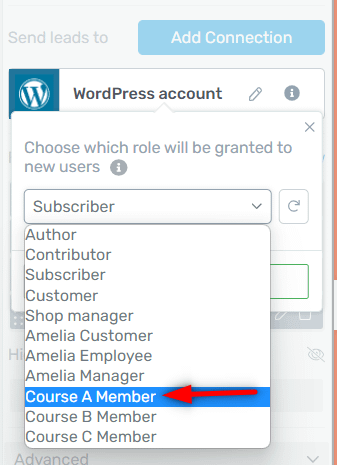
Then open the role drop-down list and select the role you have created for this course:
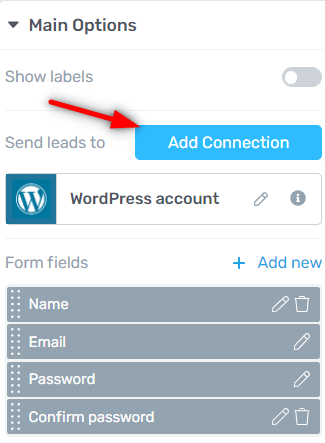
If you want to simultaneously add and tag this user in your autoresponder, you can do that as well. Simply click on the “Add Connection” button:
And select your service from the list:

Note: prior to doing this you will have to set up an API connection with your preferred service.
Here’s a list of all the supported API connections and how to set them up:
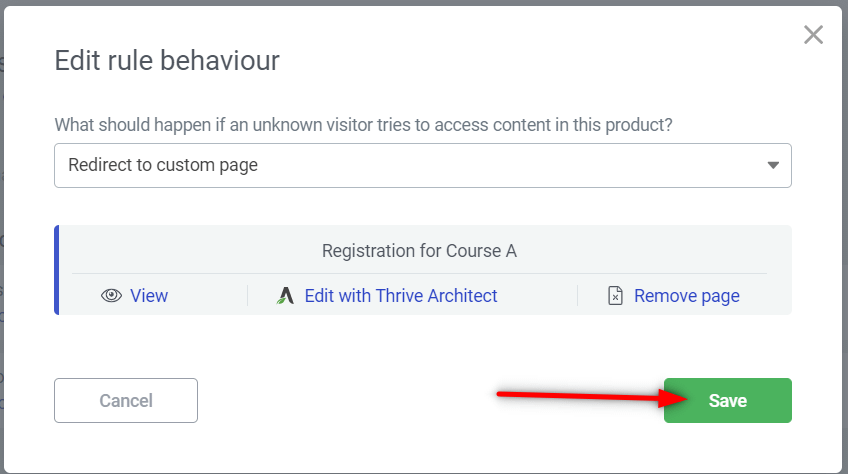
With this set up, you can save everything, exit the editor and return to this dashboard, where you have to click on “Save”:
The same process should be applied to each course for which you want to create this funnel.
However, make sure you assign the correct role for the course you are working on. So if you are working on course B, then the registration page should be set up to grant the custom role created for course B, then for course C the same and so on.
With all this set up, you should now have as many free courses as you want on your website, all protected with different custom user roles. All new visitors that register on your website will be granted access only to the course for which they registered.
In addition to all this, you can also add them to your autoresponder (just as shown above), assign tags to their user role and then send out customized offers and promotions via email.
Hopefully this tutorial about how to create multiple custom user roles on your website and grant them access to different courses was useful to you.
We have an entire section in our knowledge base, dedicated to Thrive Apprentice options and features: