In this article, you’ll learn how to connect your Thrive Leads forms to your email marketing service (like Mailchimp, ActiveCampaign, etc.) and how to use the Asset Delivery feature to send lead magnets automatically.
To save the leads you collect, you generally need to connect your forms to an external service.
Method 1: API Connection (Recommended)
The best way to connect is using the API. This ensures a stable connection and allows you to use tags and groups easily.
- Go to Thrive Dashboard > API Connections to set up the integration data globally.

- In your form (Thrive Architect), click the Lead Generation element.
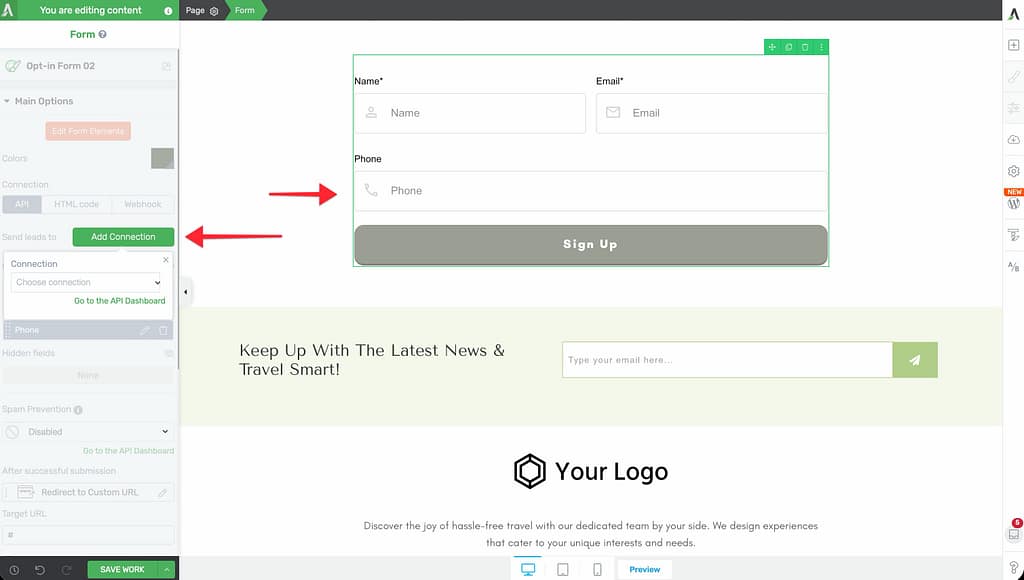
- In the left sidebar, click Connection.
- Choose API.
- Select your service and your mailing list.
- Click Apply.
Method 2: HTML Form Code
If your service isn’t supported via API, or you need to use a specific custom form setup, you can use the raw HTML code.
Step 1: Get the Code
- Log in to your email marketing provider.
- Create a signup form (often called “Embedded Form”).
- Copy the full HTML code provided (usually starts with
<form...).
Step 2: Add to Thrive Leads
- Open your form in Thrive Architect.
- Click the Lead Generation element.
- In the left sidebar, click Connection.
- Choose HTML Code.
- Paste your code into the box.
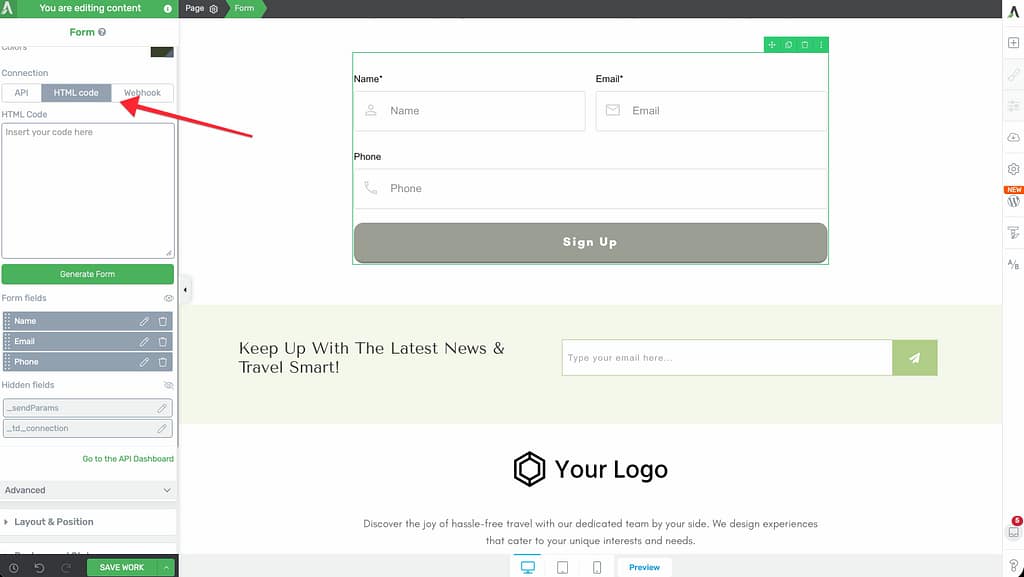
- Click Generate Form.
- Note: Thrive Leads will parse the code and recreate the fields (Name, Email) visually.
Asset Delivery (Delivering Lead Magnets)
Asset Delivery is a feature in Thrive Leads that automatically emails a file (PDF, ebook, code) to a new subscriber immediately after they sign up. This eliminates the need for complex automation in your email marketing service.
1. Create an Asset Group
- Go to Thrive Dashboard > Thrive Leads.
- Click the Menu (three dots) in the top right and select Asset Delivery.

- Click Asset Groups > Add New.
- Name your group (e.g., “Free Ebook”).
- Upload your file (PDF, etc.) or add a download link.
2. Configure the Email
In the Asset Delivery dashboard, customize the email template. This is the email the user receives, which will include a link to the asset you uploaded.

3. Enable on Content
- Open your form in Thrive Architect.
- Click the Lead Generation element.
- In the left sidebar, go to Advanced.
- Toggle Asset Delivery to ON.
- Select the Asset Group you created.
Now, when someone signs up, Thrive Leads will add them to your mailing list AND immediately send them the asset email.
Advanced: Adding Dynamic Data
Sometimes you need to pass hidden data to your autoresponder, such as the visitor’s IP address.
Developer Filter: tve_additional_fields
For developers, Thrive Leads provides a filter to inject hidden fields programmatically.
add_filter("tve_additional_fields", "my_custom_fields", 10, 4);

function my_custom_fields($additional_content, $lead_group, $form_type, $form_variation){
    return $additional_content . "<input type='hidden' name='source' value='sidebar_widget'>";
}
That’s it! You’ve successfully connected your forms to your email service.
Related Resources
- Building Forms: Building and Displaying Your First Form
- Dashboard: Understanding the Thrive Leads Dashboard