After purchasing the Thrive Architect plugin, you need to install and activate it on your WordPress website, in order to be able to use it.
Here is how you can do this in four easy steps:
1. Access the Thrive Product Manager
First of all, you will need to have the Thrive Product Manager installed on your WordPress based website. If you need more info on how to get the Thrive Product Manager and install it, please click here.
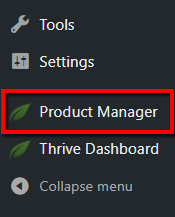
Then, you will need to access the Thrive Product Manager from the left side menu of your WordPress admin dashboard:

2. Select Thrive Architect
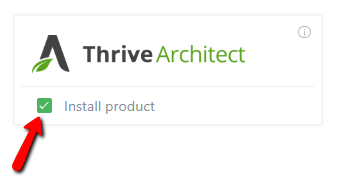
After you have accessed the Thrive Product Manager, look for Thrive Architect in the “Plugins” section and make sure to check the “Install product” option under it:

3. Install & Activate
The next step is to install and activate the Thrive Architect plugin by clicking on the “Install selected products” button from the bottom-center part of the page:

Then, the process, where Thrive Architect will be installed and activated at the same time, will start and it will only take a couple of seconds.
Once Thrive Architect is installed and activated , you will see the “Ready to use” status next to it:

After you have completed these steps, Thrive Architect will be ready to be used on your website so you can start editing your pages with it!
If you want to find out how to use Thrive Architect and its elements, check out the tutorials here.
Hopefully, this article was useful for you. If so, please give us a smile below 🙂