Installing and activating Thrive Theme Builder is an important first step towards being able to use it alongside the companion themes that come with it. There are a few aspects of the installation process that you should know before doing this:
-
You first install Thrive Theme Builder, that comes by default with the companion Shapeshift theme
-
Besides Shapeshift, you will also have access to other companion themes that can be downloaded from the cloud
-
Every Thrive Theme Builder theme is a Thrive product, thus, the process of installing & activating them is the same as installing and activating the other Thrive products.
Installing & activating Thrive Theme Builder can be done in a few easy steps, showcased below.
For customers
If you are already a Thrive Suite customer, then this process will be easier for you because you are familiar with the way in which you can install Thrive products in general. As a Thrive customer, you will get access to Thrive Theme Builder and its companion themes without having to buy them separately.
All you will have to do, in order to be able to use one of the themes is the following:
Update (or Install) the Thrive Product Manager
First, you will have to update the Thrive Product Manager plugin. You most probably already have this plugin on your website, because this is needed to install any Thrive product.
However, if you need detailed information on how to get and use this plugin, please check out this tutorial.
Go to your WordPress admin dashboard and click on the “Plugins” item from the left side menu:
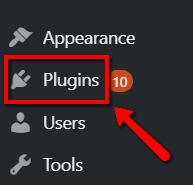
The page with your plugins will open. Look for the Thrive Product Manager plugin:

Once you have found it, you should be able to see a notification under it, saying that a new version is available. Click on the linked “update now” part of the notification to update the plugin:

If the notification is not there, you can make sure your plugin is up-to-date, by clicking on the “Check for updates” option, below the description of the Thrive Product Manager:

-
If there is a new version, a message about it will appear in the upper part of the page. Also, the previously mentioned notification with the “update now” option will appear too, below the plugin’s description on the page. You can scroll down to the notification and click on the option to update the plugin.
-
If there is no newer version for the plugin, you will see a message letting you know that the plugin is up-to-date.
Update Thrive Architect
Since Thrive Theme Builder will also work together with Thrive Architect, you will need to update this plugin as well. On the same page with your plugins, mentioned above, look for the Thrive Architect plugin:

Once you have found it, you should see the notification under it, which lets you know that there is a new version available, and it prompts you to update the plugin. Click on the “update now” part of the notification:

Then, the Thrive Architect plugin will be updated in a few seconds.
If the notification is not there, you can check to see if you indeed have the latest version of the plugin. To do that click on the “Check for updates” option, from below the description of Thrive Architect:

-
If there is a newer version for the plugin, a message about it will appear (in the upper left part of the page), as well as the above-mentioned notification (below the plugin’s description on the page), containing the “update now” option that you can use to update the plugin.
-
If you already have the latest version of the plugin, then you will see a message letting you know that the plugin is up-to-date and you do not need to update it.
Important!
Please keep in mind that besides having the Thrive Product Manager and Thrive Architect up-to-date, you will also need a minimum of 4.9 version of WordPress and the 5.6+ PHP version, in order for the Thrive Theme Builder to properly work on your website.
Therefore, if you have versions that are older/lower than these on your website, please make sure to update them as well, before proceeding.
Install & activate the theme
After the Thrive Plugin Manager is updated, you will have to access it. To do that, go to the left side menu of the WordPress dashboard again, and click on the “Product Manager”:
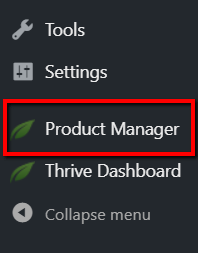
This will open the Thrive Product Manager dashboard with the available Thrive products. You will see a new section called “Thrive Theme Builder”. Here, click on “Install Theme”:
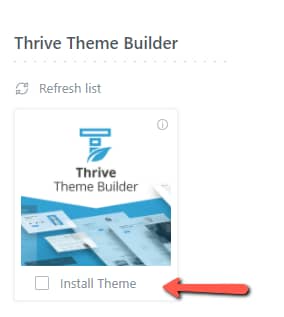
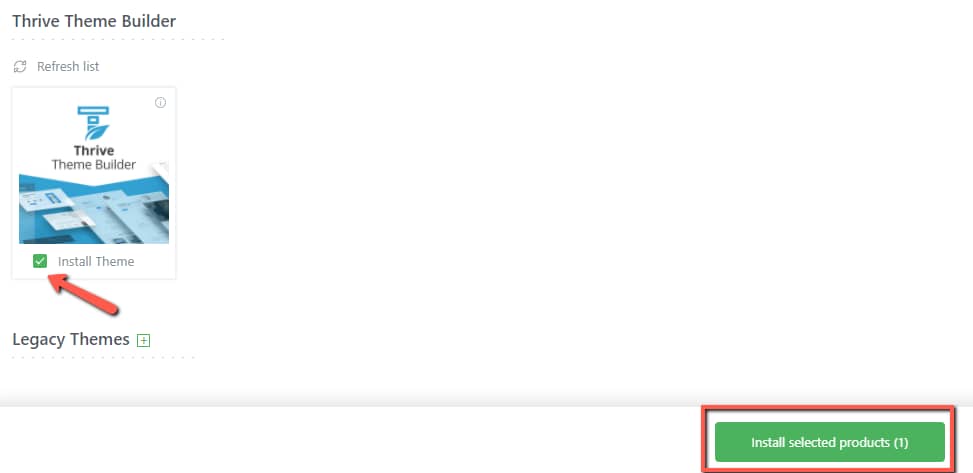
This will automatically install Thrive Theme Builder on your website together with the companion theme called Shapeshift.
Click on the “Install selected products” button that became available on the bottom-center part of the page:
Important!
Please note that this will install Thrive Theme Builder, but not activate it.
When the installation is complete, you will see this notification:

At the bottom of the screen, you can also notice an “Activate Thrive Theme Builder” button. If you click on it, you will also activate Thrive Theme Builder and the theme on your website:

Once you do that as well, the status of the product will change to “Activated”, and you can go directly to your Theme Builder Dashboard, by clicking on the blue button located in the lower part of the screen:
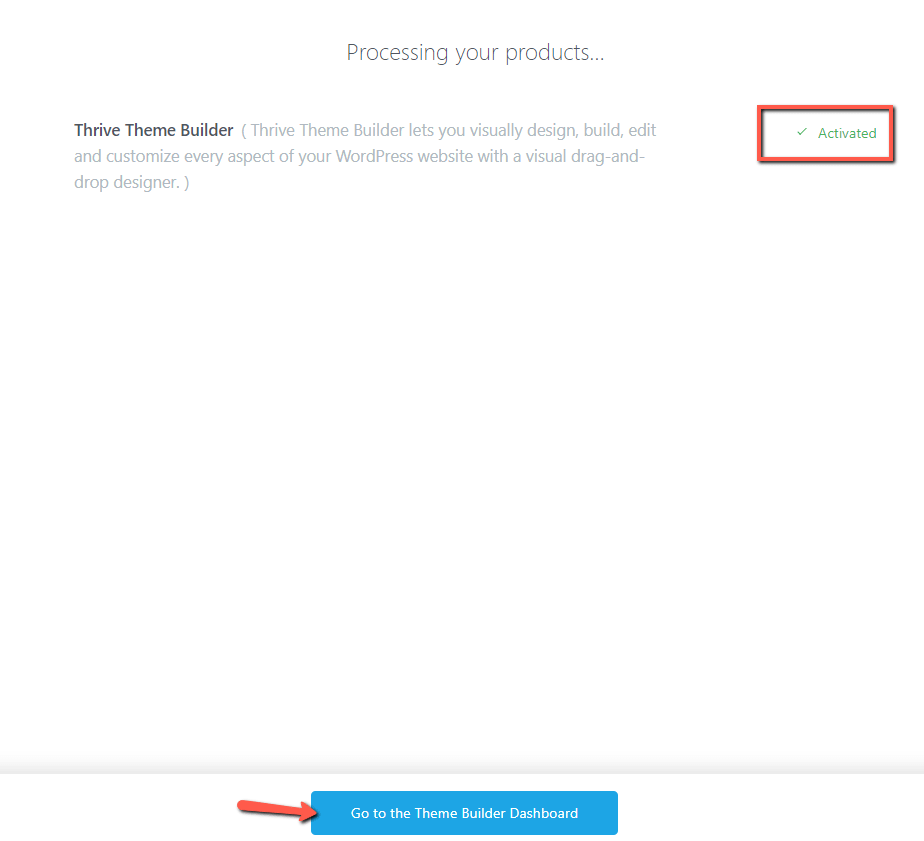
You will now be able to start building your website using Thrive Theme Builder. At the end of this article you will also be able to find several articles about how to manage the different companion themes that come with Thrive Theme Builder, so make sure to check those out as well if you want to learn more about this topic.
For non-customers
Purchase Thrive Suite
If you are not a Thrive customer yet, first, you will have to purchase Thrive Suite. This will give you access to Thrive Theme Builder, which, as already mentioned, comes with the companion theme called Shapeshift (and several more that are available in the cloud). You can purchase Thrive Suite from here.
Get the Thrive Product Manager
After you have made the purchase, you will have to use the Thrive Product Manager to install & activate it.
To be able to use the Thrive Product Manager plugin, first, go to your Member Dashboard and download it, by following the link in the “Download and install the Thrive Product Manager plugin” sentence:
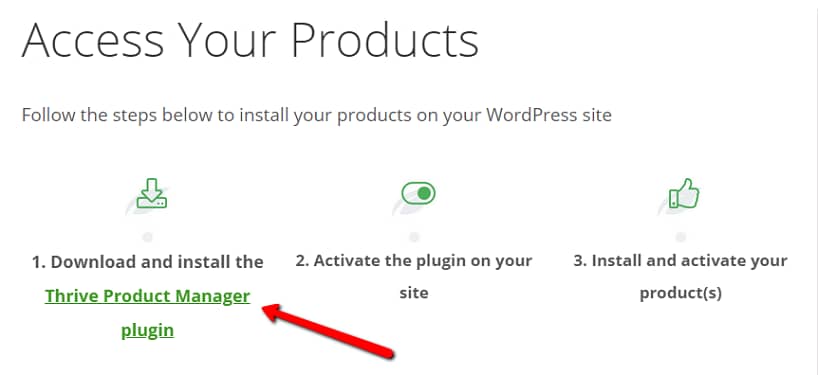
Then, you will have to install and activate the downloaded plugin on your WordPress website. Once that is done, you will have to connect your Thrive Themes account to the Thrive Product Manager. You can do that by logging in to the account in the Thrive Product Manager dashboard.
This article describes in detail each of these steps.
Install & activate the theme
After you have done all this, you will be able to see the product in your Thrive Product Manager dashboard. It will be available in the “Thrive Theme Builder” section of the dashboard:

After you have found it, you can install & activate it exactly the same way as described above. Just like for the Thrive members, the Thrive Theme Builder tool will be automatically installed for your website too, when you install & activate the theme.
Once the theme is installed and activated, you can go to the Thrive Theme Builder dashboard and start working on customizing the theme and its templates to your liking.
If you want to find out about other aspects and features of Thrive Theme Builder and its theme, check out our knowledge base section here.
Also, check out these articles if you want to read more about how to manage the companion themes that come with Thrive Theme Builder:
-
How to Manage Themes in Thrive Theme Builder
Hopefully, this article was useful to you. If so, please give it a smile below 🙂