Let’s have a look at how you can download, install and activate the Shapeshift theme from your Thrive Theme Builder dashboard.
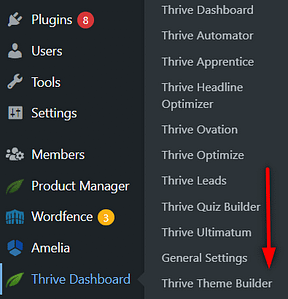
1. Access the Thrive Theme Builder dashboard
First, log into your WordPress account, and access the Thrive Theme Builder dashboard:
2. Go to the Themes Section
Now you can access the “Themes” section of your navigation bar:

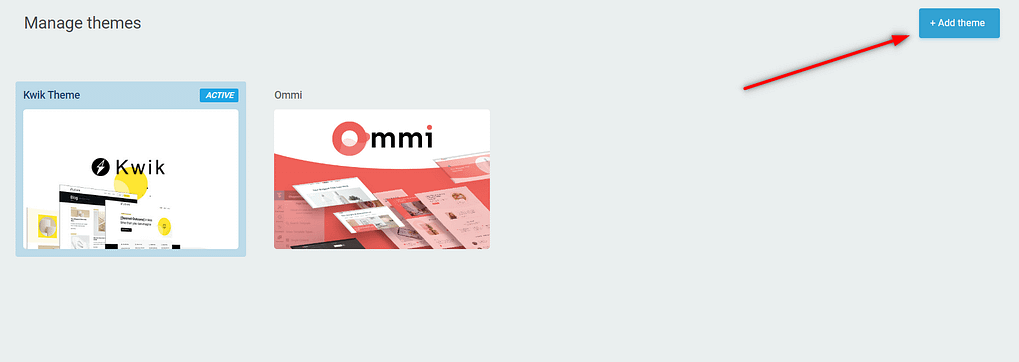
This will open the themes library, where you can view the currently active theme from your website:

3. Download the Theme
This is where you can also add a new theme if you want, simply by clicking on the “+Add theme” button from the top right-hand side of the page:
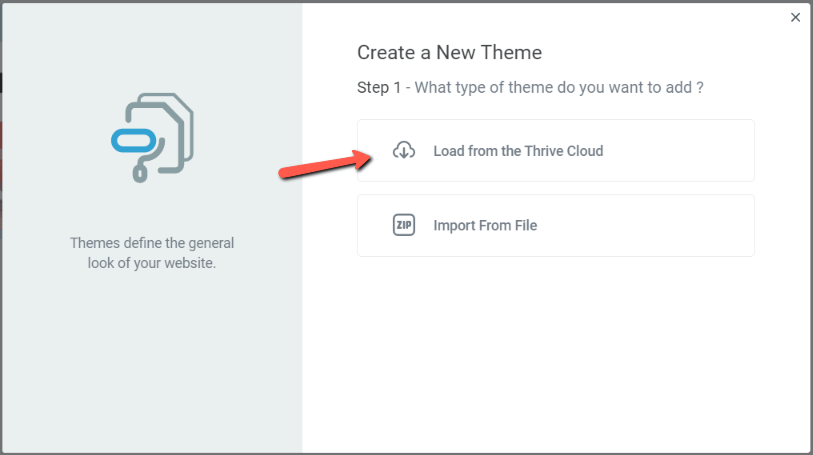
Once you do that, you will be prompted with this lightbox. If you have Thrive Suite installed, then the Shapeshift theme will be available for you to download directly from the Thrive Cloud:
4. Install and Activate the Theme
After you click on “Load from the Thrive Cloud”, you will see the full list of available themes. Hover over the Shapeshift theme, and click on “Download”:

Note: Use the “Preview” button if you want to see how the theme looks like before actually downloading it.
After the installation is successful, you’ll see this success notification, and Shapeshift will be automatically added to your theme library:
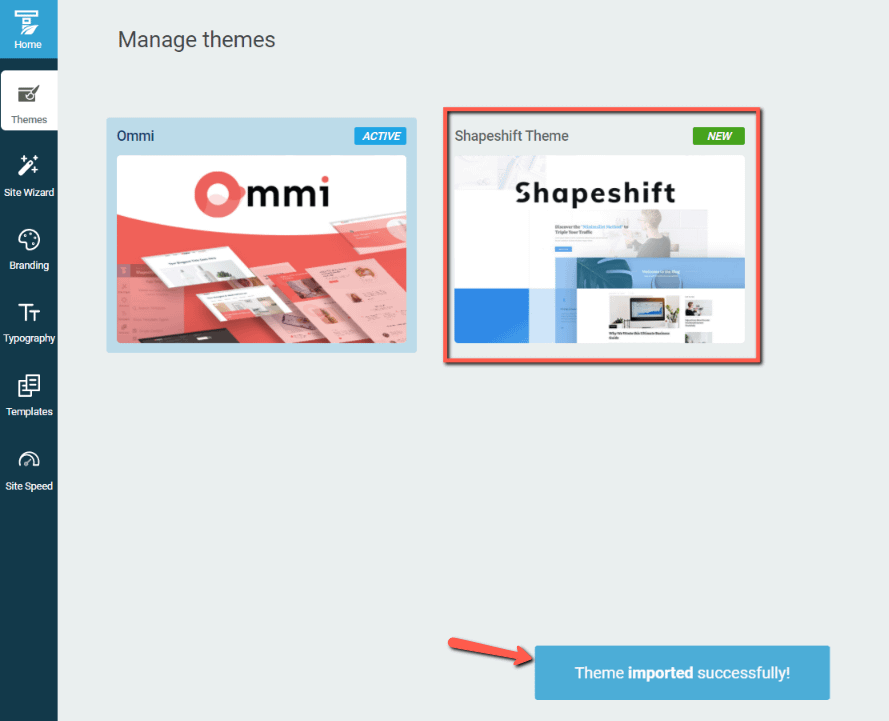
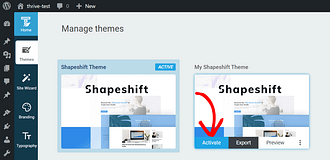
The only thing left to do is to activate it. To do that, hover once more over the theme, and the “Activate” button will become available:
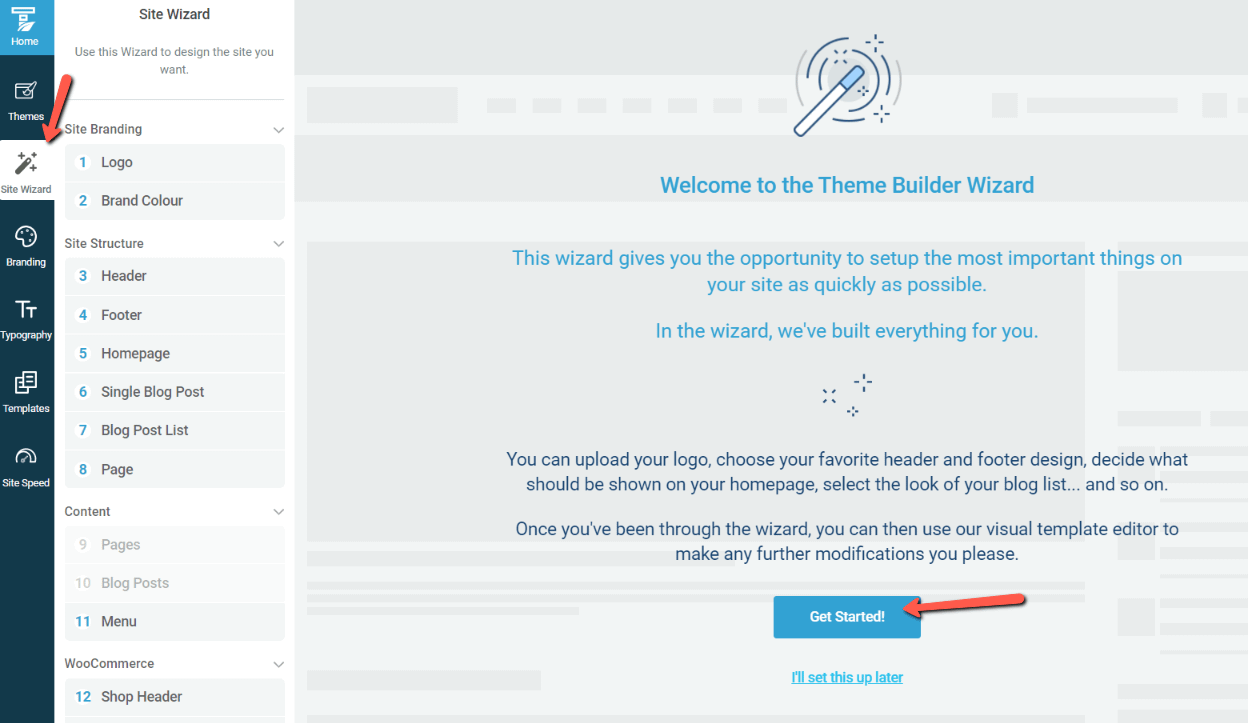
Once the activation is complete, you will be taken directly to the “Site Wizard” where you can start customizing it:
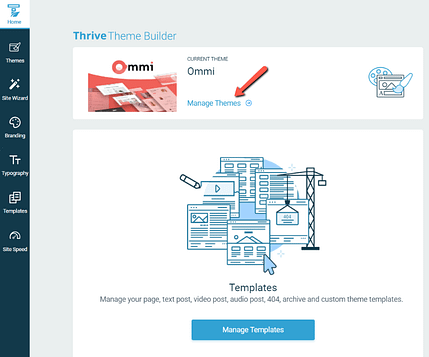
As simple as that, your newly added Shapeshift theme has been installed and activated on your website You can always return to the “Themes” dashboard and further manage your themes:
There are several resources in our knowledge base about this topic, that you might find useful:
I hope this tutorial was useful to you. If so, don’t hesitate to rate it with a smile below 🙂