This article will explain the step-by-step process of how to install the Classic Editor plugin.
This can come in handy if, for example, you are using Thrive Headline Optimizer. If you do not install the “Classic Editor”, you will not be able to use the plugin to its full potential.
Add the plugin
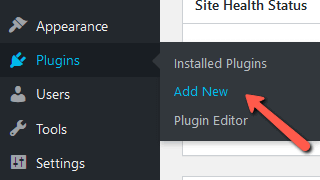
In order to install the plugin, you first need to go to the WordPress admin dashboard, hover over “Plugins”, and then click on “Add New” from the sub-menu that expands:
This will take you to the full list of plugins available for download. In order to easily find the “Classic Editor”, you can type its name in the search box:
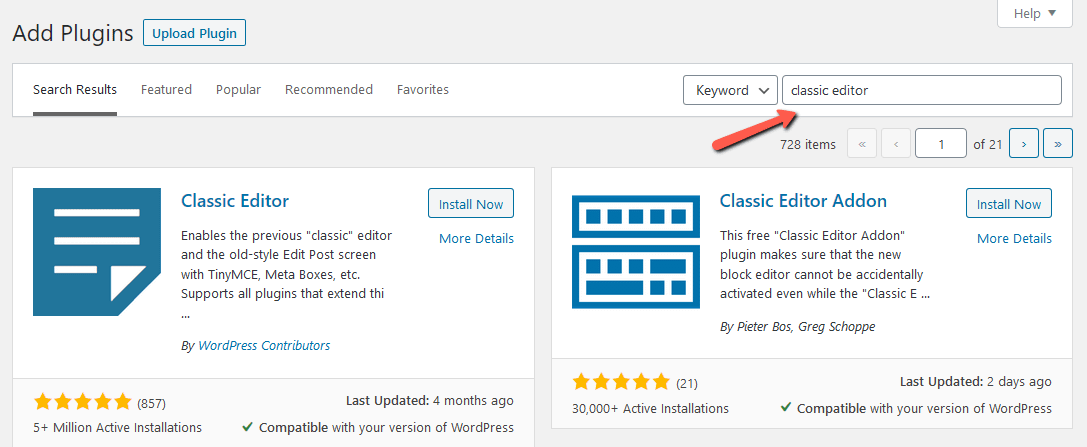
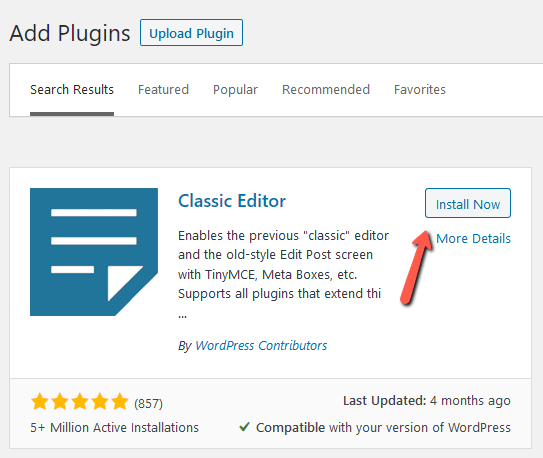
The plugin will be displayed automatically in the “Search Result” area, so the next step is to press “Install Now”:
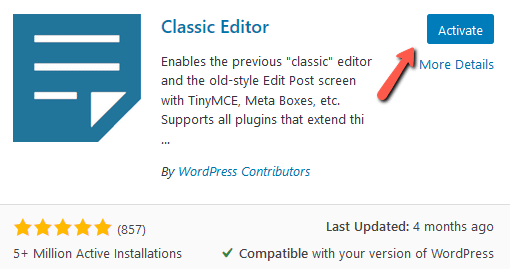
Once the installation is complete you will get a success notification and you can proceed with activating the plugin:
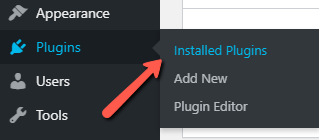
You can also activate the plugin from the “Installed Plugins” section in your WordPress admin dashboard. Just follow the same steps as you would do for the installation, but instead of clicking on “Add New” make sure to click on the “Installed Plugins” section:
In the new window that you will be taken to, look for the newly installed plugin and click on “Activate”:

After completing this, your plugin is installed, activated, and ready for use.
Delete the plugin
In case you want to delete the plugin, you will have to first go to your list of “Installed Plugins” available in the WordPress admin dashboard, look for “Classic Editor” and once located, click on “Deactivate”:
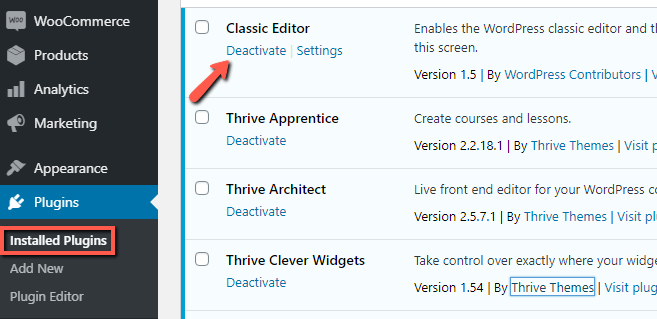
This action will deactivate the editor, but the plugin itself will still be listed amongst your already installed plugins. Should you want to remove it completely, just click on “Delete” and the plugin will be removed from the list:

Switch the editor
If you don’t want to use the “Classic Editor” on a daily basis as your default editor, you have the option of switching between editors and returning to it when needed.
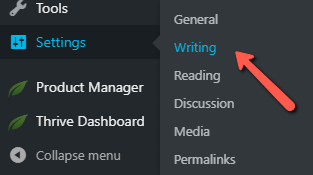
In the WordPress admin dashboard hover over “Settings” and click on “Writing” in the drop-down that expands:
Look for the setting that allows the user to switch between editors and make sure to enable it:
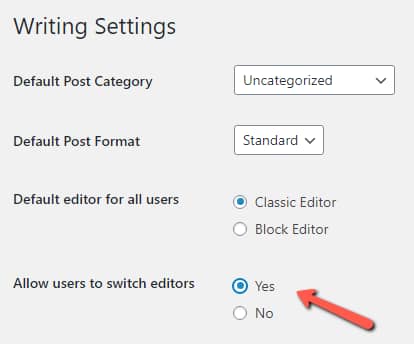
After doing this, you will notice that the next time you go to your post/page dashboard, you’ll have the option of choosing which editor to use:

In case you are already editing a post in the Block Editor, you have the possibility of switching to the Classic Editor without exiting the post. You just have to click on the ‘More tools & options” button in the right corner of the screen:

And then, in the menu that expands, make sure to select “Switch to Classic Editor”, and the change will be done from within the post you are editing:

This plugin is mostly recommended for those situations in which you have to use other plugins that are not compatible with the most recent version of WordPress.
Such would be the case of Thrive Headline Optimizer, for which we advise you to read the following articles about how you can test your post/page headlines and decide which is best suited for your website:
Hopefully, you found out everything you needed to know about how to install and use the “Classic Editor”. You can also check out other articles from our Knowledge Base archives here.
Don’t hesitate to leave us a smile below if this article was helpful for you!