Didn’t find an integration with the autoresponder you want to use? You can integrate Thrive Themes with many autoresponders like Mailchimp, Keap, Brevo, and more.
This article will show you how you can create an integration to a third party autoresponder with the Thrive Themes API Connections.
As an example, we will create the integration with the CleverReach API.
|
Note: All of the information written in this article can be found in GitHub as well, here. |
CleverReach Instructions
|
CleverReach Dashboard URL: https://eu2.cleverreach.com/admin/index.php |
Downloading and Installing the ‘3rd Party Autoresponder’ Plugin
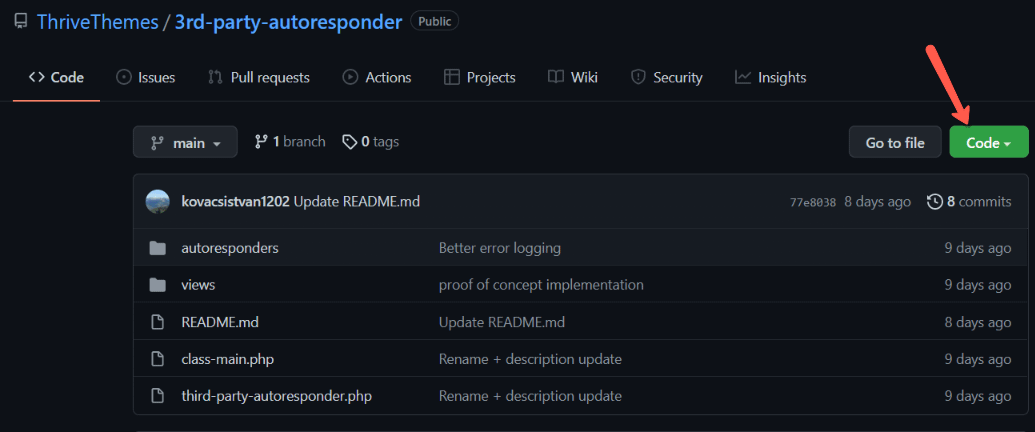
Firstly, you will need to download the plugin from GitHub. To do so, open this URL and click on the “Code” button:
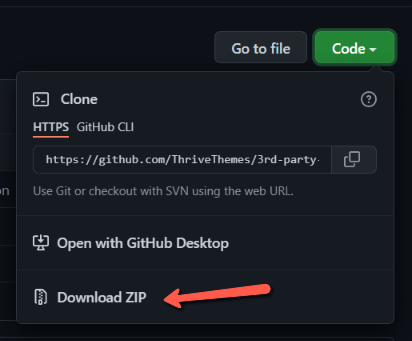
After you click Code, click on “Download ZIP“
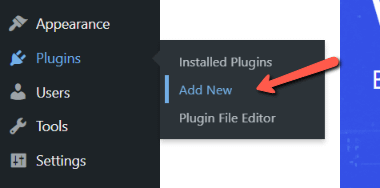
Once the file has been downloaded, access your WordPress admin dashboard and go to the “Plugins” section -> “Add new”:
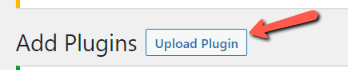
On the plugins add new page, click on “Upload Plugin”:
Next, click on “Choose file”:
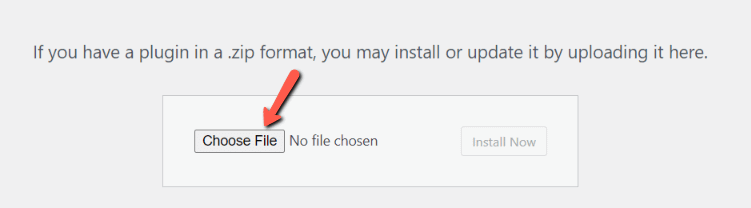
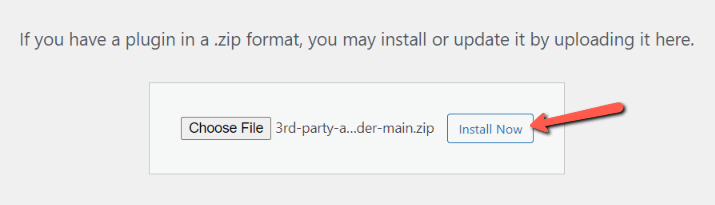
This will open a pop-up from where you will have to select the plugin downloaded from GitHub, and then click on “Install Now”:
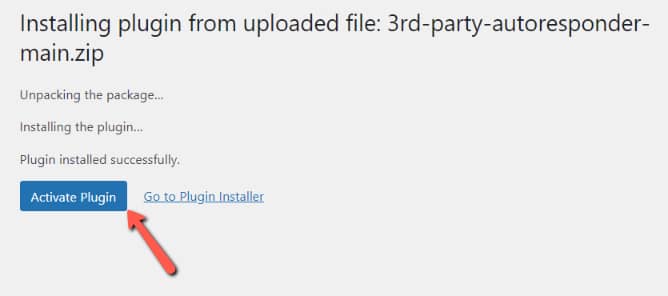
Once the plugin has been installed, go ahead and activate it:
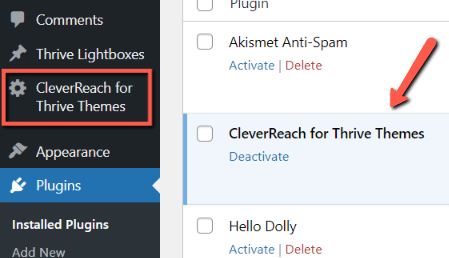
You will find the plugin in the “Plugins” list, as well as the left sidebar of the admin dashboard:
Then, to start with the actual integration and gain access to the API, we need to generate an access token with OAuth:
Create/use an OAuth App from here. Look for the Client ID and Secret keys.
Add the Client ID and Client Secret on the plugin page and click on “Connect” inside the Autoresponder dashboard found at
[your_site]/wp-admin/admin.php?page=thrive_third_party_autoresponder_section:
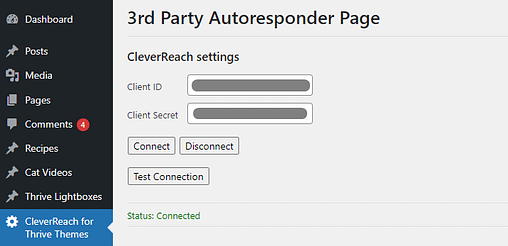
Note: the access token generated through this method lasts for one month, after which it has to be regenerated. There are code examples for how to refresh your access token and they can be found here.
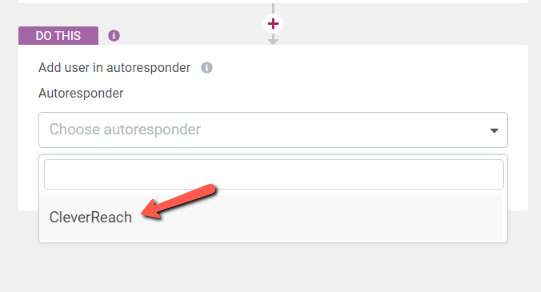
After this, CleverReach should be visible in the list of API Connection Autoresponders. For example, you’ll find it in Thrive Automator, under the autoresponders list of the “Add user in autoresponder” action:
Testing the Integration
→ Subscribing to mailing lists
In order to test it, you can add/use an existing mailing list from here.
Afterwards, you can:
add the mailing list to the “Lead Generation” element from Thrive Architect and check that submitting the form successfully adds subscribers;
create an “Add user in autoresponder” automation in Thrive Automator and verify that triggering the automation adds the subscribers;
→ Tags
Users can be tagged both through Thrive Architect and Thrive Automator, by:
adding tags to the “Lead Generation” element from Thrive Architect – this will attach the specified tags to the subscribing user;
starting an “Add user in autoresponder” automation from Thrive Automator.
starting a “Tag user in autoresponder” automation, after which triggering the automation adds the tag to the user. Please note that the user already has to be subscribed to the mailing list in order for this automation to work.
→ Custom Fields
CleverReach supports using Custom Fields. For a short guide on how to add them to your mailing lists, take a look here.
This integration currently supports inter-group (global) Text-type custom fields. They can be added to the “Lead Generation” element in Thrive Architect, and also as the Thrive Automator fields inside the automations.
Technical details
→ Resources
This plugin integrates with the CleverReach REST API. It was implemented relying on information provided at:
→ Implementation steps
In order to add an autoresponder, create a folder for it in the autoresponders folder, where you can include your own structure and implementation.
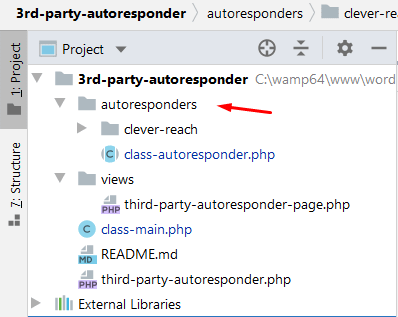
Make sure that the main class of your autoresponder extends class-autoresponder.php.
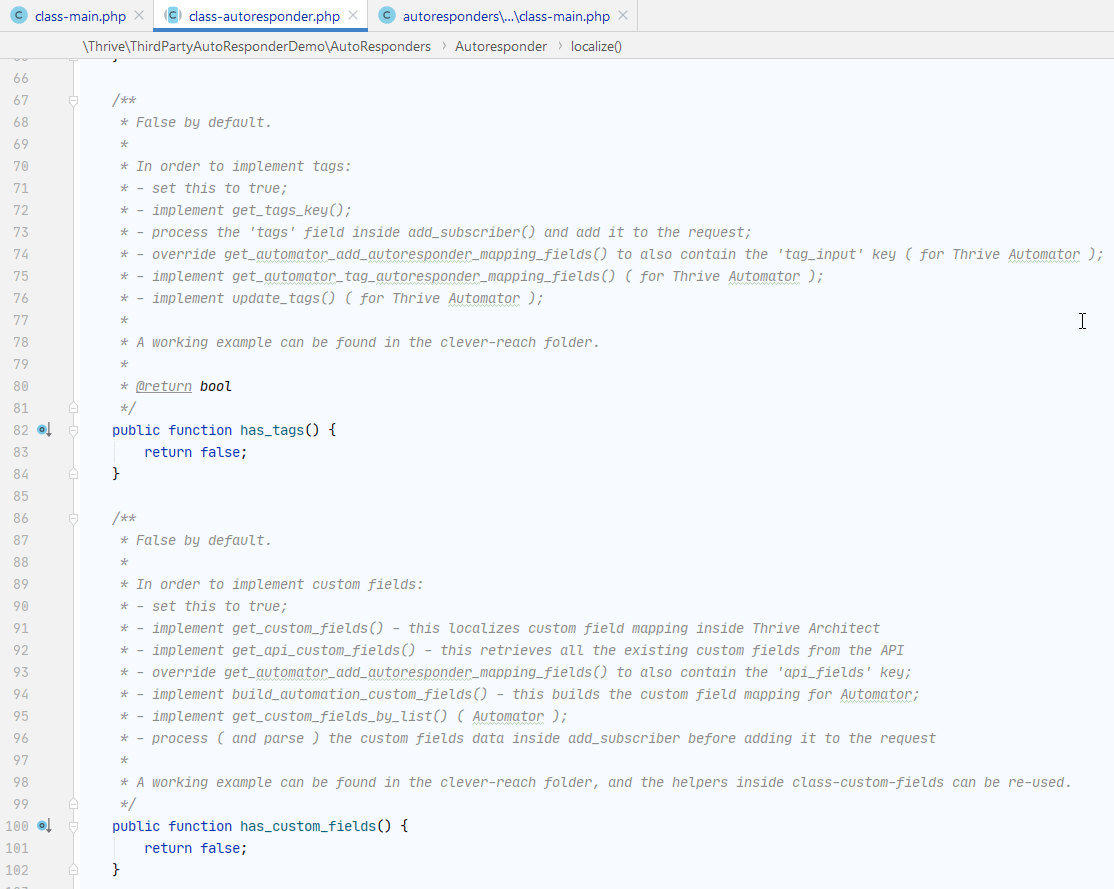
The class should implement the abstract methods listed in Autoresponder, along with additional methods depending on the features that you want to add to your autoresponder.
Tags and Custom Fields are disabled by default in the abstract class, and their function definition showcases the additional steps required to enable them:
For an Autoresponder class implementation example with all features enabled, see class-main.php from the clever-reach folder, along with the other helper classes.
The newly added autoresponder must be registered inside the init() function from ThriveThirdPartyAutoResponderDemoMain, like this:
static::register_autoresponder( 'clever-reach', 'ThriveThirdPartyAutoResponderDemoAutoRespondersCleverReachMain' );This adds the autoresponder to the API Connections lists from Thrive Dashboard, Thrive Automator and Thrive Architect.