Are you using Thrive Leads on your website and want to know what Lead Groups are and how they work? A Lead group is basically made of one or more types of opt-in forms that will be displayed automatically on your website, based on how you set them up.
These groups allow you to create and use multiple opt-in forms at the same time, on the same pages. With just a few clicks, you have the possibility to set the forms to appear in multiple places and you can also choose how often you want them to appear.
In this article, we’ll show you what Lead Groups are and how they work when set up well.
- Creating and Managing Lead Groups
- Understanding Lead Group Options
- Testing Opt-in Forms
- Organizing and Prioritizing Lead Groups
Creating and Managing Lead Groups
To be able to create a Lead Group, you need to ensure you have the Thrive Leads plugin installed on your website.
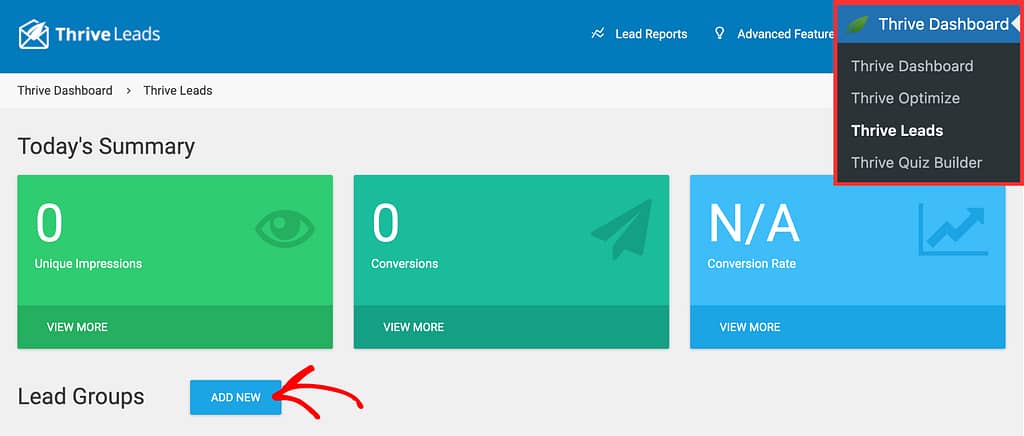
Once you’ve installed and activated the plugin, open your WordPress admin area, navigate to Thrive Dashboard >> Thrive Leads, beside Lead Groups, click the Add New button.

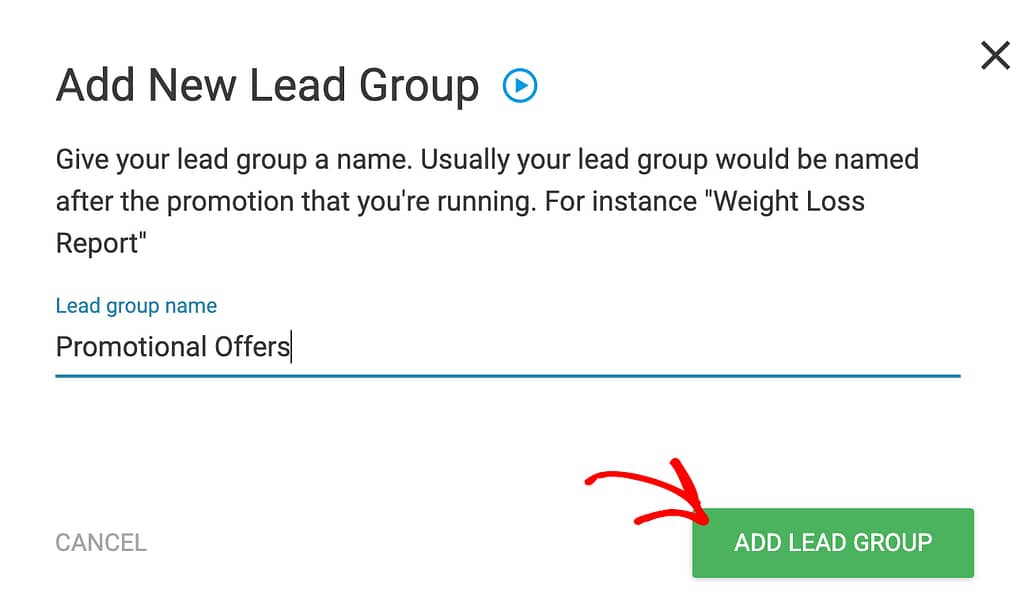
Clicking the Add New button will open a popup where you enter the Lead Group name and click the Add Lead Group button.

This will add a Lead Group into the Thrive Leads dashboard on your website.
Understanding Lead Group Options
After creating a Lead Group there are two things you will need to set up for it.
Adding Opt-in Forms in a Lead Group
A Lead Group allows you to create and use multiple opt-in forms at the same time, on the same pages.
To create an opt-in form expand the Lead Group and click the Add New Type of Opt-in Form button.

After clicking the button, you’ll see a popup to select an opt-in form type you want to create. You can create any of the following opt-in form types in a lead group.
- In content
- Lightbox
- Post footer
- Ribbon
- Screen filler lightbox
- Scroll mat
- Slide in
- Widget
- PHP Insert
To know more about form types, read our document here.
Once you have added the types of opt-in forms that you want in the Lead Group, you will have to add the actual forms/content to these by clicking on the Add button that is next to them, on the right part of the page.

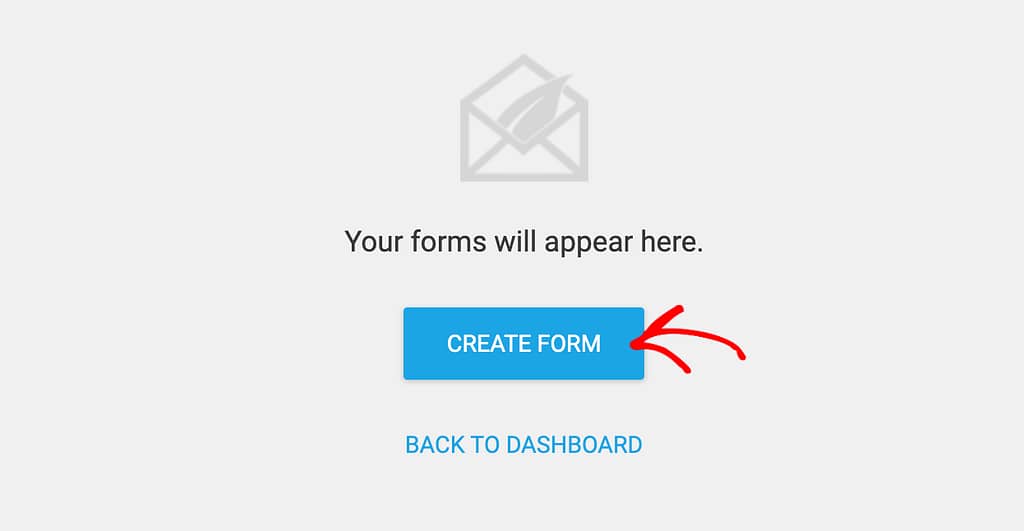
Clicking on this button will open a new page, dedicated to that opt-in type. Click on the Create Form button and follow the steps given to create and set up your opt-in form.

Using Lead Group Settings
After you have added and customized your opt-in forms, you can go back to the Thrive Leads Dashboard >> Lead Group section and use the setting options to manage your groups.

The Leads Groups settings section lets you manage 3 things.
- The arrow: You can use this arrow to open or close the Lead Group details.
- Gear icon: You can use this to set the targeting options for your Lead Group. Using these settings for each Lead Group you create means that you can specifically determine which Lead Group to be shown and when. Learn more here.
- Trash icon: You can delete a Lead Group if you don’t need it anymore.
Testing Opt-in Forms
Lead groups have another major advantage: You can test different types of opt-in forms against each other and see which one performs best or is the most preferred one by your visitors.
To do this, you need to have at least two types of opt-ins. Once you have created them, you’ll see a button that says Test Types of Form Against Each Other.
To test the created forms under a Lead Group click the button.

After you click the button you’ll see a popup where you can set the test. To know more on how you can do this effectively, refer to our document here.
Organizing and Prioritizing Lead Groups
If you have more lead groups it is advisable to prioritize them in your list. In the Lead Group section of the Thrive Leads dashboard, you will see two icons on the left of each Lead Group’s name.

Using the first icon, you can drag and drop the lead groups to change the order and their place on the list. This order will also represent their priority.
This means that if you have lead groups that have overlapping display set-ups/rules, then, the one with a higher priority (higher in the list) will be shown and the other one will be ignored. This will prevent for example two different lightboxes from opening on the same page, at the same time.
Need help understanding the priority of opt-in forms on your website? Read our document here.
Next, did you know you can use shortcodes to display Thrive Leads forms too? Read or document that will help you understand the difference between Shortcodes and Lead Groups.