This article will show you a simple way in which you can keep an eye on the comments that are posted in your online course (created with Thrive Apprentice).
In this tutorial, I will mention two Thrive Suite products:
Thrive Apprentice is where you will build your online course (if you haven’t already) and Thrive Automator is the tool with the help of which we can create automations.
Here’s how to create an automation that sends a notification on a Slack channel each time someone leaves a comment on your course lessons:
Set up the Slack connection
Since we are using a Slack action in our automation, you should make sure that you have integrated Slack on your site.
That can be quickly done in a few seconds. Here’s an in-depth article on how to install Slack through API:
Installing Slack via API will provide a new set of triggers and actions in the Thrive Automator dashboard that you can start using immediately.
Set up and publish your course/lessons
Naturally, for this automation to make sense, you will have to take care of creating and publishing your courses and lessons. Here are some help articles that might come in handy:
- Thrive Apprentice Introduction
- How to Create Your First Thrive Apprentice Course
- How to Create and Publish a Thrive Apprentice Lesson
- Thrive Apprentice Section (Knowledge Base)
Set up the Thrive Automator automation
It’s time to set up the automation in Thrive Automator, and here’s how:
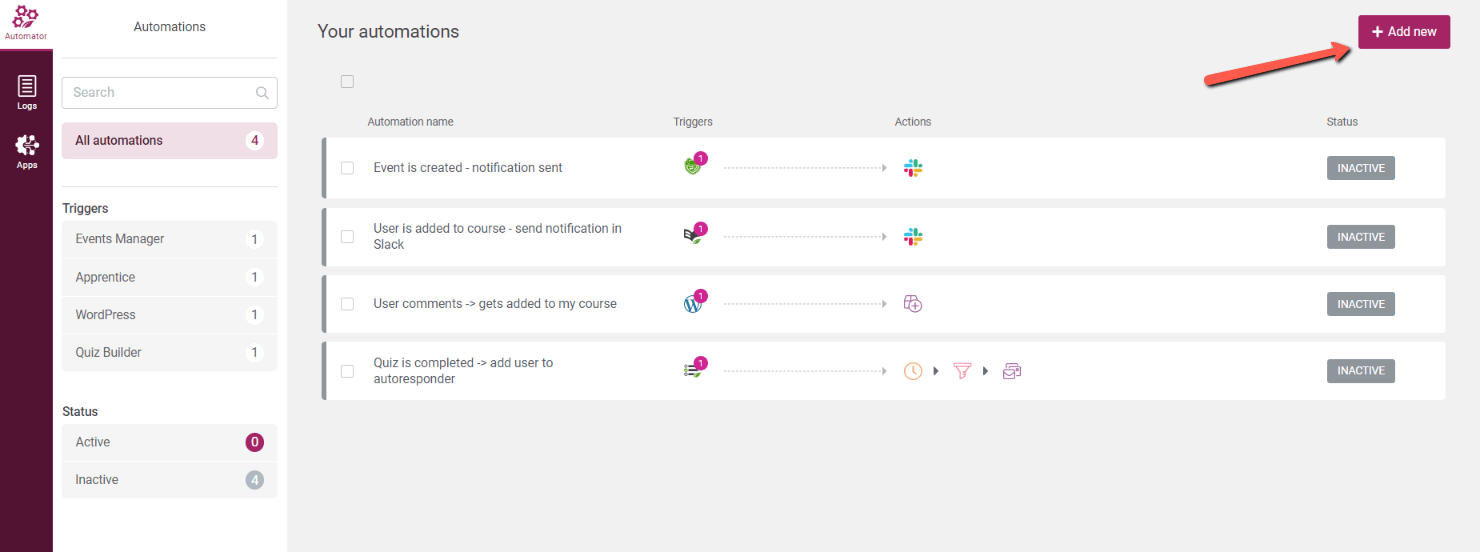
Firstly, access your Thrive Automator dashboard and create a new automation, by clicking on “Add new” here:
Once the automation canvas opens, you can start setting up the automation:
Choose a start trigger
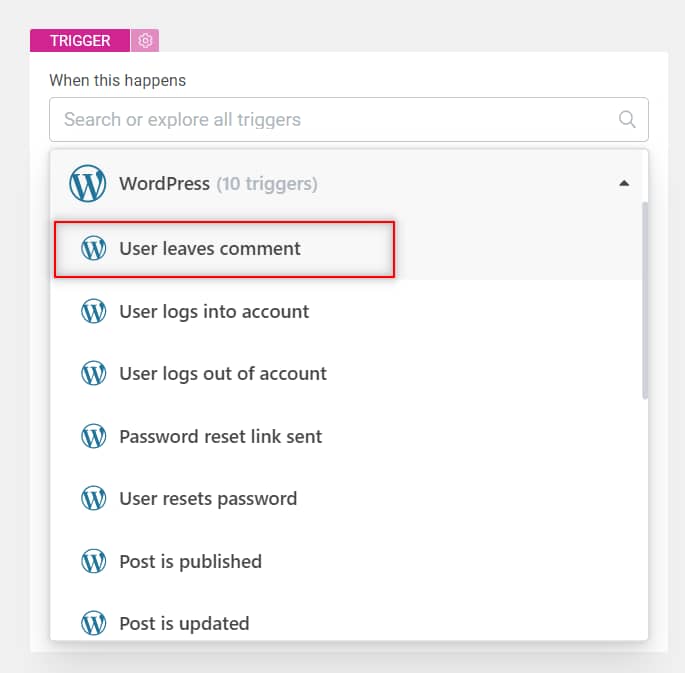
You can start by naming your automation (in the top left section) and choosing the start trigger. In this case, our start trigger can be found in the “WordPress” trigger category:

From the list of available triggers, choose the “User leaves comment” one:
By default, the trigger is set to “Always trigger”, meaning that the automation starts whenever a user leaves a comment anywhere on your site. As mentioned at the beginning of this article, we want the notification to be sent when someone comments on a lesson from a course. That can be set up by adding some conditions here:
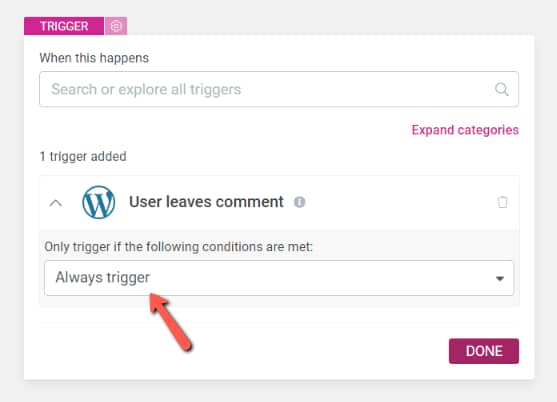
Clicking the “Always trigger” field will open a list with some conditions. What you choose here depends on how you want to set up the automation, and you have to decide if:
- the automation should start only if comments are left on a specific lesson
- the automation should start only if comments are left on one out of several lessons
For both outcomes, you can use the “Comment Post ID” condition:
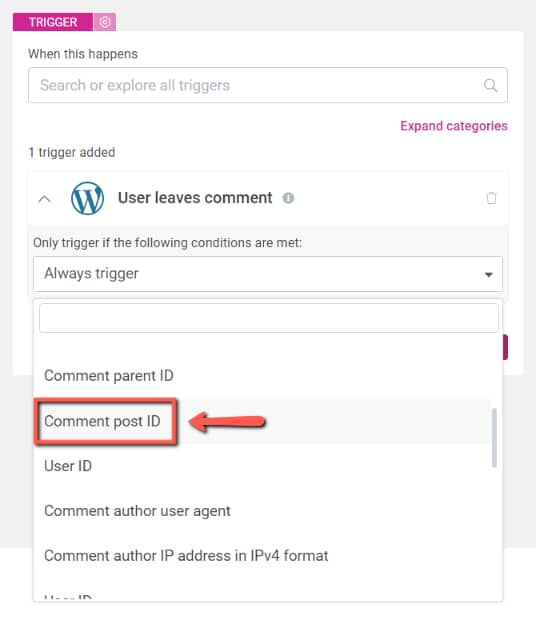
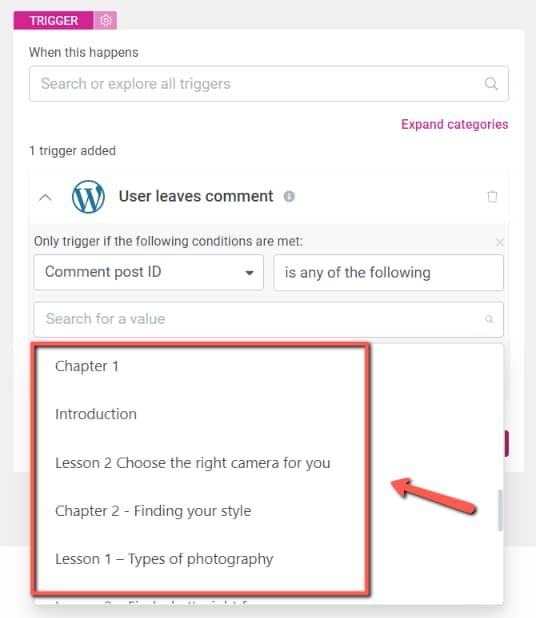
If you want the automation should start only if comments are left on a specific lesson, insert the ID of the lesson or choose it from this field:
|
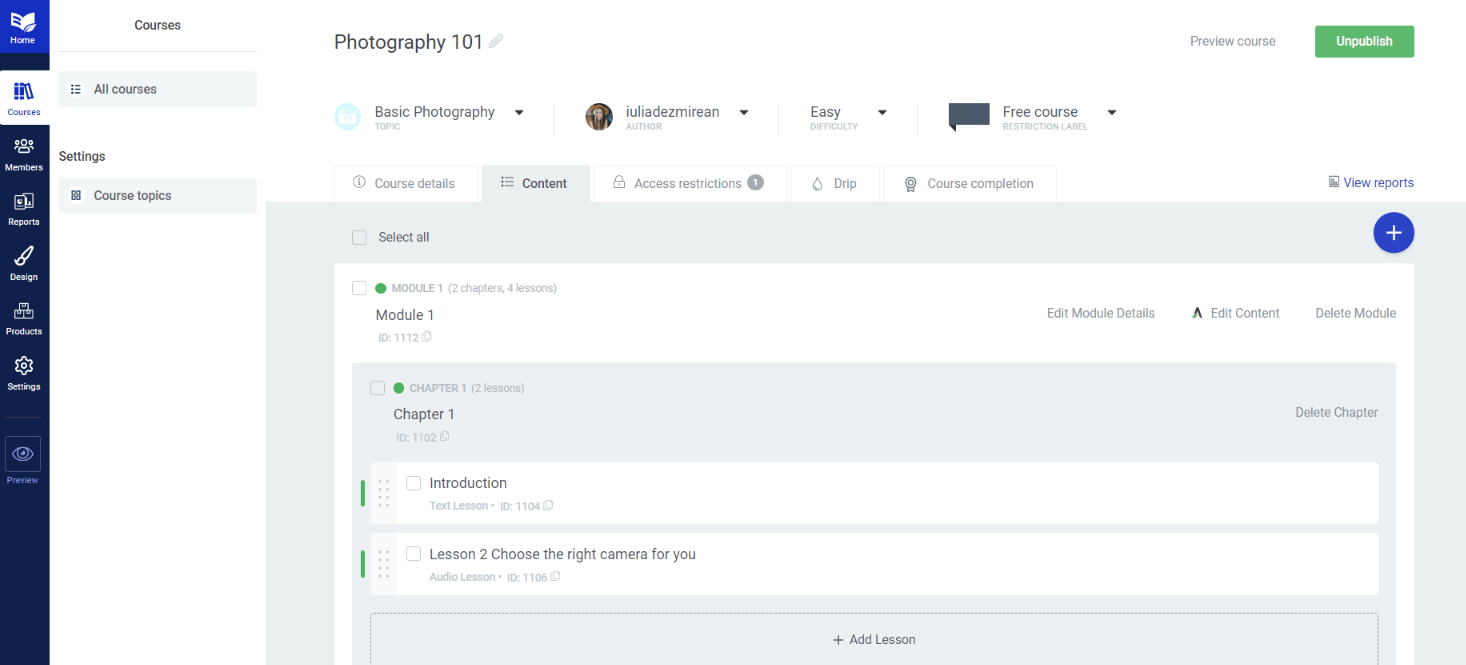
Tip! The ID of each lesson can be found by accessing your Thrive Apprentice course and accessing the “Content” tab: 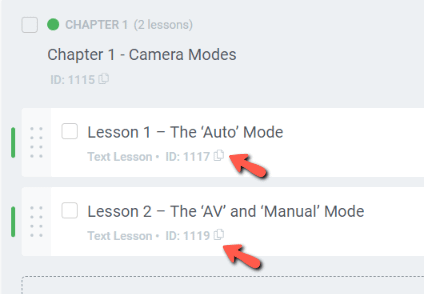 |
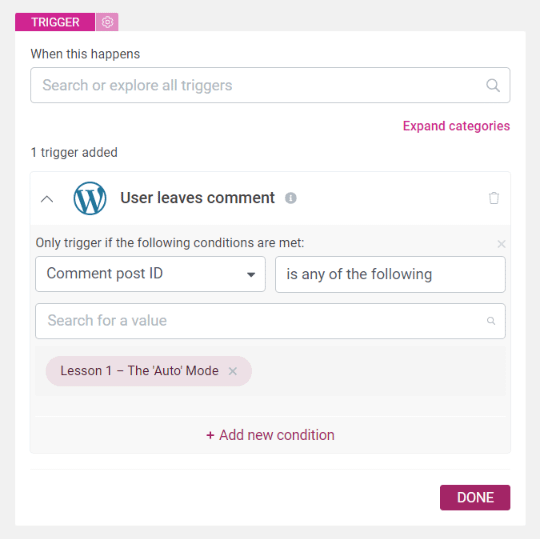
Setting up the condition as in the image below means that if a user leaves a comment on the “Lesson 1 – The ‘Auto’ Mode” lesson, the automation starts:
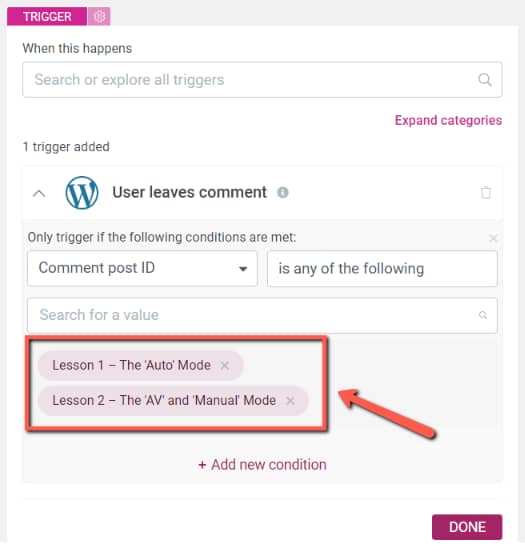
If you want the automation should start only if comments are left on one out of several lessons, all you have to do is enter the IDs of all the desired lessons, or quickly choose them from the dropdown:
Click on “Done” to save the start trigger.
Choose the action
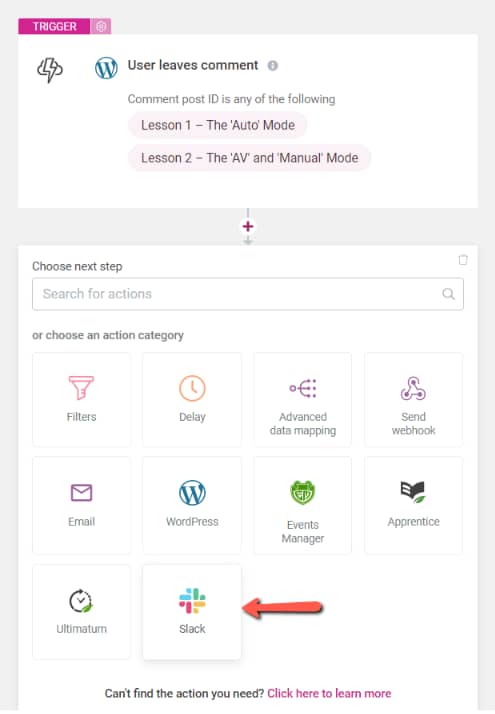
The next part is setting up the right action. In our case, we have to choose the “Slack” action category:
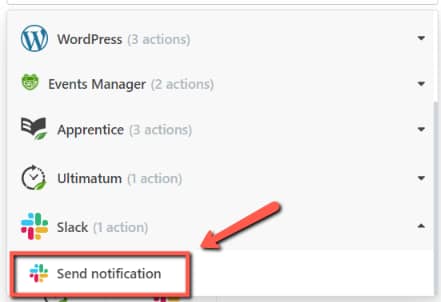
Choose the “Send notification” action from the list:
You will then have to set up the action, as shown here:
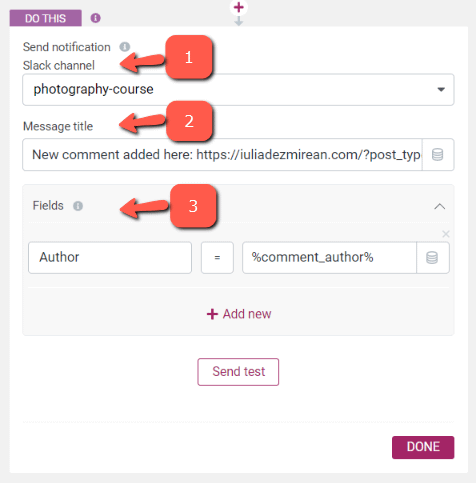
- 1 – Choose the Slack channel where the notification will be sent;
- 2 – Choose a title for the notification
Here, I have used the following title:
New comment added here: https://mysite.com/?post_type=tva_lesson&p=%comment_post_ID%
I’ve added a direct URL that will be posted in the notification message so that anyone can easily access the lesson where the comment was posted.
The way the URL is constructed is by combining static text with dynamic text.
The static part of the message is everything that would not change, in this case the bold part. (just make sure you replace “mysite.com” with your actual domain)
The last part of this message is the dynamic part (as indicated by the “%” signs).
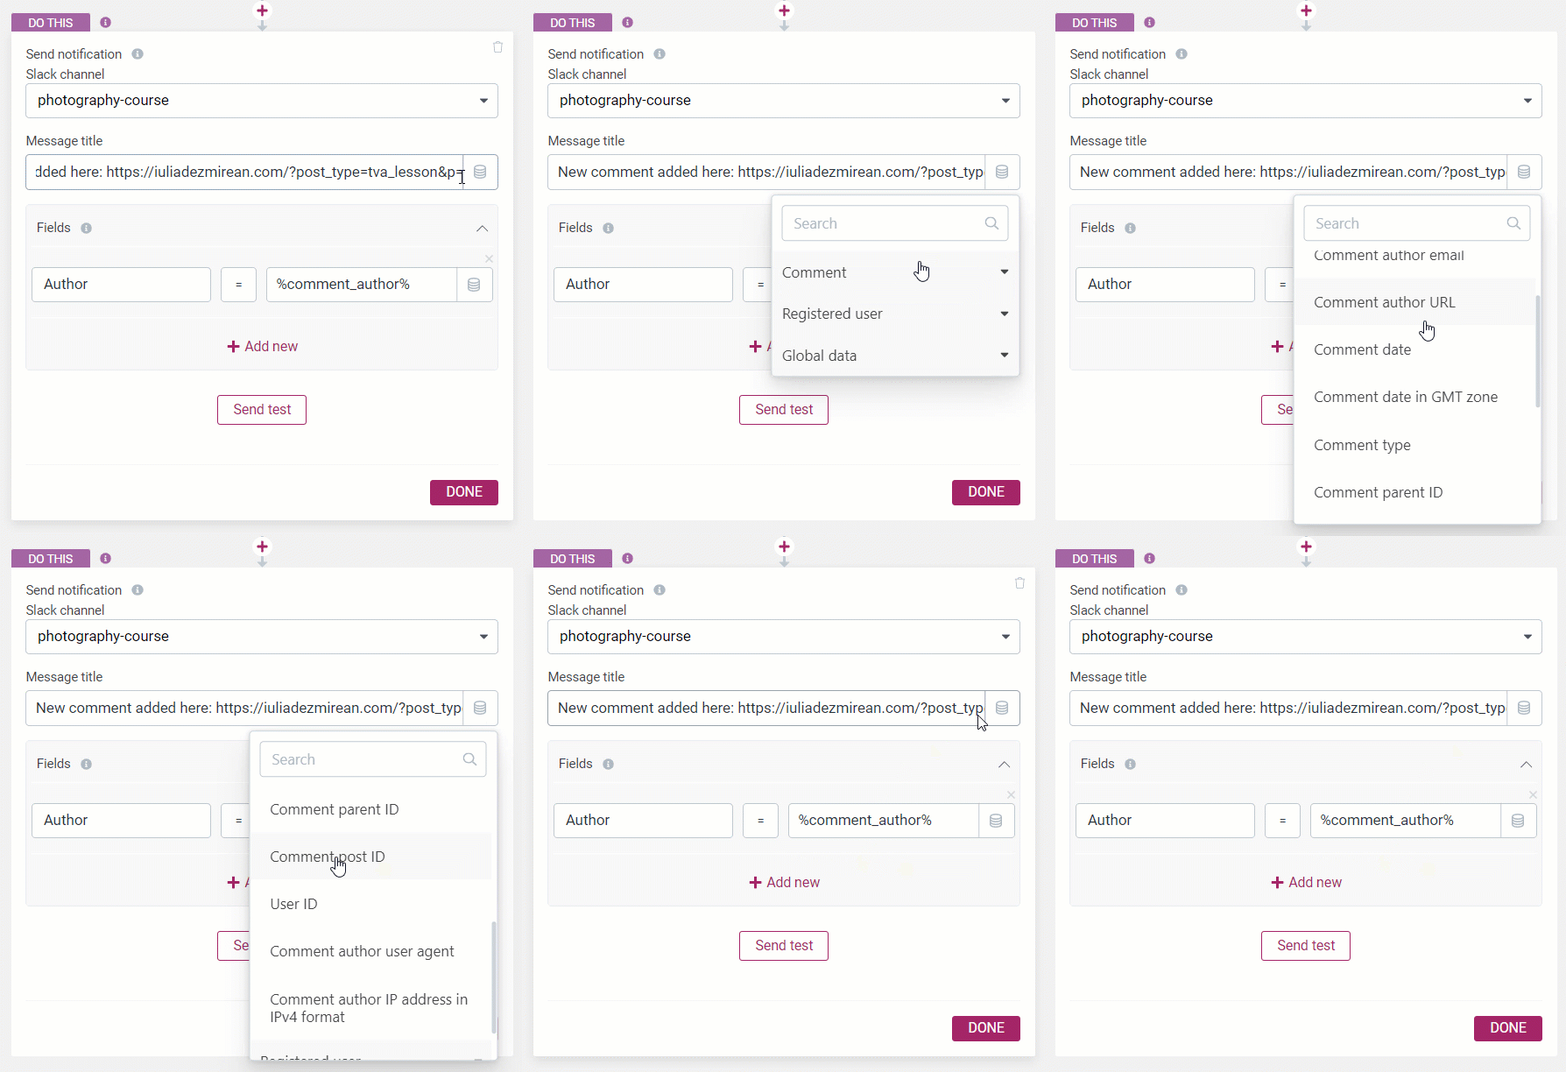
You can easily add this by placing your cursor at the end of the static text, clicking the stack of coins, and choosing “Comment Post ID” from the available comments data:
- 3 – Additionally, fields can be sent through the notification:
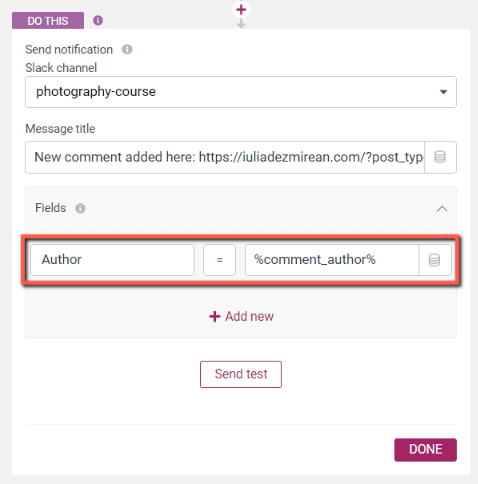
You can send a test notification to see if everything works as expected.

Save and activate the automation
You’re all set and, as a final step, you will simply have to activate and save your automation:
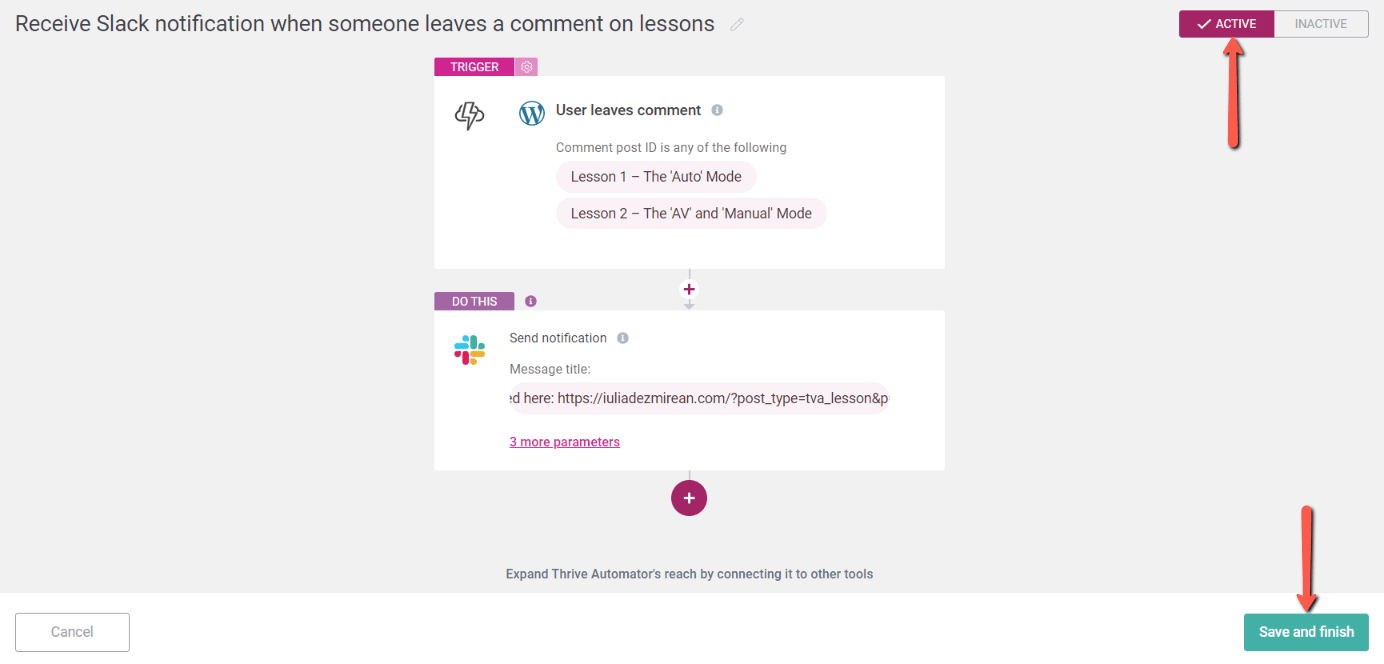
And that’s all! This is how you can notify a Slack channel that one or more of your lessons have received a comment.
If you need more information on Thrive Automator or any other Thrive Suite products, make sure you check out our knowledge base.