This article will show you how you can create a Thrive Automator setup that will automatically send a “Thank you” email to the users that purchase one of your Thrive Apprentice products.
If you’re not sure about what products are and how you can bundle courses or various content from your site and sell it as a product, make sure to check out this knowledge base section.
And you can find out more about Thrive Automator and all of its features by reading the articles found here.
This article will strictly go through the steps needed to achieve this scenario: a visitor purchases a product you’ve created in Thrive Apprentice, in order to get access to one of your courses. Once they do that, they receive access to the product and they also get a “Thank you” email.
For this example, we will need to use an autoresponder that will send the email. As an example, I will use ActiveCampaign, but please remember that you can use any service that you have created the connection to from the Thrive Dashboard.
Here’s our list of supported autoresponders and the corresponding tutorials.
|
To achieve this, you would have to follow these steps:
|
If you want to create such an automation, using Thrive Apprentice, Thrive Automator and ActiveCampaign, follow the steps presented in this article:
I’ve chosen to sell the product through ThriveCart, and here are the tutorials on how to do that, in case you’re also planning on using this setup:
Let’s get started with the automation!
Set up the product in Thrive Apprentice
In Thrive Apprentice, you will have to, of course, create, design and publish your course. We’re starting from the premise that you have already taken all the necessary steps in order to have a fully set up course.
Please check out the tutorials from our knowledge base in case you need help getting to this step.
In order to protect any course, you’ll have to add it inside a product. Since this example shows how you can send an email to a student after they’ve purchased a course (the setup is made via ThriveCart), this means that we’ll have to add the course into one of our products:

Note: Creating a product means that you can sell more than one course – you can add multiple courses to a product, or even other content types (pages/posts/custom content types).
Then, when creating the setup in ThriveCart, I’ve chosen this product from the list:

And this means that, when making the purchase, the students will get access to the product, which in my case consists of two pages and one course.
Once the product is ready and the purchase process is all set up, you can access Thrive Automator and start creating the automation.
Create the automation in Thrive Automator
First of all, access the Thrive Automator dashboard and click on the “Add New” button, to add a new automation:

Please see this article if you need more information about the process.
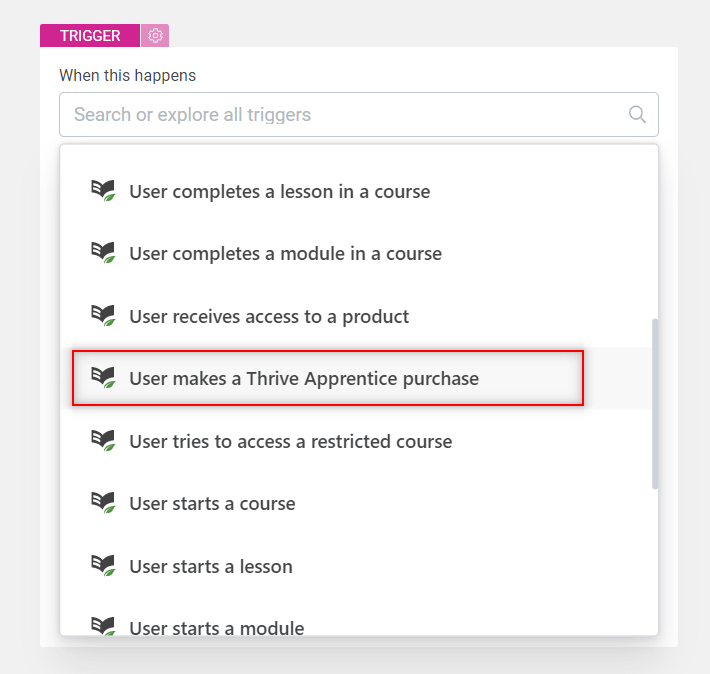
Start trigger – User makes a Thrive Apprentice purchase
The event that should start this automation is the “User makes a Thrive Apprentice purchase” one:
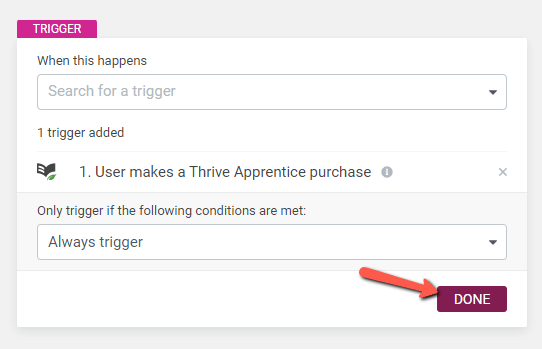
Optionally, you can set up the automation to be triggered only if certain conditions are met. Click on “Done” when finished:
Action – Add user to autoresponder
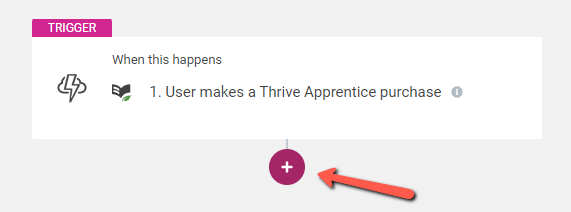
Next, click on the plus sign to add a new action:
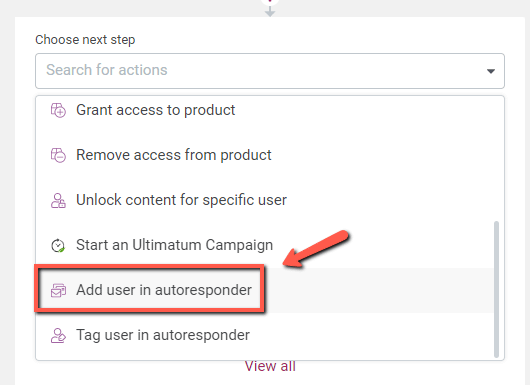
Choose the “Add user in autoresponder” action:
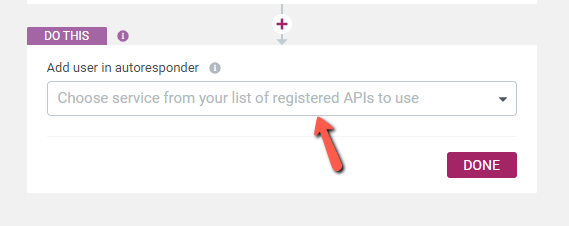
You will be asked to choose the mailing service of your choice. Click on this field, to open the list of available integrations, that you have previously set up in the Thrive Dashboard:
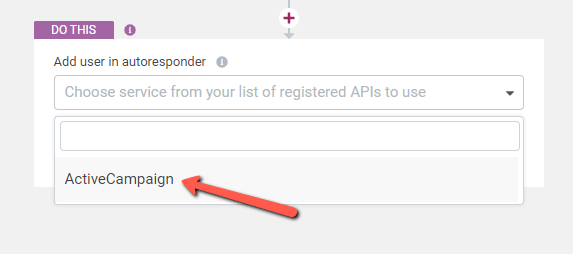
For this example, I will use ActiveCampaign:
Then, set up the autoresponder:
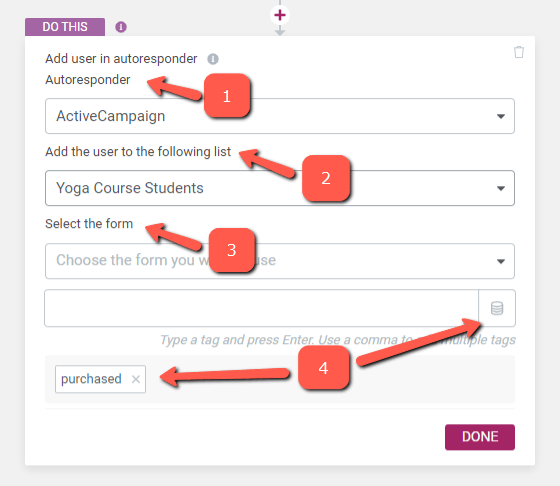
After choosing the service (1), you will have to select the mailing list (2) to which you want the user to be added, the form (3), as well as the tag(s) that should be assigned to them (4).
You’re also able to send dynamic information to the autoresponder, as tags – for example, you can also send the username/email etc. of the person that has filled in the form, and the information will be received as a tag in the autoresponder. Click on “Done” after inserting them:

|
Note: Adding a tag is important in this case because this is what will start our automation from ActiveCampaign. Of course, you can set everything up as you wish, but in this particular example, we will need to associate a tag to each user. |
This automation from Thrive Automator is ready, you can click on “Save and finish” from the bottom right corner of the canvas:
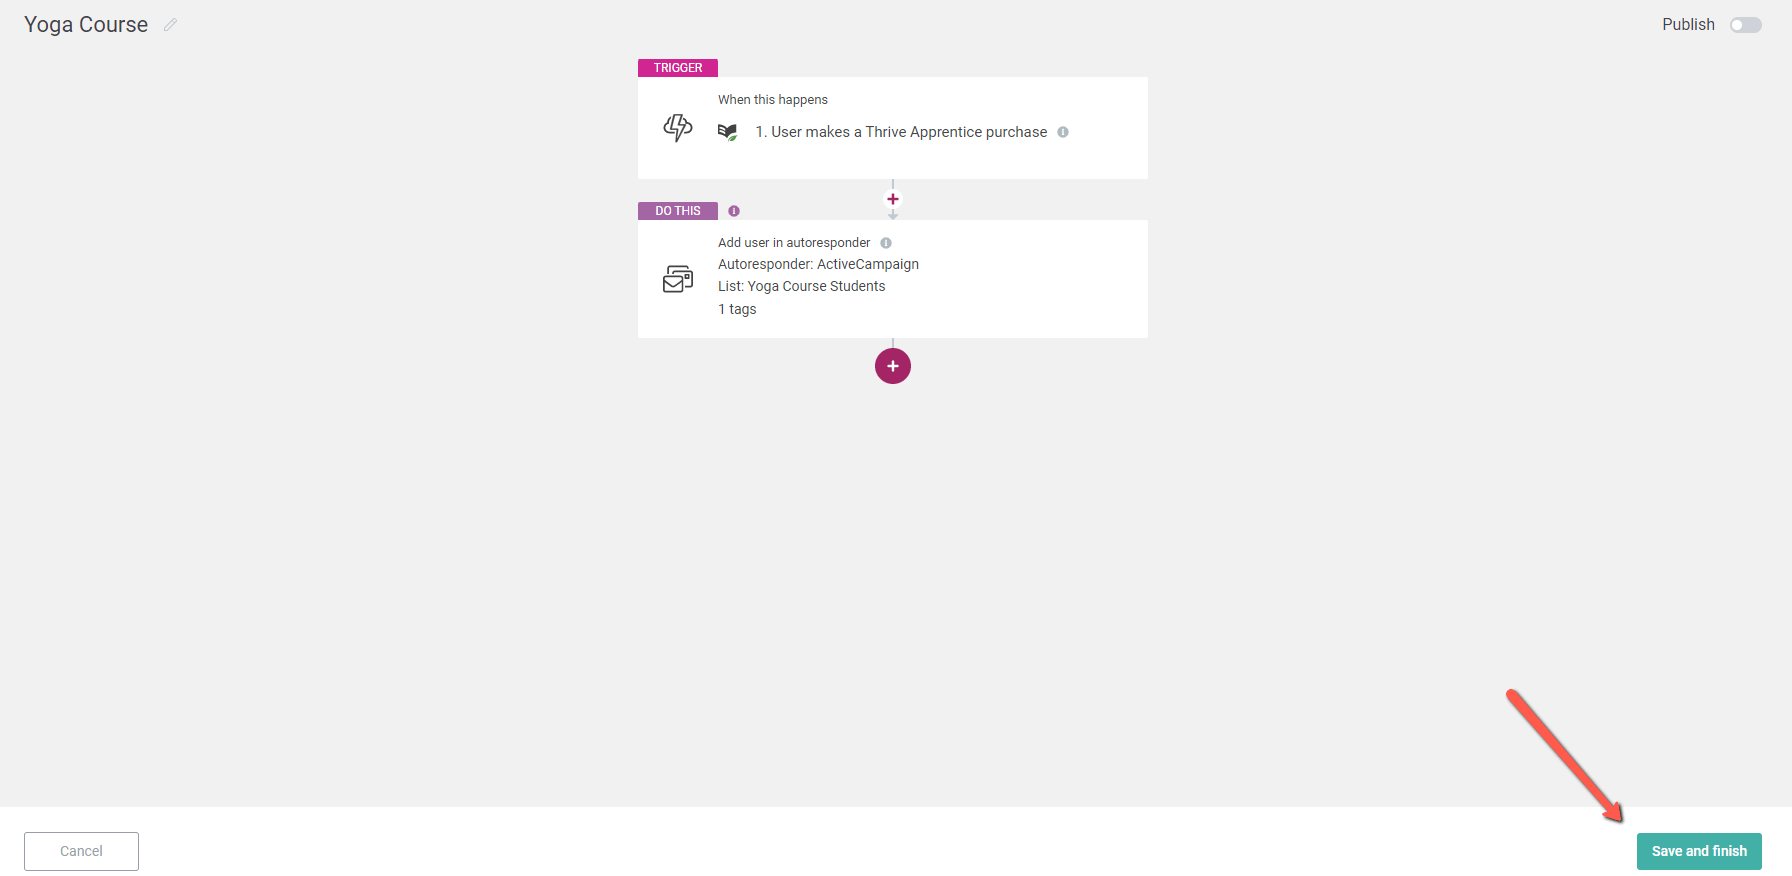
And, if you haven’t yet, go ahead and publish the automation:

Right now, each time someone successfully purchases your Thrive Apprentice product, they will be added to the mailing list of your choice, with a tag associated with it.
You can now go ahead and create the setup in the autoresponder, in order to send each user associated with that tag an email, which can also be set up in ActiveCampaign.
Create the automation in ActiveCampaign
As mentioned earlier, I will be using ActiveCampaign as an example, but please keep in mind that the setup might be different when using other services.
Create a new automation
The new automation starts whenever the tag chosen in Thrive Automator is added to a contact, and that will send out a new email to that contact. This will be our “Thank You” email.
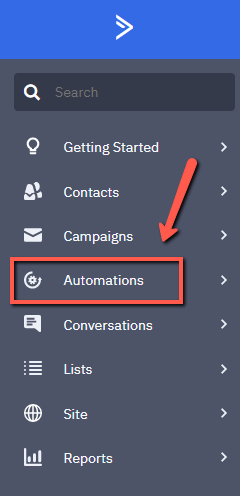
To do that, once you access the ActiveCampaign dashboard and log in, go to the “Automations” section of the left sidebar:
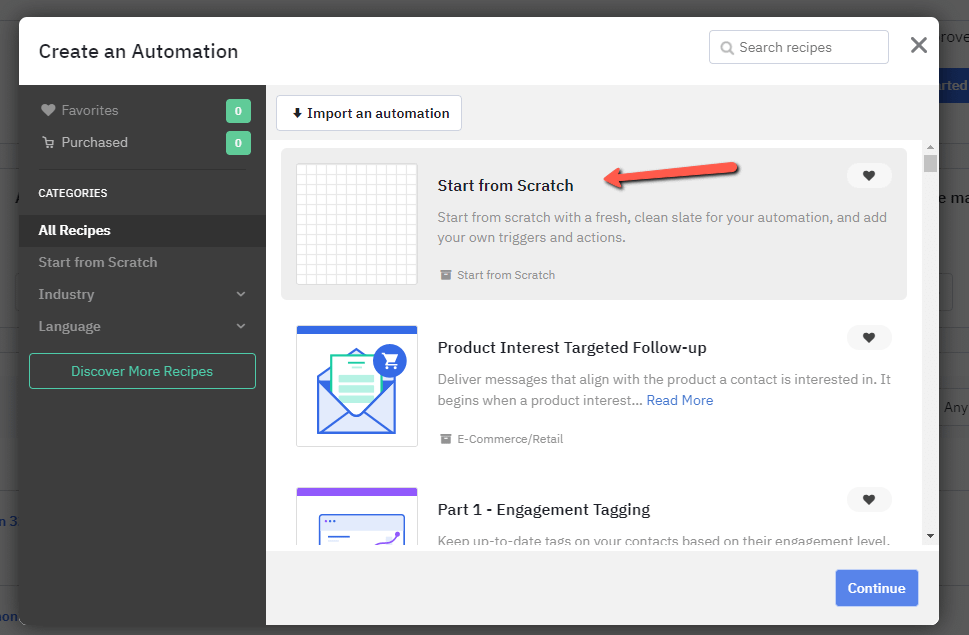
Click on “Create an automation” from the top right corner of the automations dashboard:

A pop-up opens, and you can choose the “Start from scratch” option”:
Once the canvas opens, you will have to choose the start trigger for the automation:
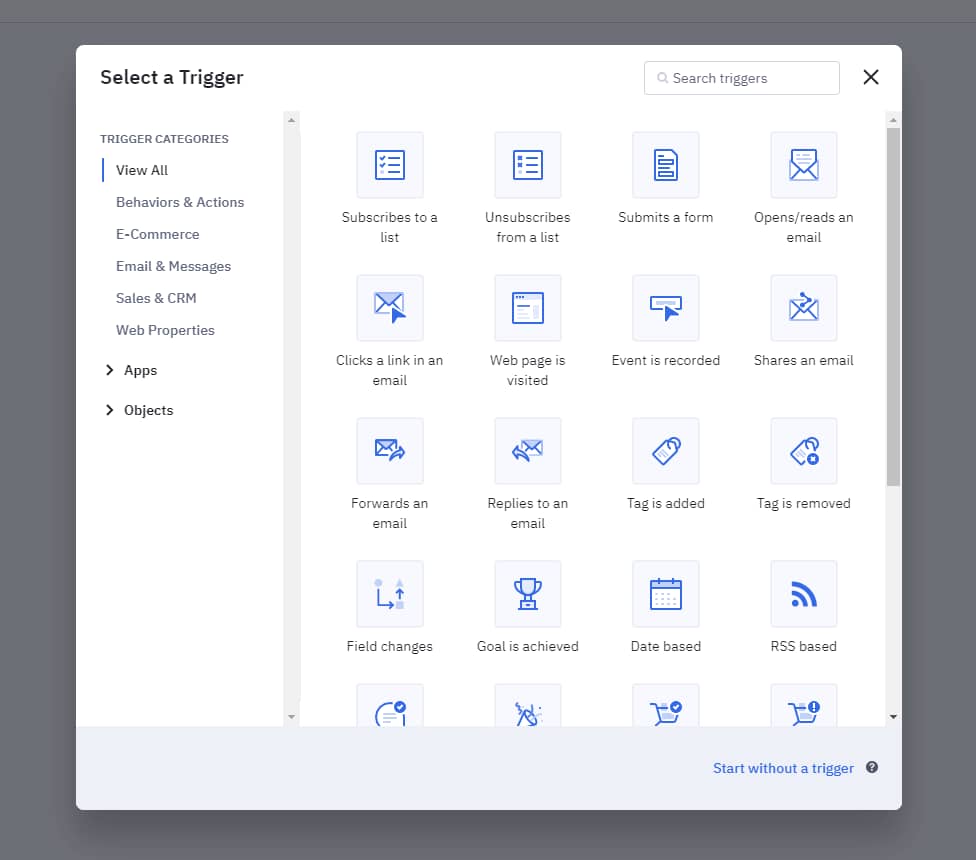
Start Trigger – Tag is added
Of course, there are multiple ways in which you can set up the automation, but, for this example, I will go for the “Tag is added” start trigger:
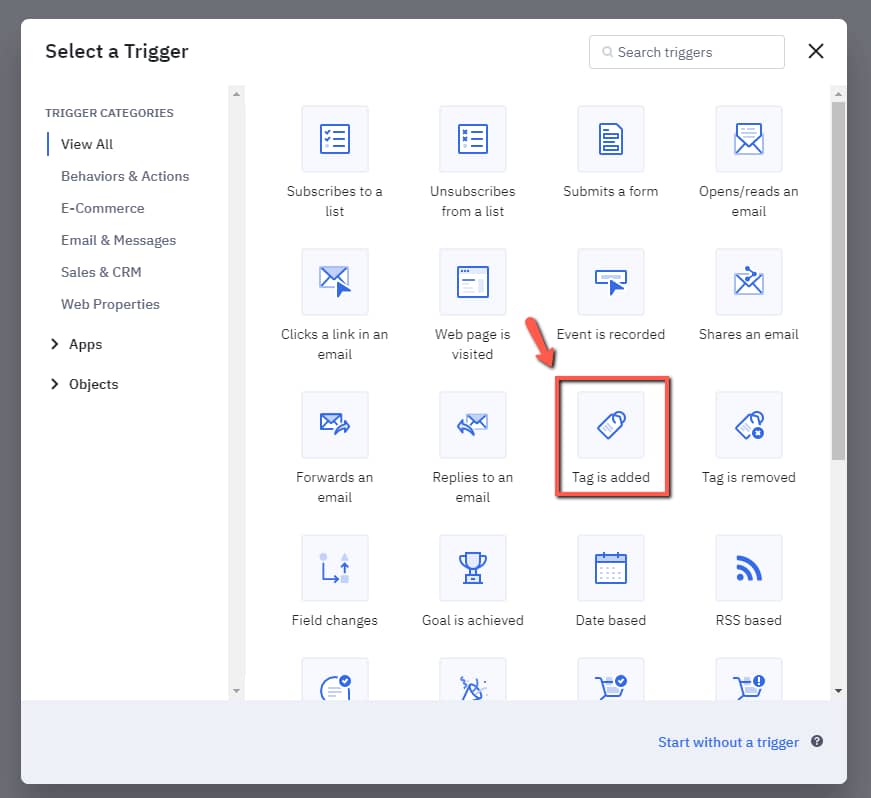
I will insert the same tag as the one added in Thrive Automator, when creating the automation:
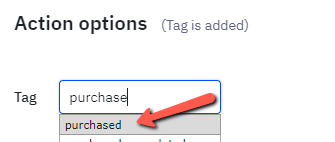
|
Note: Make sure you’ve also added the tag to ActiveCampaign from the “Contacts” -> “Manage Tags” section: 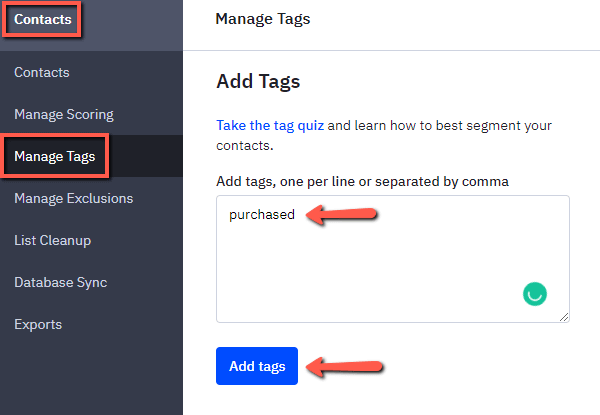 |
Then, click on “Add Start”:
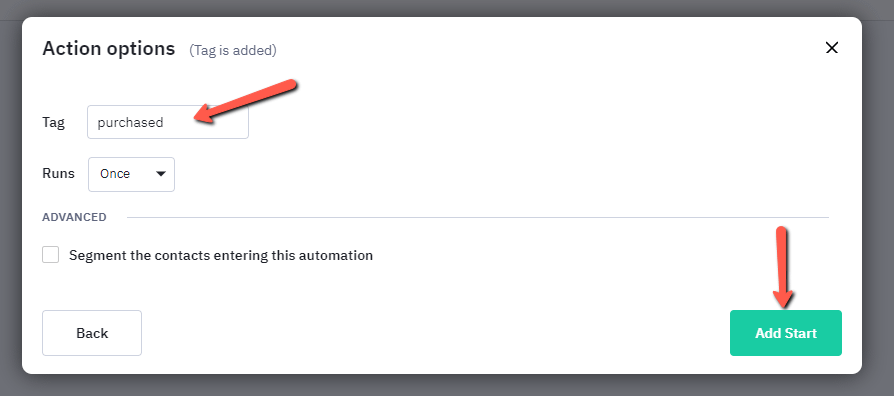
The step that comes next is to choose the action to be taken when the start trigger event occurs. A pop-up opens, to help you quickly choose the action:
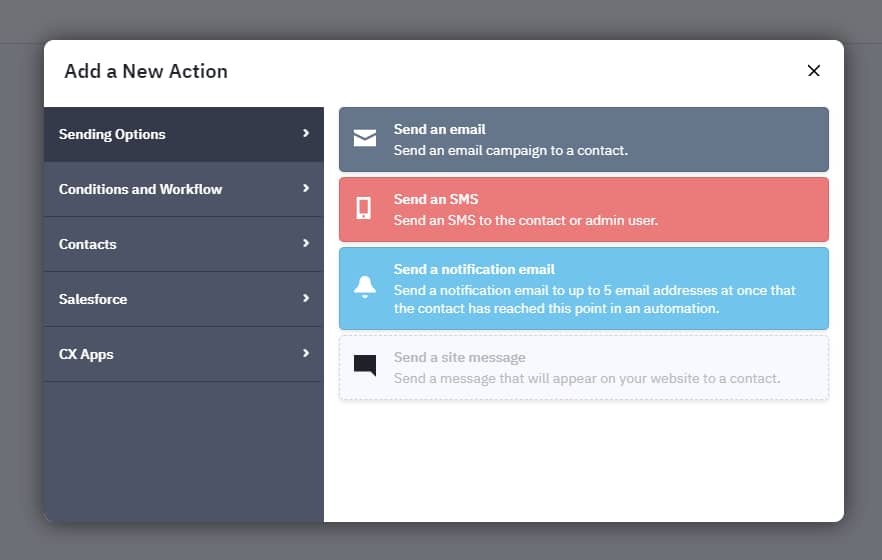
Action – Send an email
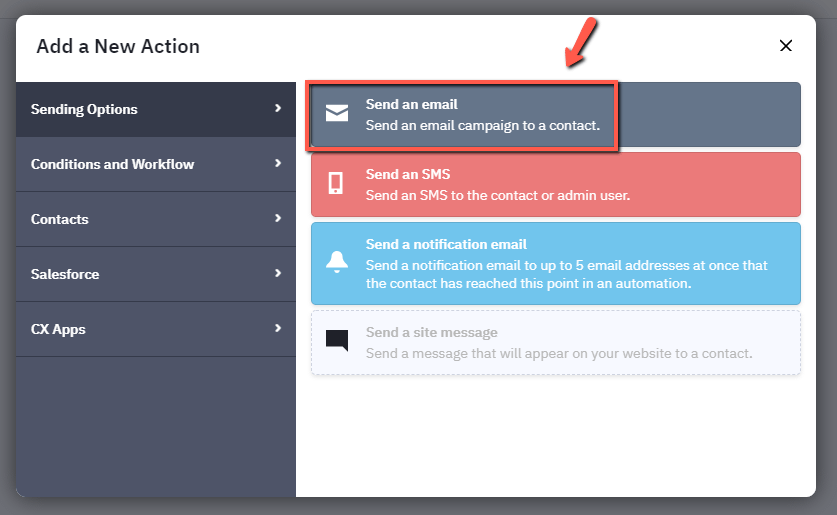
In order to continue setting up the scenario presented at the beginning of this article, the action that is chosen here is the “Send an email” one:
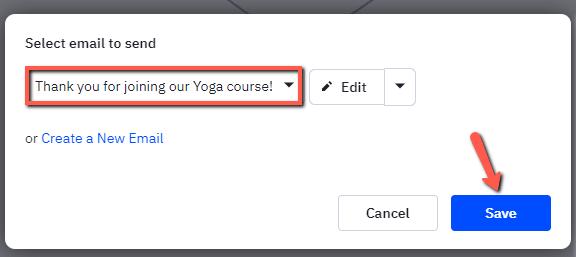
And then, you will have to choose the email that will be sent:
The ActiveCampaign automation should look like this:

Make sure you set it to “Active”:

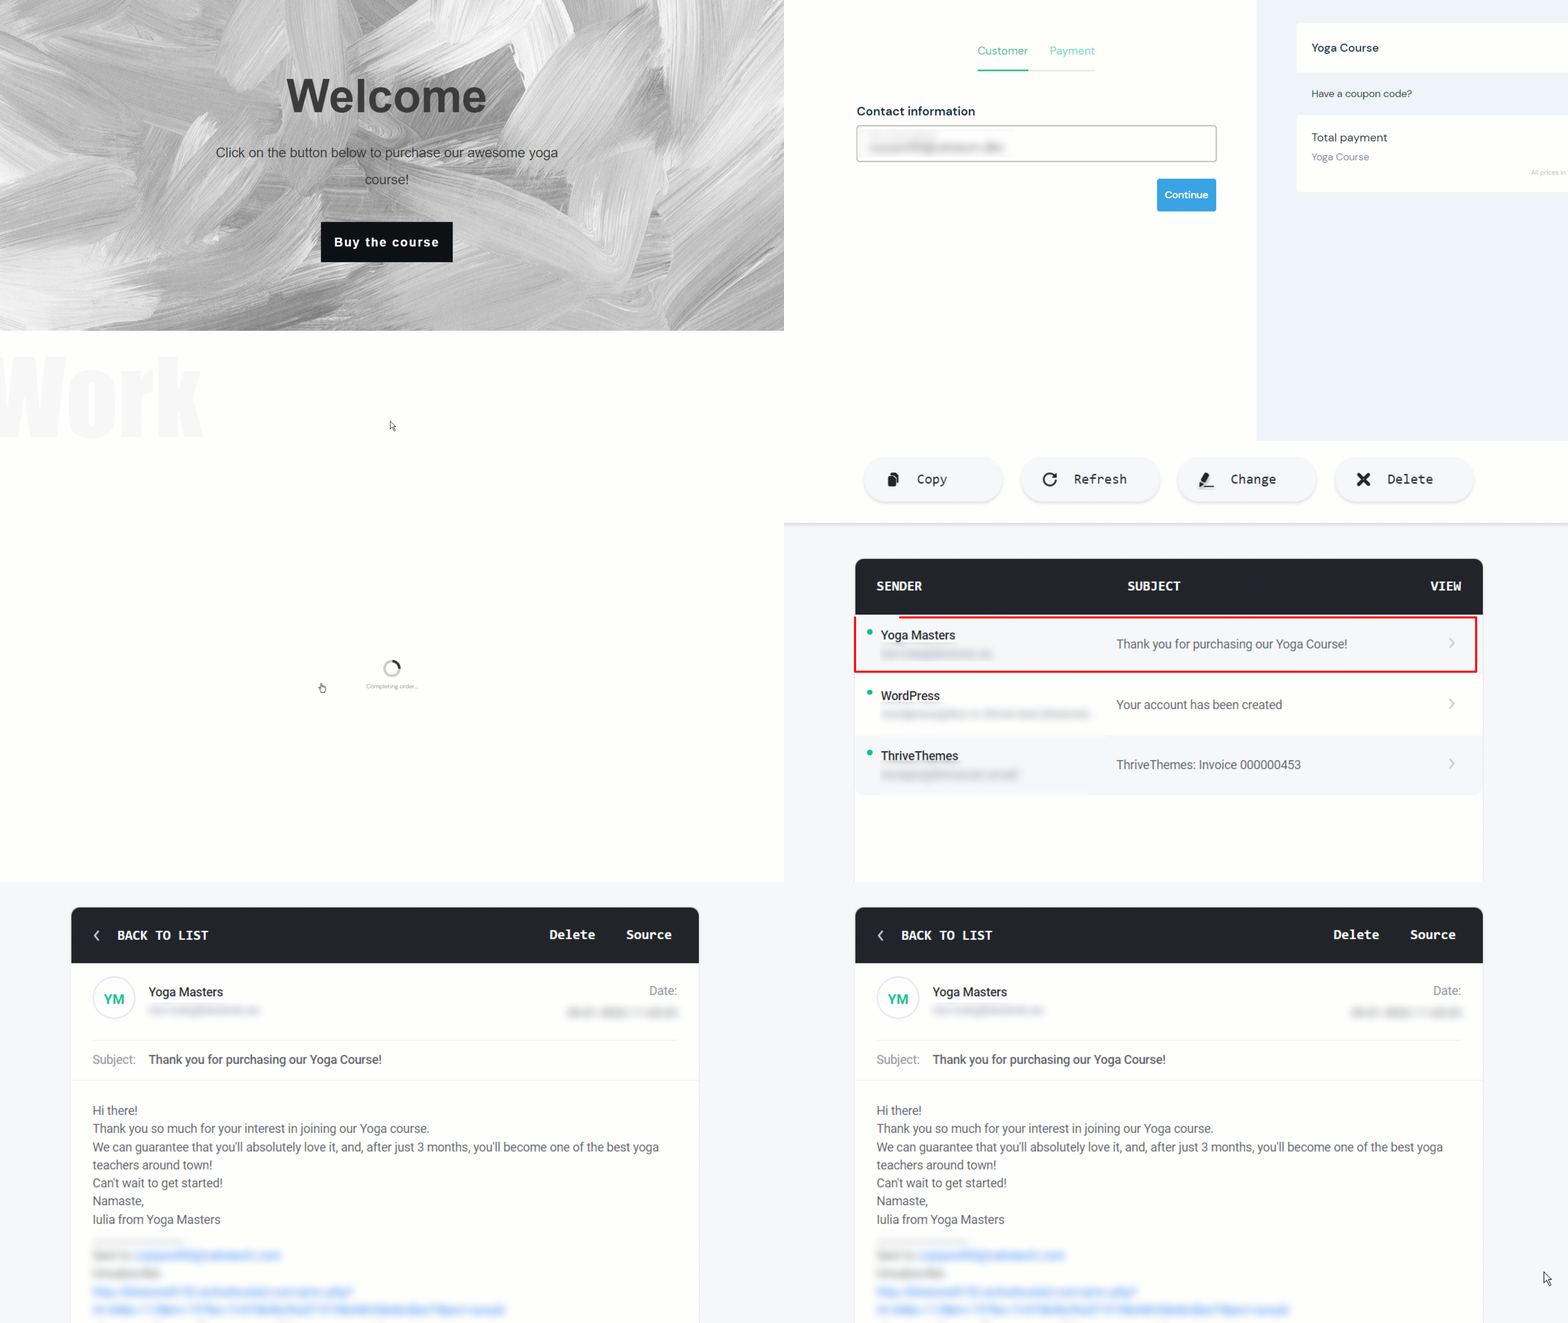
With the two automations combined, you’ll know that whenever someone successfully purchases your product created in Thrive Apprentice, they will receive a “Thank You” email:
Hopefully, this article was useful. Please take a look at this section of our knowledge base in case you want to see more examples of automations created in Thrive Automator.
Or, if you need more help articles around Thrive Apprentice, check out this section.