You can use the forms available on your website to collect data that can be later compiled into a Google Sheet file, in your Google Drive.
In this tutorial you’ll learn how to do that using Thrive Automator and Zapier.
|
1.Make sure you have a Google Drive account and an already created spreadsheet where you plan to collect all the data. 2.Add a form on your website, and set up the form fields in correspondence with the data you want to gather. 3.Set up an automation that collects the form data and passes it to Zapier through a webhook. 4.Create your zap in Zapier, and connect it to your Thrive Themes website through the webhook sent from Thrive Automator. |
Here’s the step by step process for achieving the above:
1.Create a Spreadsheet in Google Drive
Log into your Google Drive account and create a new spreadsheet:
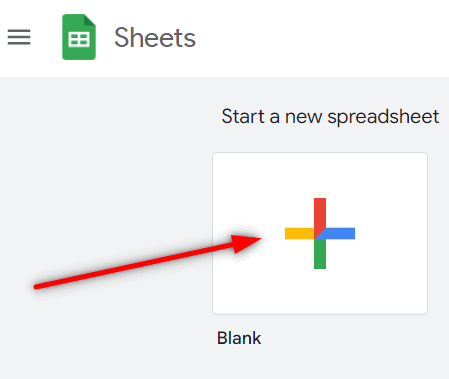
Within that spreadsheet, set up the column names for the data you want to collect:

This way you will be able to structure the collected data.
The next step in the process is setting up the form on your website along with the form fields, so that the spreadsheet will be populated with the required information.
2.Set up a Form on Your Website
For this you can use a “Lead Generation” element, that you can add to your post or page:
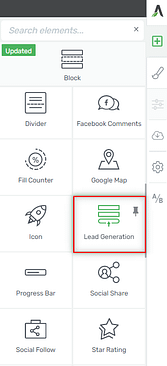
Once added, use the left sidebar options to configure it:
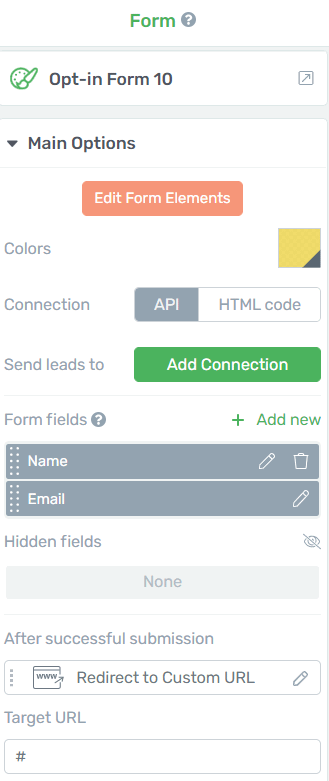
The template that I’ve chosen has two form fields – one for the e-mail address and one for the user’s name:
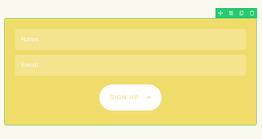
I also want to collect the phone numbers of each user that submits this form.
This can be done by adding a custom field to my form:
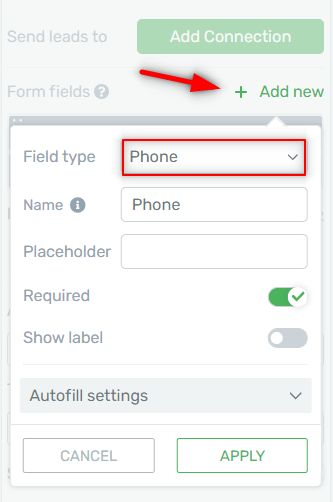
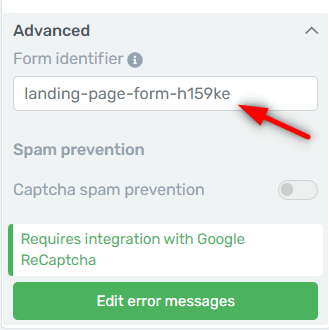
With this set up, the only thing left to do is copy the unique form identifier of the form, as you will need it in Thrive Automator.
The unique form identifier can be found if you expand the “Advanced” section of the same left sidebar list of options:
Here’s an article that you might find useful with regards to this topic:
You’ll next have to set up the zap in Zapier and the automation in Thrive Automator, simultaneously. For that, it might be helpful to use two separate tabs, one for the zap and one for the automation so that you can easily switch between them.
3.Create an Automation in Thrive Automator
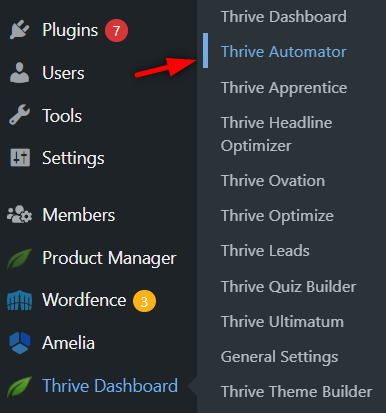
Access Thrive Automator from the Thrive Dashboard and add a new automation:
Give it a name and then continue with adding a start trigger, that will be listed under the Thrive Architect card:
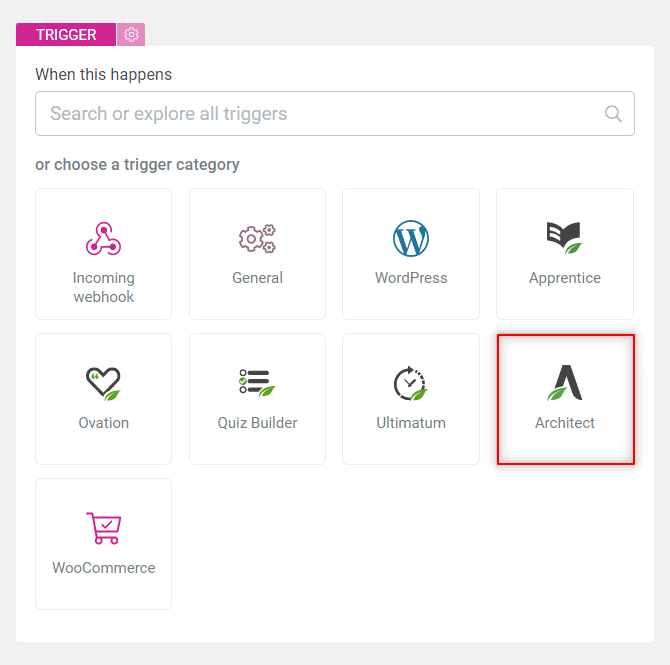
Select the “Form Submit” trigger:
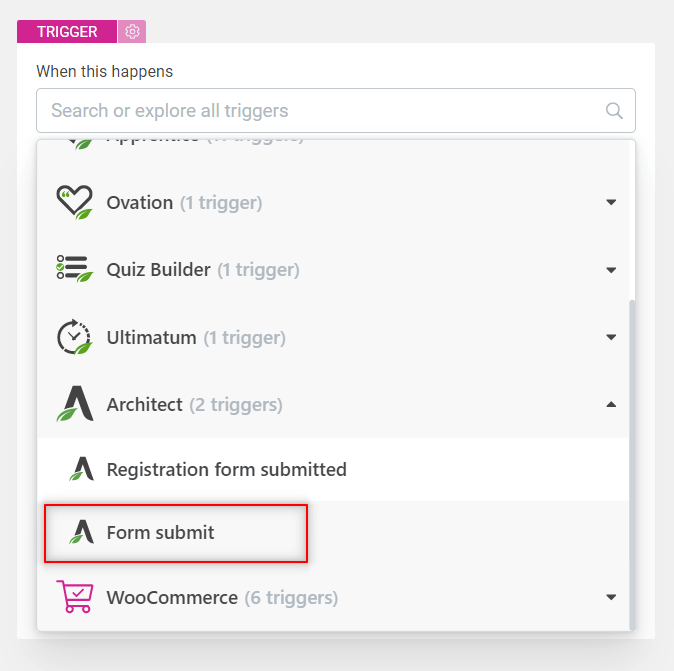
You will next have to target the form that you’ve just set up on your page:

Open the drop-down list and paste the unique identifier copied from the “Advanced” section of your form:
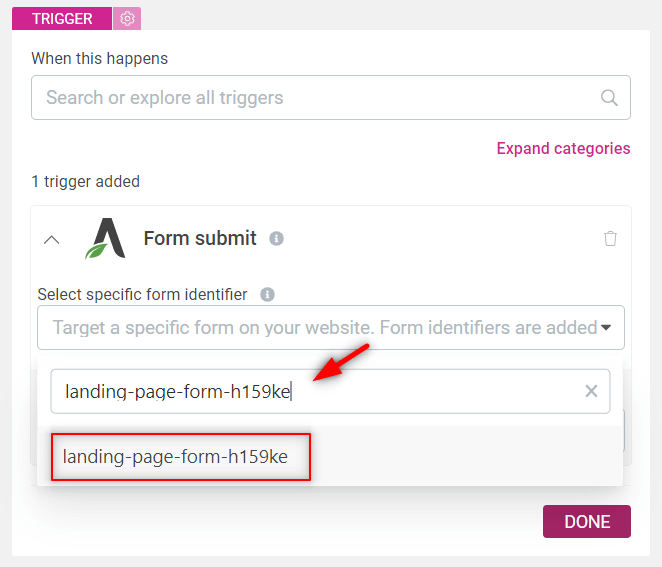
The form should show right up on your screen, so go ahead and select it. Then click on “Done”:

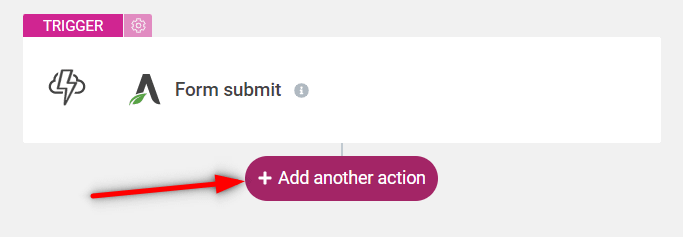
Proceed to the next step, which is adding an action to your automation:
The action will be in the form of sending a webhook:
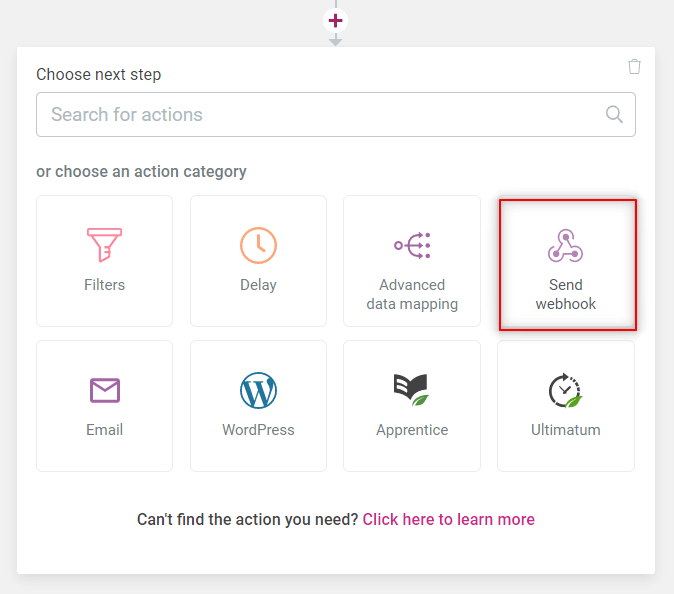
This is where you will have to paste the webhook URL generated in Zapier:
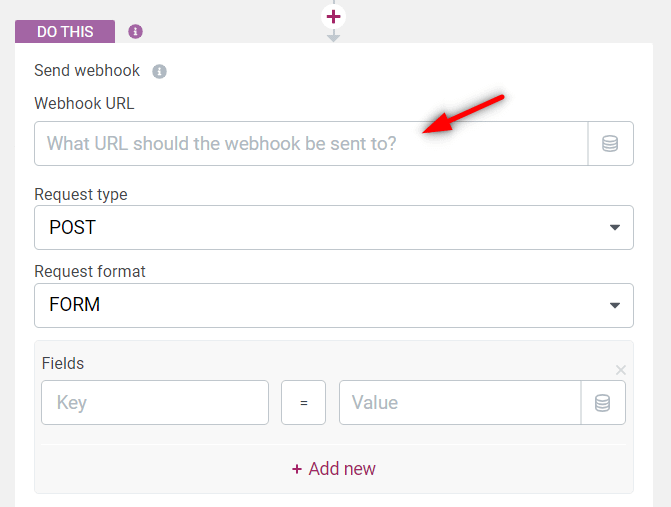
Follow the below steps to get the URL.
4.Configure the Zap Trigger
Log into Zapier and create a new zap:
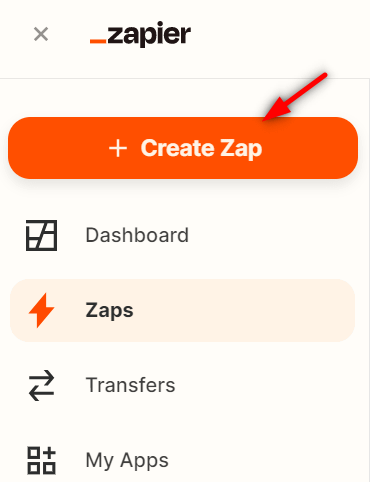
Give it a name, to easily find it later on:

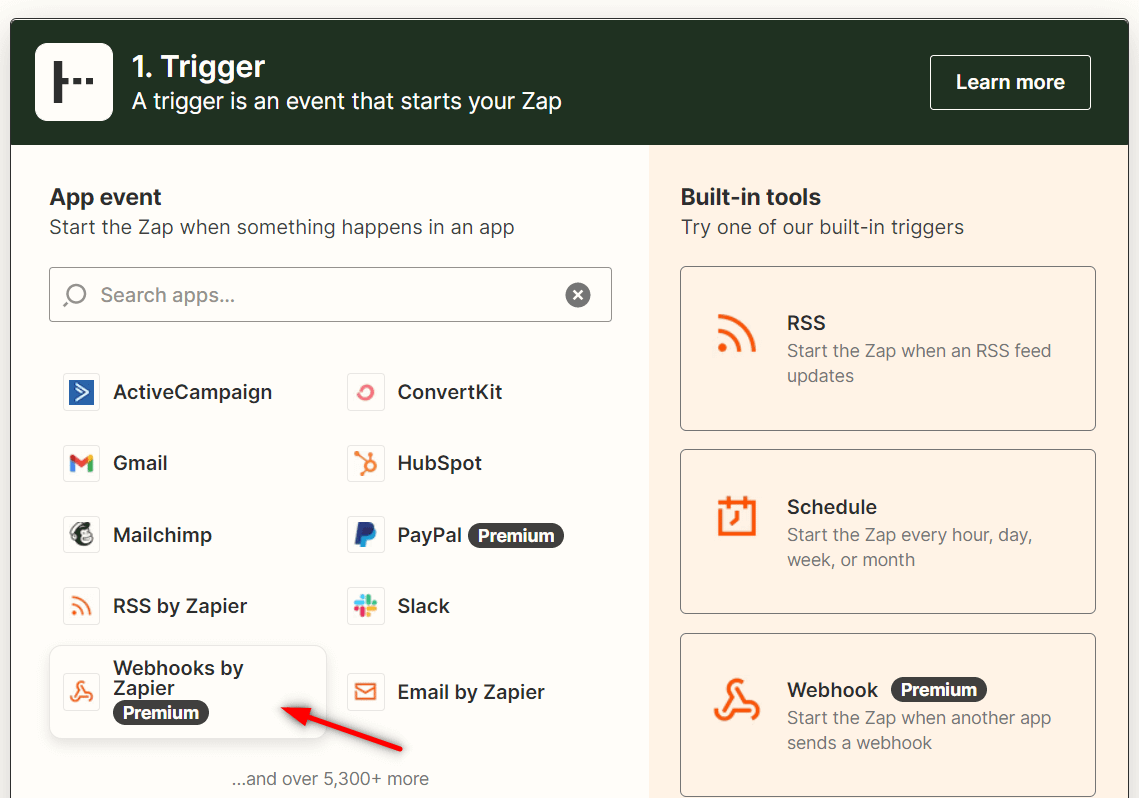
Add your start trigger. For this use case, you need to click on “Webhooks by Zapier”:
Proceed with choosing an event:
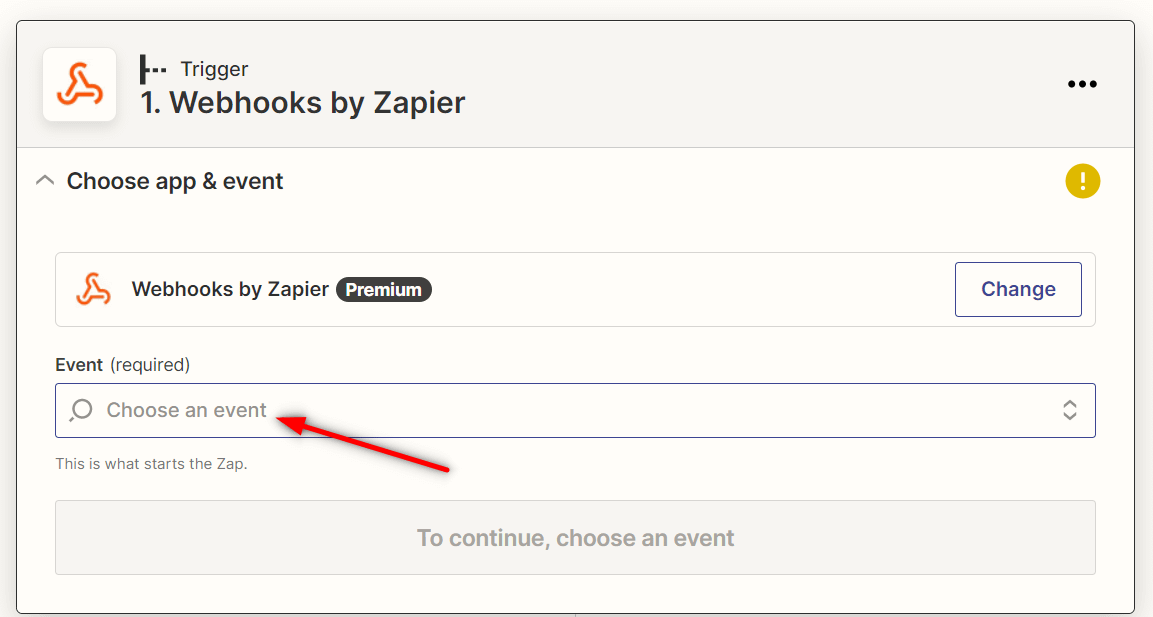
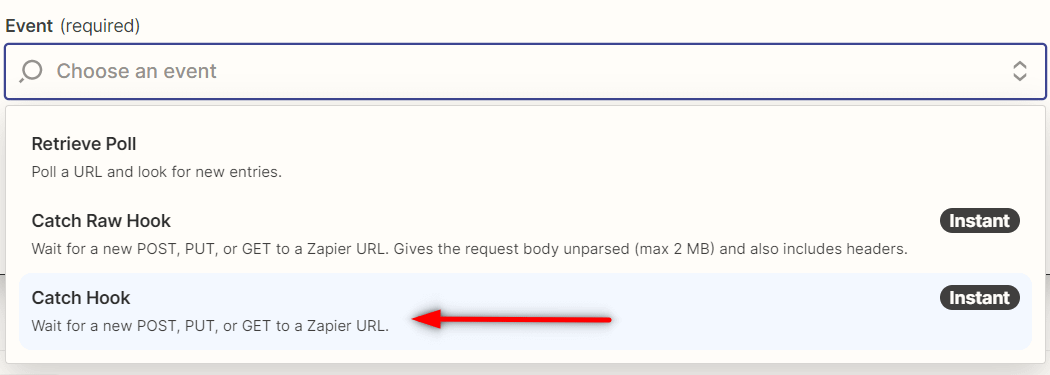
Open the “Event” drop down list and select “Catch Hook”:
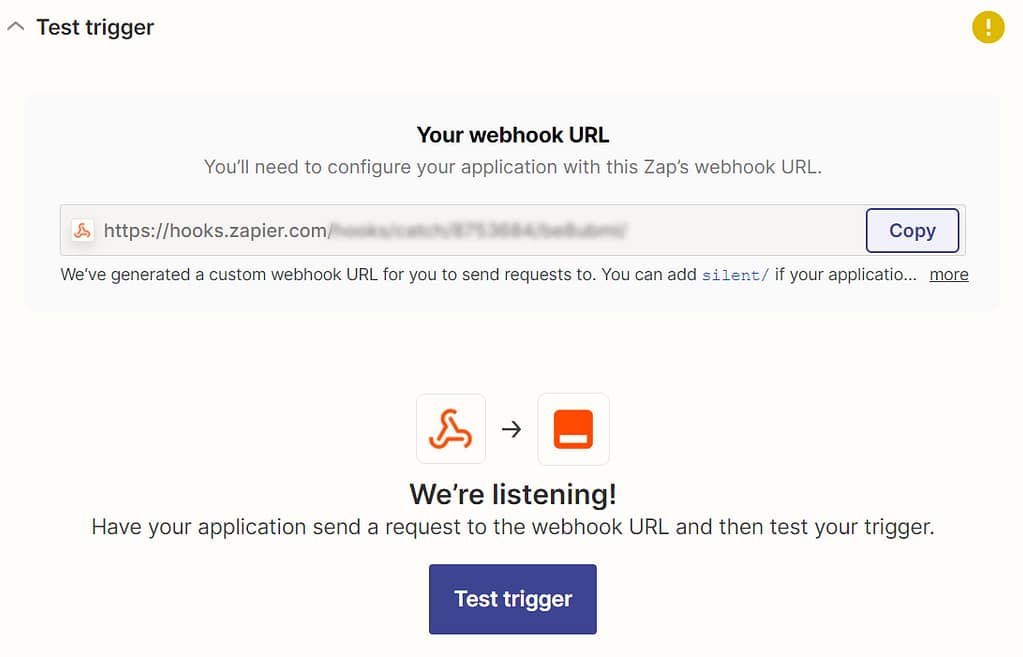
Proceed with setting up the trigger, until you reach the last step where you can test your trigger. First, copy the webhook URL from here:
5.Sending the Webhook from Thrive Automator to Zapier
Swipe over to Thrive Automator, and paste it into the “Webhook URL” empty field:
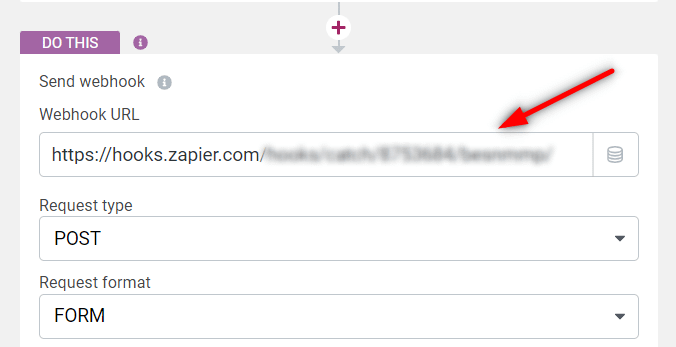
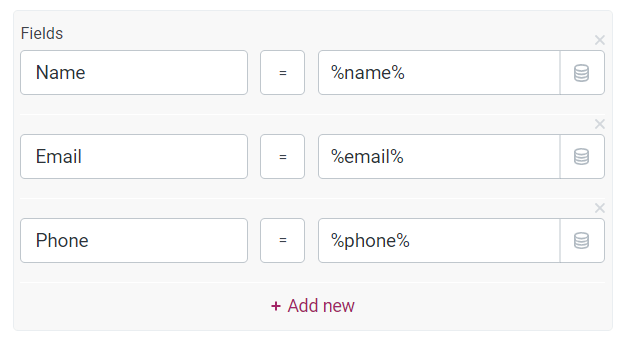
Next, map the form fields:

Use the dynamic form data for each field that you want to be sent to Zapier:
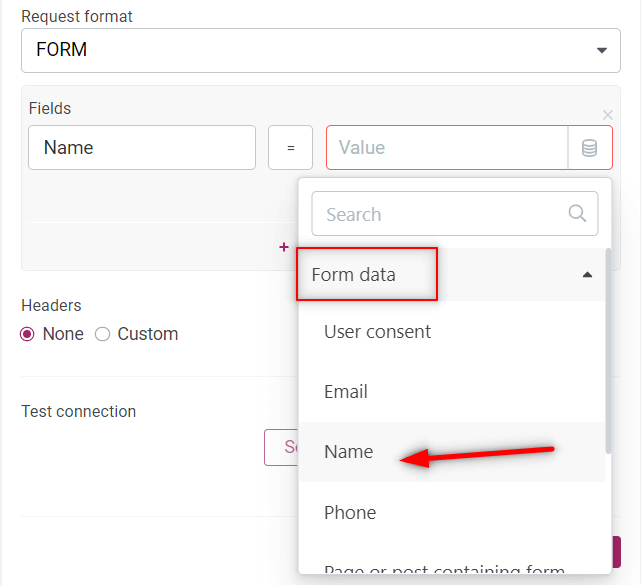
In the end, my three mapped form fields look like this:
Lastly, click on the “Send Test” button:
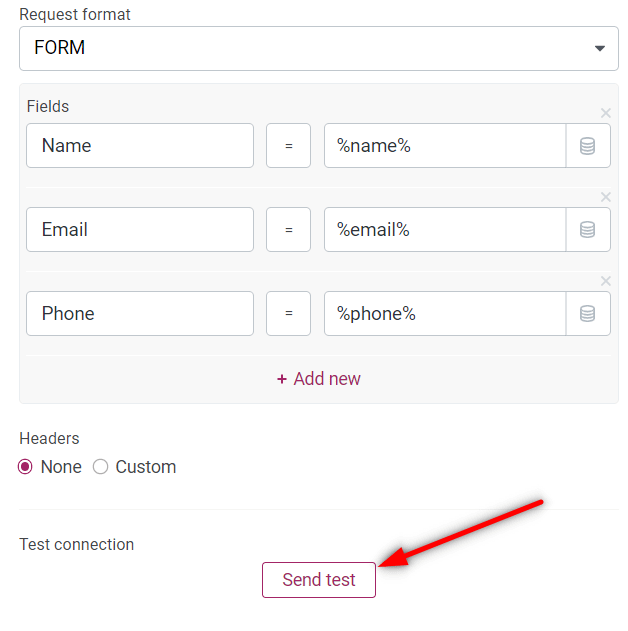
After you do that, swipe over to the Zapier tab and click on “Test trigger”:

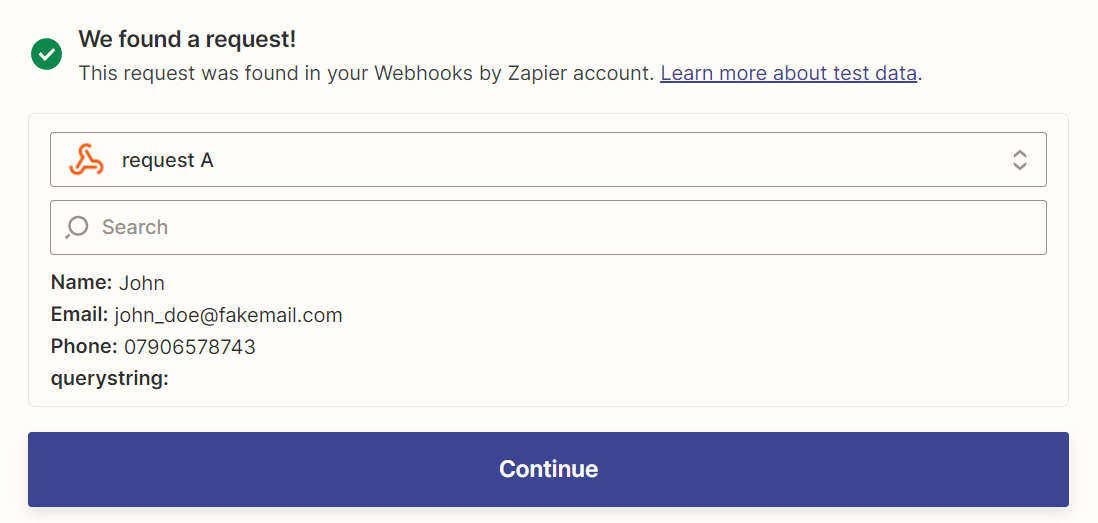
If the request is successful, your zap will show you this notification. Click on “Continue”:
6.Configure the Zap Action
You’ll next have to add an action to your zap flow. Click on “Google Sheets”:

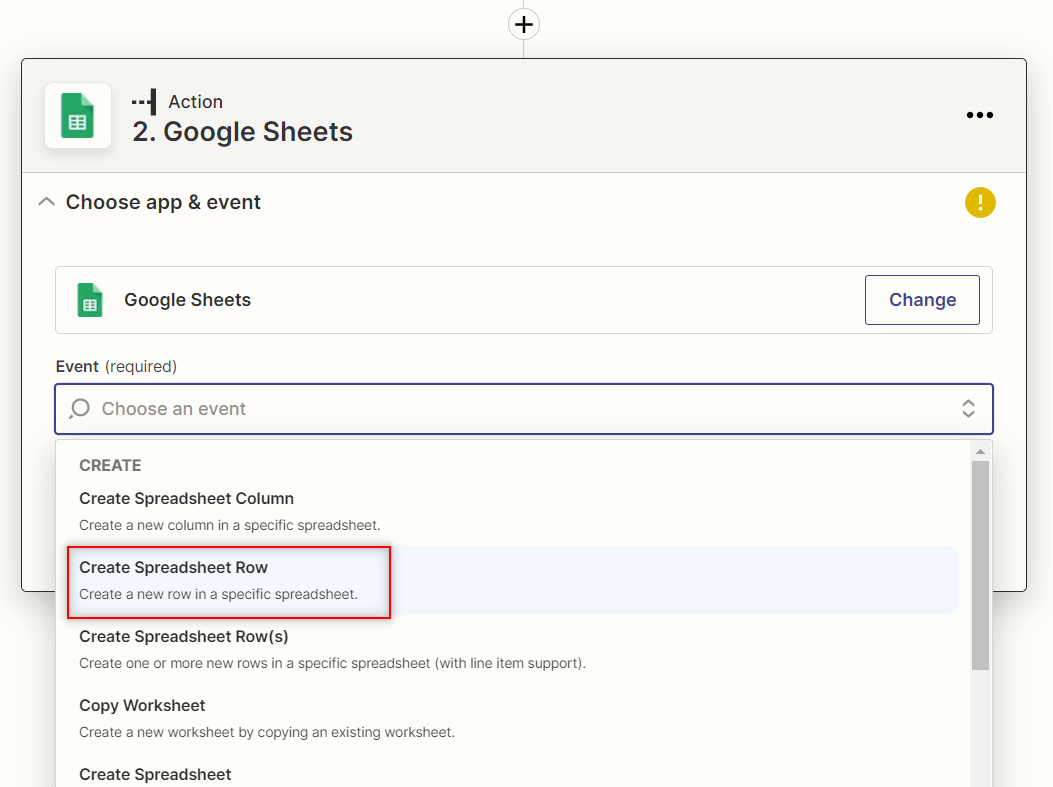
Open the “Event” drop-down list:
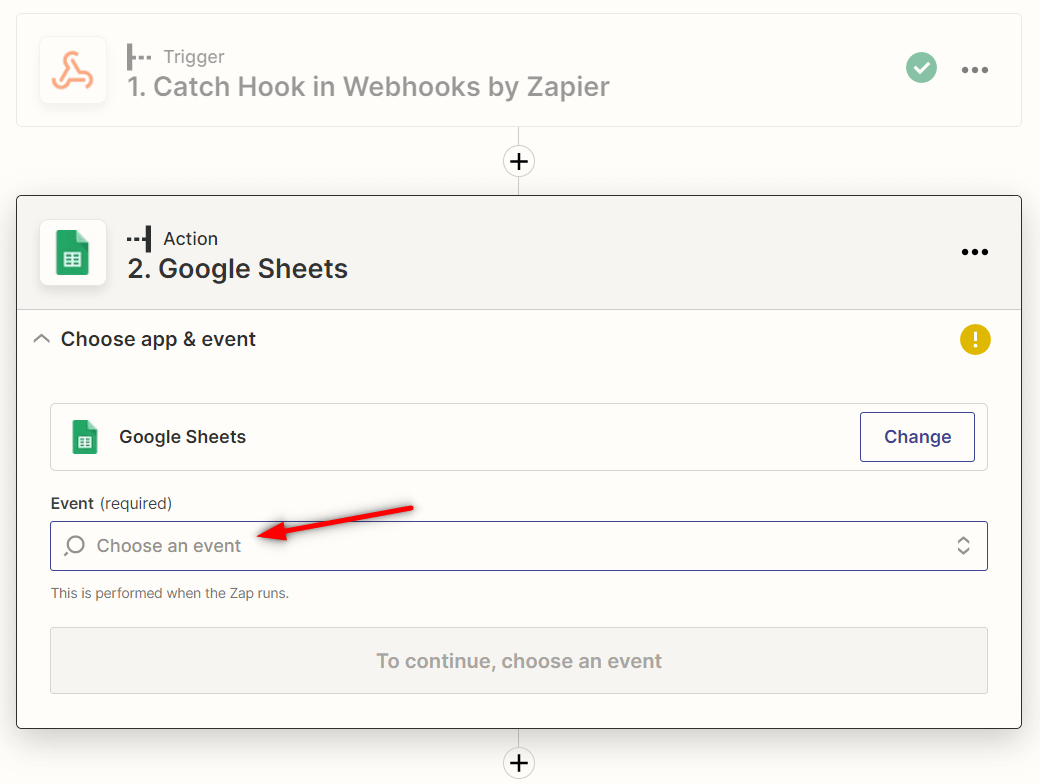
Choose the action of adding a new spreadsheet row:
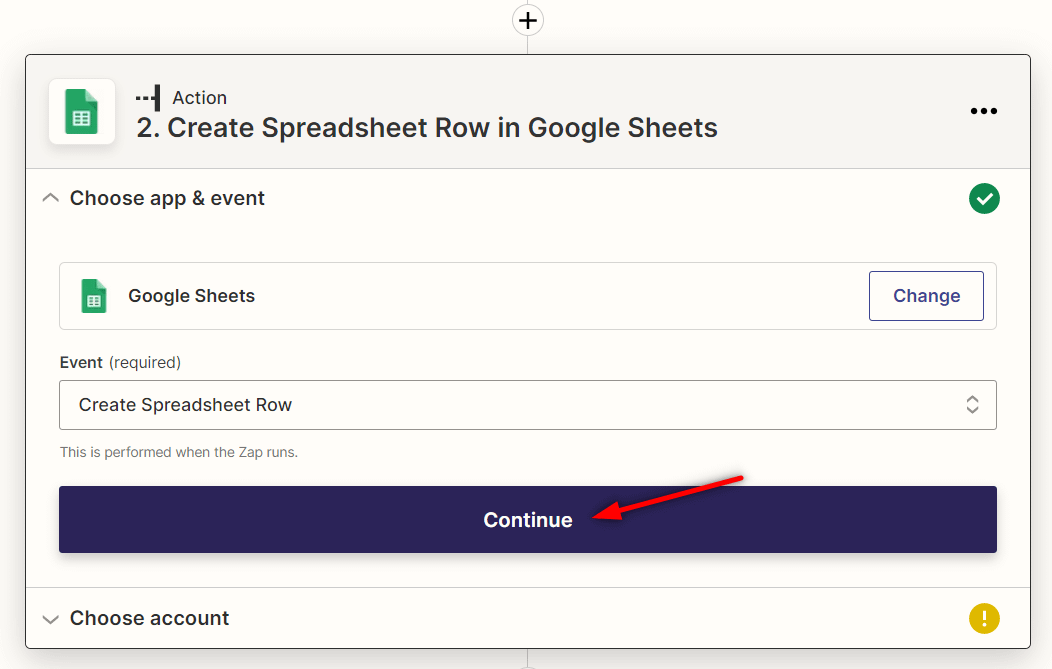
Click once more on “Continue”:
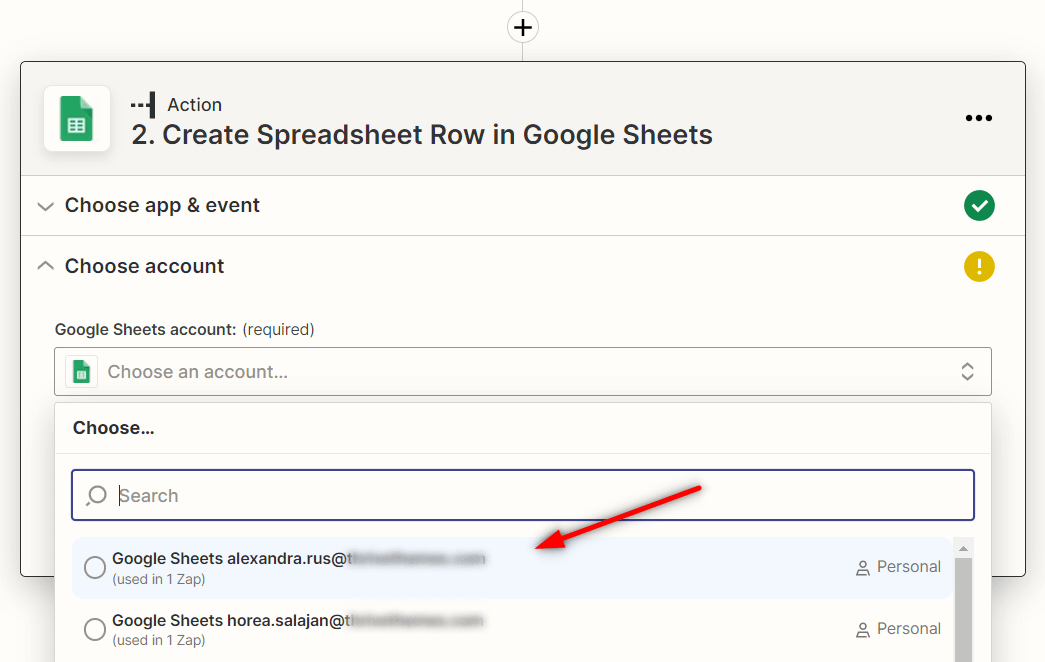
Select the Google Sheets account in which your spreadsheet is located:
Click once more on “Continue” and proceed with setting up the action:
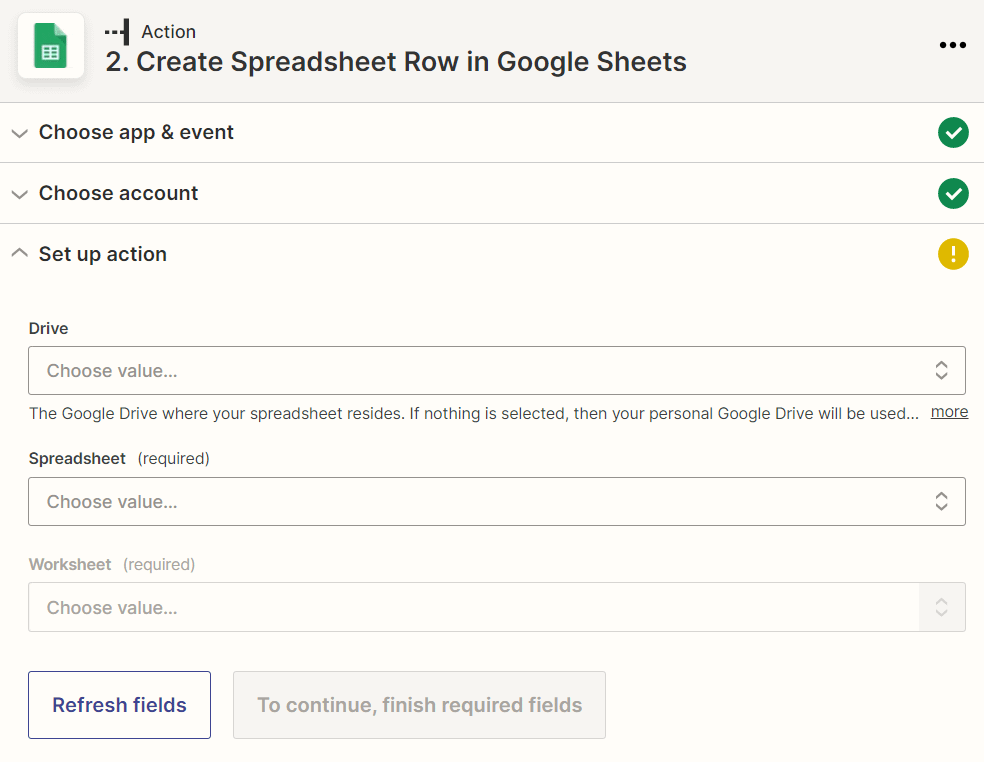
Select “My Google Drive” in the first drop-down list:
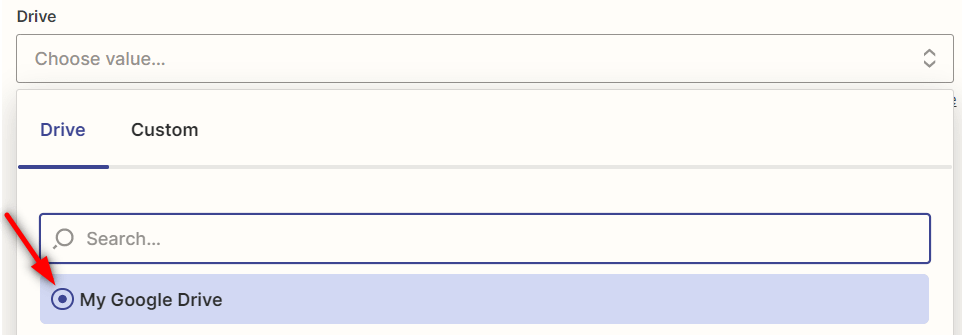
Then select the spreadsheet that you’ve previously set up for gathering data:

My spreadsheet has only one sheet, therefore in the next drop-down that is the only one that I can select:
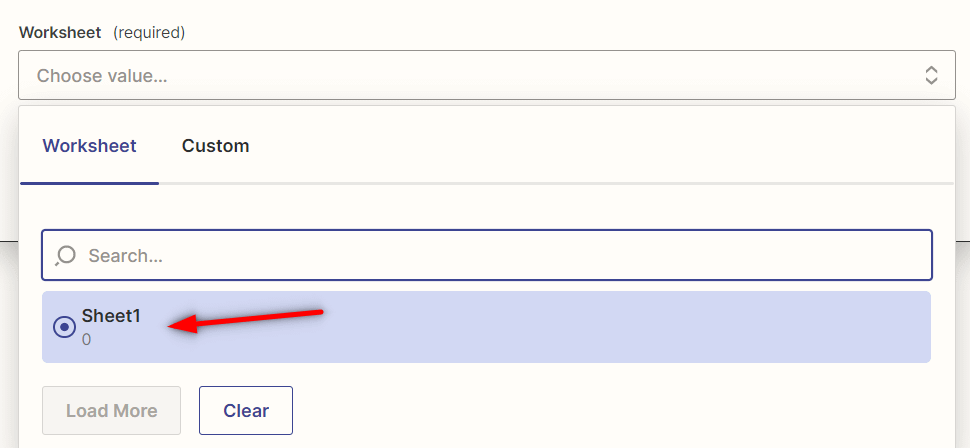
If you have multiple worksheets, select the one that you’ve created for collecting this data.
Map the action fields with mock data that was generated when you’ve tested the webhook.
Start with the first one and map it according to its field name:
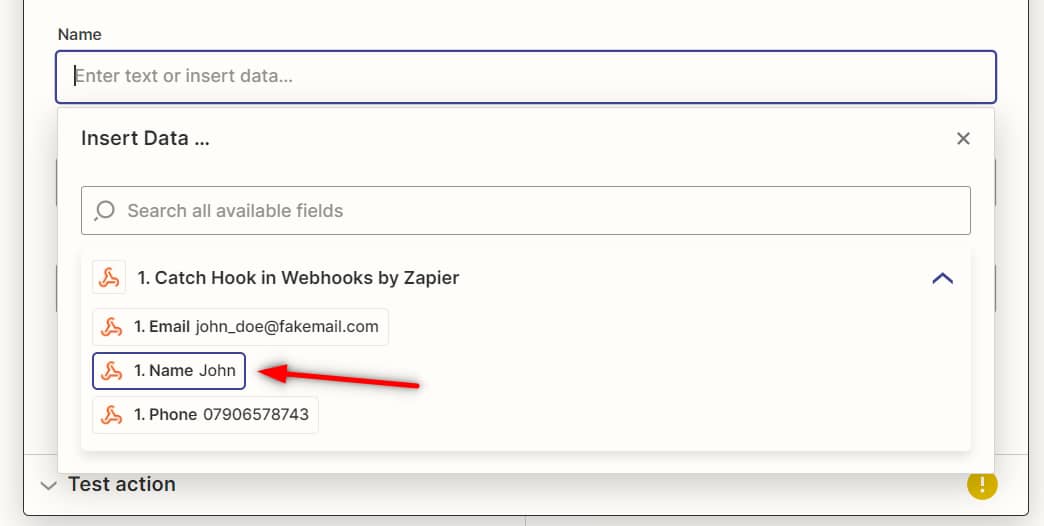
Do the same for all fields that you have. When done, click on “Continue”:
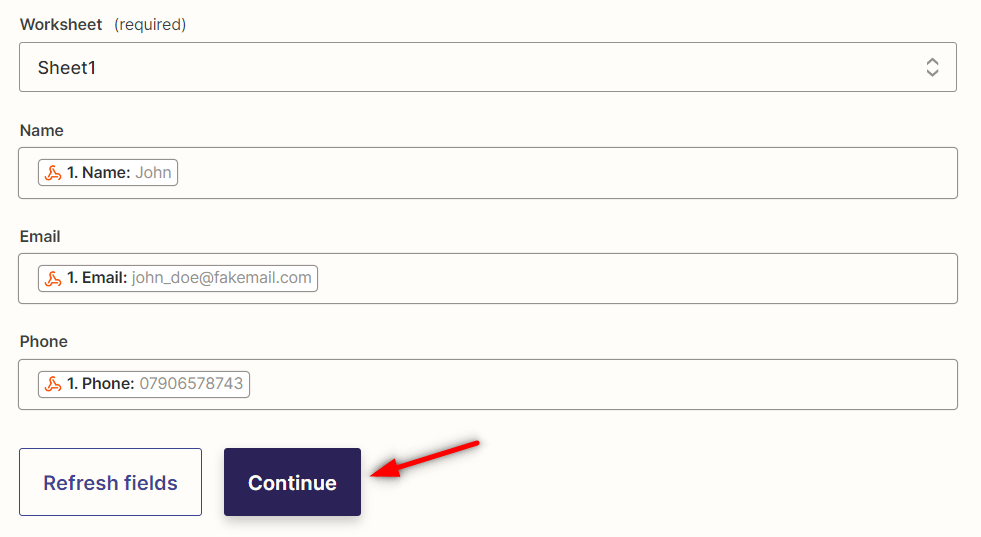
The last thing you can do here is to do a test, by sending a spreadsheet row to your Goggle Sheets:

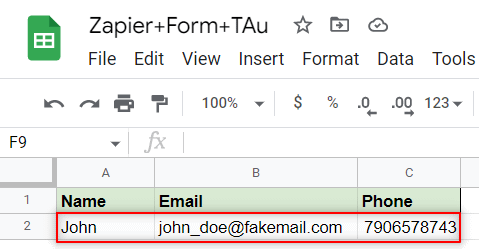
Your spreadsheet should now have a new row, filled in with the mock information sent from Zapier:
Lastly, you can publish your zap:

Then swipe over to Thrive Automator one last time, and save and activate your automation (so that your form will start to collect and send data to Zapier, through the webhook):

Now each time someone signs up through your form, the automation will run in the backend and will send the collected data to Zapier, and eventually that data will show up in your spreadsheet.
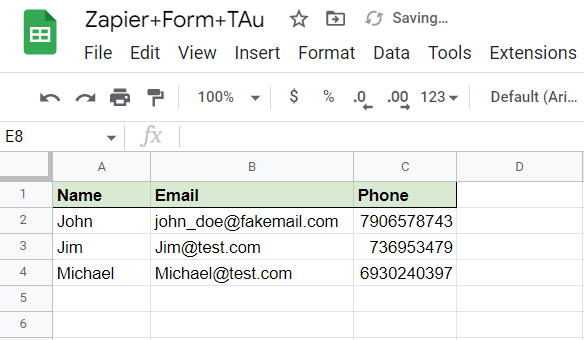
You can test this in a private window, with a test e-mail. Submit the form, check the “Logs” section of your Thrive Automator to see if the automation was successfully performed, and then head over to your spreadsheet to view the newly added data:
This is how you can use Zapier and Thrive Automator to send custom field data from your forms to your Google Drive spreadsheet. I hope you found this tutorial useful.
We have many more tutorials and articles of this type available in our knowledge base: