Do you want to connect Thrive Apprentice with Stripe more easily and quickly? Stripe version 1.3 simplifies the process in a few steps.
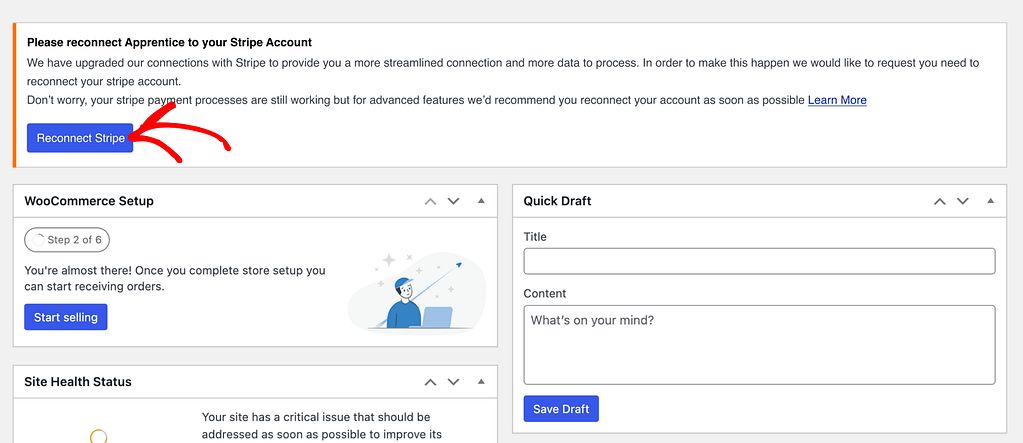
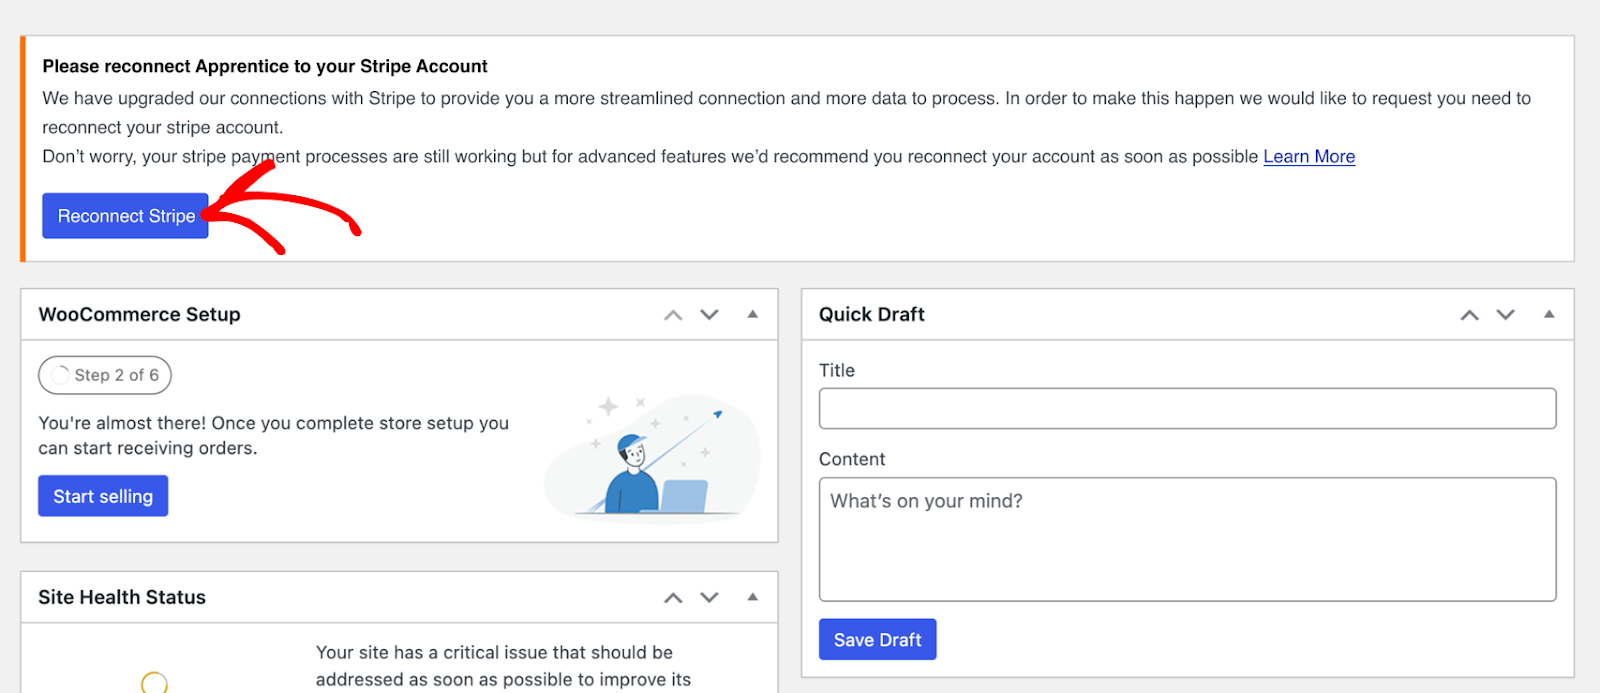
If you’ve already integrated Thrive Apprentice with Stripe, you’ll see a notification about the transition from Stripe 1.2 to Stripe 1.3 in the WordPress admin area.
It recommends reconnecting Stripe, which you can start by clicking the Reconnect Stripe button.
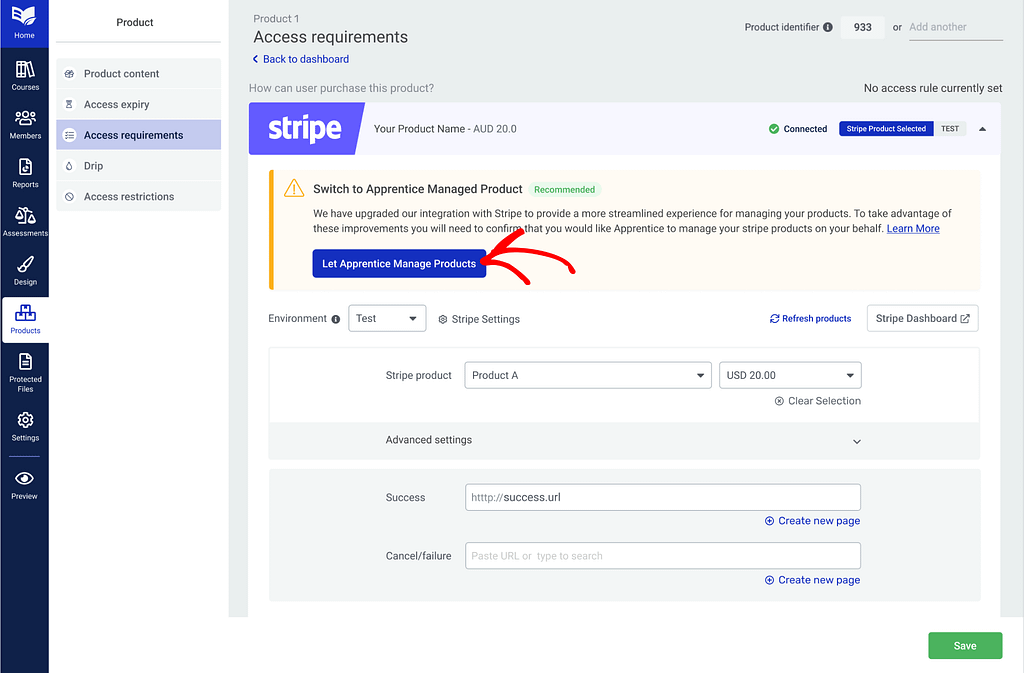
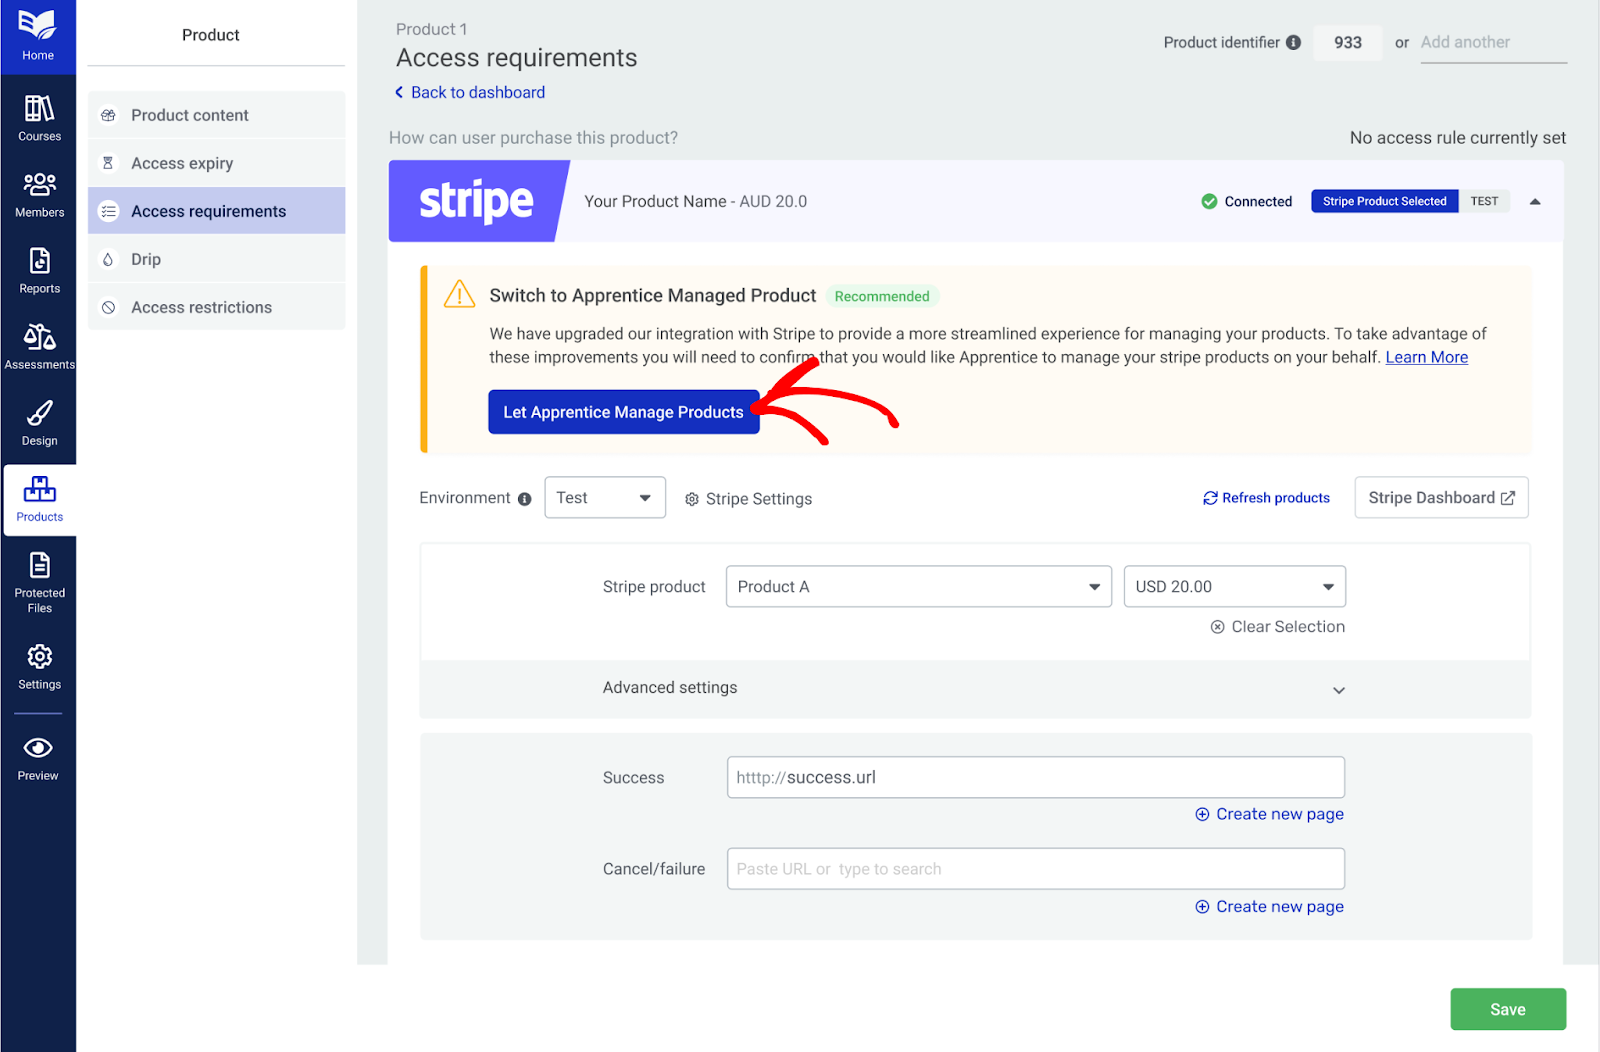
You’ll see a similar notification under the Access Requirements section of the specific Thrive Apprentice product. This will inform you about the transition from Stripe 1.2 to Stripe 1.3 and recommend that Thrive Apprentice manage products in your Stripe account.
In this article, we’ll see the main differences between connecting Thrive Apprentice with Stripe 1.2 and Stripe 1.3, the steps to connect with Stripe 1.3, and creating products in Stripe.
- Difference between connecting Thrive Apprentice with Stripe 1.2 and Stripe 1.3
- Enabling product access requirements in Thrive Apprentice
- Adding a Product to Stripe Through Thrive Apprentice
- Enabling the Buy Now Button in Thrive Apprentice
Difference Between Connecting with Stripe 1.2 and Stripe 1.3
We see two main differences when connecting Thrive Apprentice with Stripe 1.3 vs Thrive Apprentice with Stripe 1.2. They are:
- You no longer need a Restricted API key to connect Thrive Apprentice with your Stripe account.
- You can add and alter a product in your Stripe account directly through the Thrive Apprentice interface.
We’ll see how that is done in the following sections of this document.
Enabling Product Access Requirements in Thrive Apprentice
Thrive Apprentice allows you to set access requirements for WordPress roles, ThriveCart Products, and more. This is extended with Stripe and Custom Payment links.
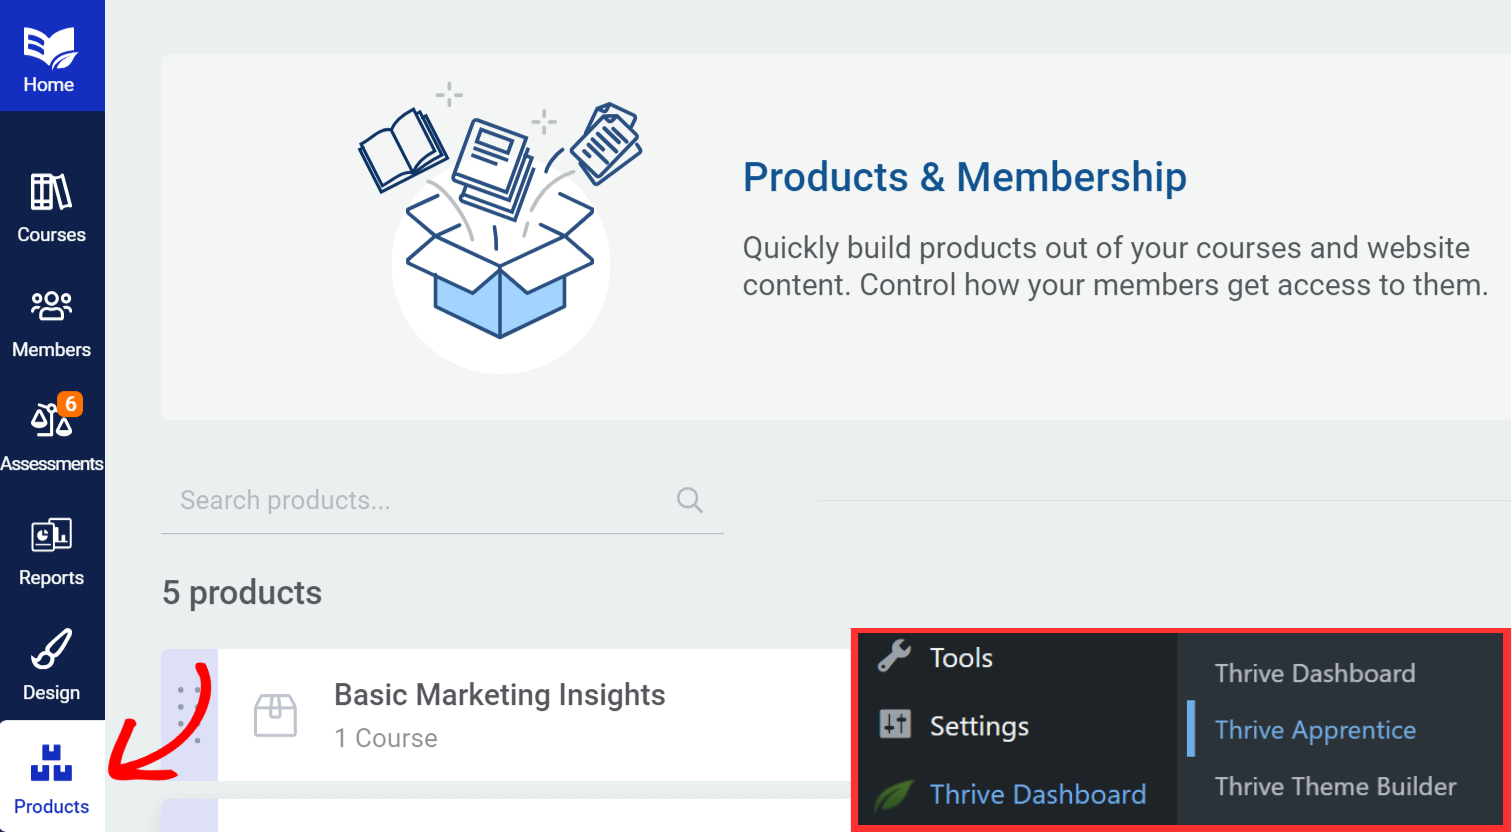
To enable access requirements, open your WordPress admin area and navigate to Thrive Dashboard >> Thrive Apprentice.
In the Thrive Apprentice dashboard, click Products in the left panel.
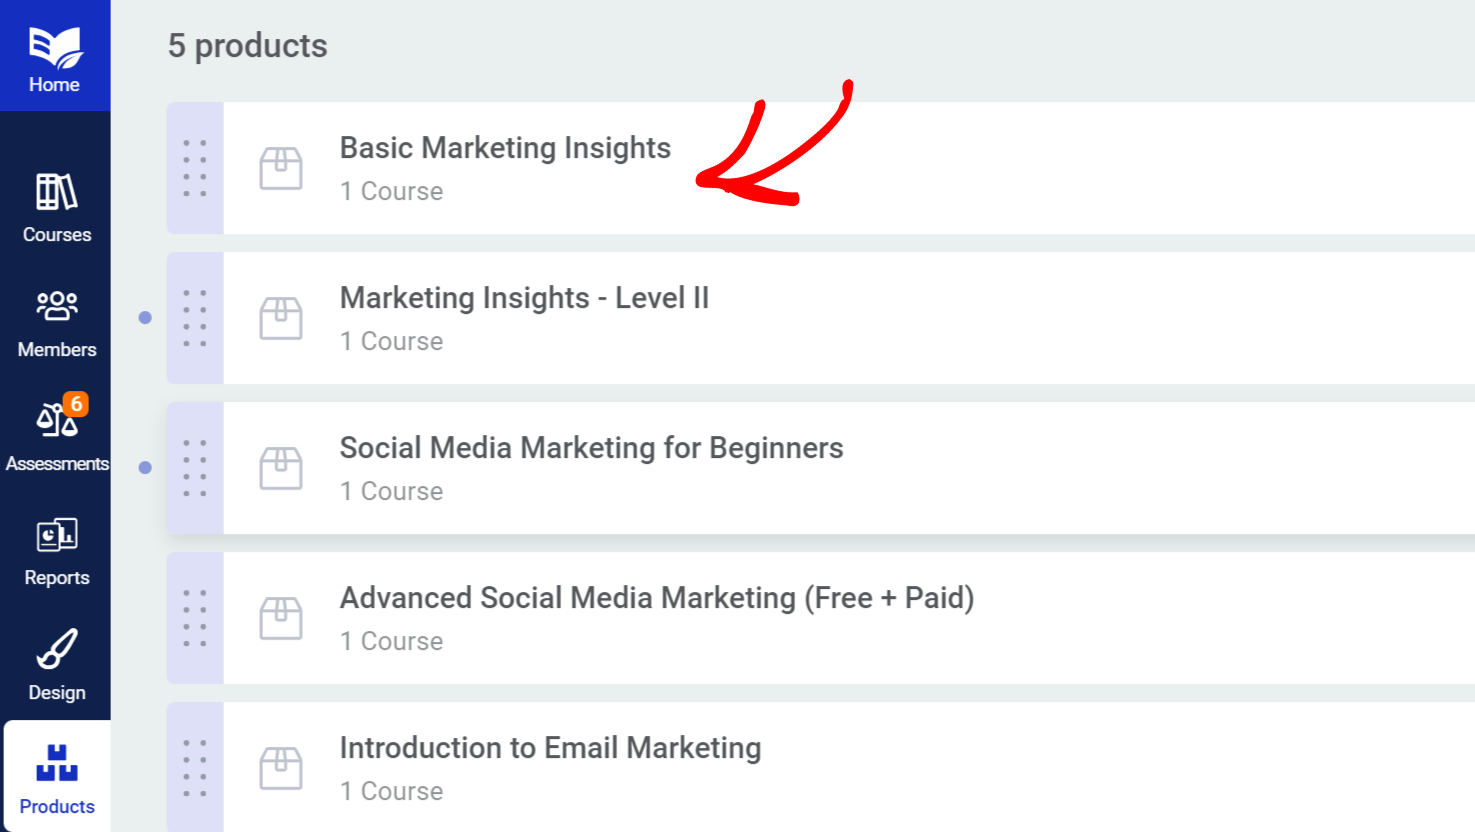
On the Products page, click the product you want to add to the access requirement.
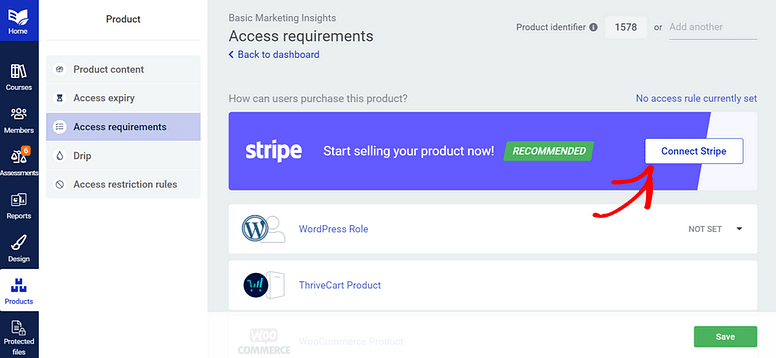
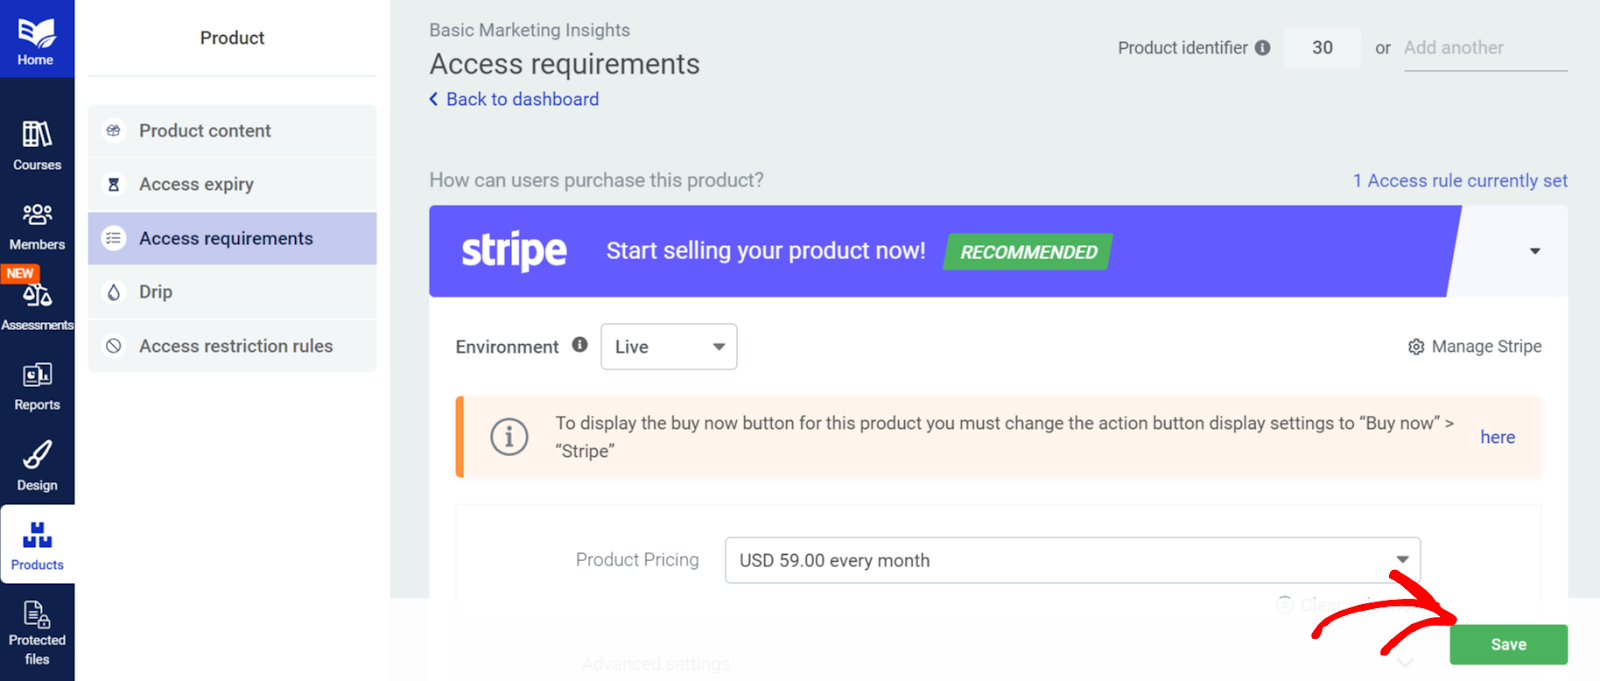
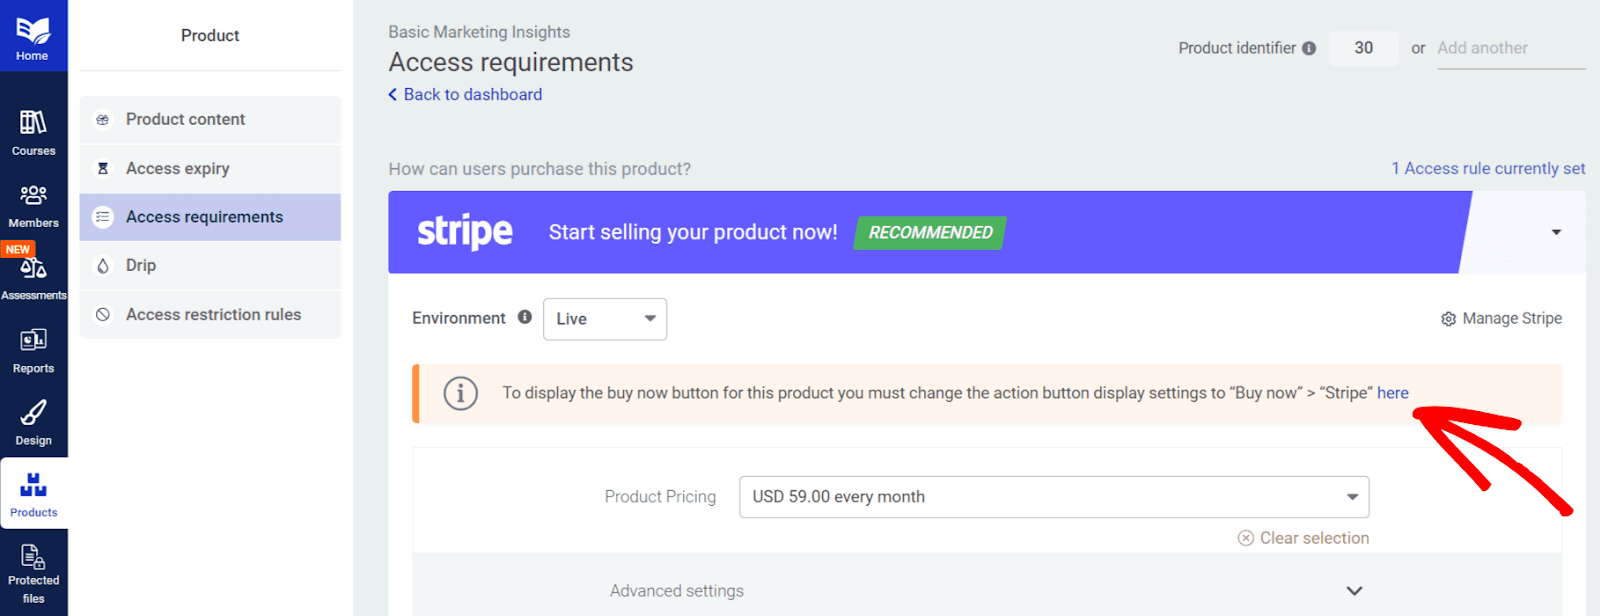
When you open the specific product page, click the Access Requirements option in the left column.

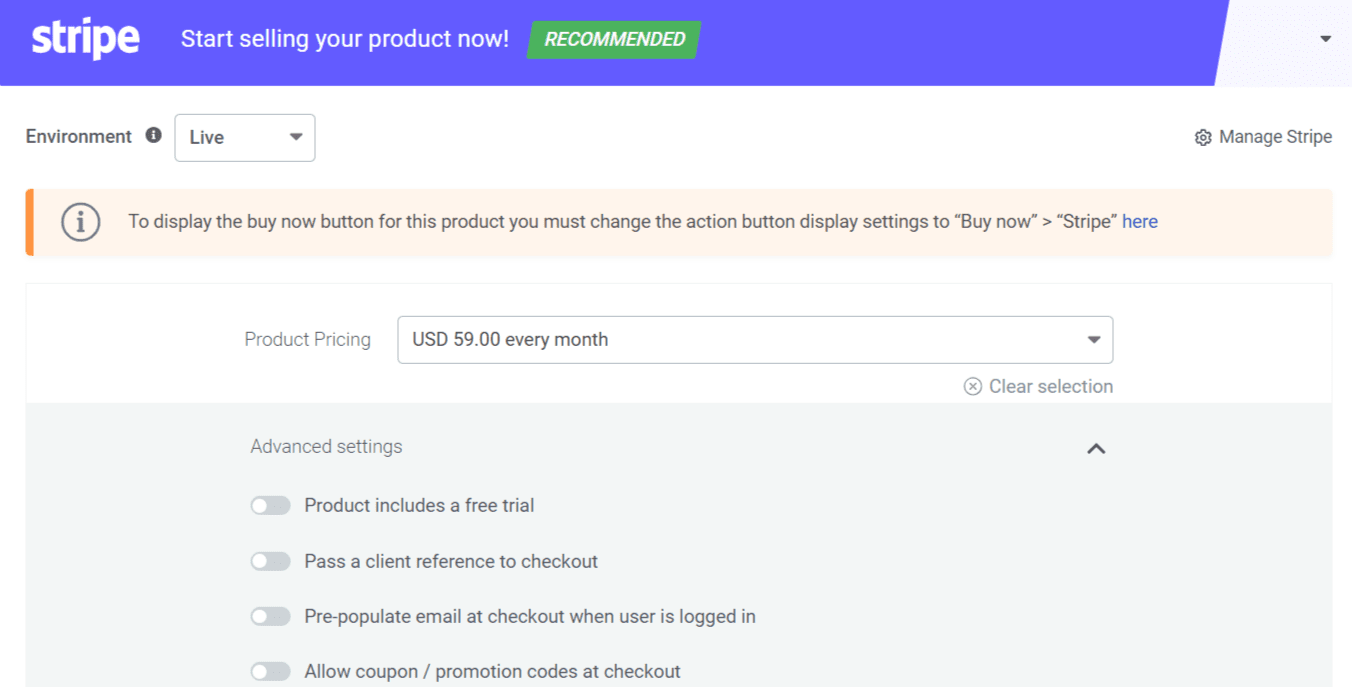
On the Access Requirements page, you’ll find Stripe highlighted in the list of requirements.
To get started with the Stripe connection, click the Connect Stripe button.
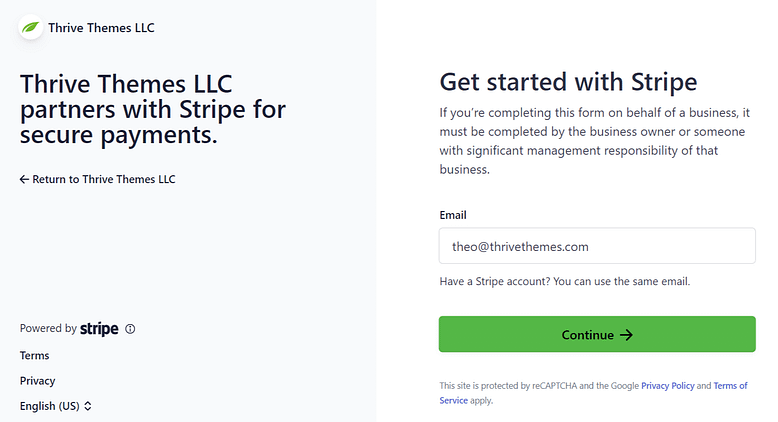
You’ll be taken to the Stripe website when you click the Connect Stripe button. This is where you can enter the email address of your associated Stripe account.
If you don’t have an existing Stripe account, enter your email address so Stripe can help you create a free one.
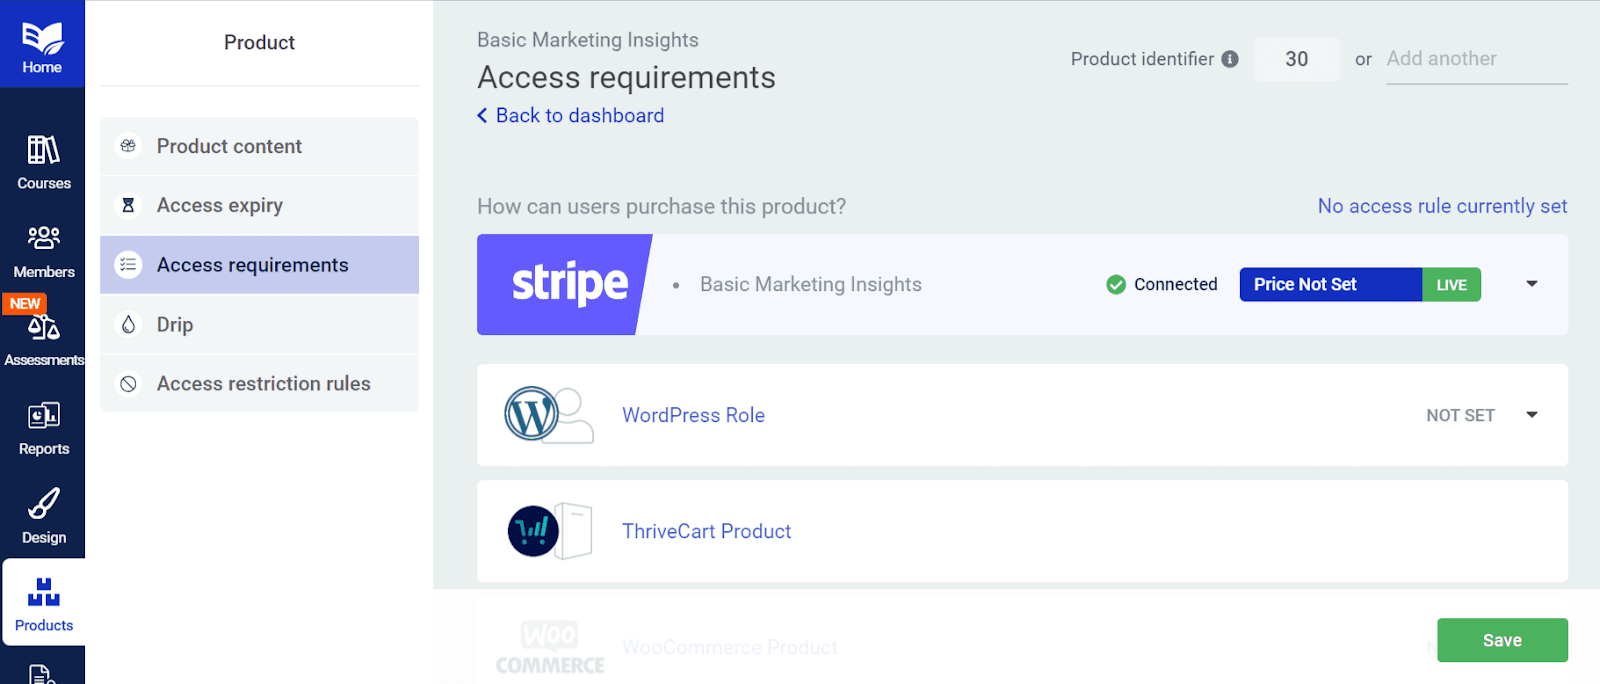
Once you’ve logged into or created your account and entered valid information, you’ll be taken back to the Thrive Apprentice product dashboard, where you’ll see that the Stripe connection has been established.
Adding Products to Your Stripe Account
When you connect with Stripe version 1.3, you can add a product directly to your Stripe account through Thrive Apprentice.
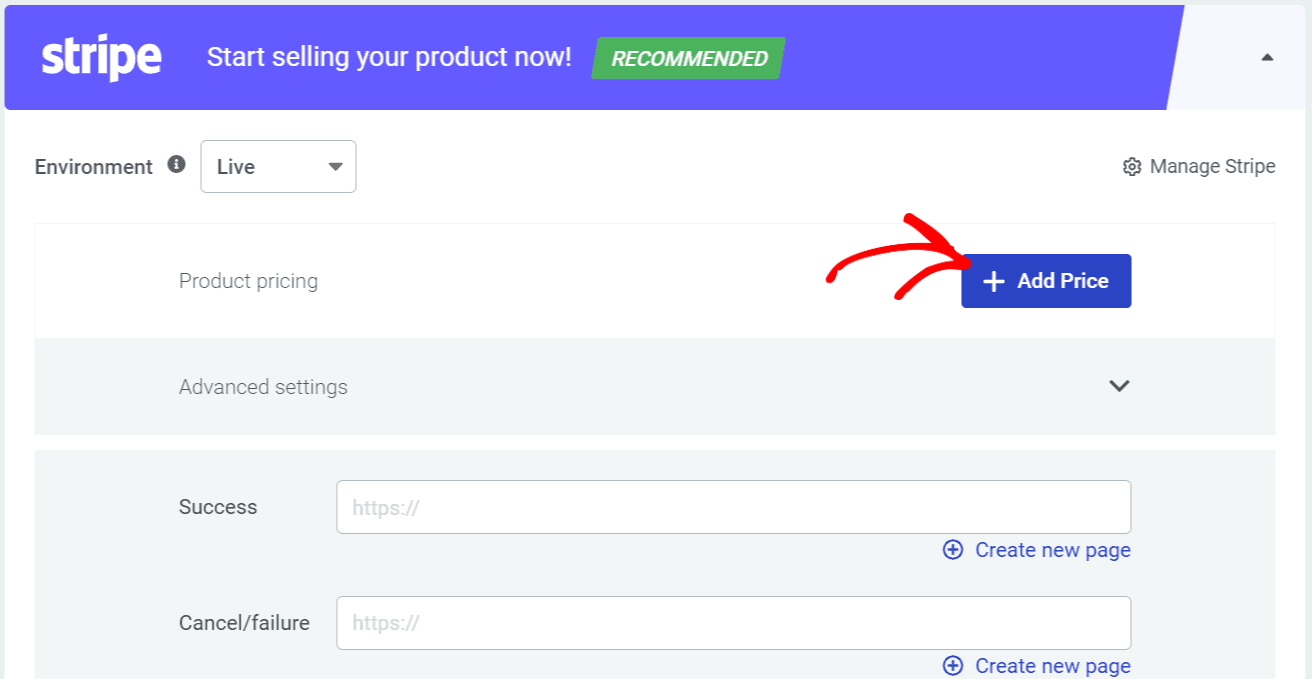
After establishing the connection, click the down arrow in line with the Stripe connection bar.
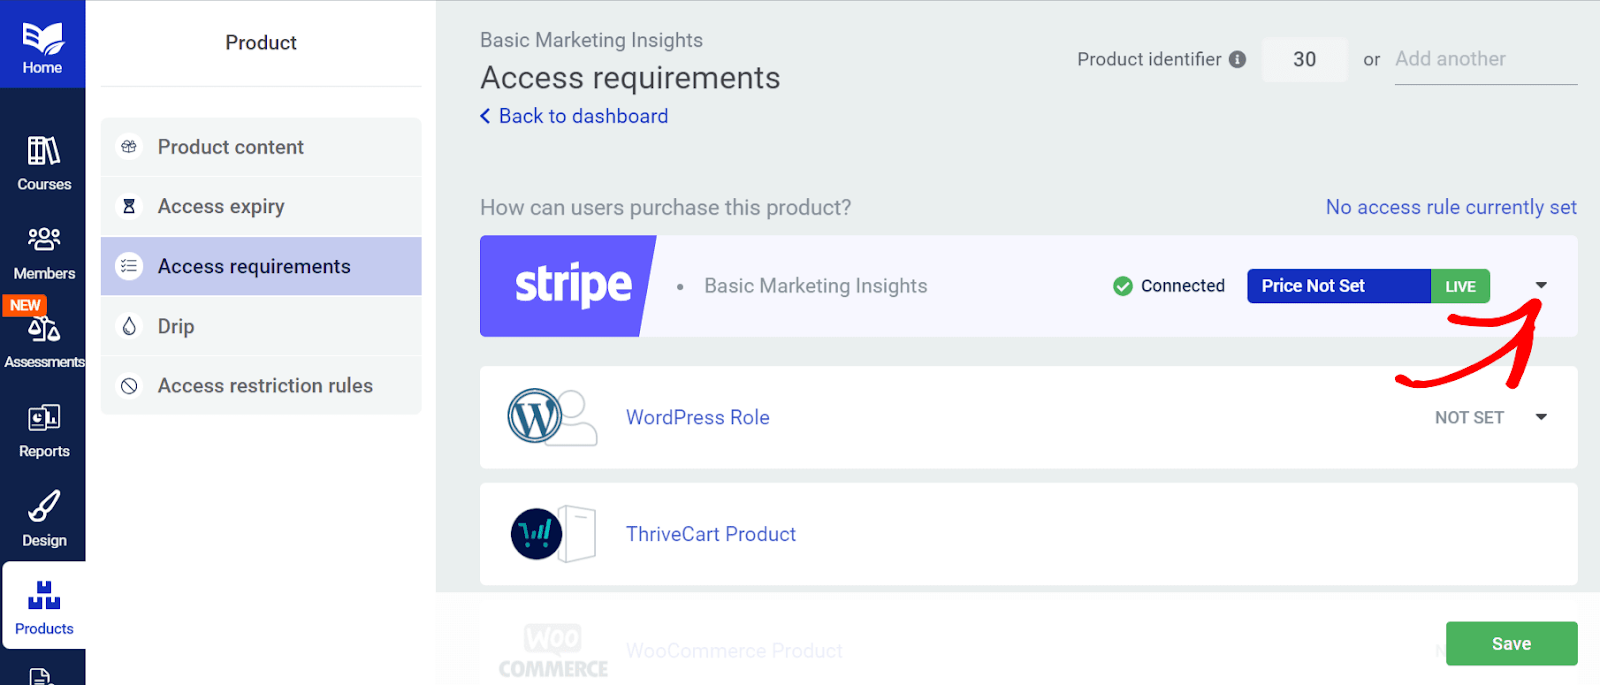
When you extend the Stripe connection section, click the +Add Price button to add pricing for the product.
After clicking the Add Price button, a popup will appear where you can select whether you want the payment to be one-time or recurring and add the product price.
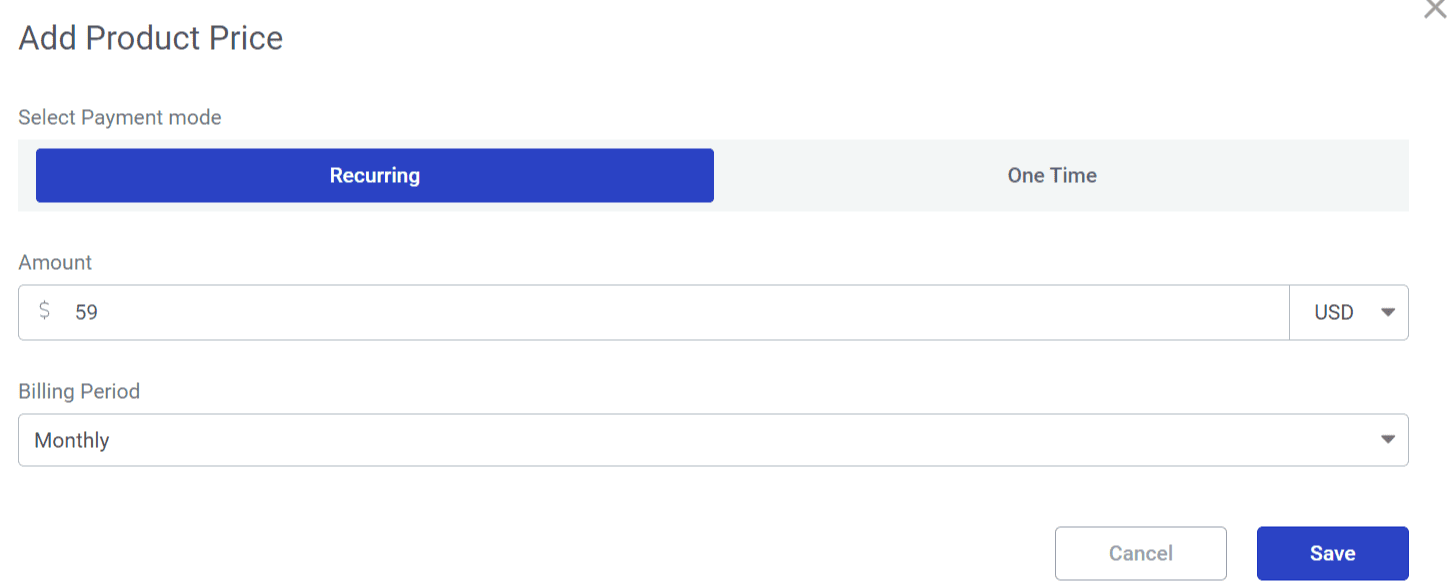
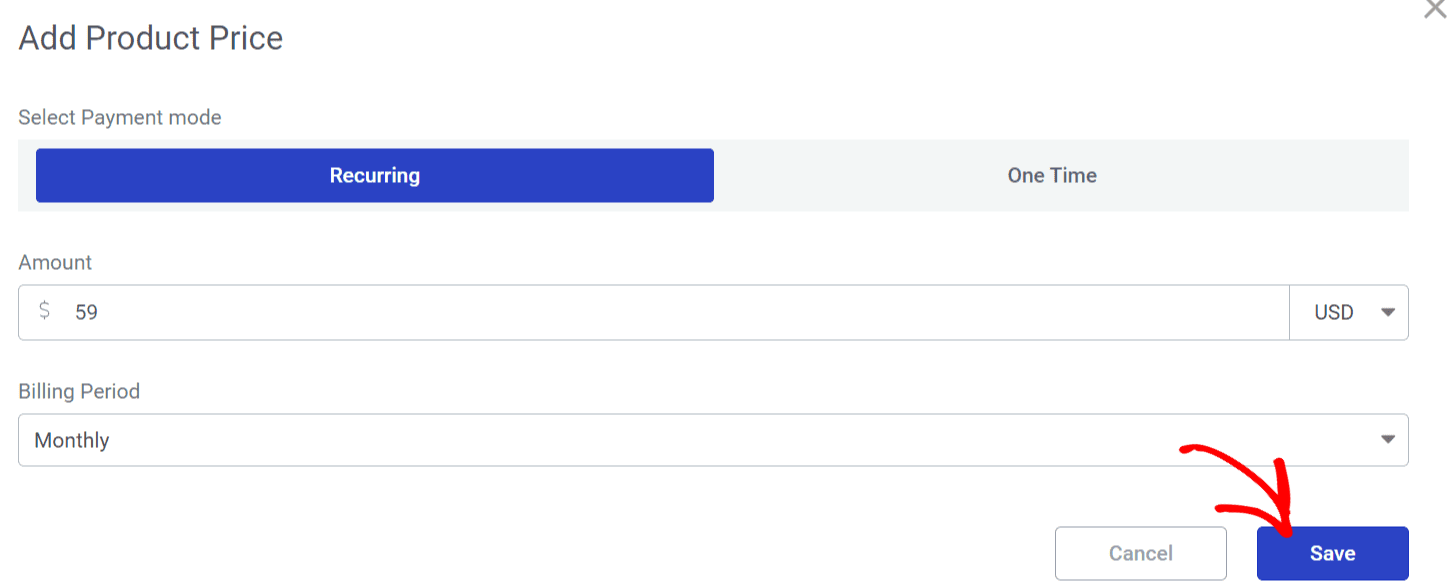
After you enter the price, select the billing period in case of a recurring payment mode, and then click the Save button.
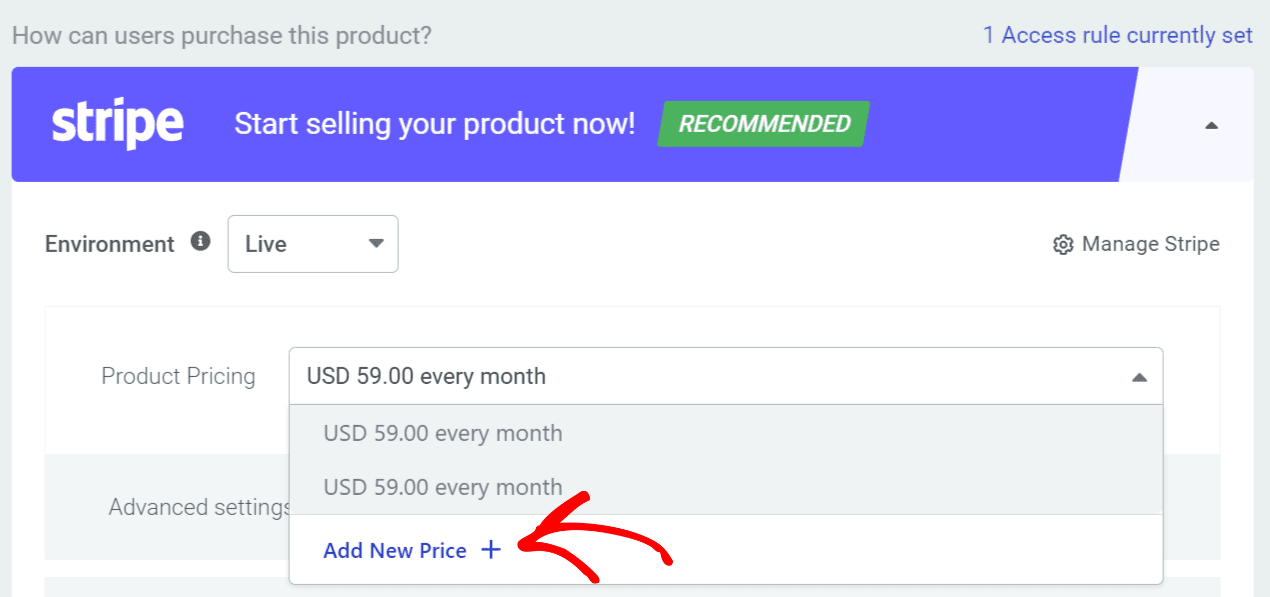
The product pricing you add here can be changed anytime by clicking the dropdown beside it and Add New Price.
Under the Pricing section, you can also manage the Advanced Settings for the product to enable any of the following:
- Include a free trial
- Pass a client reference for checkout
- Pre-populate email at checkout when the user is logged in
- Allow coupons/promotion codes at checkout
After you finish adding the product pricing and managing the advanced settings, you can add a success and failure page for each. You can start typing the page name in the given field or click the “Create new page” link.
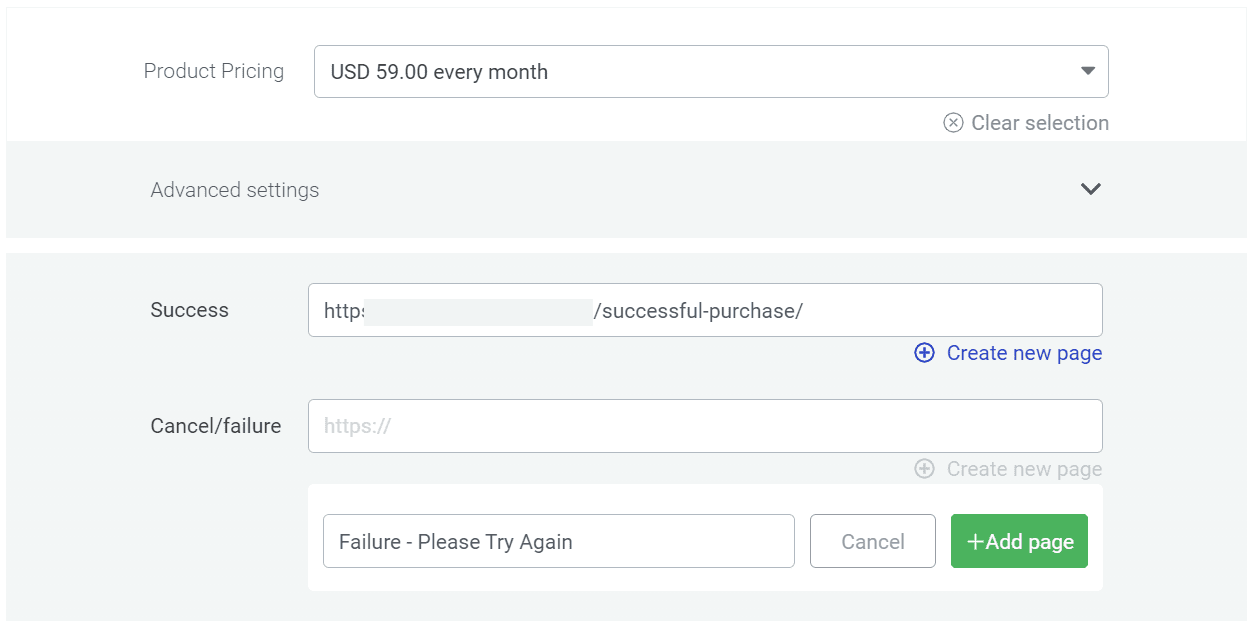
After you add the pages, click the Save button on the screen’s bottom right.
Enabling the Buy Now Button in Thrive Apprentice
When you save the product pricing, you’ll see a notification that says: “To display the buy now button for this product, you must change the action button display settings to “Buy now” > “Stripe” here.
Clicking “here” will take you to a page where you can manage the product’s Access restriction rules.
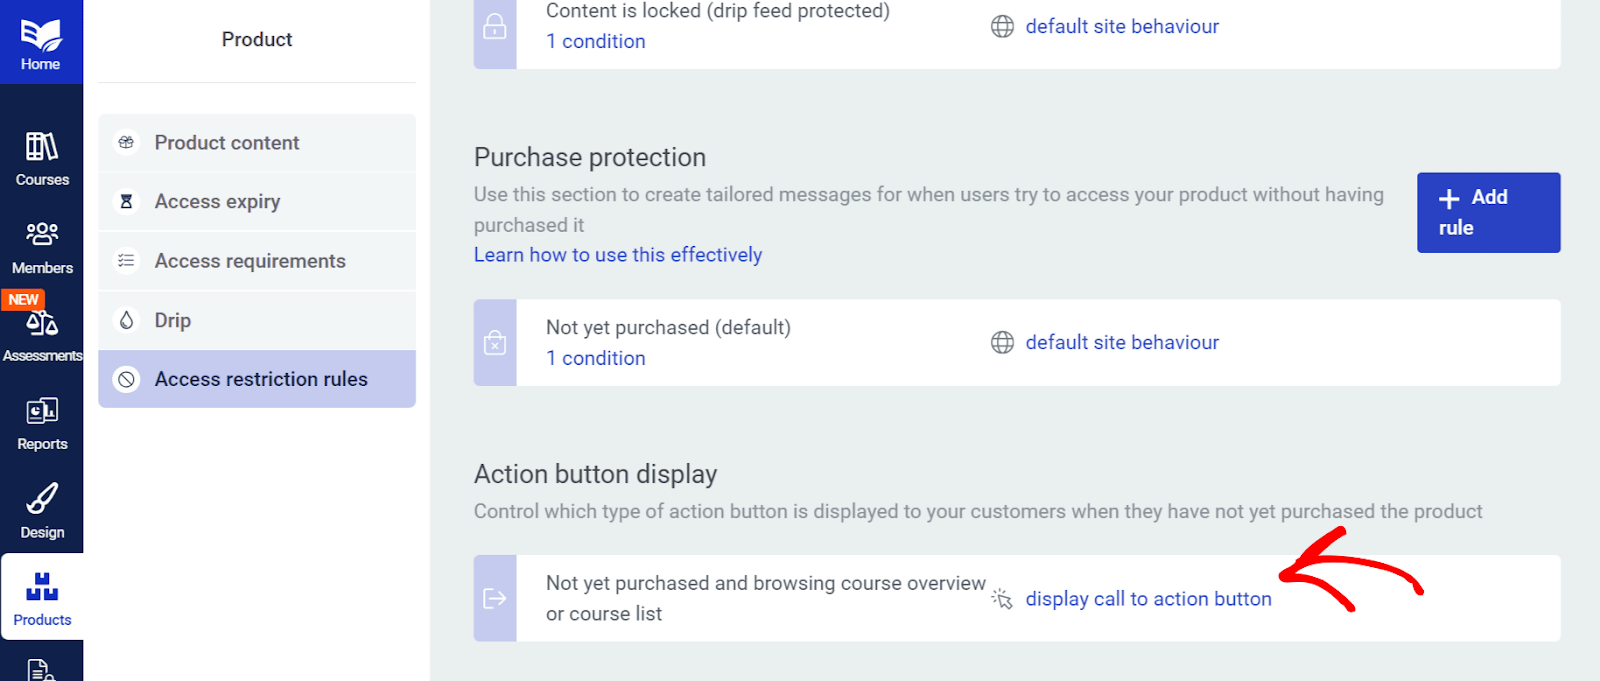
You can also navigate to Thrive Apprentice >> Products >> Select the product >> Access restriction rules.
On the Access Restriction Rules page, scroll down to the Action button display section and click the display call to action button link.
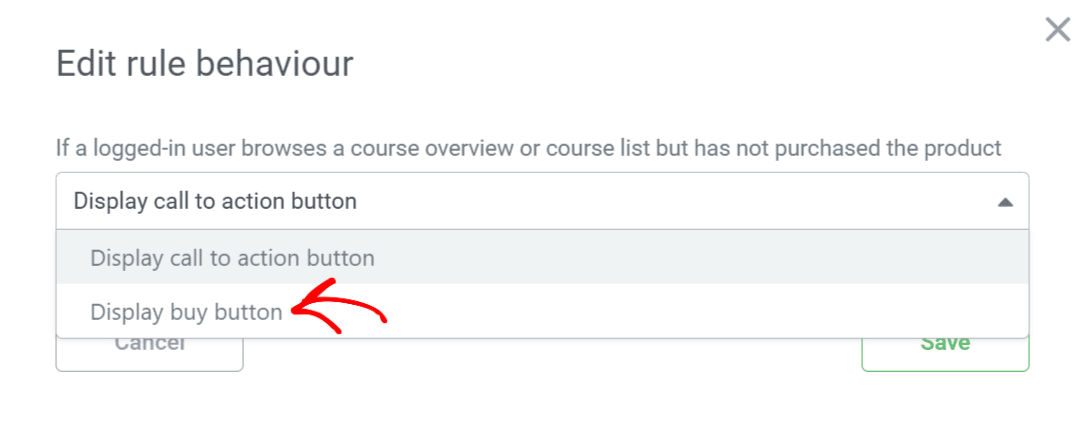
When you click the display call to action button, a popup will appear. You can select the Display Buy Button from the dropdown in this popup.
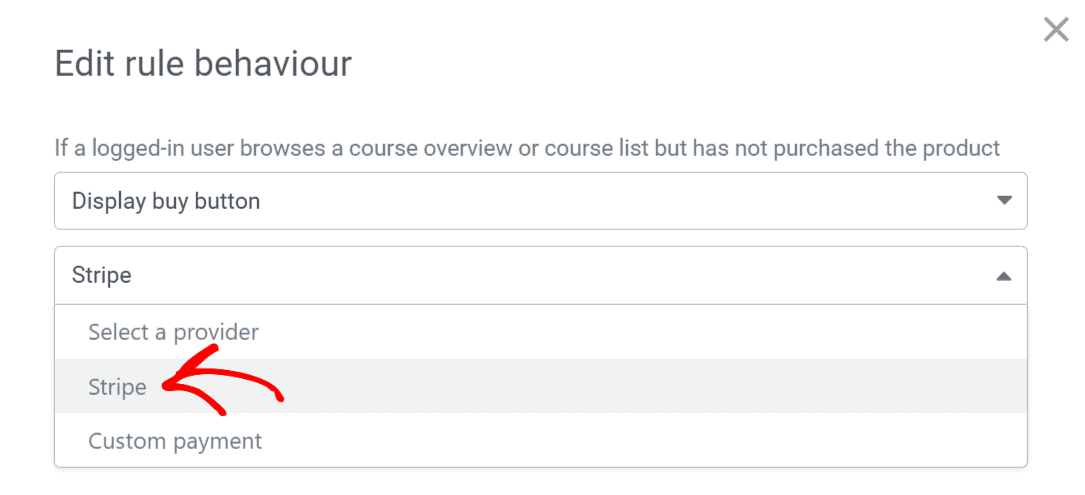
After selecting the Display Buy button, you’ll see a dropdown to select the button provider. In this dropdown, select Stripe.
Once you select the Buy Now button and Stripe as the source, click Save.
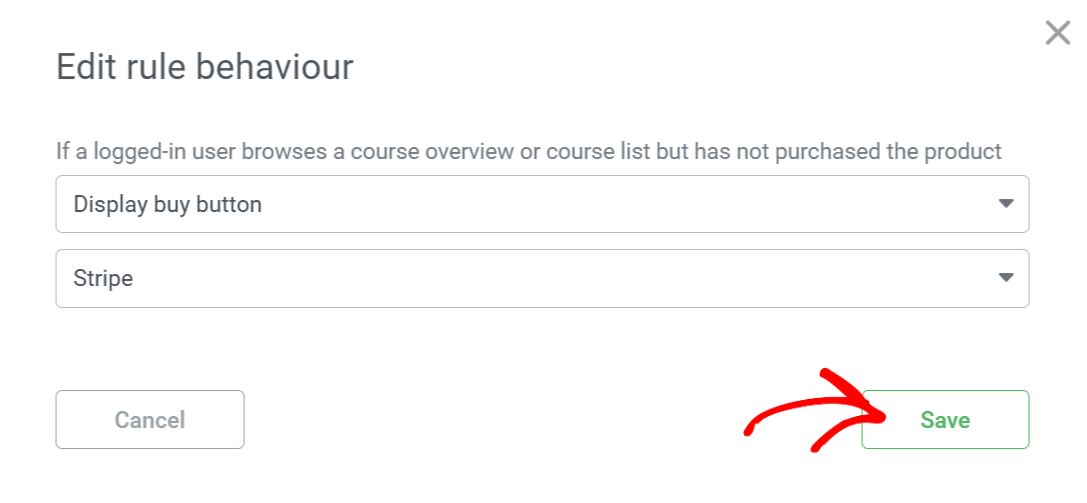
This will ensure you see a Buy Now button on the front end, allowing website visitors to purchase using Stripe as a payment mode.
We’ve just seen the difference between integrating Thrive Apprentice with the two versions of Stripe, enabling product access requirements, adding Stripe products, and enabling the Stripe Buy Now button.
Frequently Asked Questions
Will I be taken to Stripe 1.3 automatically if I’ve connected Thrive Apprentice with Stripe 1.2?
If you’ve already connected Thrive Apprentice to Stripe 1.2 before, you will see a notification in your WordPress backend asking you to Reconnect Stripe.
Will the products I created in Stripe 1.2 be carried on when we switch to Stripe 1.3?
When you navigate to update the Thrive Apprentice plugin to the latest version and navigate to Thrive Apprentice >> Products >> Specific Product’s Access Requirements, you’ll see a notice informing you about the transition.
Next, Thrive Apprentice also lets you add custom payment links, which this article explains.