This article might be useful to you if you want to give access to your students to the first lesson of a premium course, that they can buy from your website.
The idea is as it follows: you have a free course on your website, for all your registered users. Anyone wanting to take this course just needs to sign up for an account or log into their already existing accounts, and they are automatically granted access to it.
In parallel with this course, you are also selling a premium one. In order to let your users know what the course is about and how much they could benefit from buying it, you want to give them a sneak peak by offering the first lesson for free. The remaining content can be accessed only after purchasing the product, and will later on be dripped on a weekly basis.
What you need to know and have ready at hands for when you plan to recreate this example:
☑how to create a Thrive Apprentice course and restrict access to it
- How to Create Your First Thrive Apprentice Course
- How to Use the Products Section of Thrive Apprentice
- Thrive Apprentice – Login & Access Restriction Settings
☑use a checkout or membership tool for selling your product:
☑how to create an automation in Thrive Automator
☑how to use Drip to drip feed your course content
- Using the Drip Campaign Templates in Thrive Apprentice
- Create and Sell a Dripped Content Course in 7 Steps
So feel free to use all these resources that take you step by step through the process of setting them up before moving on to the process steps described in this article.
1. Setting up the Course for all Registered Users
Start with the free course, that’s available for all registers users on your website:
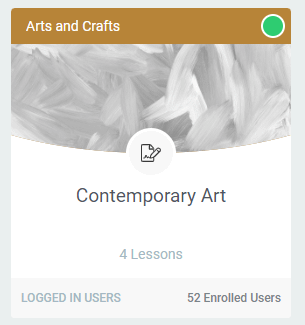
Create the lessons that you want, and don’t forget to publish the course when you are done setting it up.
Later, after my premium course is set up as well, I will come back to this course and insert in my last lesson a direct link to my premium course.
This way, the users who are completing the first course, can click on this link and get redirected to the start of my premium course. Through their action, they are basically unlocking the first lesson of the paid course, thanks to the automation that I set up in the backend.
The steps will be detailed later in this article, but this is just a piece of information to keep in mind for when we will reach that step.
Tie the Course to a Product
So after you’ve created your course content, you can swipe over to the access “Access restrictions” tab. Here you need to make sure that your course is tied to a product:
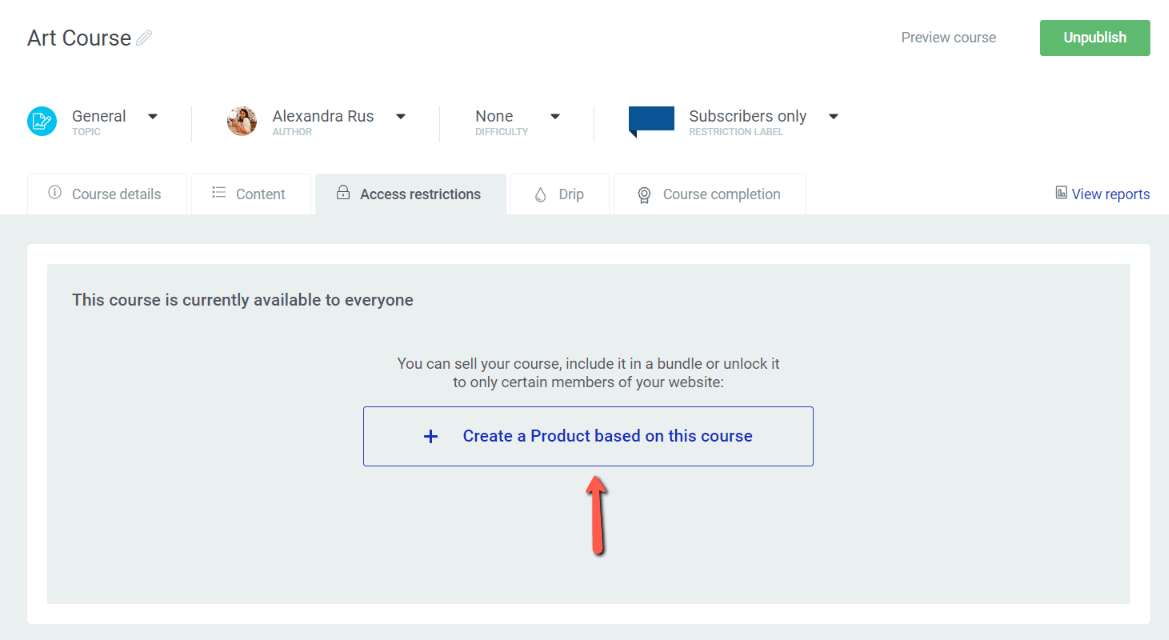
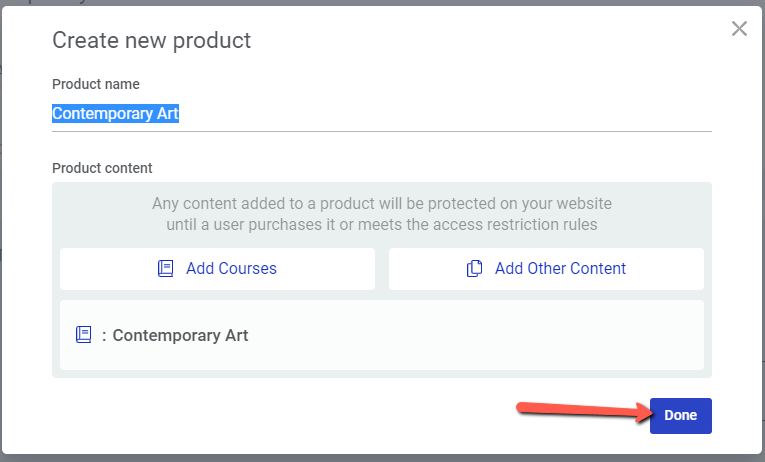
The system is intuitive and will add by default the selected course to your product, and fill in the name for you:
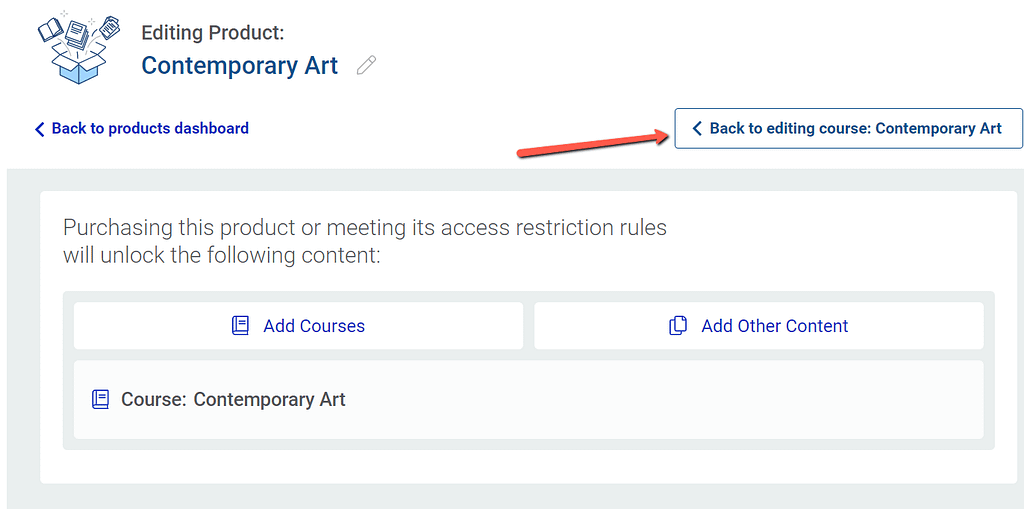
You will be redirected to this view, where you can set up other requirements and rules for this product:
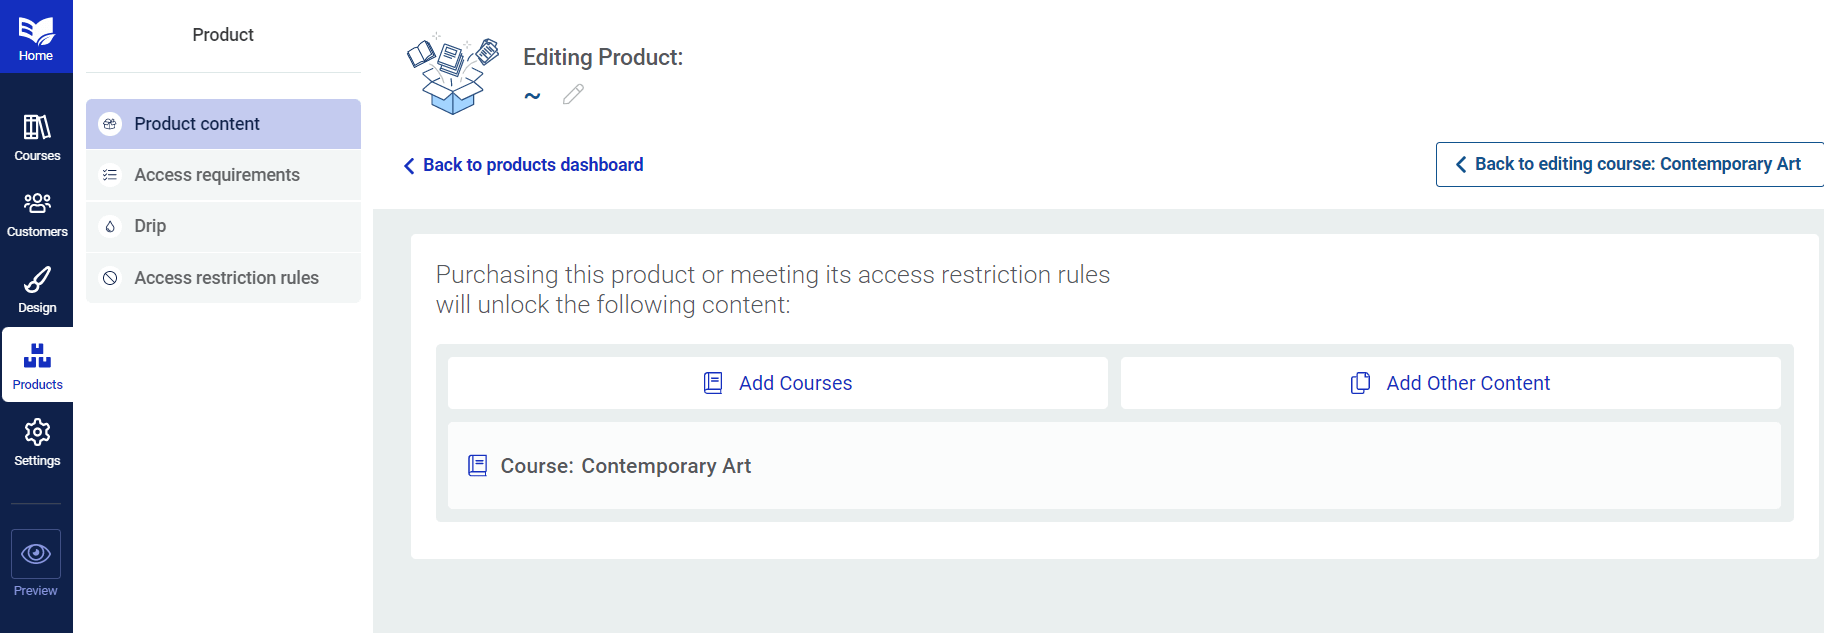
But before you do that, go back to the editing course view:
Create a Drip Schedule
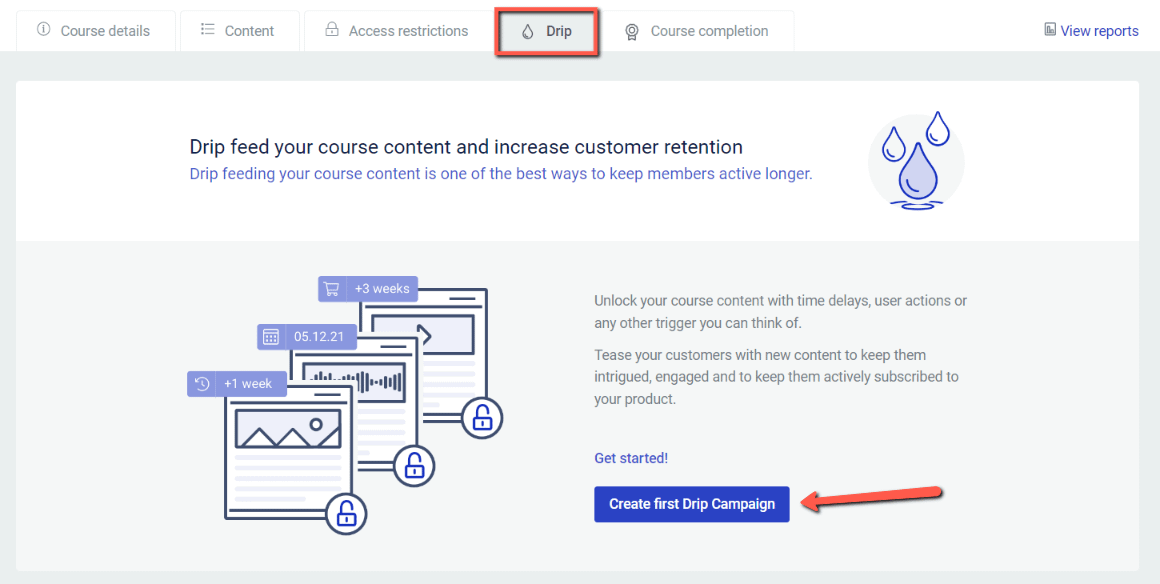
Next, let’s create a drip schedule for this free course:
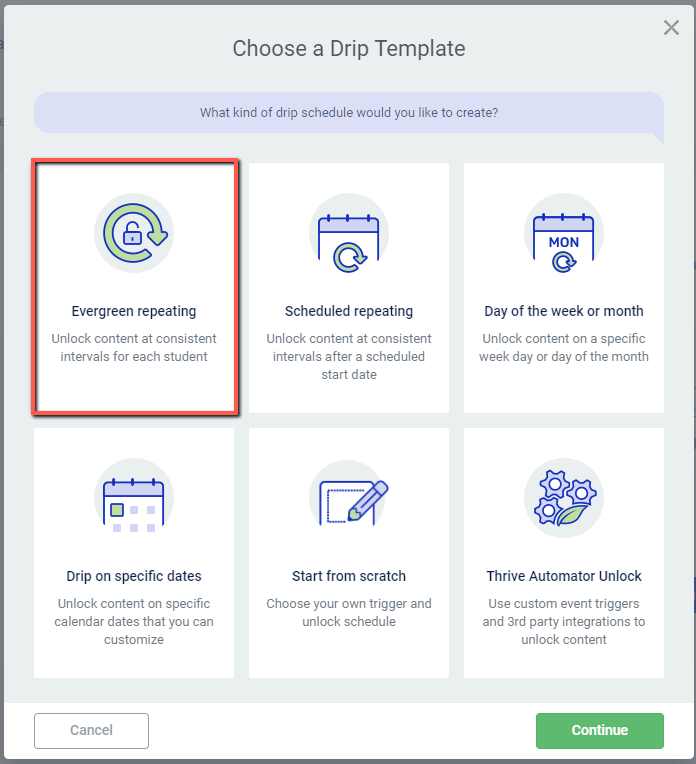
Here, pick the “Evergreen repeating” template:
And then, set it up as it follows:
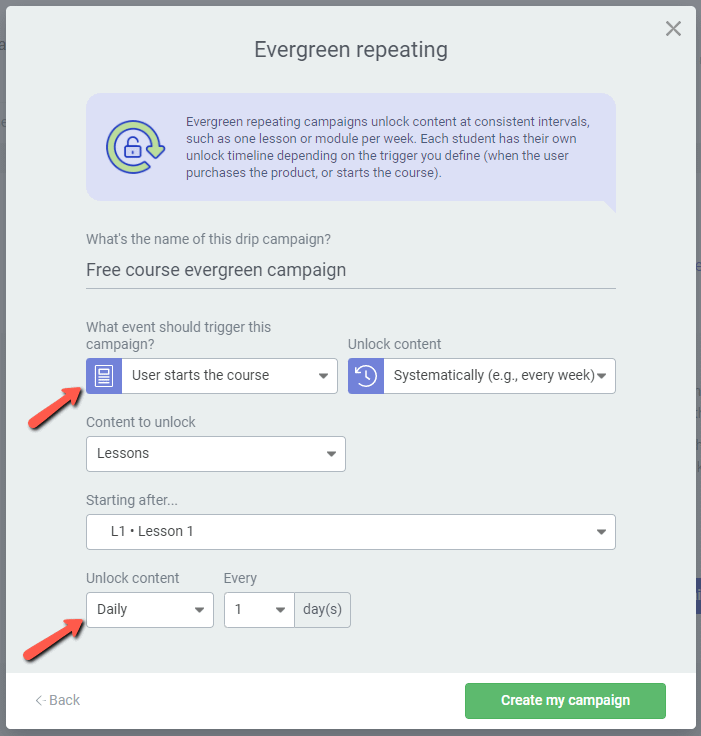
This means that after the user starts the 4 lesson course, new content will be dripped on a daily basis, for four days. On the fourth day, the last lesson is unlocked and the user will be able to see the content that has the redirect link to the premium paid course.
Set up the ‘Access Requirements’
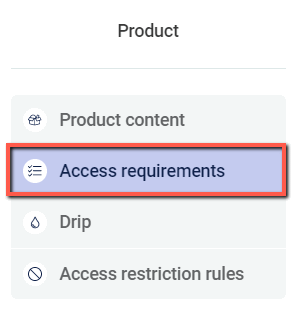
In order to make sure your product is available to logged in users, head over to the “Access requirements” tab:
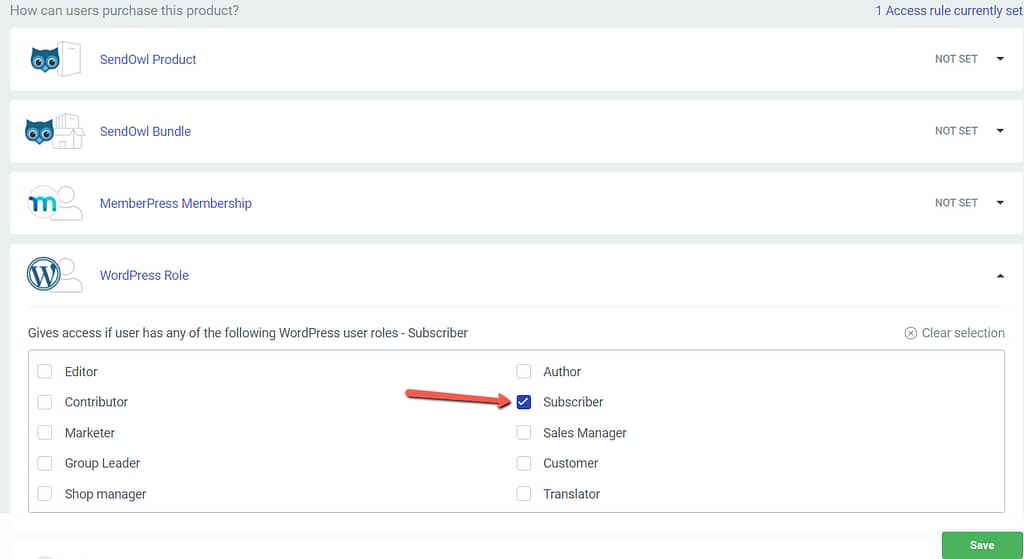
And here, make sure you give access to the “Subscriber” user role:
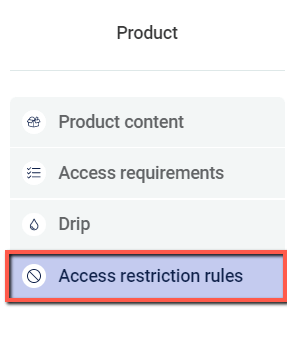
Configure the ‘Access Restriction Rules’
Next you’re gonna have to make sure you configure the content that will be displayed to anyone who is trying to take this course without having access to it:
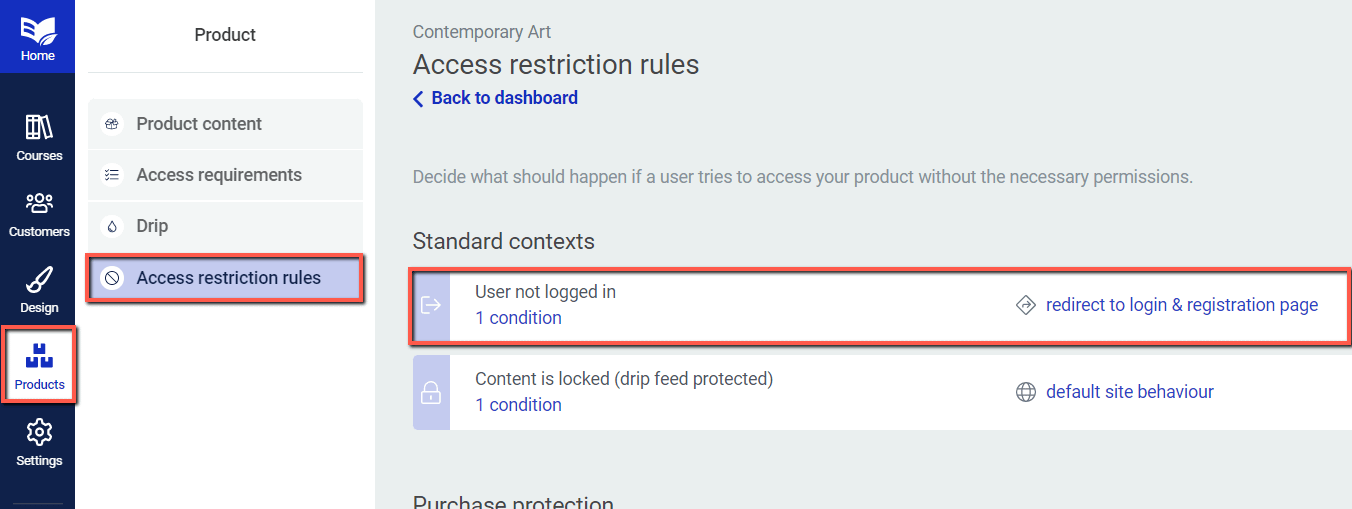
The context that interests you most is for when the user is not logged it:
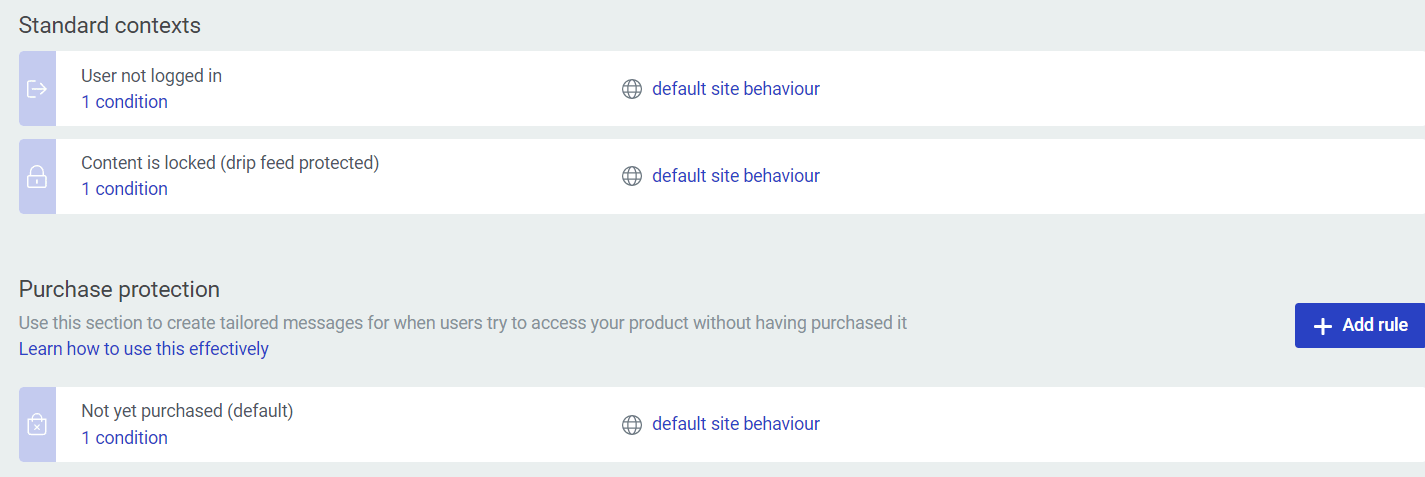
The product comes with the global settings as you’ve set them up in your “Login & access restriction” tab:
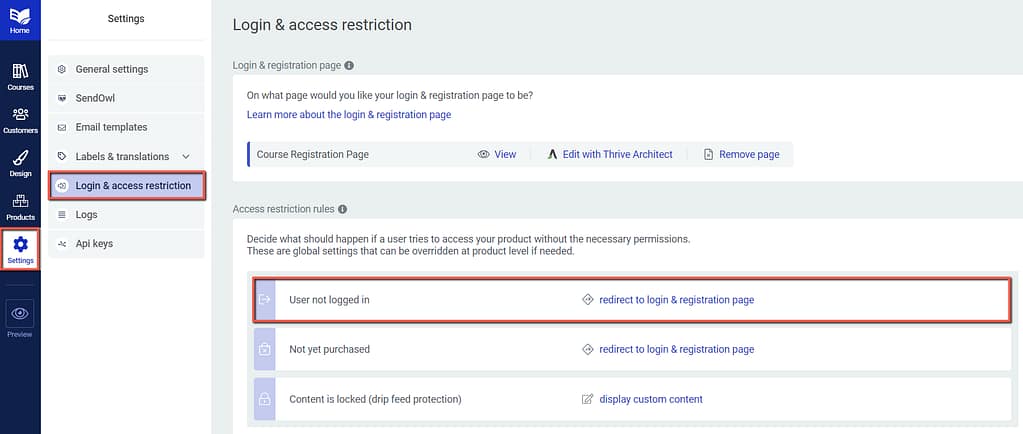
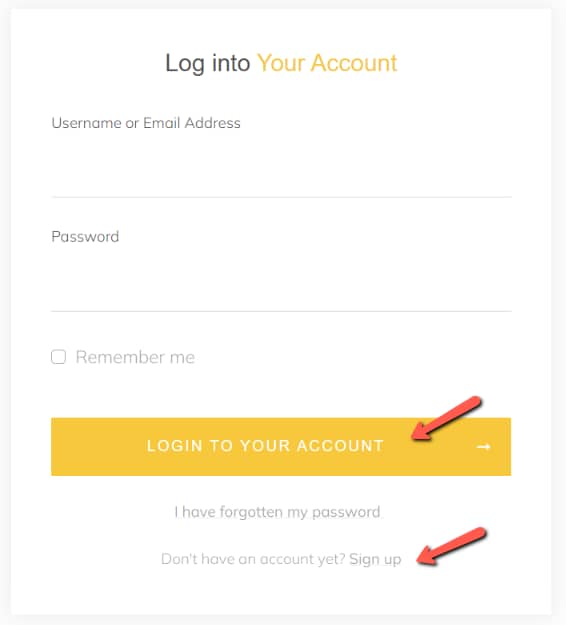
So you can leave them as they are, and basically redirect anyone trying to access this course to a login and registration page, in order to be granted access to it:
Of course, if you want, you can go on and create a custom “Login & registration page” at product level, if you don’t want to use the global one:
You course should now be protected so that only the logged in users would have access to it.
2. Setting up the Premium Course
For your premium course, the process is slightly different, as this one will also have a drip schedule applied to it and will also be sold through a checkout tool.
Create your course content and make sure it’s published, as the drip feature only works for published content:
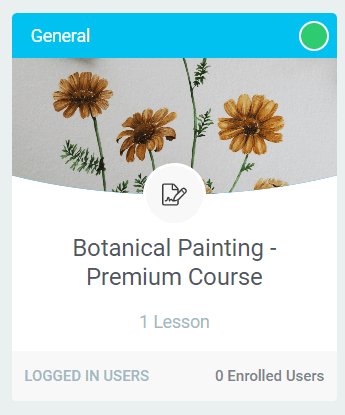
Tie the Course to a Product
Here as well you need to make sure that your course is added to a product:

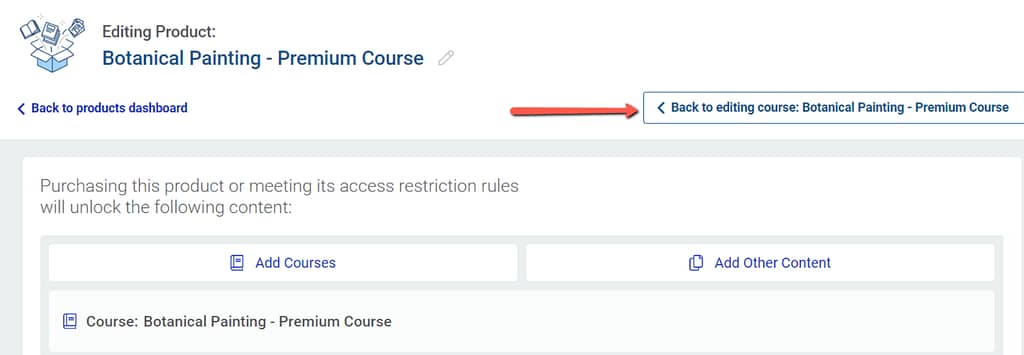
After you do that, you will see this dashboard again. Now simply go back to editing your course, from the button available at the top right-hand side of the screen:
We will be returning to this set of options later, but before that there’s one more thing left to do in the course overview dashboard, and that is to set up the drip schedule.
Create a Drip Schedule
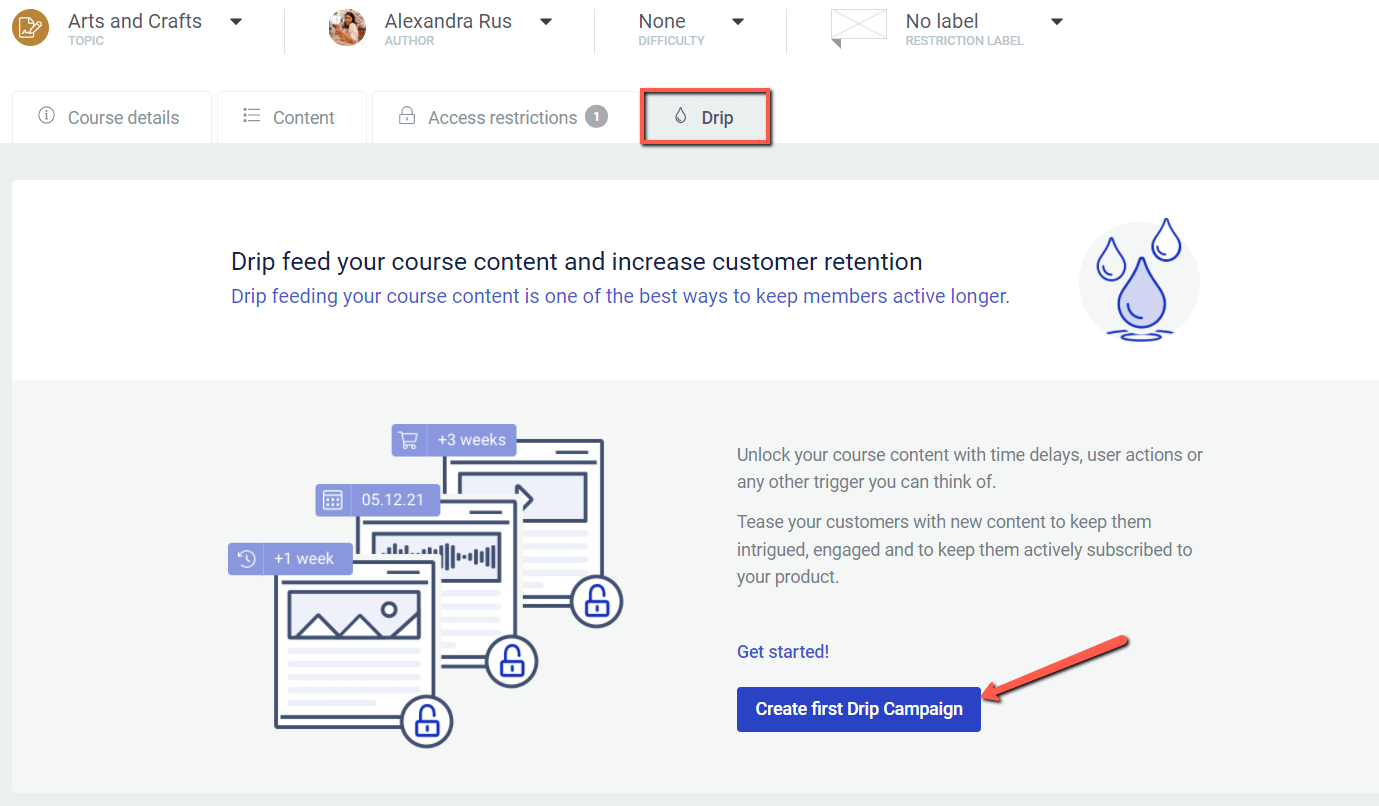
In your course dashboard, make sure you are on the “Drip” tab in order to create your first drip campaign:
From the lightbox that opens, select the “Evergreen repeating” one, which means that it will unlock content at consistent intervals for each student:

Next, you can start setting up your drip campaign. Give it a name and make sure the event that triggers this campaign is the purchase of the product:
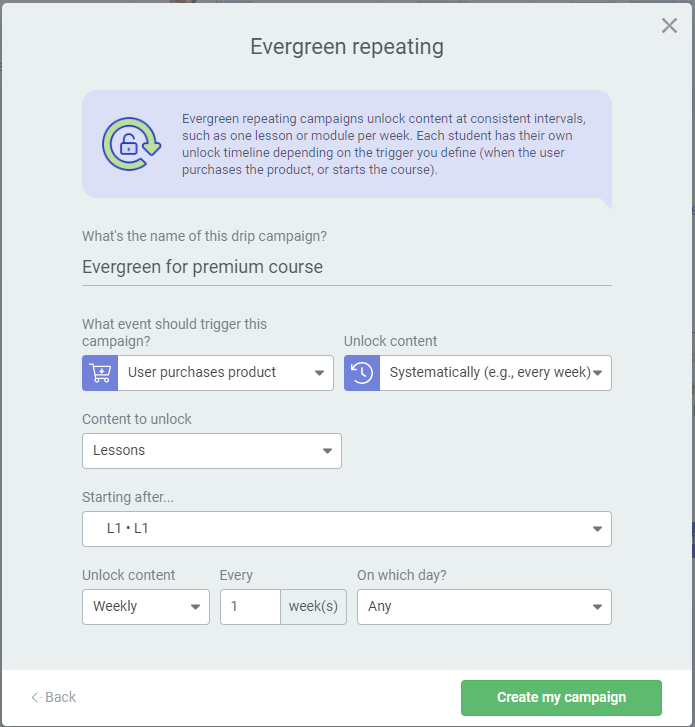
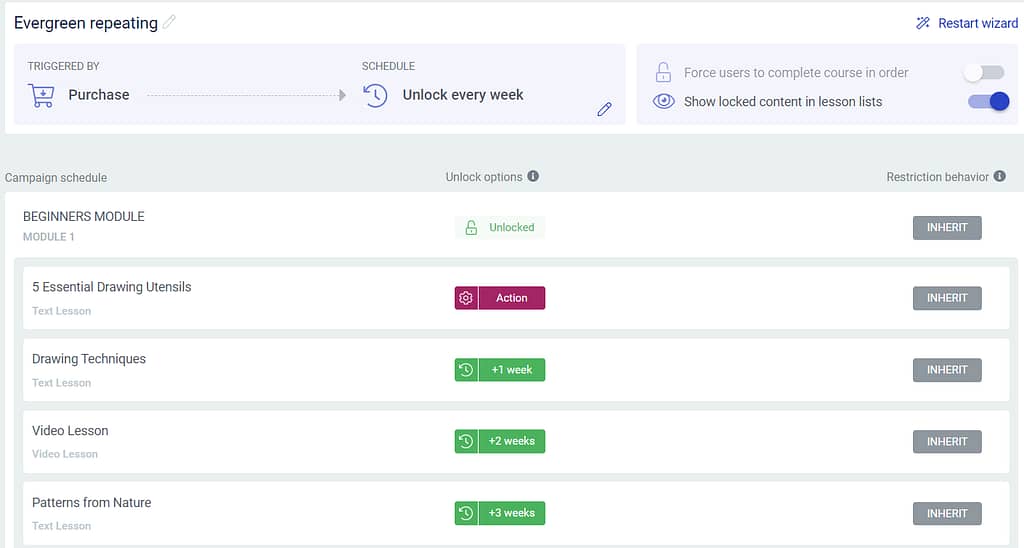
As per the above template, our course will start dripping content after the product is purchased. The content will be drip fed after the first lesson, on a weekly basis.
Now, as this is set up at the moment, the user would have to first buy the course, in order to get access to the first unlocked lesson. After this, the course content will be dripped weekly:
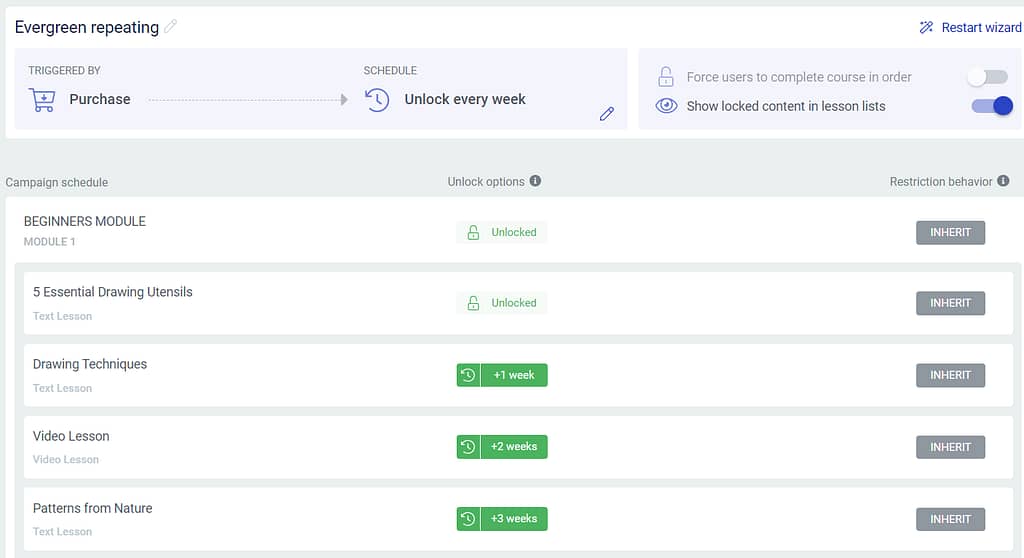
But since our goal is to offer the first lesson for free, there are still some further adjustments to make here.
For that, I’ll go ahead and click on the “Unlocked” option next to my first lesson:

Add a new rule:
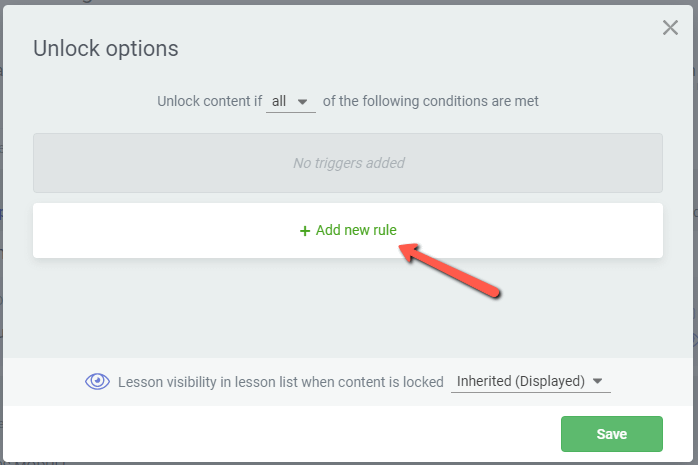
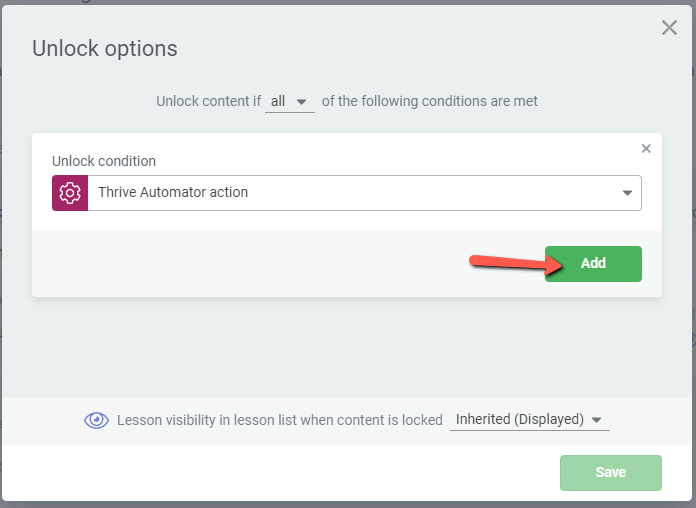
And set a Thrive Automation action as the condition that needs to be met in order to unlock this first piece of content:

Click once more on “Add” and then save your work:
Your campaign schedule should look something like this:
This is all that needs to be done for the time being in the course overview page. Don’t forget to publish your course, as the drip feature only works with published content.
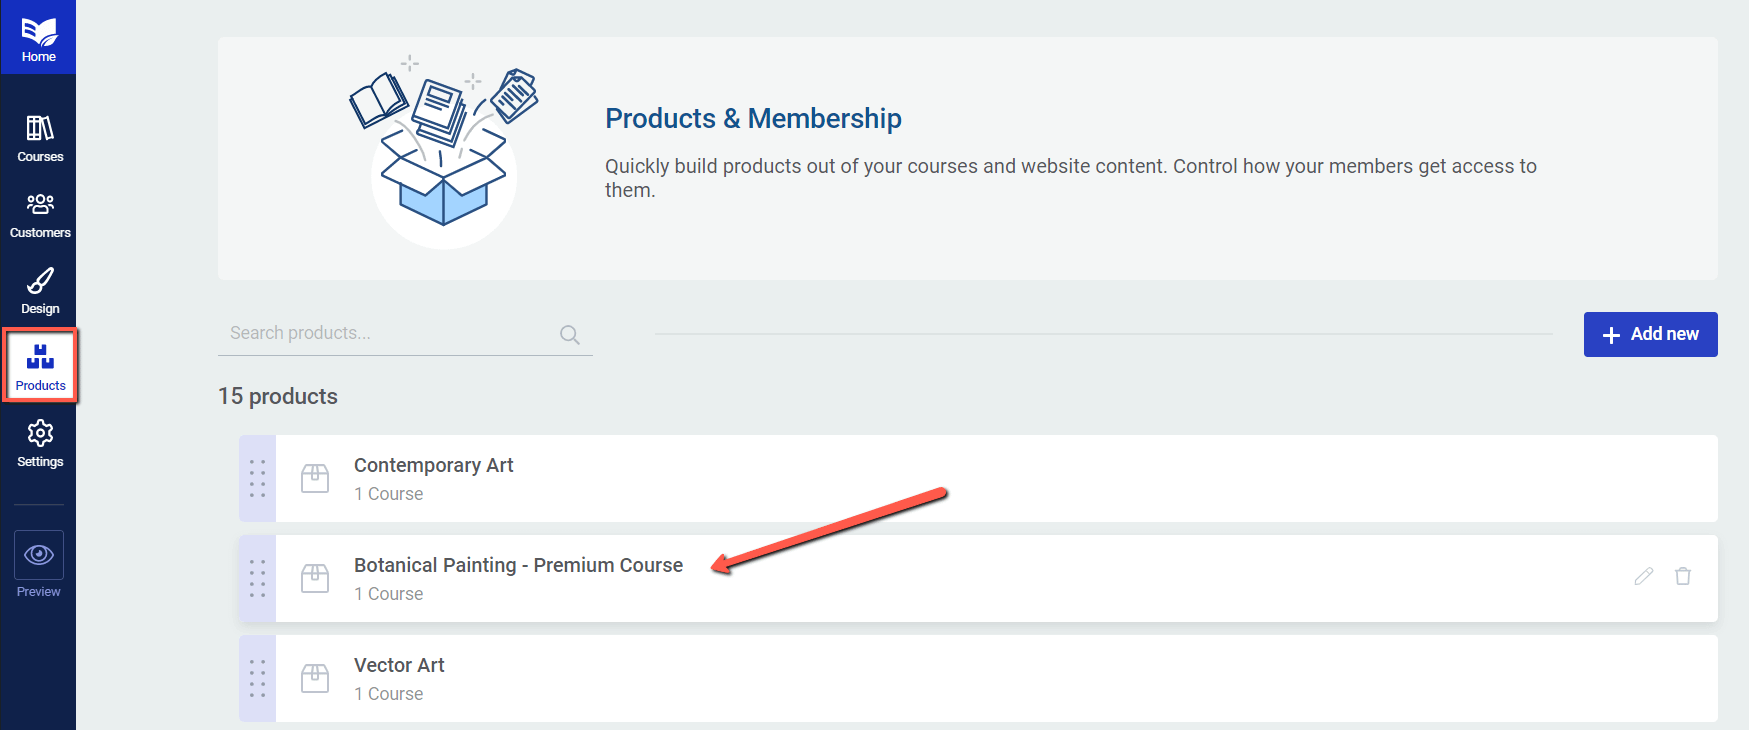
You can now move on to the Products section of your left sidebar, to start setting up the restrictions and requirements at product level:
Set up the ‘Access Requirements’
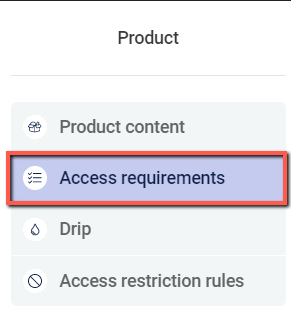
After you access your premium product, you can go systematically though each tab, starting with the “Access requirements” one:
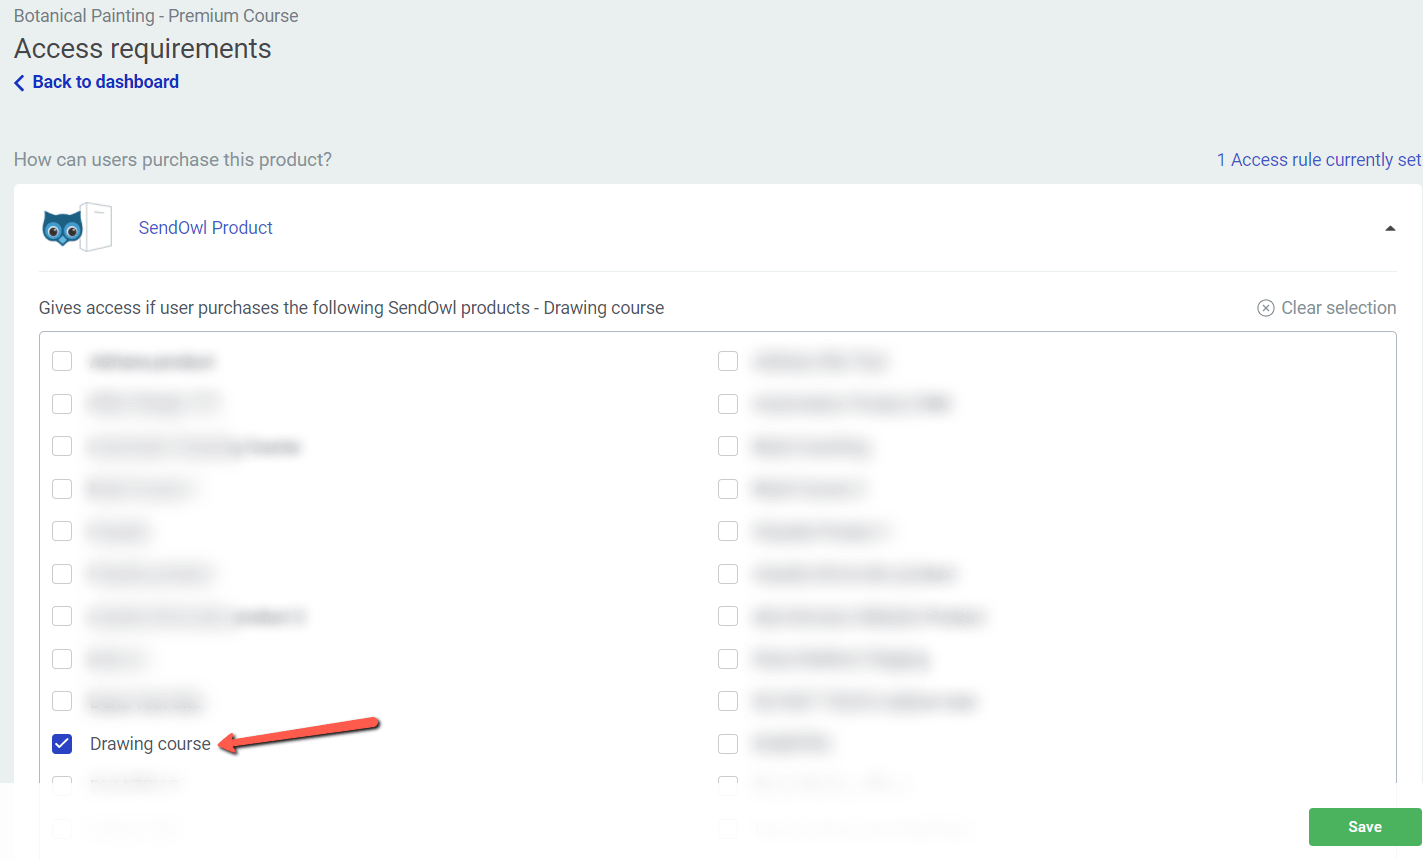
Here’s where you can select the checkout tool or membership that you are planning to use for selling your product. I’ve already set up a SendOwl integration, and created my product in my SendOwl account, so I can just go ahead and select it from the list of available products:
Important!
A Thrive Apprentice product is a digital layer that protects your content. Access can be granted to it simply by having the required user role, or, alternatively, by selling it through a third party platform.
A SendOwl product is a separate product that you create in your SendOwl account. The integration with this platform only works if you create a SendOwl product that you tie to your Thrive Apprentice product. So you’d have a product within a product and sell it as one.
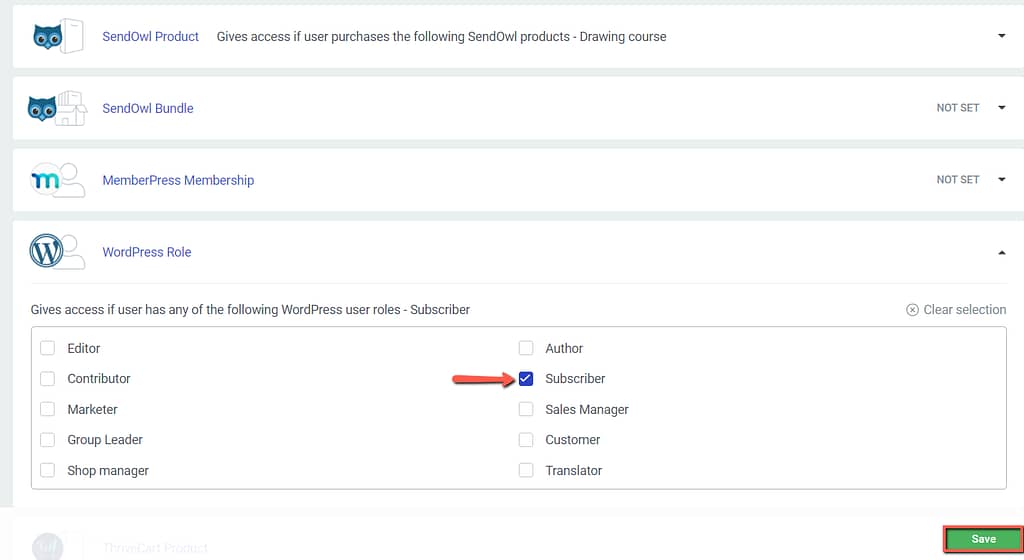
After you select the course from this list, move on the the WordPress Role section, and make sure the “Subscriber” role is selected as well and then save your work:
Apply the Drip Schedule
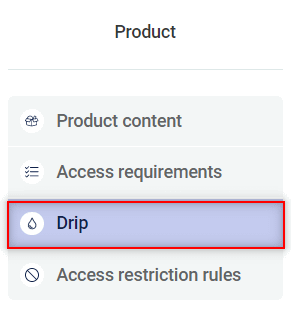
Next, let’s move on to the “Drip” tab:
At the moment there’s no drip schedule applied to your product:

But if you open the drop down list you will be able to select the one that you’ve just configured in the previous steps:
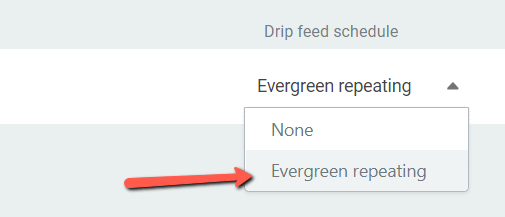
With this set up as well, you can go on to the next tab.
Configure the ‘Access Restriction Rules’
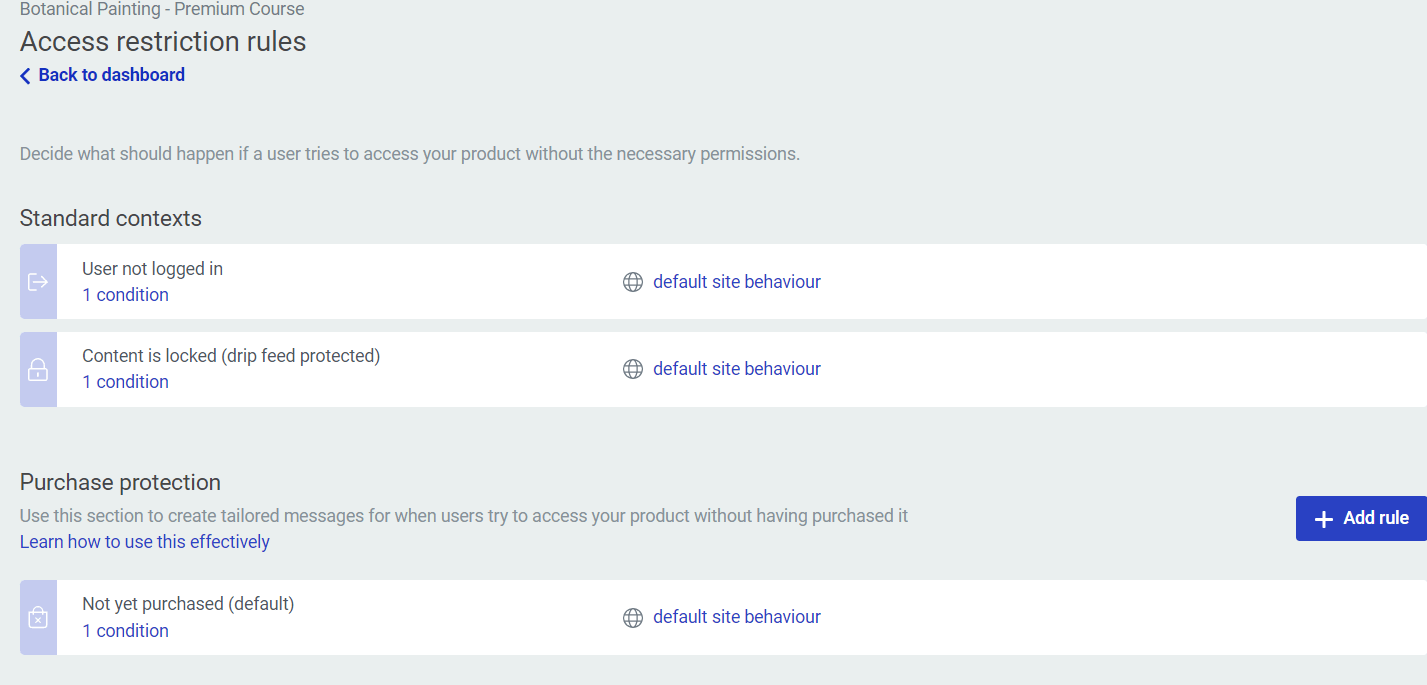
Here’s where you can decide what content should be displayed if a user tries to access your course without the necessary permissions:
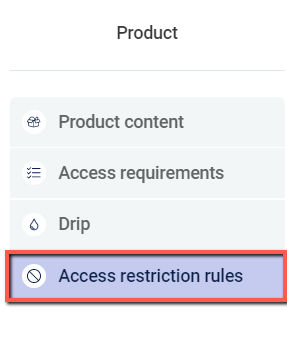
You can keep the global settings, or you can create custom ones at product level:
As an example, here’s what you could set up for each particular case:
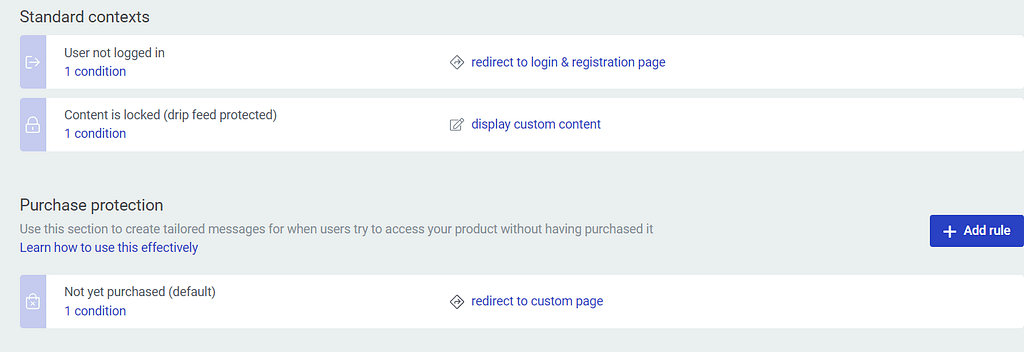
The not logged in users can be redirected to the login and registration page when trying to access the course. Then, for the users who are trying to access locked lesson, for example, you can display a custom content, and lastly, for anyone who has not yet purchased the course, you can set up a redirect to the sales page of the course.
3. Create an Automation in Thrive Automator
Lastly, let’s move on to the final step of the process, which is setting everything up in Thrive Automator, so that your first lesson of the premium course would be unlocked for the users who have completed the free course.
In your Thrive Automator dashboard, click on “+Add new”:

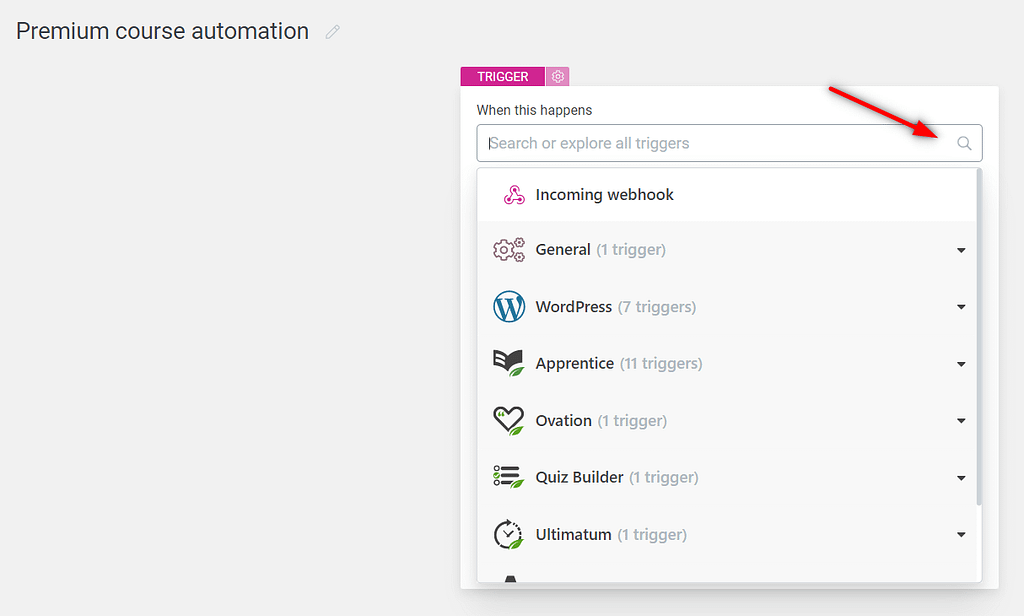
Give your new automation and name and open the first drop-down list to select the start trigger:
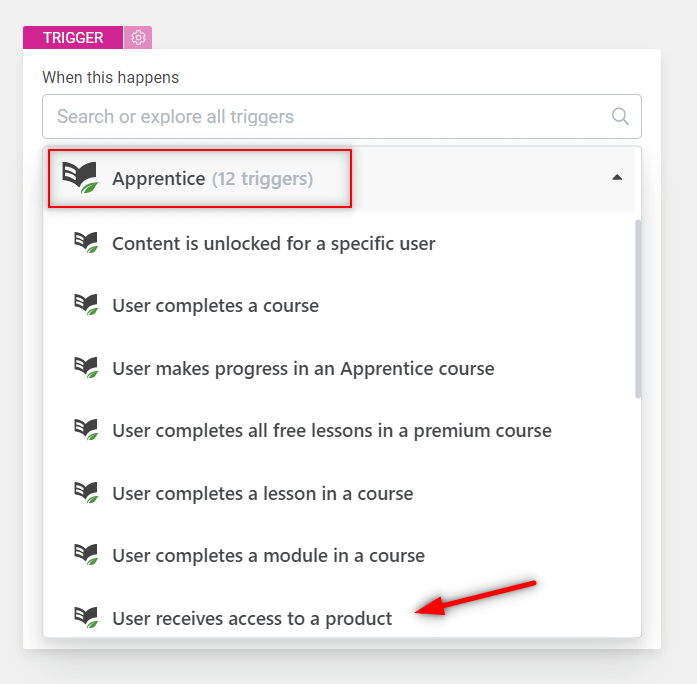
Here, select “User receives access to a product”:
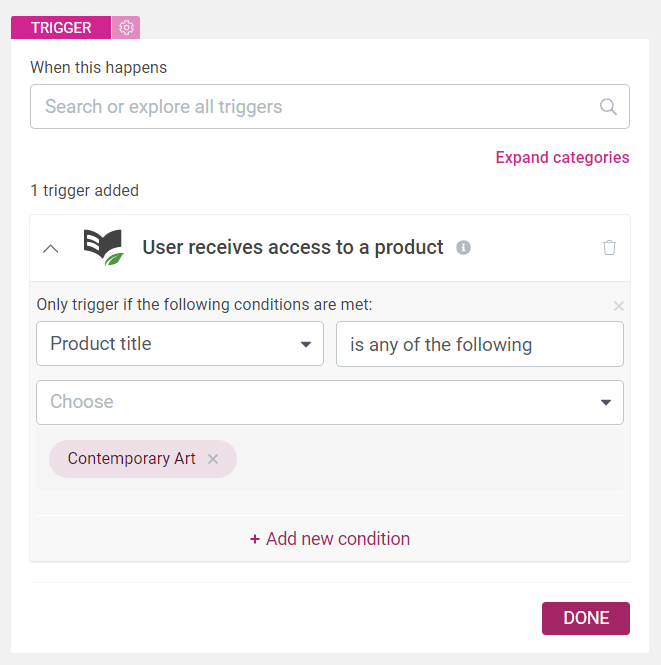
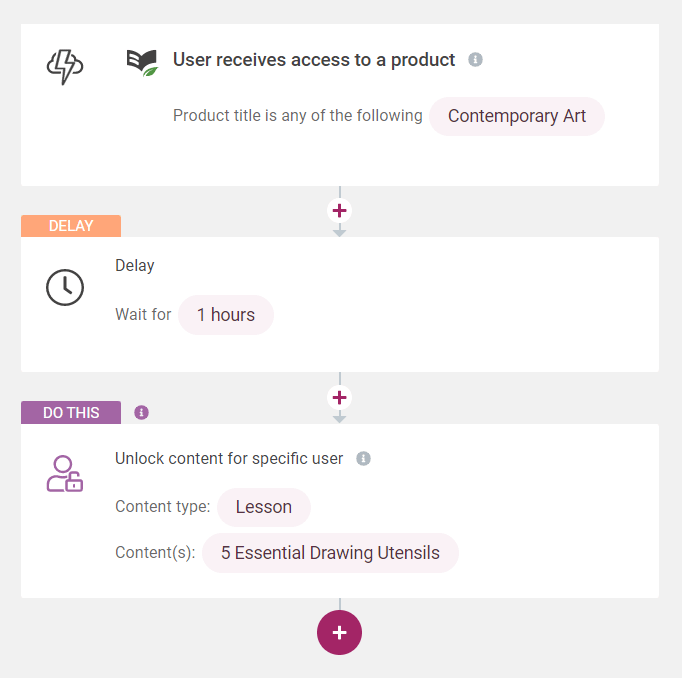
The automation should be triggered by those users who get access to your first free course, by signing up on your website. What you also need to do here, is add a condition that only targets that first free course:
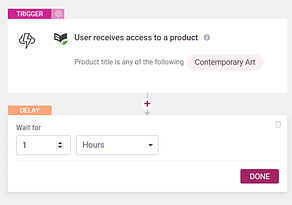
Then you can add another action, in the form of a delay, if you want:

This is optional, though. With this action you are just adding some extra time in between the start trigger and the unlocking of the first lesson of the premium course:
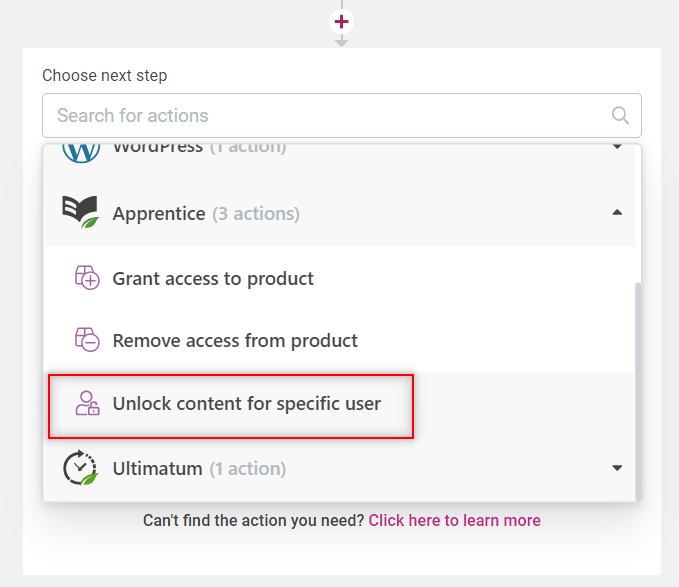
And then lastly, there’s the last action to still be added here, and that is to “Unlock content for specific user”:
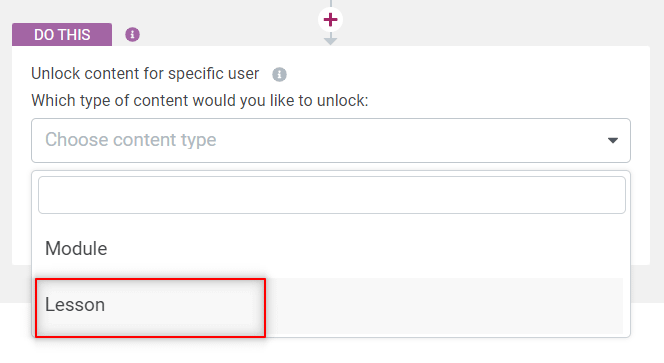
Select the lesson field from the drop-down list:
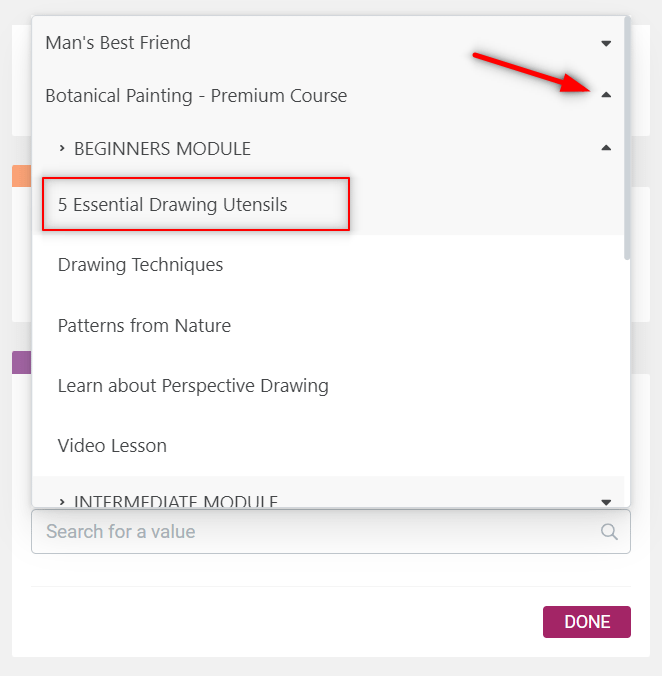
And then simply look up the first lesson of your premium course:
Once everything is done save and run your automation:
4. Set up the Redirect Link for the Premium Course
Lastly, just as mentioned at the beginning of this article, your users should be able to come across your premium course while completing the lessons from the free course.
There are multiple ways in which you can do that. You can set up an autoresponder that let’s them know about the premium course in an e-mail, you can create a sales page, or, for the situation that would work in this example, you can simply add a redirected link in the last lesson of your free course.
Anyone completing the course and getting to that last lesson, will be also able to take the first lesson of your premium course.
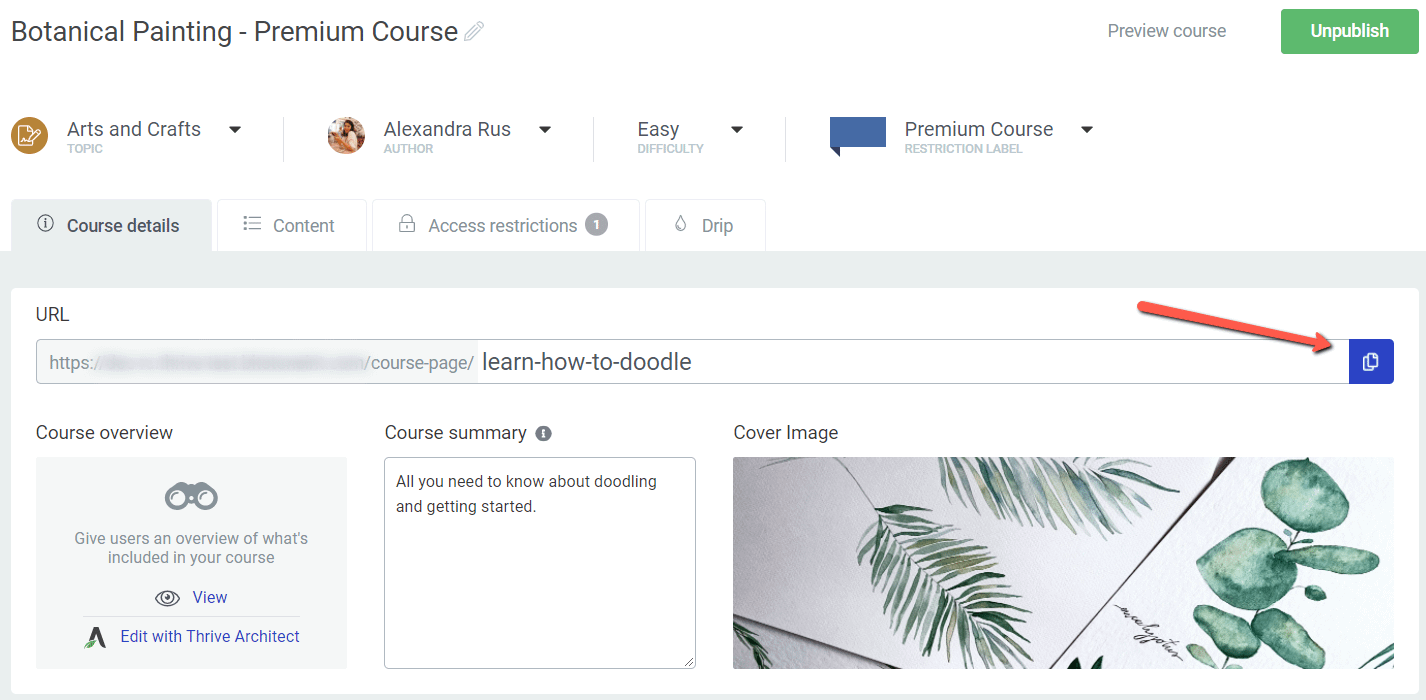
So for this one last step, copy the link of your premium course:
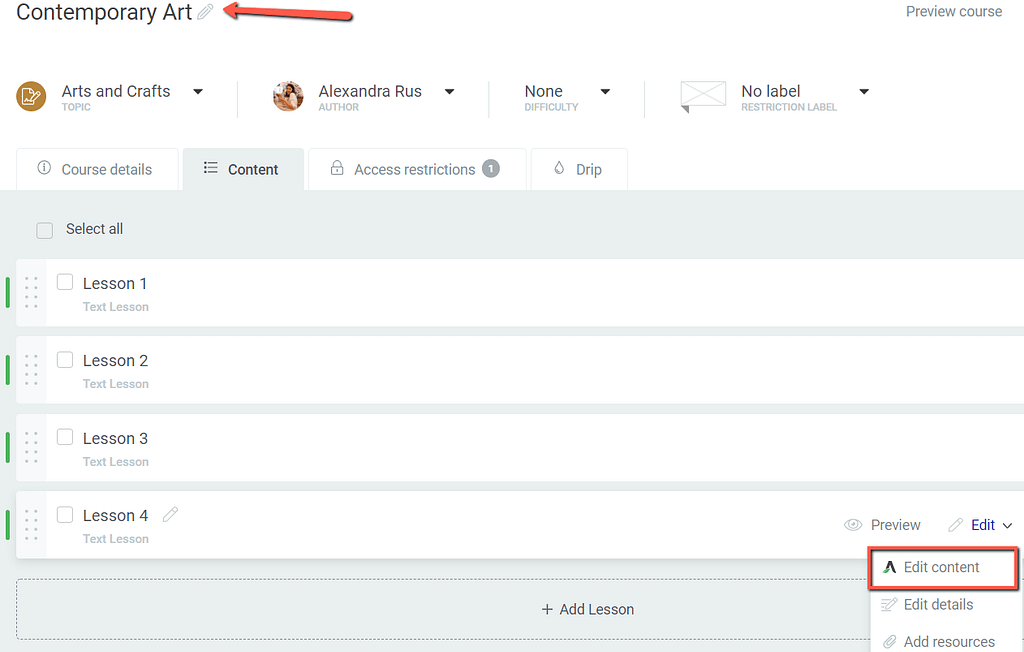
Then access your free course dashboard and edit the content of your last lesson:
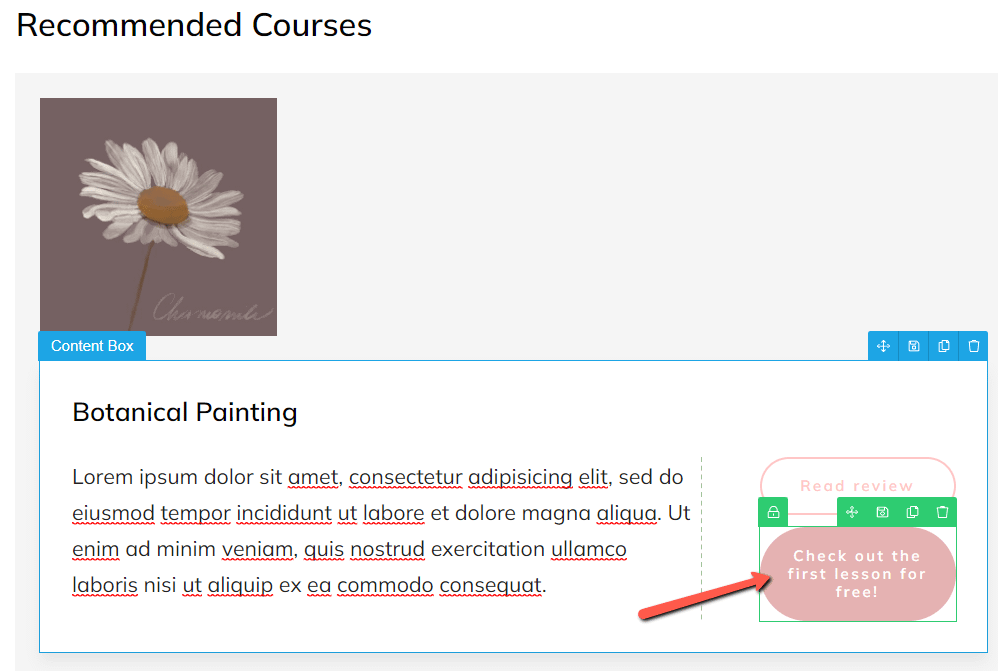
I will use a button for this example:
And simply add a link to it:
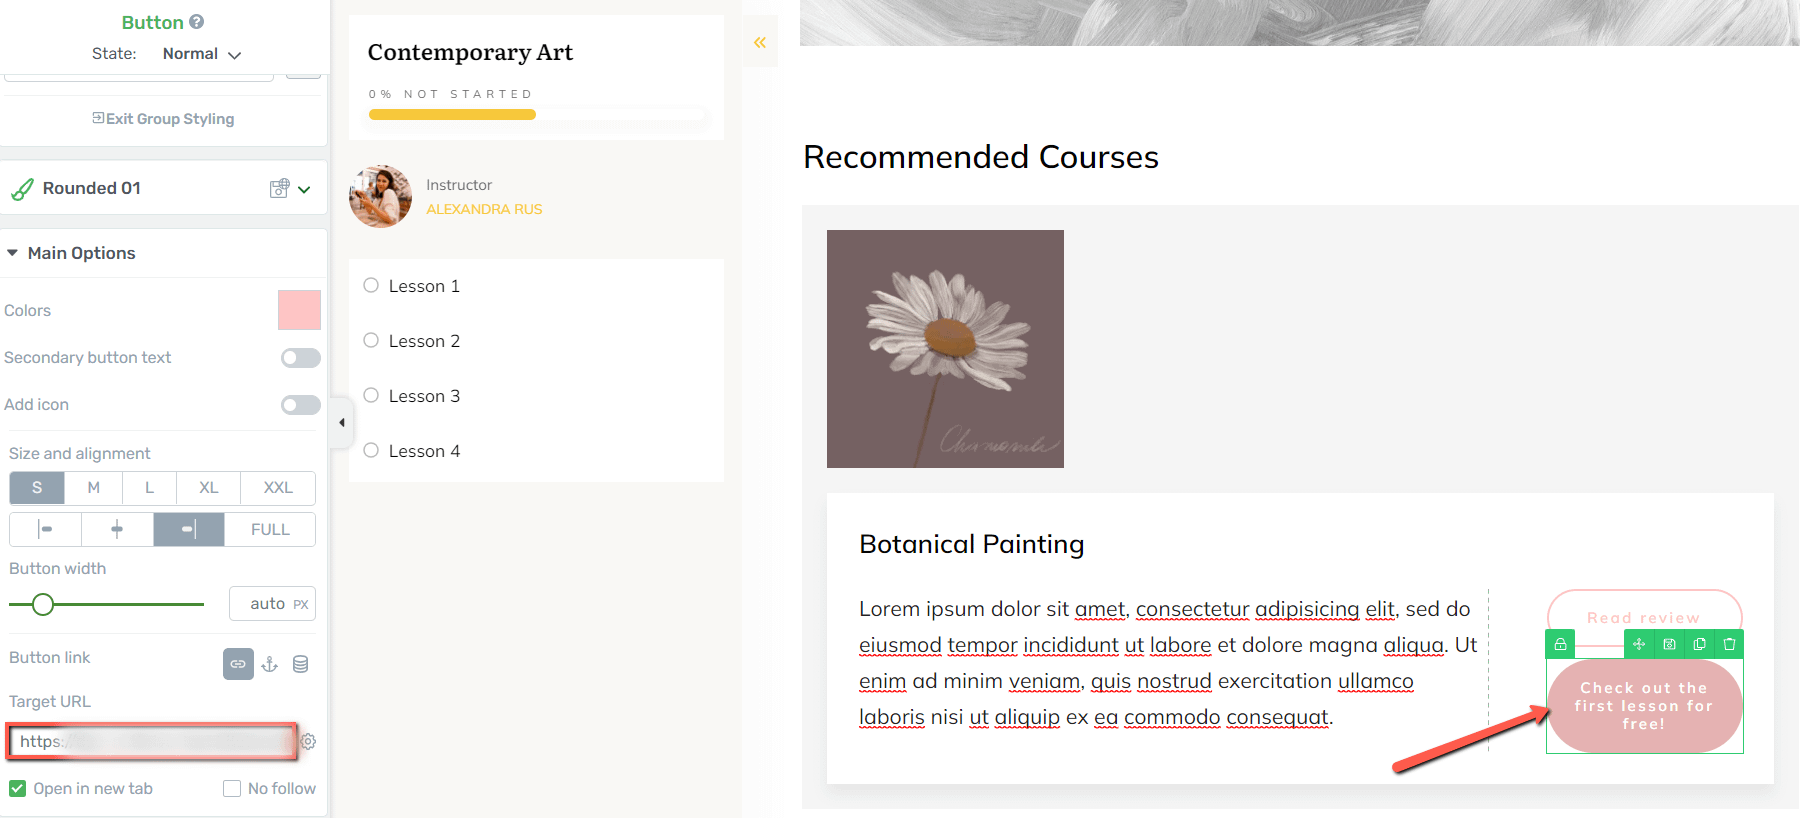
And now, as soon as the fourth lesson is unlocked, the user will be able to click on this button and get redirected to the first lesson of my premium course. The lesson will be unlocked and free, thanks to the automation set up in Thrive Automator.
Don’t hesitate to take a look at this section of our knowledge base in case you want to see more examples of automations created in Thrive Automator.
Or, if you want to learn more about Thrive Apprentice, check out this section.