|
Thrive Apprentice 4.0 has just been released! Check out this blog post to see what changes will be applied once you update. Unsure about what the Drip feature for Thrive Apprentice is? Learn all about it here. |
If you want to keep your students engaged for longer, all while being flexible to their needs, then the Drip feature might be exactly what you are looking for.
With Drip, you have the ability to release course content over an extended period of time, at intervals set by you.
Here are the most important key aspects you should know about Drip:
- choose between six different Drip campaign templates (or create your own)
- use various events to trigger the unlocking of dripped content in your course
- unlock content systematically or at custom intervals set by you
- hide or show upcoming lessons from the visual timeline
Where to Find it
The Drip feature can be found in Thrive Apprentice, listed as a separate tab in the course dashboard:
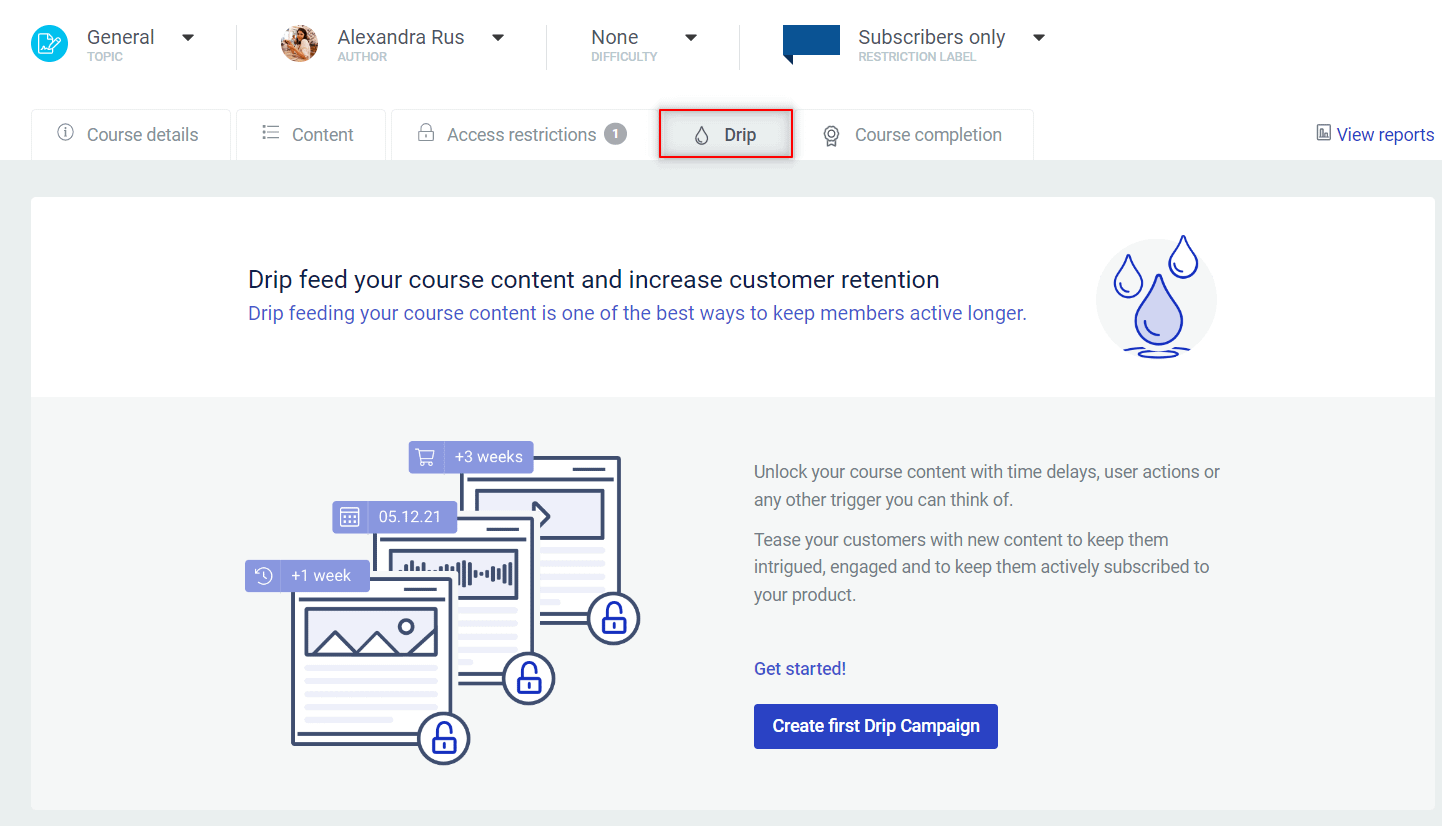
In order to get started, click on the “Create new Drip Campaign” button:
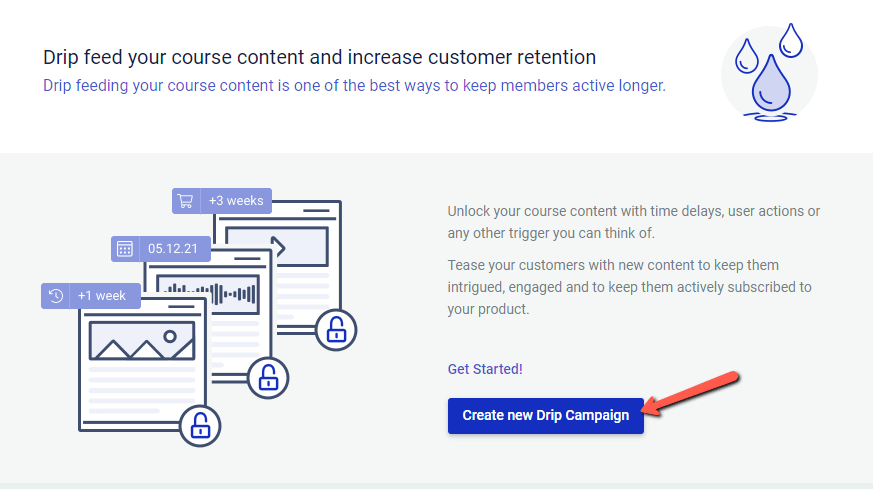
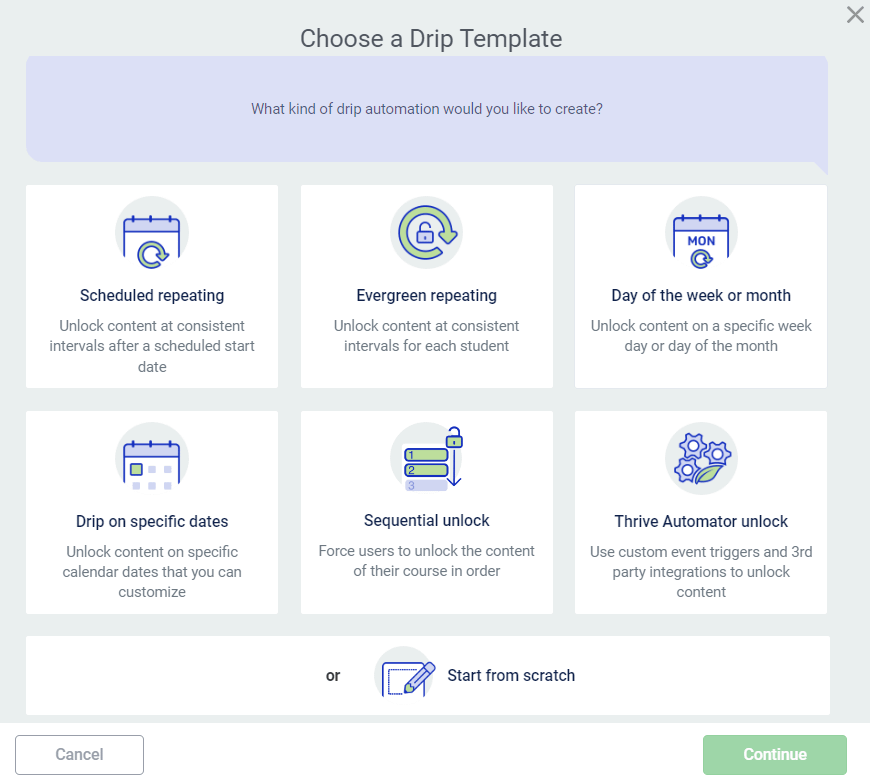
This will trigger a pop-up with all the available templates you can choose from.
Important!
The drip campaigns can only be applied to published modules and lessons from your course. Therefore, make sure your content is fully published, in order to successfully use this feature.
If you have unpublished content, you will be notified about it in the dashboard:

Drip Templates
Before setting up the campaign, you will have to decide what kind of schedule you would like to create.
Choose the campaign based on how you want to unlock content for your students. You can choose between multiple trigger events, such as the start of the course, the purchasing of the course, or even a third party event from Thrive Automator.
Furthermore, you can also choose the template based on when you would like to start drip feeding course content. You can unlock it at consistent intervals, on a specific day, week and so on.
Each template comes with predefined settings, ready for you to use. You can also manually tweak these settings, but keep in mind that this might also change your campaign template.
For example, you might start with an “Evergreen repeating” template, meaning that each student has their own unlock timeline:

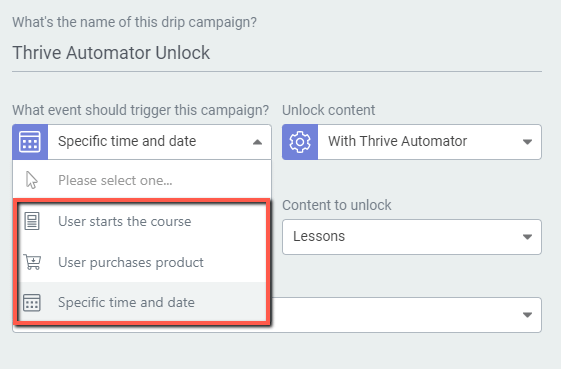
You can pick between three different start triggers. If you go for the “User starts the course” or “User purchases product” ones, then new content will be unlocked for those users at consistent intervals, after they start the course, or after they purchase it (just as the trigger says):

However, if you select the third trigger, “Specific time and date”, and reapply the drip schedule your drip campaign template will change into a “Scheduled repeating” one:
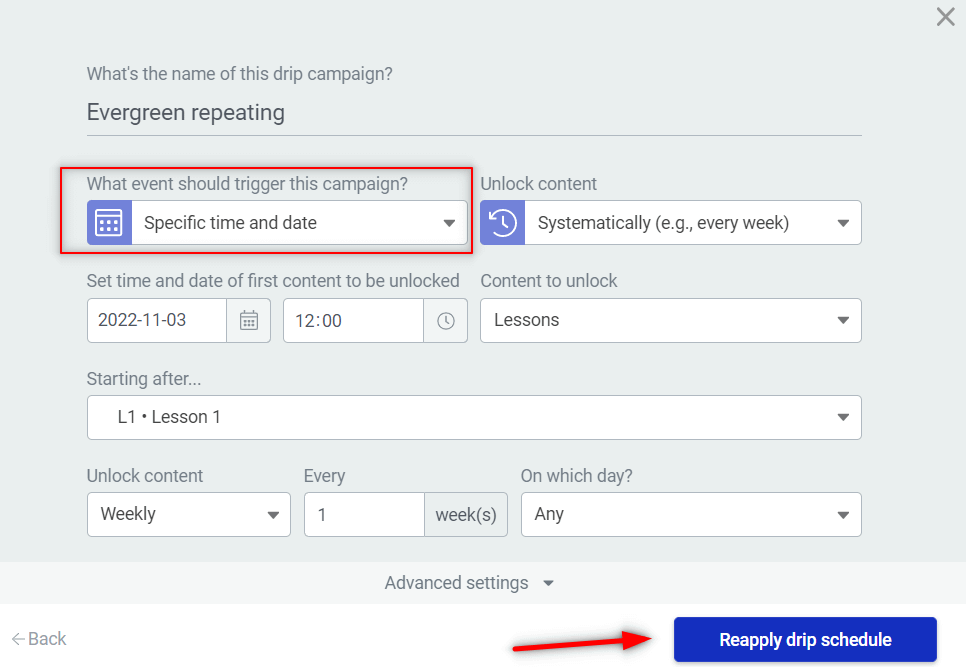
Unlike evergreen campaigns, the content is now unlocked at the same time for everyone starting from the scheduled date and time you choose.
Now let’s have a quick look at each of the available templates, and see how you can use them:
Evergreen repeating
The “Evergreen repeating” campaign is set off when someone purchases the product or starts the course, and the students have to unlock their own unlock timeline, individually:
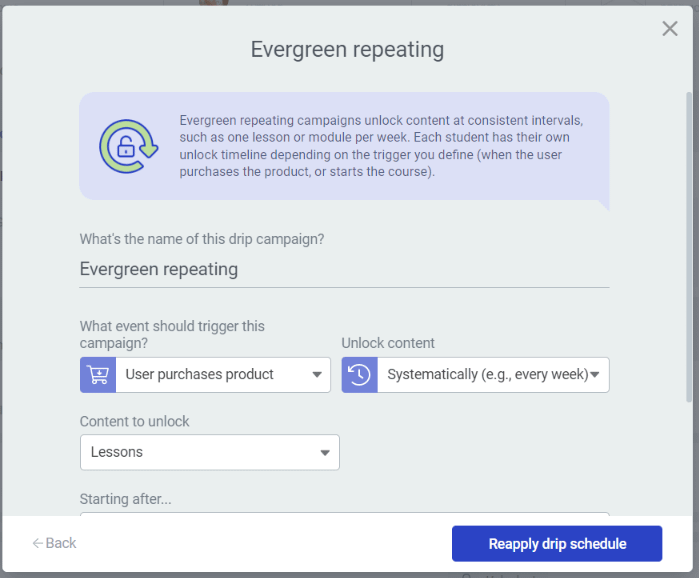
So, you might have seven different users purchasing and starting the course at different times.
The remaining options from this view can be used to define what content to unlock as well as the frequency of the dripped content. Also, don’t forget to name your campaign before creating it:
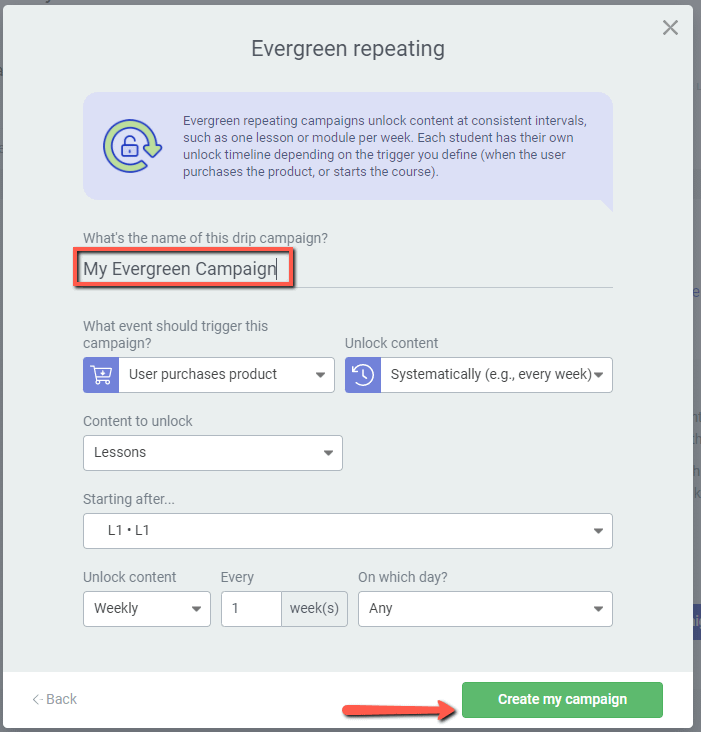
As soon as you create your campaign, you will be taken to this view where you can see how the schedule looks like:
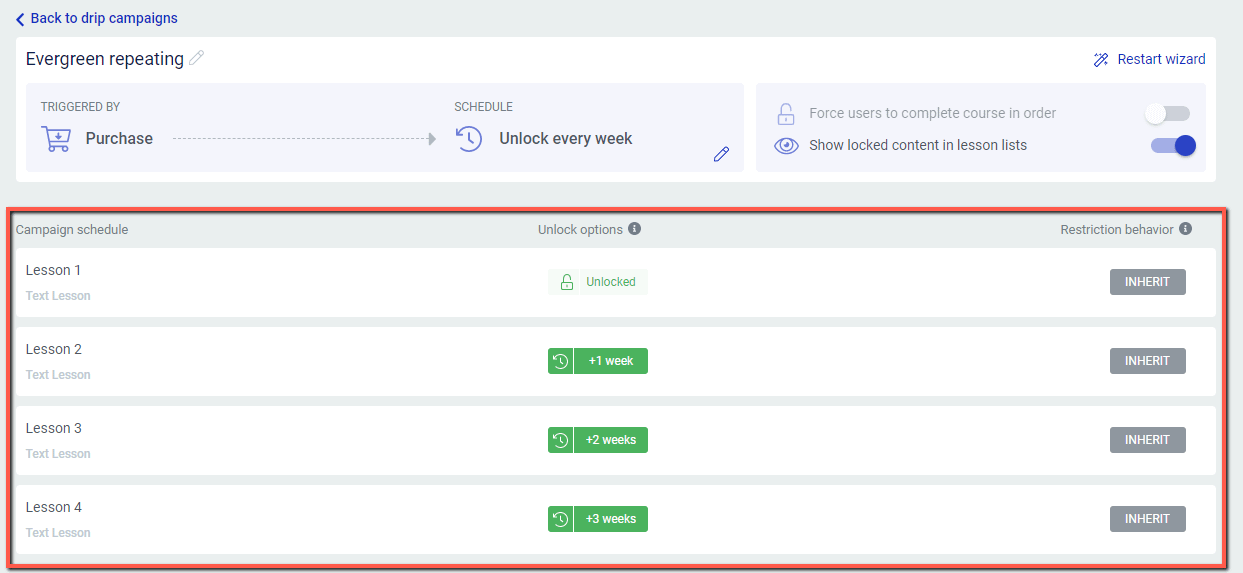
Here’s where you can also edit the campaign, add new unlocking rules, set up the restriction behavior and many more. All these options are detailed in the dedicated options section of this article, that you can find linked here.
Furthermore, if you want to read a separate article about the “Evergreen repeating” campaign, then make sure to check out this article:
Scheduled repeating
This campaign will be triggered by a specific date and time. This means that the campaigns created in this template will unlock content at the same time for everyone, at consistent intervals:
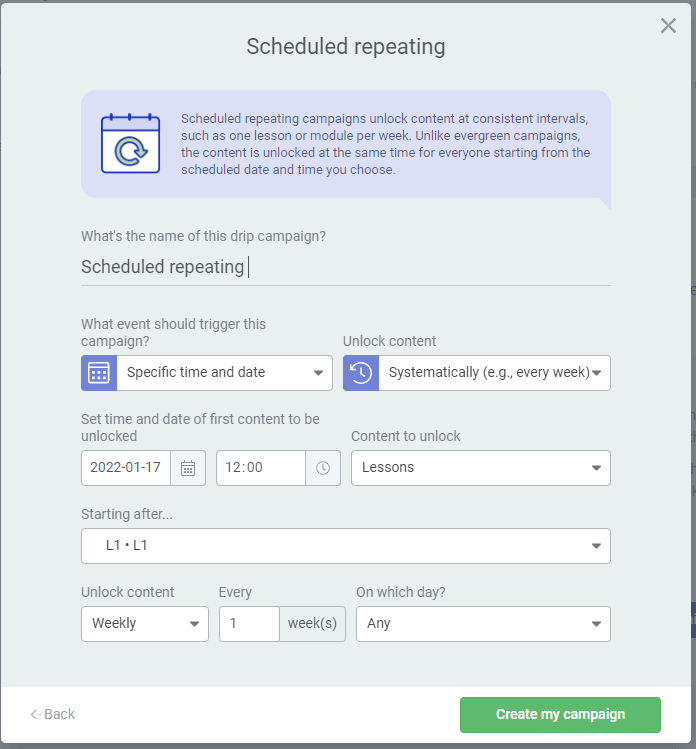
You can set the date time and hour when the content should be unlocked, as well what content to unlock and how often:
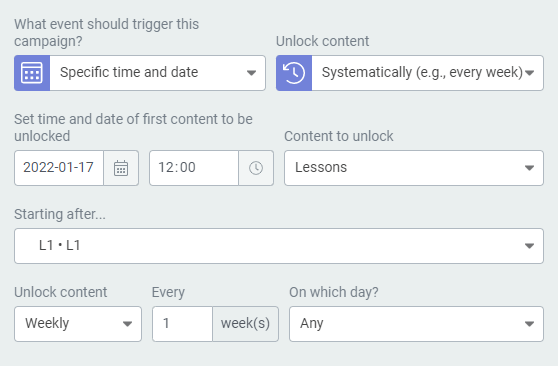
Unlike evergreen campaigns, the content is unlocked at the same time for everyone as per the schedule that you define.
Check out this article from our knowledge base, if you want to read more about this drip campaign template:
Day of the week or month
If you choose the “Day of the week or month” template, then the content will be unlocked on a specific day of the week or of the month:
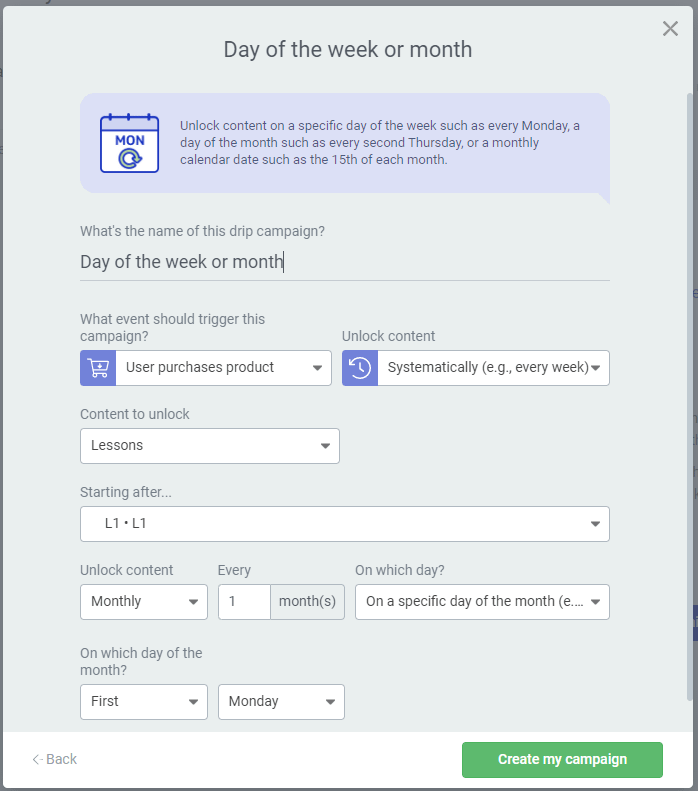
For example, you can unlock content weekly on every Monday, or you can pick a day of the month such as every second Thursday, or a monthly calendar date such as the 15th of each month:

Drip on specific dates
If you want to drip feed content to your students on specific dates and at custom intervals, then this is the template that you might want to use:
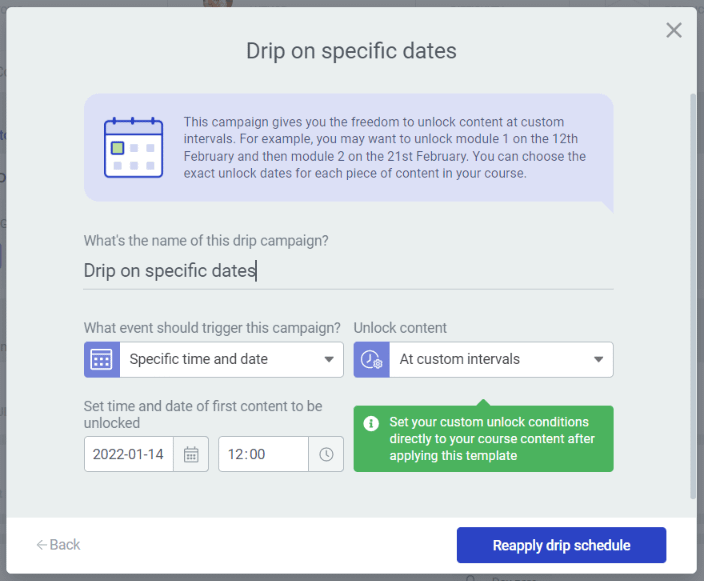
This campaign gives you the freedom to choose the unlock dates for each piece of content, and to unlock it at custom intervals. For example, you may want to unlock the first lesson on the 10th of January and then second lesson on the 24th January.
After you apply this template, you will be able to set your custom unlock conditions directly to your course content, in the campaign schedule. By default, all content is set to be unlocked at “Day zero” which is the date that you set for your first content to be unlocked:
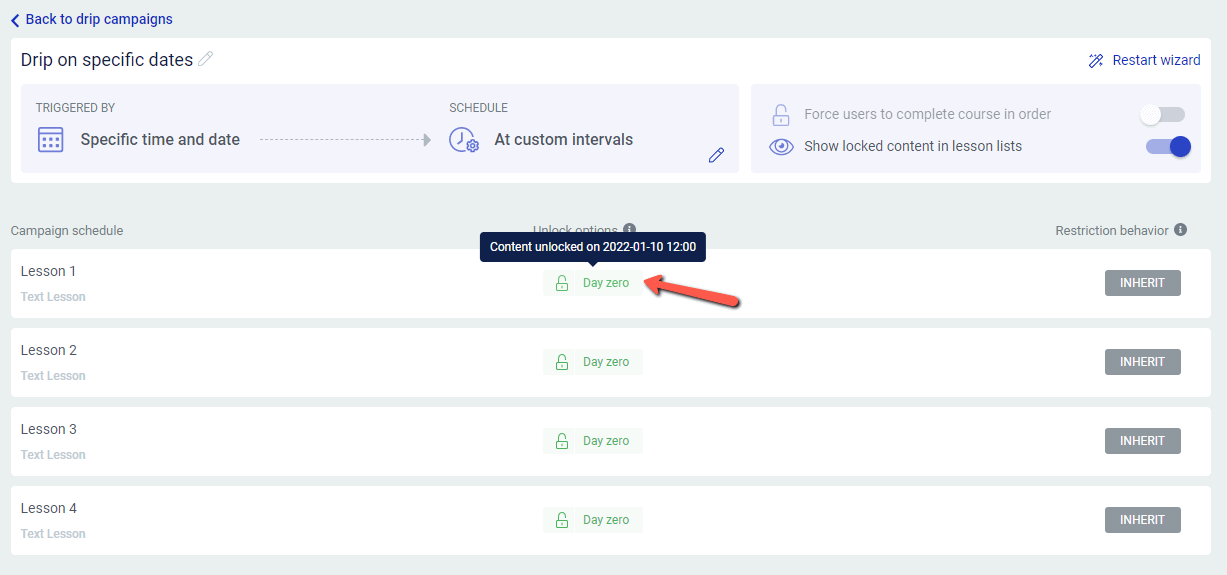
You can simply click on the green lock next to each lesson, to view the unlock options pop-up:
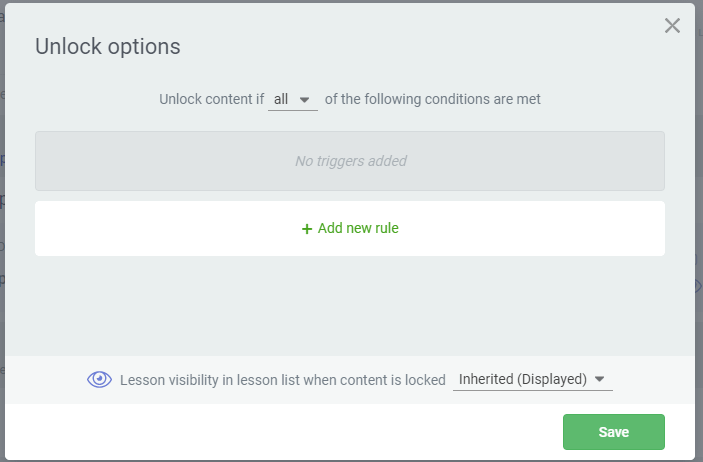
And then proceed with adding a rule:
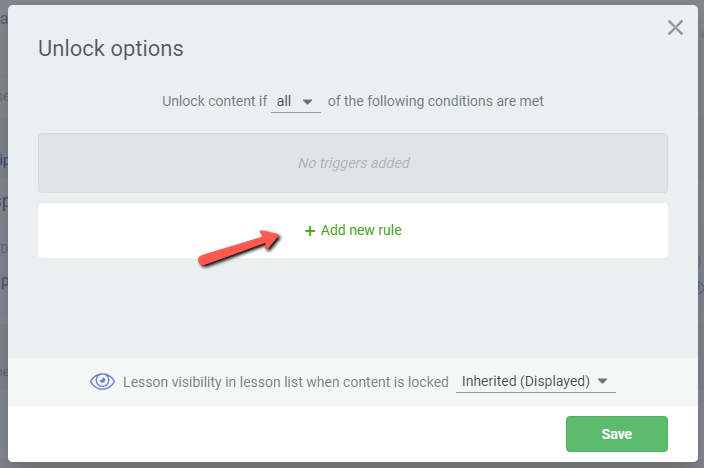
Since I am planning to unlock my second lesson on the 24th of January, as mentioned at the beginning of this example, I will configure my condition as it follows:
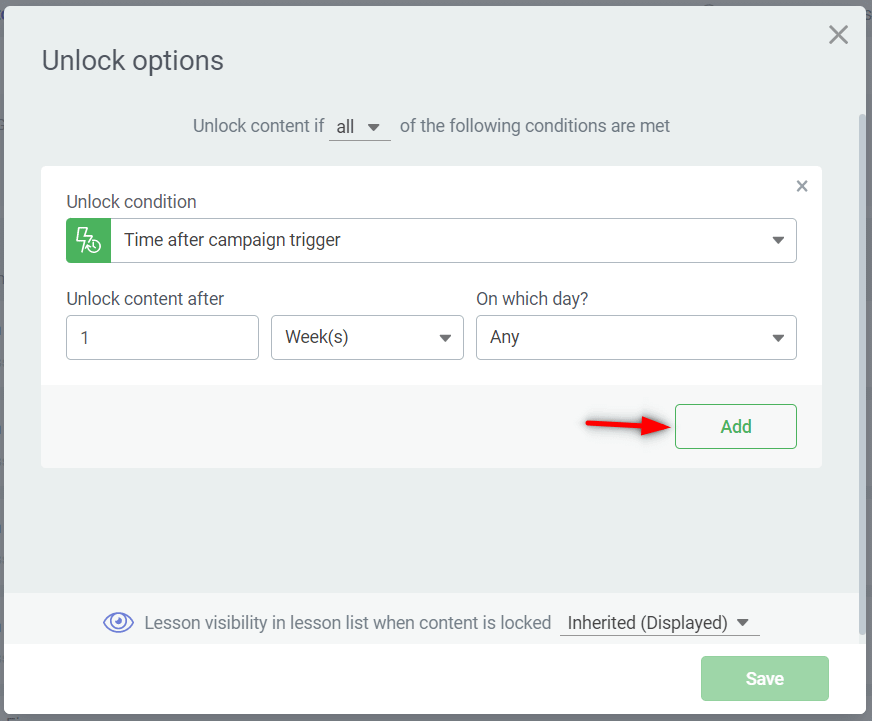
Click on “Add” and then save your settings and return to the campaign schedule, which will have this new custom date for the selected lesson:
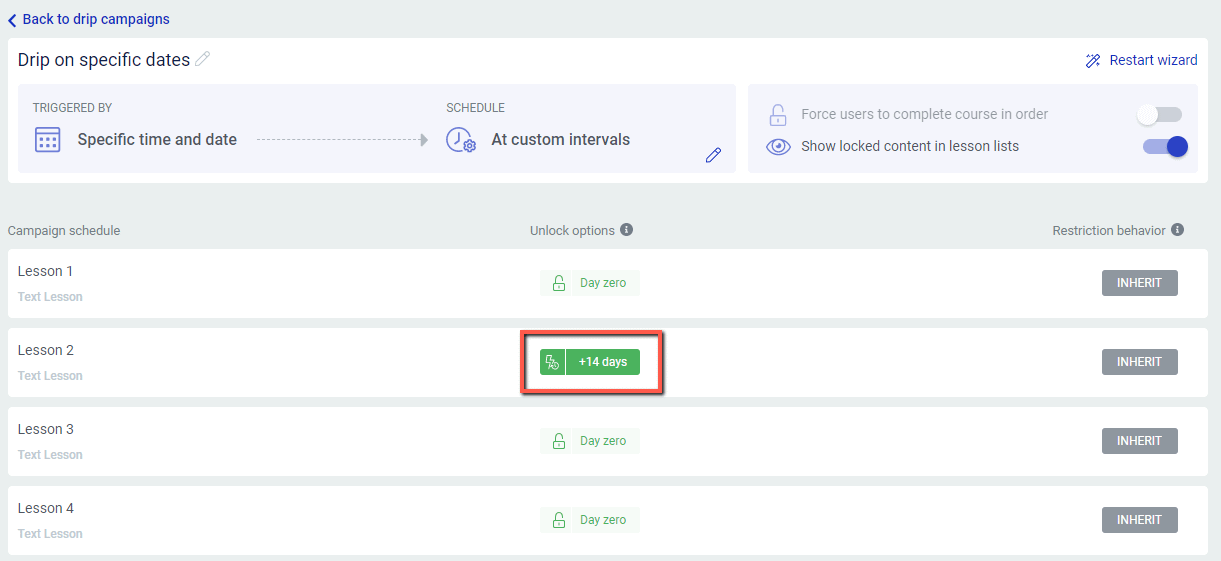
Follow the same process for each piece of content that you want to unlock at a given date.
Start from scratch
The start from scratch will be useful if you want to create your own custom template:
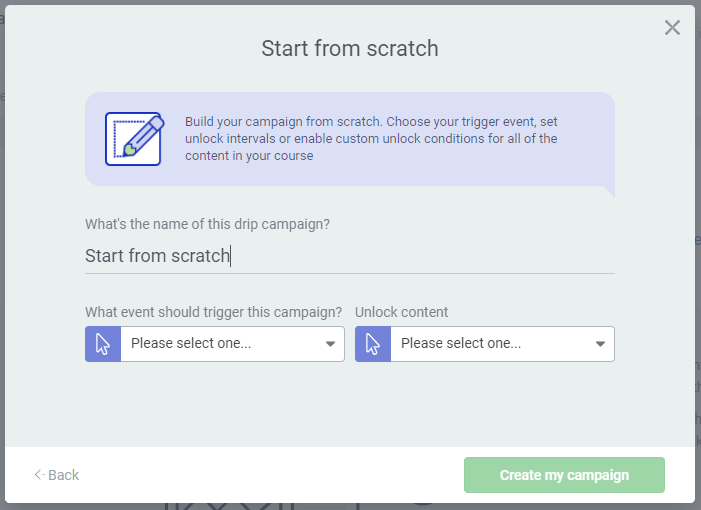
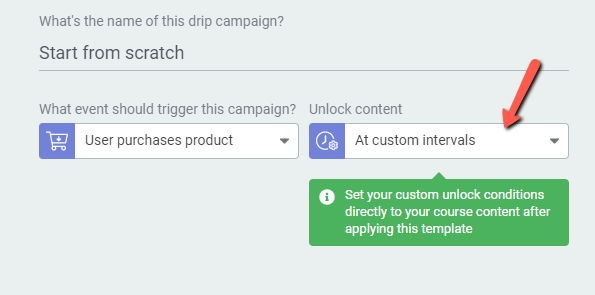
This means that you can choose your trigger event and set unlock intervals or custom unlock conditions for all your course content:
The campaign schedule will look like this:
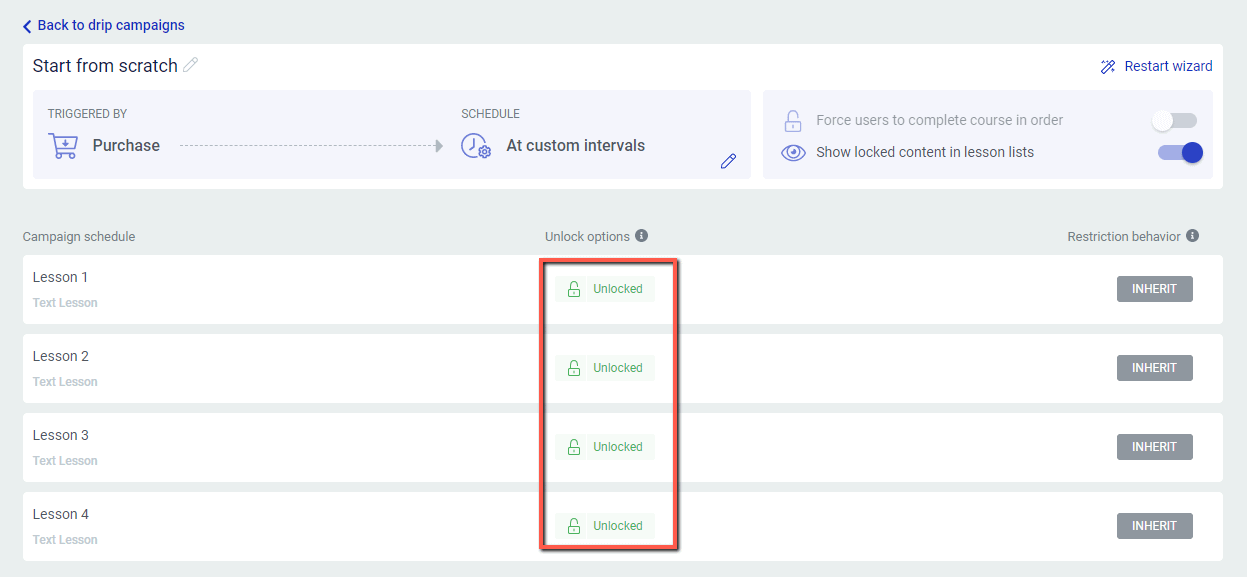
You can edit and configure the set of conditions individually per piece of content. You just have to click on the corresponding “Unlocked” option, and set it up:
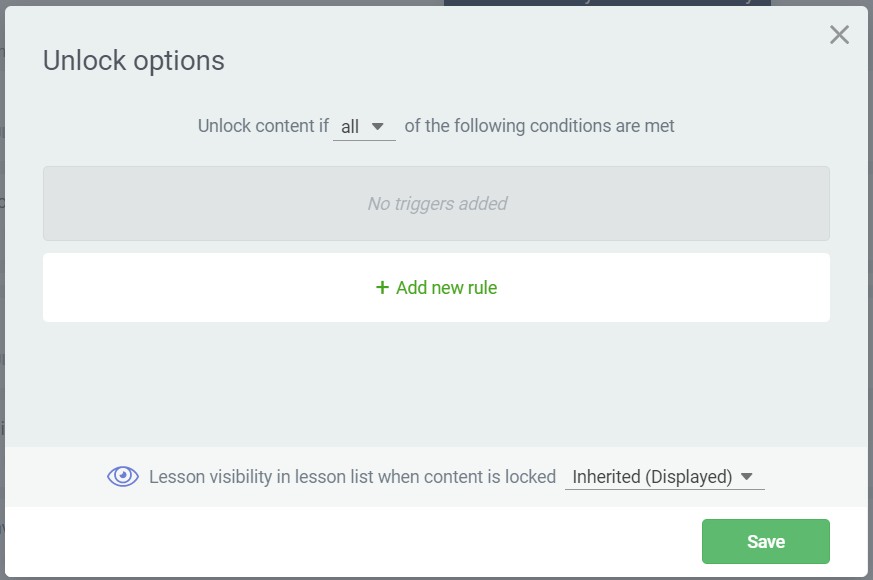
After you add your condition, it will automatically show up in the timeline:
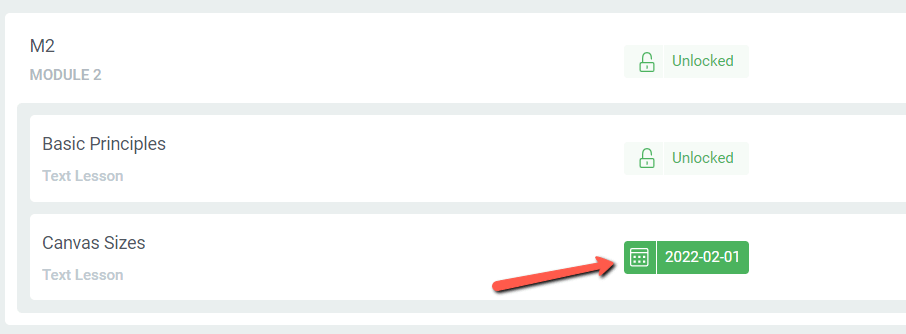
Thrive Automator Unlock
The Thrive Automator Unlock campaign schedule allows you to create custom automations in Thrive Automator based on website events or 3rd party integrations to unlock each piece of content:
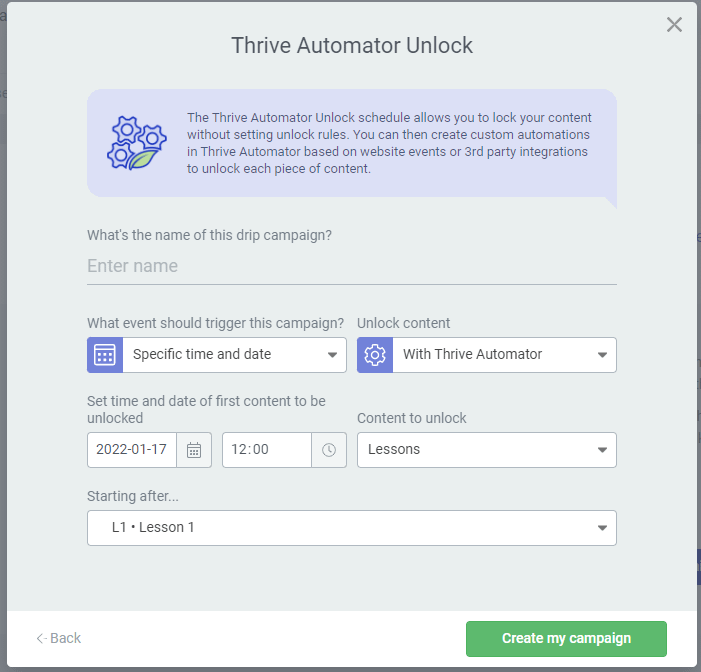
All available triggers can be used with Thrive Automator:
You campaign schedule will look similar to this:

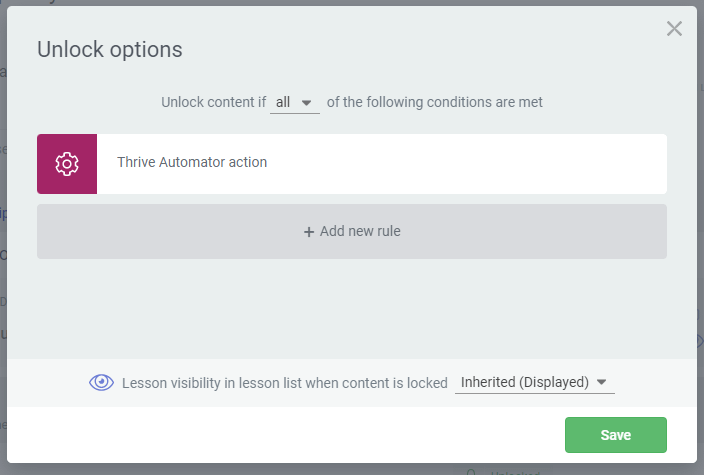
So you will not have unlock rules as in the case of the other templates. Instead, your content will be locked with Thrive Automation actions.
Clicking on any of the “Action” buttons will trigger the unlock options pop-up, where your Thrive Automator action will be listed by default. You can add additional rules if you want to the already existing Thrive Automation action:
Important!
Make sure that you also select the corresponding triggers when setting up your automation in Thrive Automator.
Sequential unlock
This drip template is useful if you want to make sure the users will unlock their course content in order:
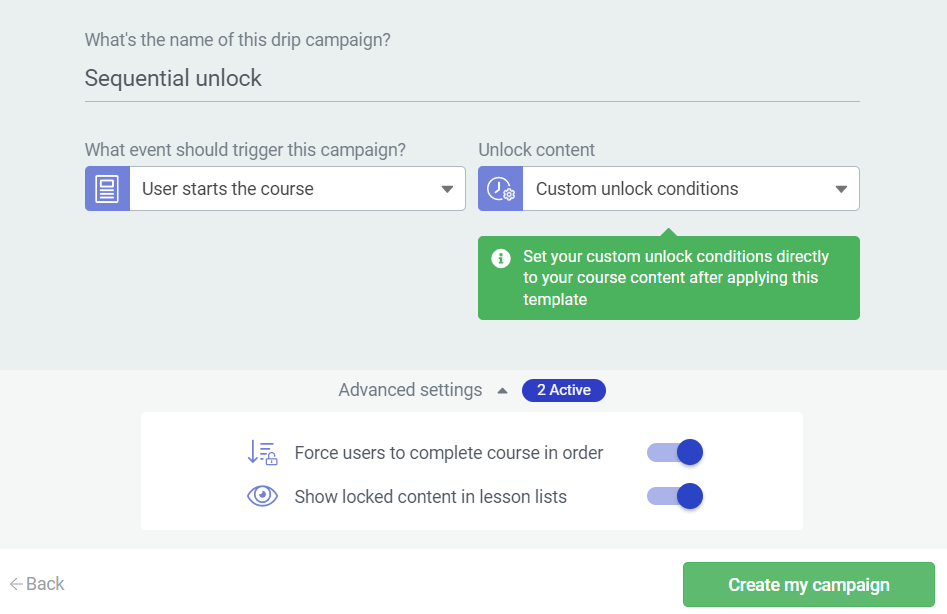
Furthermore, in the “Advanced settings” (that are available for all other drip templates as well), you will have these two options activated by default:

The first one can be used in order to force the users to complete the course content in order, whilst the second one (when enabled), will display the locked content in the lesson lists.
Here’s a separate article in our knowledge base that you might find useful:
Drip Schedule Options
After creating your campaign, you will be able to view the entire schedule in the same Drip tab of your Thrive Apprentice course:
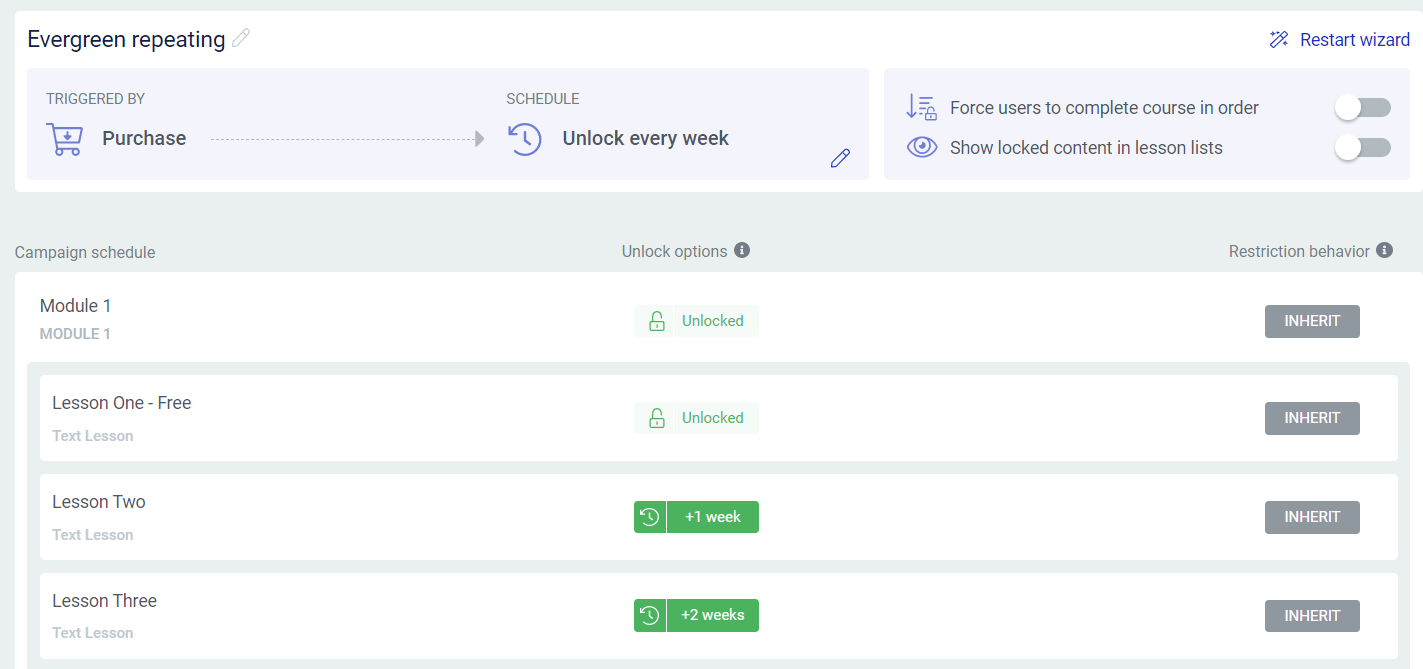
Rename the Campaign
This is where you can rename your campaign if you want:

Change the Campaign
If, for example, you want to tweak some settings or change the campaign altogether, you can click on this pencil icon which till take you back to the template setup:

Make the necessary adjustments, and then click on “Reapply drip schedule”:
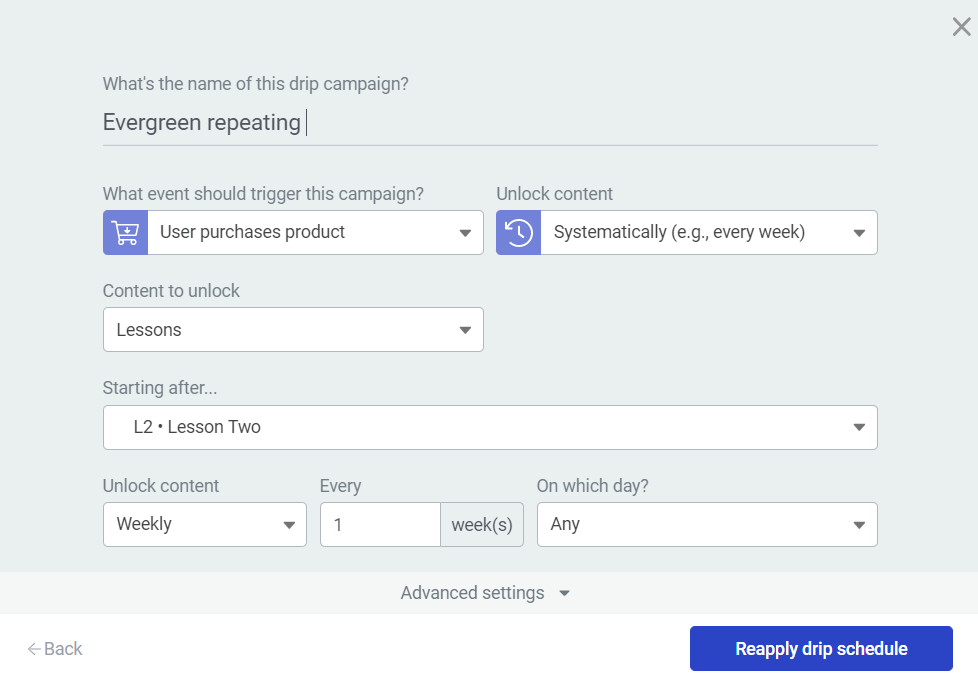
Before finalizing the request, you will be asked if you are sure you want to proceed with this action:
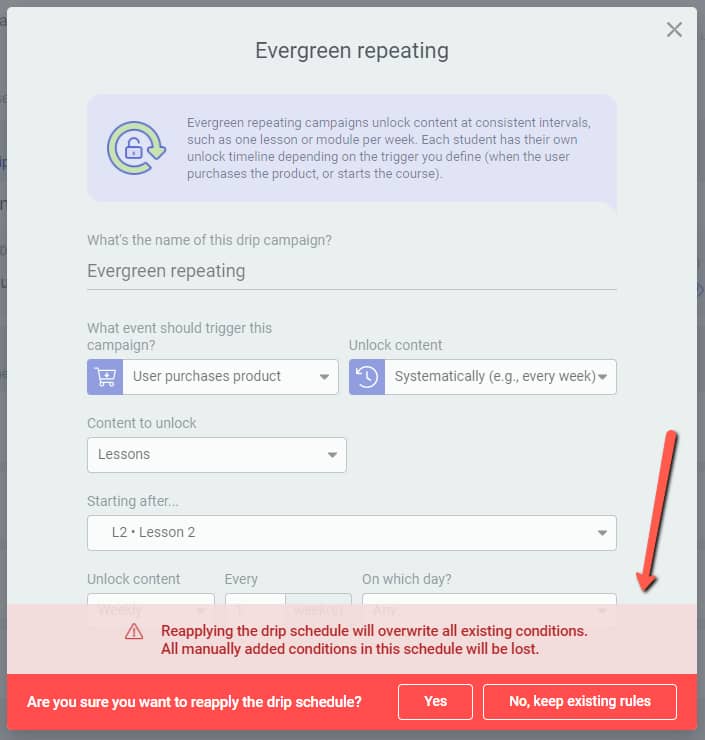
As soon as you confirm, you will be taken back tot his view and your changes will be visible in your new schedule.
Restart wizard
Clicking on the “Restart wizard” will trigger the same Drip template pop-up, so feel free to use this option anytime you want to go back to that set of templates:
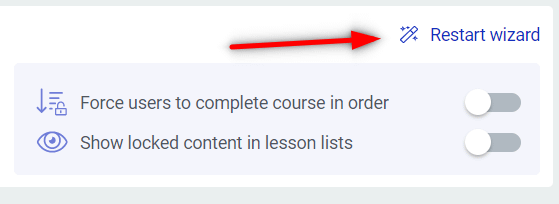
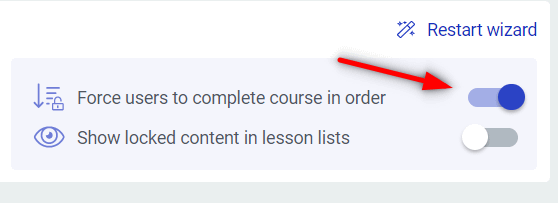
Force users to complete course in order
This toggle can be used when you want to force your students to go through the course content in order:
Show locked content in lesson list
This toggle will allow you to show or hide the locked content in the lesson list timeline:

So, if this toggle is active, the students can view the title of the upcoming lessons or modules that will be unlocked for them:
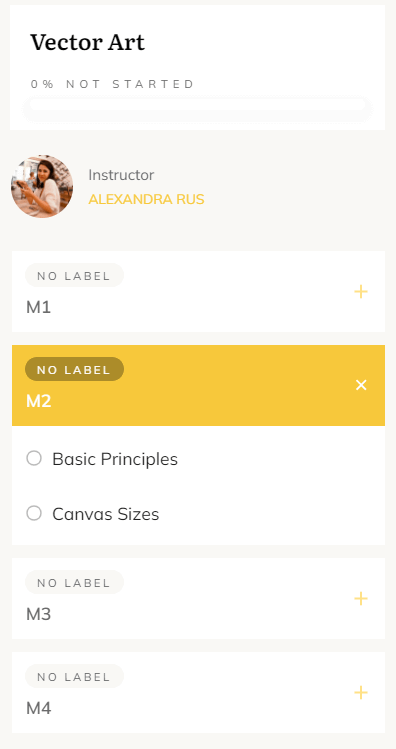
Whilst if you switch if off, those locked modules or lessons will be hidden from the lesson list.
Campaign Schedule
The campaign schedule will show you an overview of the content that is planned to be dripped. The content that is already available is marked as “unlocked”:

If you click on any unlock option, from the center row of the screen, you will open this pop-up where you can make further adjustments:
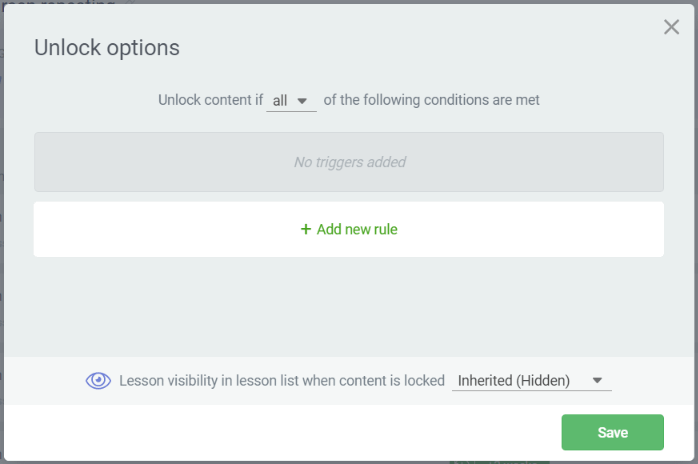
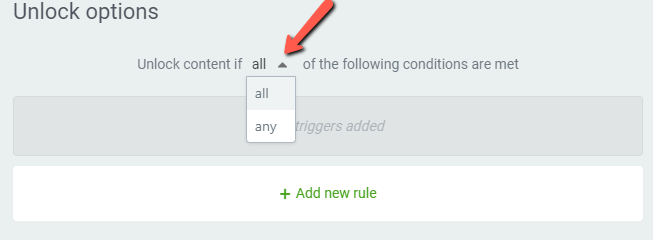
Here, you can decide if the content will be unlocked if all or just some of the conditions are met:
Pick one of the available conditions:
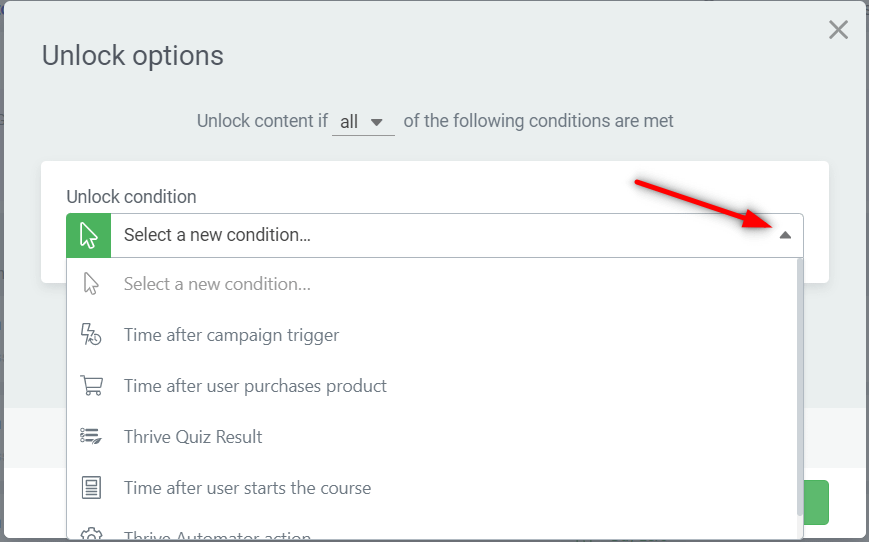
It is possible to add multiple conditions here, but you need to make sure you add a new rule to each new conditions.
Important!
You can only apply a condition once per rule. After you select it, you cannot use it again for a new rule. You will have to pick another condition from the drop-down list.
After you’ve added your rule, you can edit or remove it anytime you want simply by hovering over it and selecting the corresponding action:

Lastly, after your rules and conditions are set up, you can make changes in terms of lesson visibility:
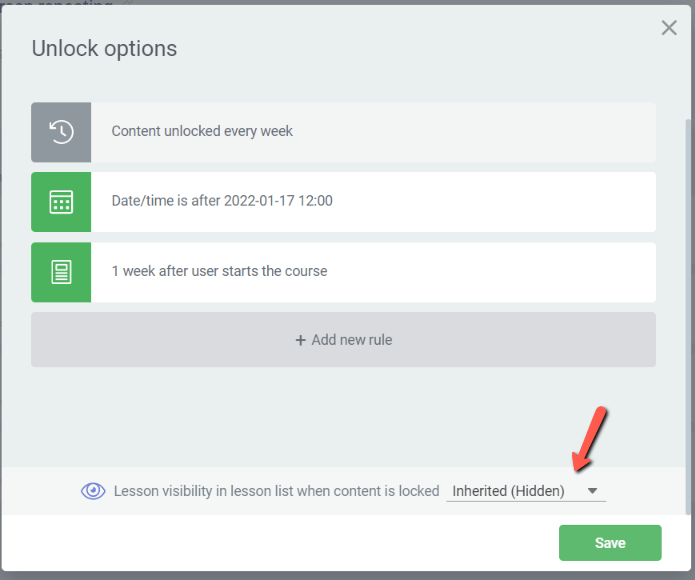
Opening the drop down will show you the list of available options:

The hidden content means that the lessons will not be listed in the lesson list, when the content is locked.
The “Display as locked” will show the lessons in the list, but they will be shown as locked. So anyone will be able to view the lesson and module titles, but as long as they are locked, they cannot be actually accessed.
Restriction behavior
On the right side of the schedule, you will be able to view the restriction behavior set for this schedule:
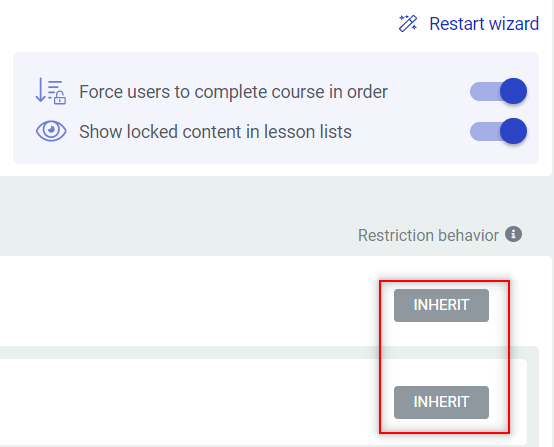
These rules are inherited the “Access restriction rules” tab of your Thrive Apprentice Products section:
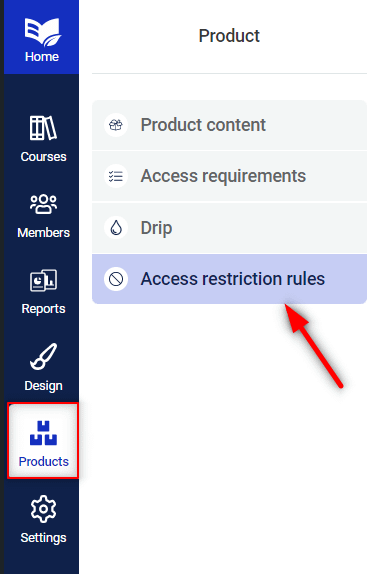
Keep in mind tough that for these you need to first add your course to a product, as detailed here.
Lastly, you can click on the “Back to drip campaigns” option to return to the main Drip dashboard:
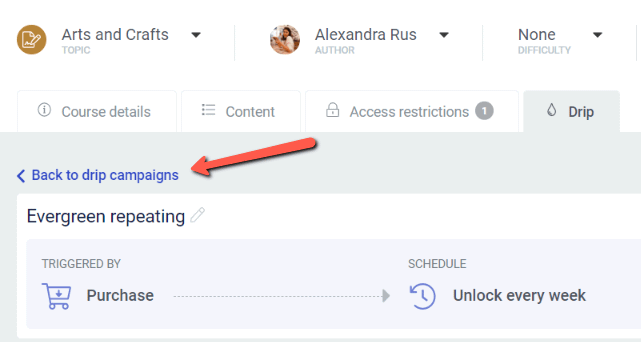
You can create multiple drip schedules to your course, if you want. Add as many as needed, and they will all be listed in your Drip tab of the selected course:

When you want to apply a particular schedule to your course, you first have to make sure you go to the Products section of your Thrive Apprentice, and select the corresponding product in which you course is added. And then, in the Drip section, make sure you apply the drip schedule that you want:
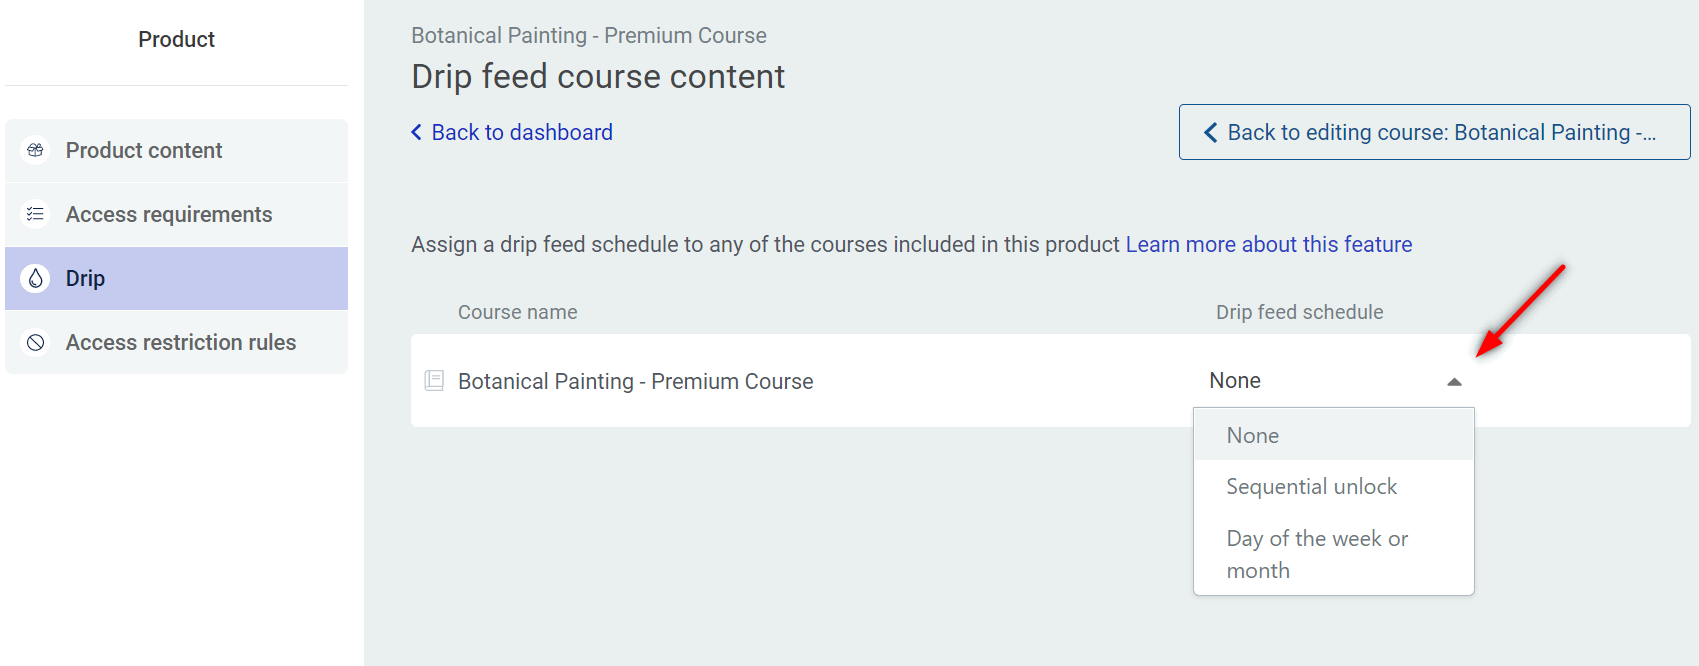
The steps for creating a drip fed course are detailed in this separate article, from our knowledge base:
Hopefully this tutorial about how to use the Drip tab of your Thrive Apprentice was useful to you.
Don’t hesitate to check out the Drip section of our knowledge base if you want to learn more about how to get the most out of this feature.