If you have two different/independent websites that have Thrive Themes installed and activated, it is very easy to interconnect the two.
Using this method will come in very handy if, for example, you are looking for ways to connect your main site to one of your subdomains (for example: yoursite.com and members.yoursite.com).
Or you can very easily achieve this scenario: someone fills in a form on one of your sites and they get access to a course that has been created on another one of your websites. This is the example I will showcase in this tutorial.
All you need to do is create an automation on each site.
The first one should have a start trigger that will get the automation running, followed by a “Send Webhook” action. This will work as an outgoing webhook and send the data over to the other website.
The automation from the other site should have the “Incoming Webhook” start trigger added to it, so that it immediately catches the information sent over from the first site.
Thus, in the case of the above-mentioned example, the first automation (from the first website) can have a structure similar to this one:
|
Form submit → Send Webhook |
The second automation (from the second site) can have this structure:
|
Incoming Webhook → Find or create user → Grant access to course |
For the automation to be correctly set up, we will need to work in both automations at the same time.
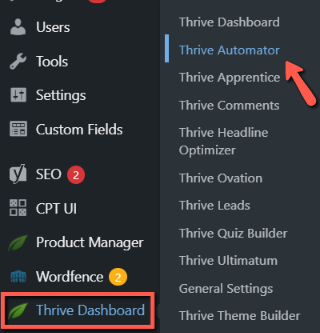
To create a new automation, access Thrive Automator from your Thrive Dashboard (or from the left sidebar of the WordPress admin dashboard):
Click on “Add New” from the top right corner of the screen:

Set up the first automation on website no 1
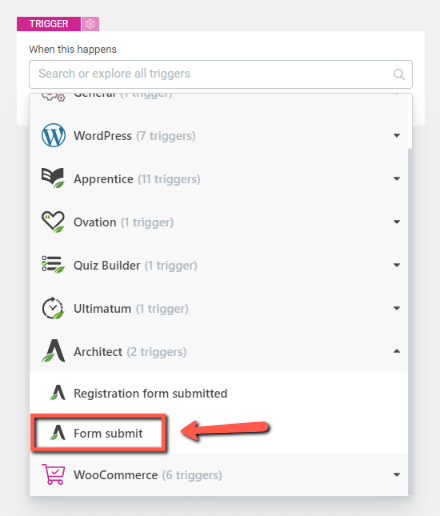
As mentioned earlier, the first automation should include the “Send Webhook” trigger. The start trigger I want to add here is the “Form submit” one:
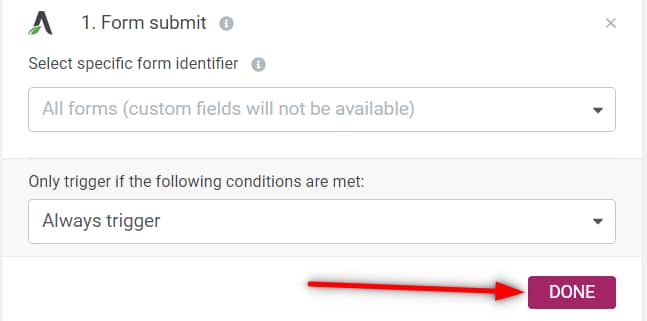
Next, you can choose to filter the automation and only start it if certain conditions are met. Click on “Done” when finished:
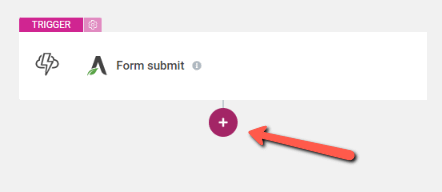
Click on “Add another action” to move on to the next step:
The second step of the automation will be the “Send Webhook” one:
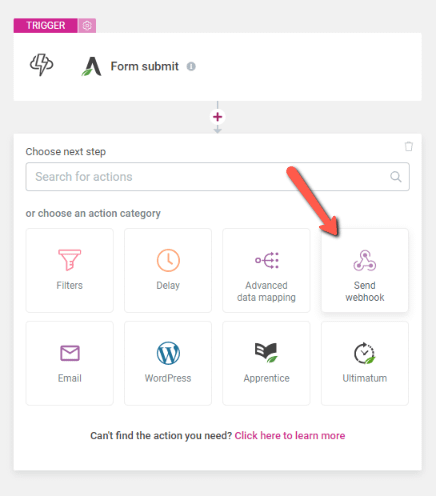
After you select it, it’s time to set it up:
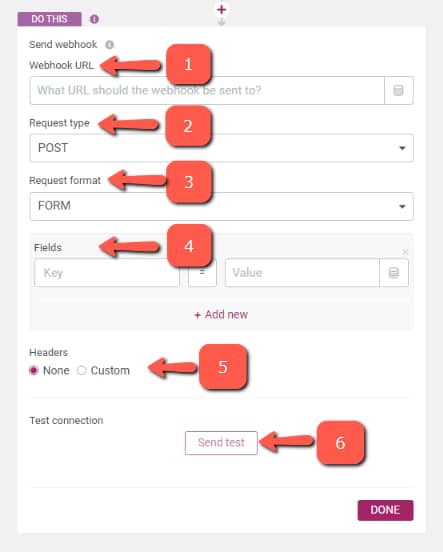
→ 1 – Send webhook
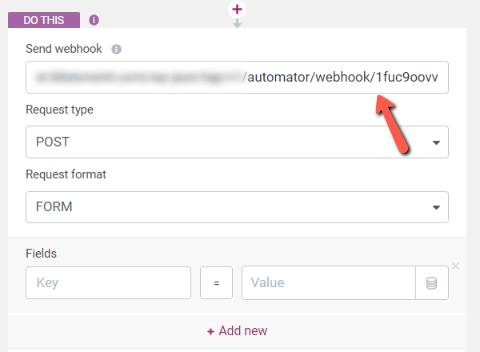
In the first field, you will have to add the webhook URL. This is the URL that will link the two websites together.
We will need to go to the second website and generate a webhook URL, that will be added in this field.
Therefore, it is now time to access our second website and create the second automation there, as we will need the webhook URL at this point.
Set up the second automation on website no 2
On your other website, access Thrive Automator and create a new automation, just like in the case of the first one.
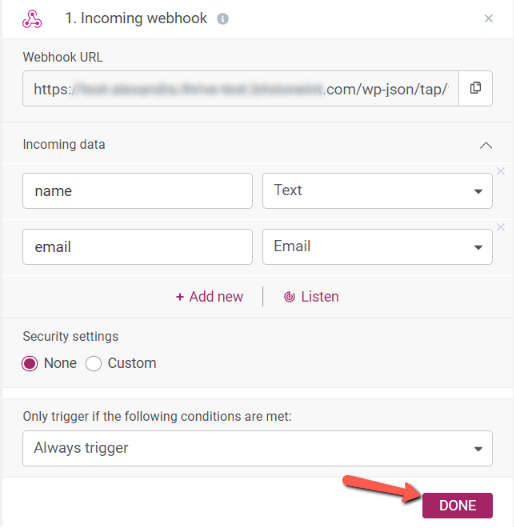
The start trigger for this one will be the “Incoming Webhook” one:
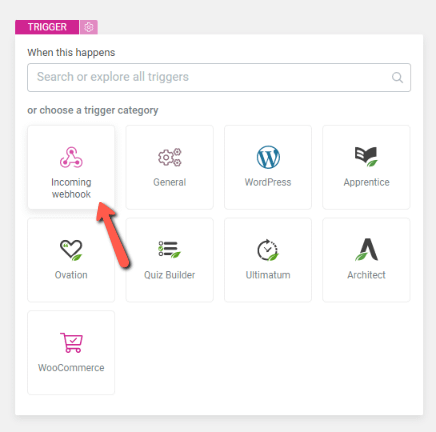
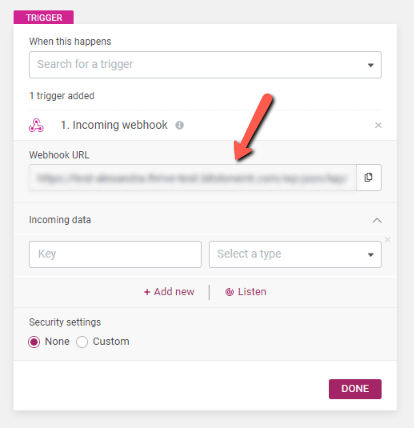
As you choose this, a webhook URL will automatically be generated into the first field, which you can go ahead and copy to your clipboard.
|
Important! If you are using the “Duplicate” option on an automation that has incoming webhook, it’s worth keeping in mind that the duplicate version will have a new webhook:  The duplicate automation will not be fired by the same webhook as the original one, because generated webhook URL where the data needs to be sent is unique per automation. |
With the link copied, we will go back to the other automation and website, to add the URL and continue setting up the action. You can go ahead and paste the webhook URL in the “Send webhook” field (on the first site):
→ 2 – Request type
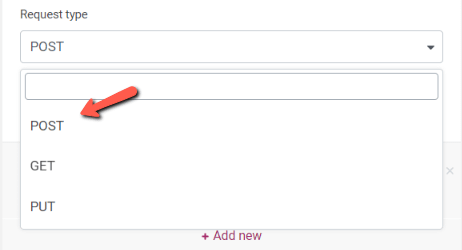
Next, you have to choose the request method. You can choose between the GET, POST or PUT methods:
- POST requests are used to send out information to a server and create or update resources. The data sent via a POST request is stored in the body of the request, not in the URL of the request.
- PUT requests are also used to send out information to a server and update or create resources, but they can be created when you are looking to send out a particular value. The PUT method is usually used to update resources available on the server, as it replaces whatever exists at the target URL with something else.
You can use it to make a new resource or overwrite an existing one.
The difference between the POST and the PUT requests is that, if you use the POST method to request the same data twice (in the case of users, for example), two identical users will be created, but with different IDs.
Using the PUT method, in this case, will create the first user, and overwrite it when the request is sent out the second time.
- GET requests are used to retrieve data from a specified source. As opposed to POST requests, all the parameters are expected to be found in the URL request, as query string values. Of course, the URL will have an explicit format, specific to each API call.
Coming back to our example, this request should be a POST request, so I will choose that option from the dropdown.
→ 3 – Request format
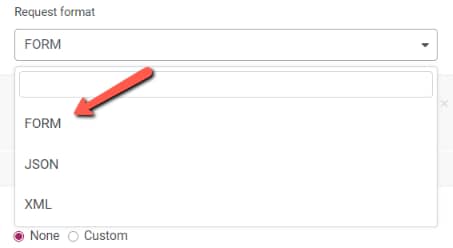
From the next field, choose the request format:
→ 4 – Choose the fields to be added
Next, we’ll have to choose which fields and what data should be sent out to the other site. As a tip here, you can make use of the dynamic data option to insert the values that you want to be sent out:
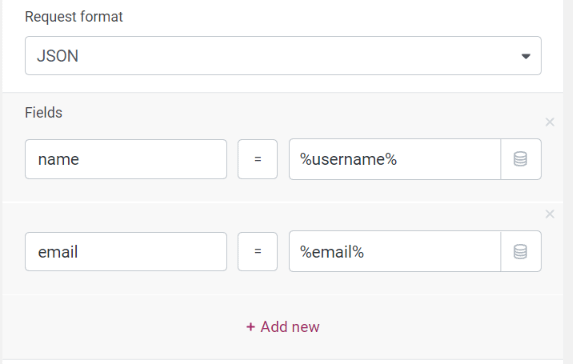
However, you need to make sure that you are requesting valid information, as we need to be able to give users access to one of our courses based on this data.
This means that an email field will surely be needed, so that a user account can be created, if needed, to give people access to your course.
In this case, I will add a “Name” and “Email” field:
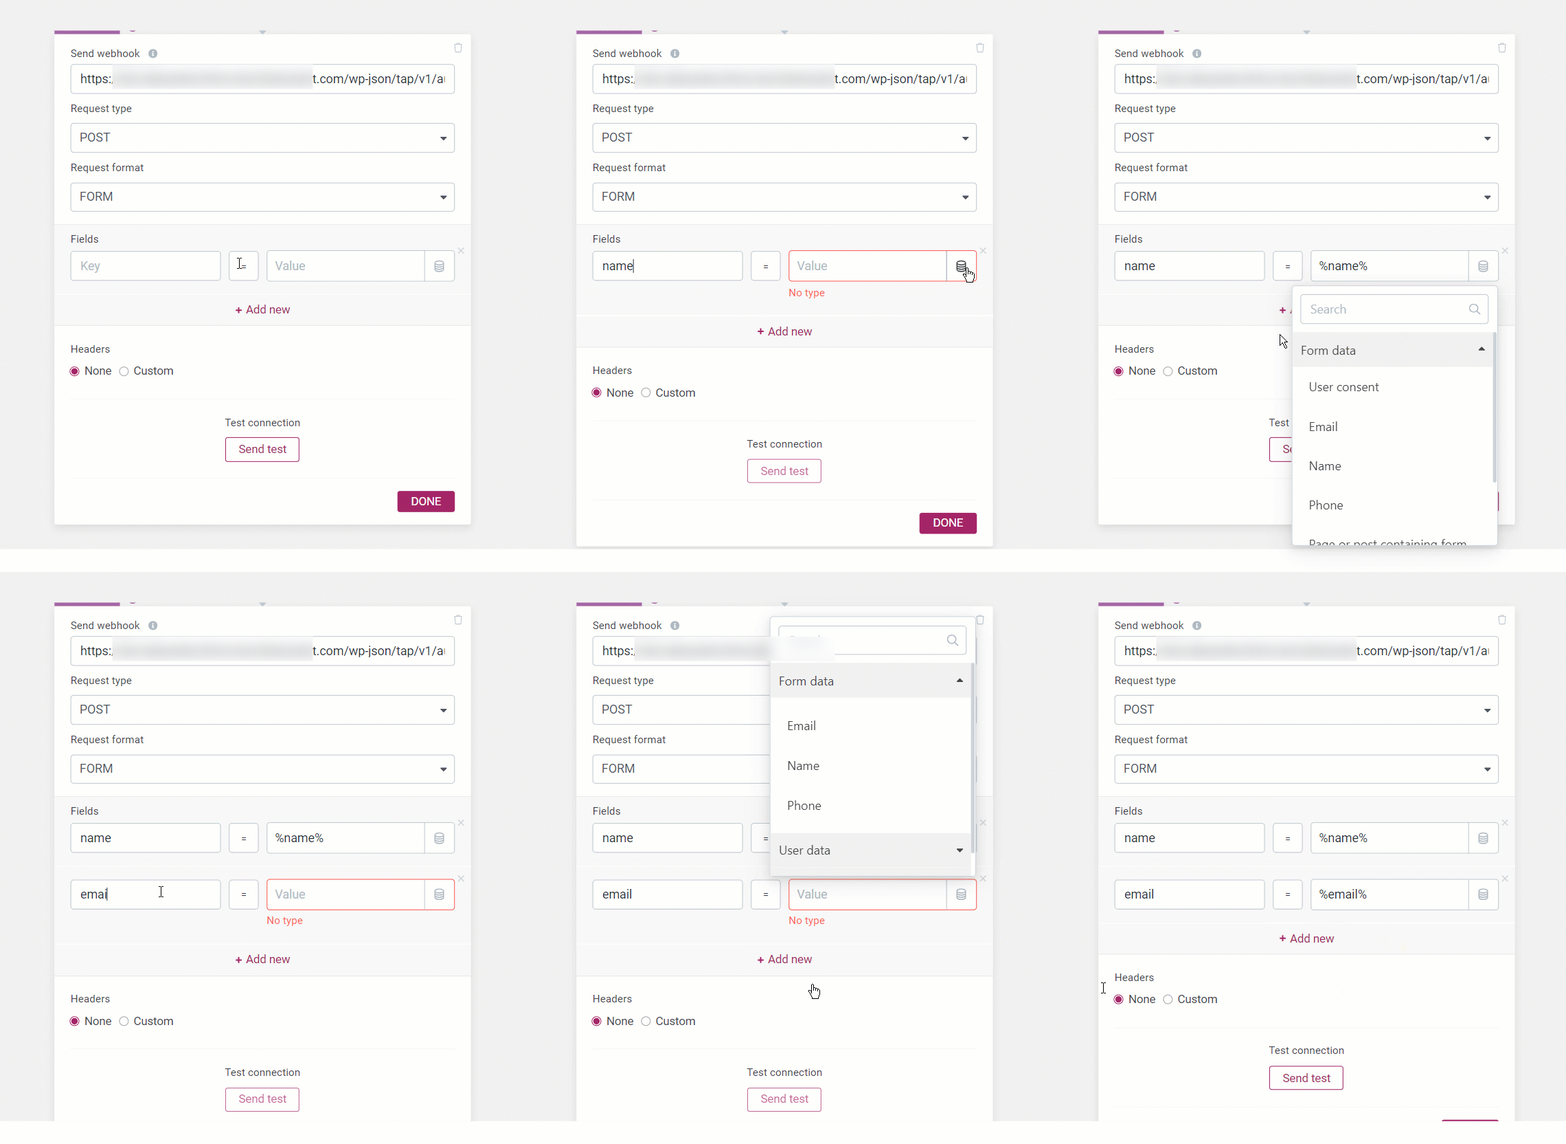
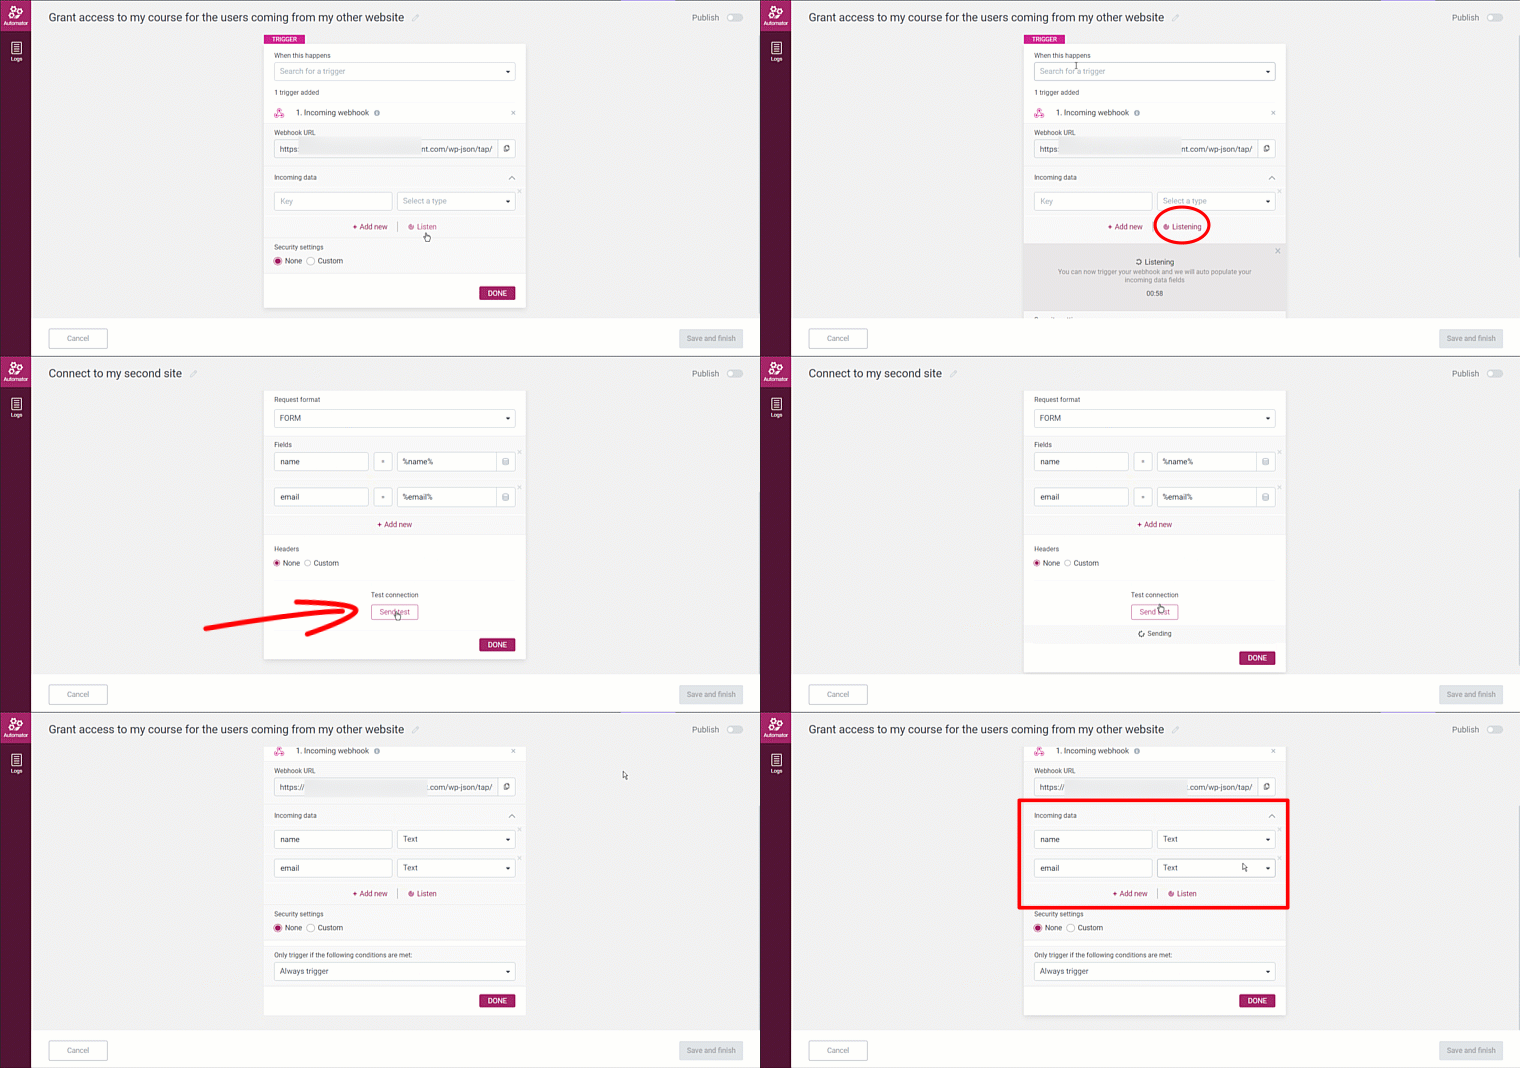
We can now send a test connection, go back to the other automation and use the “Listen” mode to make sure that the data from the fields will be sent out correctly from one site to the other – as shown in the animation below:
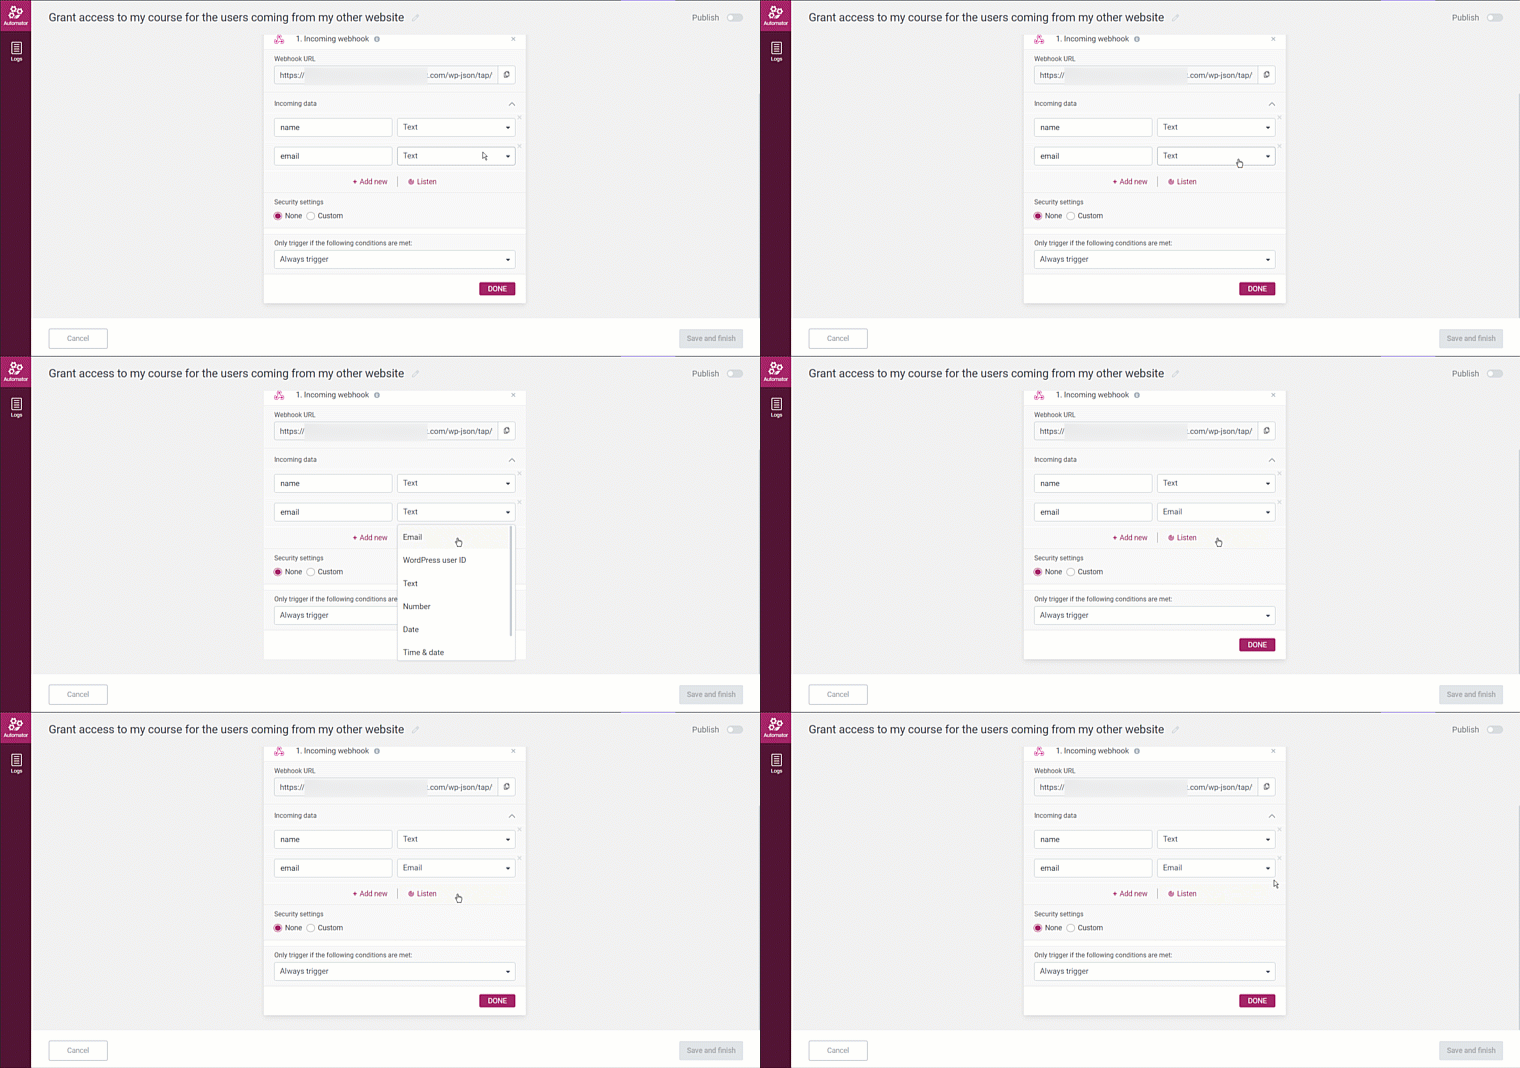
Note: In the case of fields such as the “Email” one, it is important to make sure you’ve correctly mapped the field by choosing the right field type:
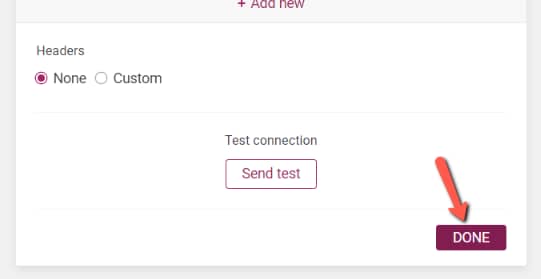
Coming back to the first automation, the “Send Webhook” action is complete, and you can click on “Done” to save it:
This automation can be saved and activated.
What’s left to do is go to the second automation, save the “Incoming Webhook” trigger and continue setting up that automation as well:
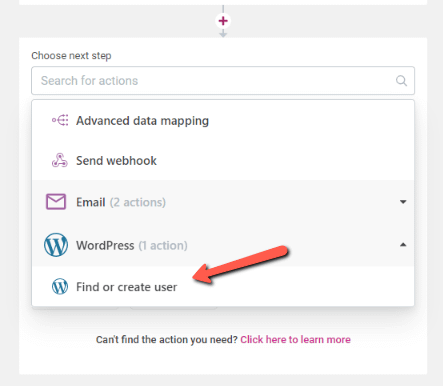
As the next action that should happen once the form is filled in, therefore the Incoming Webhook is triggered, I will choose the “Find or create user” one.
This way, in case the person who has just filled in the form was already a user on my site, the system will look for them and will grant them access to the product.
In case they have not created an account on my site prior to this step, the automation will automatically create a user for them, and they will receive an email with the login information.
For this action, you will have to choose the role to be granted to the user, and you can also map out the first and last name:
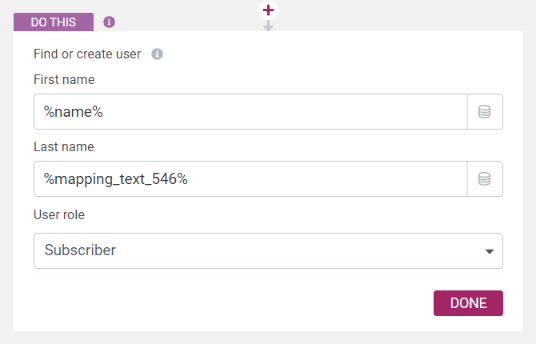
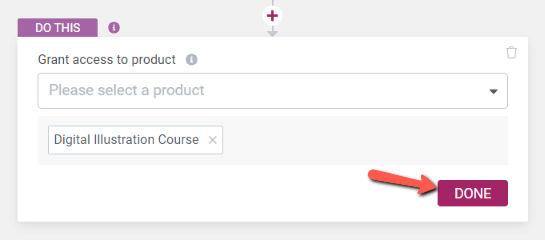
Click on “Done” to save it.
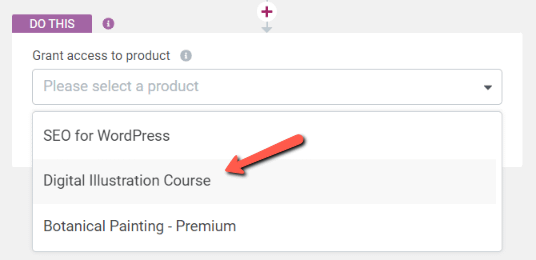
The last action to be chosen here is the “Grant access to product” one:
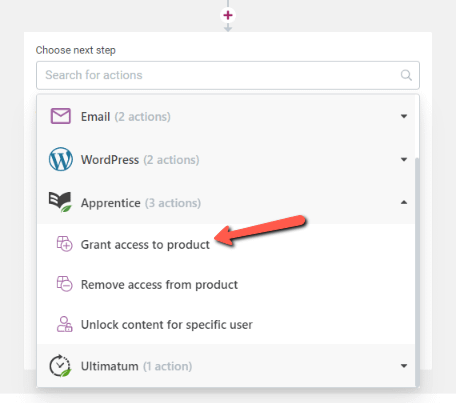
This will give the users permission to access a Thrive Apprentice product, that will contain the course in the matter.
Choose the Thrive Apprentice product from the list:
And click on “Done” to save the action:
Lastly, you can activate the automation and click on “Save and finish”.
With the two automations saved and published, the outcome will be that, whenever someone fills in a form on website no 1, they will be granted access to a course that is hosted on website no 2.
The situation showcased in this article was just an example to show you how you can connect two sites, but please keep in mind that you can create numerous setups starting from this idea, customized to your liking, depending on what setup you are trying to achieve.