Do you want to use additional form fields apart from the name, email address and phone number and ensure the values land in the right fields in the email marketing service you use? With a Lead Generation form in Thrive Themes you can add as many fields as you want and map them with the respective field in the email marketing service provider.
In this article, we’ll see how you can map these custom fields with those in your email marketing service.
- Adding a Text Field in Your Email Marketing Service
- Establishing an API Connection Between the Service and Thrive Dashboard
- Adding the Service Connection to the Lead Generation Form
- Adding a Custom Field to the Lead Generation Form
- Mapping Fields in the Lead Generation Form Settings
Adding a Text Field in Your Email Marketing Service
To link the custom field from your Lead Generation element to a field in your email marketing service you need to make sure that first, there IS a field to connect to.
That’s why step 1 is creating the field in your email marketing service. Make sure that the new field you are creating is a “Text” type field because that is the one supported with our custom field integration.
This is slightly different for each email marketing service. Here’s a list of autoresponders that support custom field integration with the Lead Generation element.
- Adding a Field in Mailchimp
- Adding a Field in AWeber
- Adding a Field in ActiveCampaign (Please ensure you enable “Visible on forms” for the new custom field you create in ActiveCampaign)
- Adding a Field in GetResponse
- Adding a Field in ConvertKit, known as Kit
- Adding a Field in MailerLite
- Adding a Field in Infusionsoft known as Keap
- Adding a Field in Campaign Monitor
- Adding a Field in Brevo, formerly known as SendinBlue
Establishing an API Connection Between the Service and Thrive Dashboard
The next step here is to ensure you’ve connected the selected email marketing service with the Thrive Dashboard. You can refer to our document that will help you establish an API connection between the Thrive Dashboard and an email marketing service.
Adding the Service Connection to the Lead Generation Form
Before you start with this step, please ensure you’ve created and added a Lead Generation element to a page.
After establishing an API connection between the email marketing service and the Thrive Dashboard, you’ll have to add the connection in the Lead Generation element too.
Here’s a section that will help you learn more about adding an API connection in a Lead Generation element.
Adding a Custom Field to the Lead Generation Form
The next step here is to add the required custom fields to the Lead Generation form so you can map them with the ones added in the email marketing service.
To add a custom field to a Lead Generation element, open Main Options, scroll down to Form Fields, and click +Add New.

After clicking Add new, select the Field type as Text, give a name to the field and enter the placeholder text.
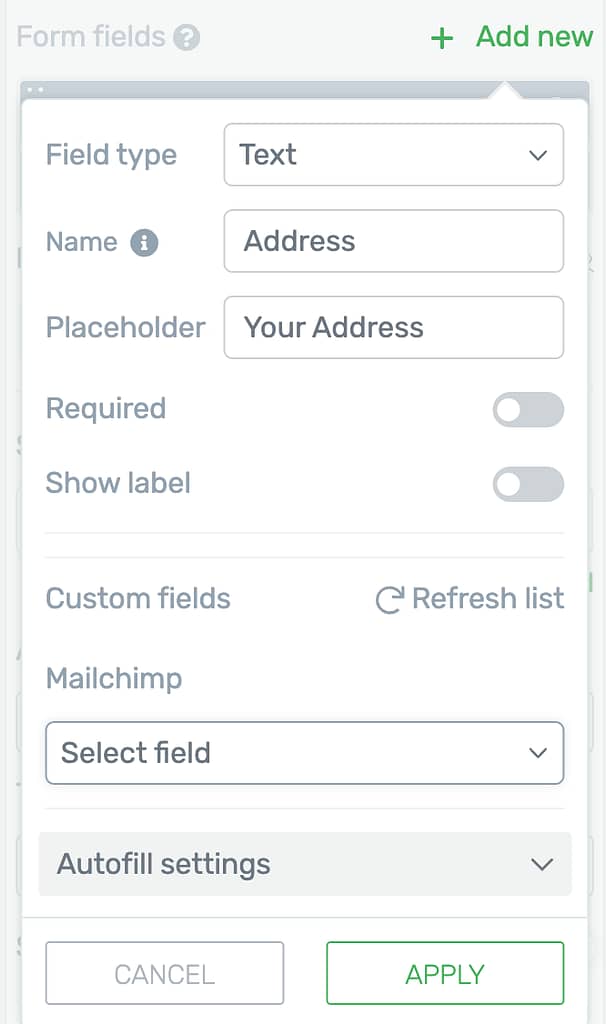
Here’s a section in the document that will help you add custom fields to a Lead Generation element.
Mapping Fields in the Lead Generation Form Settings
When you add a custom field after connecting the Lead Generation element to the email marketing service, scroll down to select a field from the email marketing service you’ve selected.
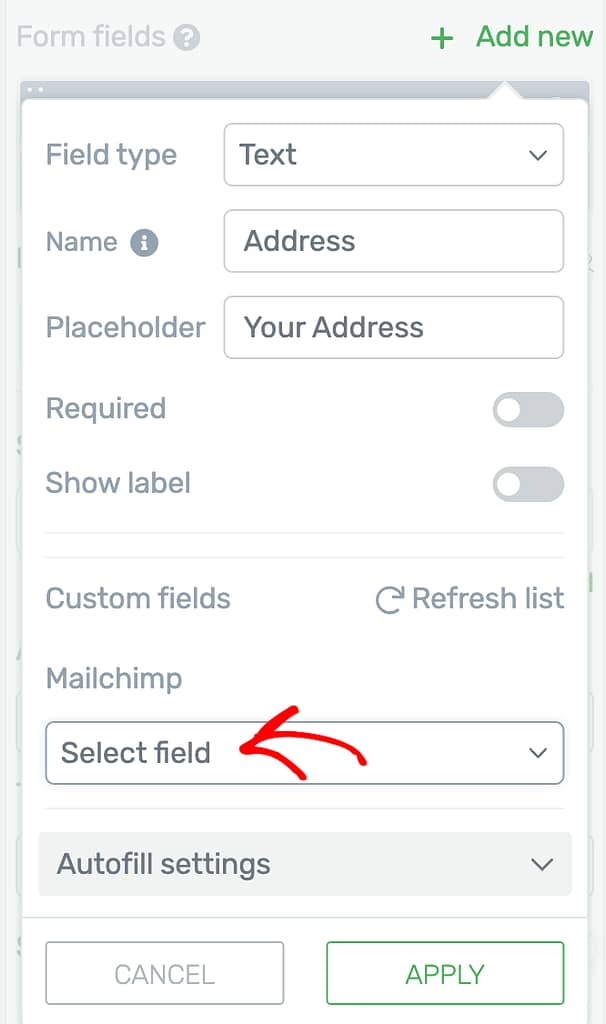
If you don’t see the newly created field from the email marketing service listed under the dropdown, click Refresh list.
We’ve just seen how you can add custom fields in a Lead Generation element and map them with those in the selected email marketing service. Similarly, you can map custom fields in your Thrive Leads forms too.
Next, do you want to create specific custom fields to use in Thrive Architect? Refer to our document that will help you learn how you can add custom fields and use them in Thrive Architect with Advanced Custom Fields.