When you are building a quiz with Thrive Quiz Builder, you now have the possibility to add open ended questions to it as well. This way you can create a quiz that has multiple choice questions and open ended questions too.
The open ended questions can help you learn more about the users who complete your quiz.
You can also make these open ended questions required, by making their answer field mandatory. Thus, users will have to answer the questions, otherwise, they will not be able to go on with the quiz.
Naturally, first, you will need to create a quiz (or edit an already existing one) in your Quiz Builder Dashboard. If you require detailed information on how to do that, please check out this article.
Add Questions
After you have created the quiz, you will be able to add the questions.
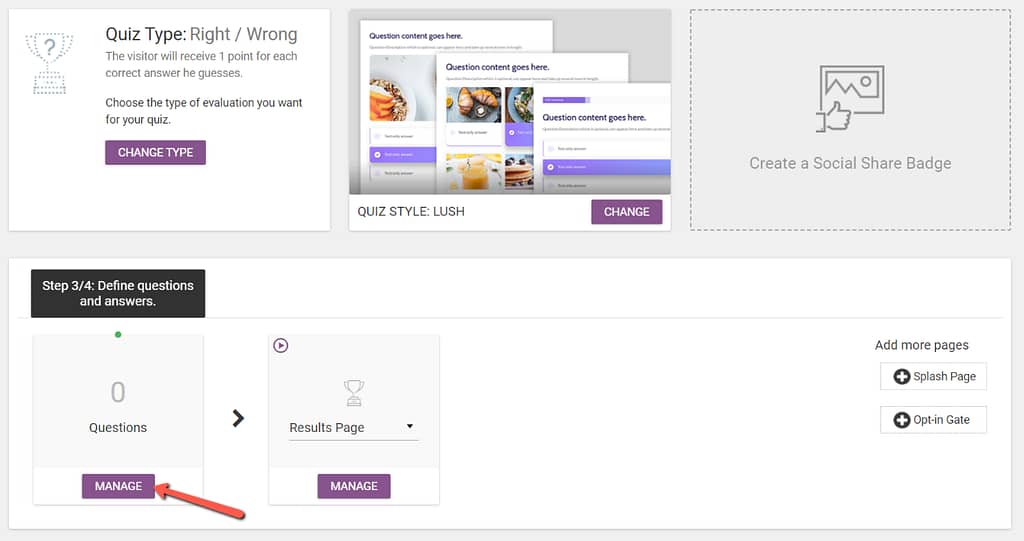
Click on the “Manage” button to trigger the questions editor:
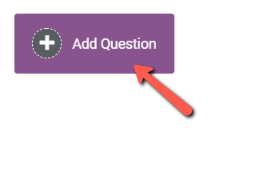
In order to add a question to your quiz, you will have to click on the “Add Question” button from the upper-left corner of the questions editor:
Choose type
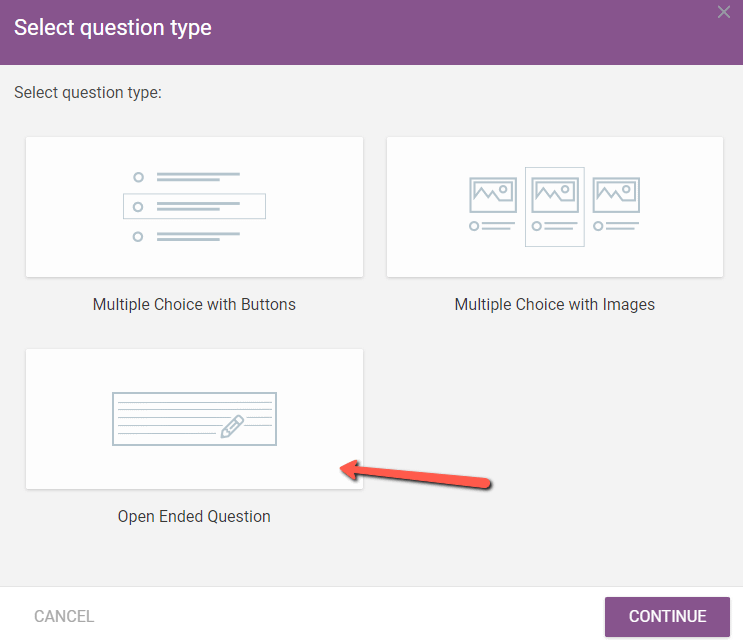
This will open a pop-up window with the three question types you can choose from. Select the “Open Ended Question” type by clicking on it and click on the “Continue” button to go on:
Add the question
Then, you will have the possibility to add and customize the question. First, write (type in or paste) the question in the “Question text” field. Optionally, you can also enter a description for the question in the “Add Description” field:

If you wish, you can add an image to the question as well, by clicking on the “Add Image” option next to these fields:

This will open the Media Library from where you can select and insert the image.
Customize the Question
The next step is to customize the way the question you have just added will look for the users who take the quiz.
General settings
You can make the question required, by clicking on the switch next to the “Required field” option. If you do this, the answer field will be a required one, so people will have to answer the open ended question you have added, in order to be able to go on with the quiz.
Furthermore, you have the possibility to select the size of the form, meaning the size of the field where the users will complete their answers. You can choose between several options, ranging from small to extra large. Just click on any of these to select it:

Advanced Answer Settings
Once you are done with the general settings you can also use the “Advanced Answer Settings” to customize the answer field further.
Click on the “Advanced Answer Settings” section to open its drop-down:

Then, use the settings from the drop-down to set up certain aspects of the answer field. There are two columns with options here:
Parameters
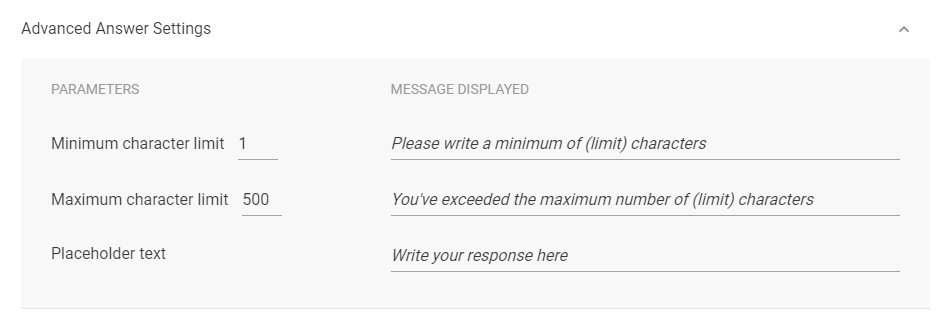
In the “Parameters” column you can set the number of minimum and maximum character limits:
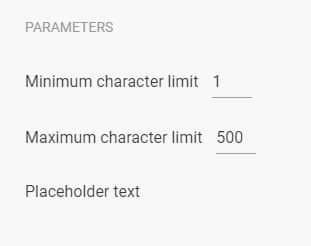
This means that the number you enter next to the “Minimum character limit” will be the minimum number of characters a user will have to write as the answer for the open ended question, in order to go on with the quiz.
Moreover, the number you enter in the “Maximum character limit” section will be the maximum number of characters a user can enter as the answer for the open ended question. If they write an answer that exceeds that number of characters, they will have to make their answer shorter.
The default numbers are set as 1, for the minimum number of characters, and 500, for the maximum number of characters. If you want to change these, simply delete them and enter the numbers you want instead in the fields.
Message Displayed
In the “Message Displayed” column, you can enter the two error messages that will be shown if the answer of the users, for the open ended question, is either too short or too long.
In the case of an answer that is too short, the message from the first field (next to the Minimum character limit) will be displayed.
In the case of an answer that is too long, the message from the second field (next to the Maximum character limit) will be displayed.
Besides these two messages, you can also set up the placeholder text that will appear inside the answer field until users complete the field with their answer and go on with the quiz.
You will see this text in the third field, next to the “Placeholder text”:
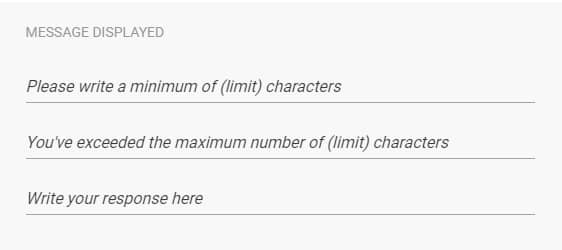
Every field in the “Message Displayed” column is completed by default. In order to change these messages, simply delete the default ones. Then, complete the fields with the texts you want to be displayed as the messages that will be shown in the respective cases.
Preview & Save
After you are done with the “Advanced Answer Settings” click outside of the drop-down and below it, you will see the “Preview” section. This is where you can see how the answer field, along with the messages will look like for the users who take your quiz and have to answer the open ended question you will add:

After you are done with every setting and you also like the preview, click on the “Save” button and the open ended question will be added to your quiz.
You can drag and connect the newly added question to the other questions of the quiz, in the questions editor.
If you want to add more open ended questions, repeat the process described above. This way you can mix the multiple-choice questions with the open-ended ones when creating/editing your quizzes.
Note: Please keep in mind that although you can create a quiz that contains only open ended questions, it is not advisable to do so, if you also want to display a result at the end of the quiz.
Since the answers to open ended questions are not predefined, the Quiz Builder cannot display a result in such cases, after someone will complete the quiz. This is why we do not recommend creating quizzes that contain only open ended questions.
This type of question goes hand in hand with the “Survey” type of quiz, where the visitors can type their answer with regards to a particular subject o interest. You can read more about the “Survey” type here.
After you have added every question you want to your quiz, you can click on the “Save & Exit” button, from the bottom right corner of the questions editor:

Then, you can continue setting up your quiz, just as described in this article.
If you want to find out more about how to use our various products, please visit our knowledge base