Automatically adding customers, who have bought your SendOwl products (in our case Thrive Apprentice courses, set up as SendOwl products), to your mailing list, can be done by connecting your SendOwl account to your email service provider.
Follow these steps in order to do this:
Go to your SendOwl account and click on the “Marketing” section from the left sidebar:
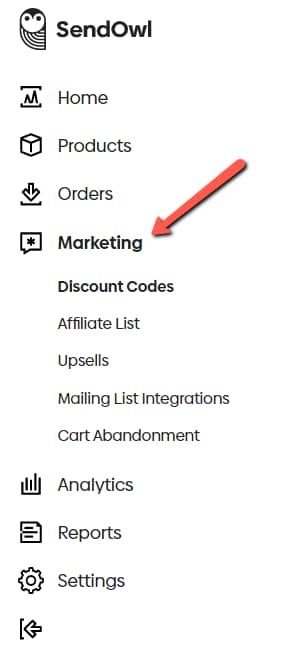
Then, choose the “Mailing list” section form the upper part of the page that opens:

A list with “Mailing List Providers” will appear.
We will use “MailChimp” as an example. If you would like to get instructions on how to connect SendOwl with a different mailing service provider, please check out this article.
So, select the provider you want to connect with and then, proceed with setting up the connection. Every setup is different depending on the mailing service provider that you want to connect to.
We already have an integration set up for this example, but normally, if this is the first time you are doing this, you will only have the “API key” and “Subscribe type” fields here:
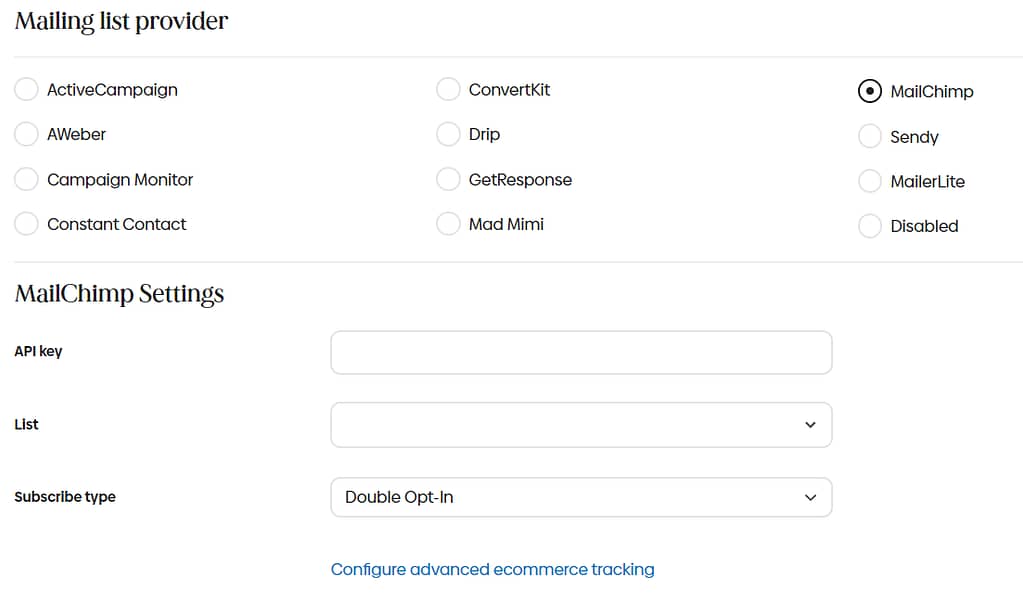
The “List” field will show up after you successfully integrate, and the system will pull in the mailing list from the account of your chosen mailing list provider.
Connect with MailChimp
After you select “MailChimp” from the list, you will see that an API key is necessary, in order to make the connection. You can get this key from your MailChimp account.
Get the API key
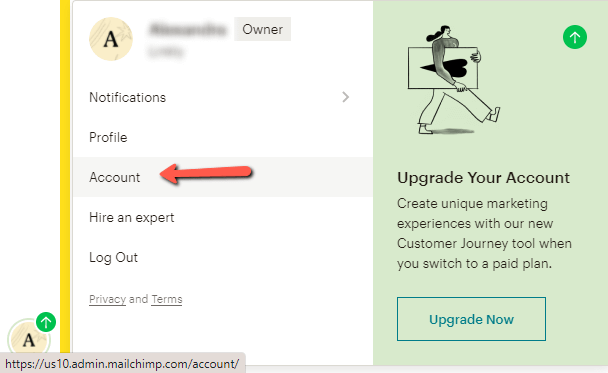
Access your MailChimp account, click on the drop-down with your name in the top right corner of the page, and select “Account” from the drop-down:
Once you are on the Account page, click on the “Extras” section and select “API keys” from the drop-down that appears:

Now, you will have to create a new API key, that you will use exclusively with SendOwl. Look for the “Create a key” button and click on it:
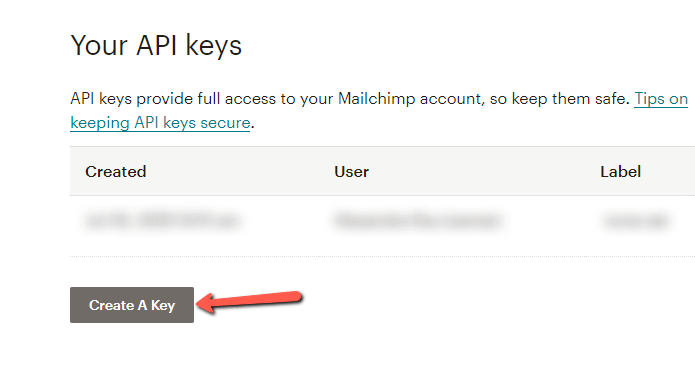
A notification message will appear, letting you know that the new API key has been successfully generated. This will be visible on the top of the API keys list. Copy the newly created API key:

Insert the API key to your SendOwl “Mailing List”
Go back to your SendOwl “Mailing List” section and paste the API key in the corresponding field and select the opt-in type:
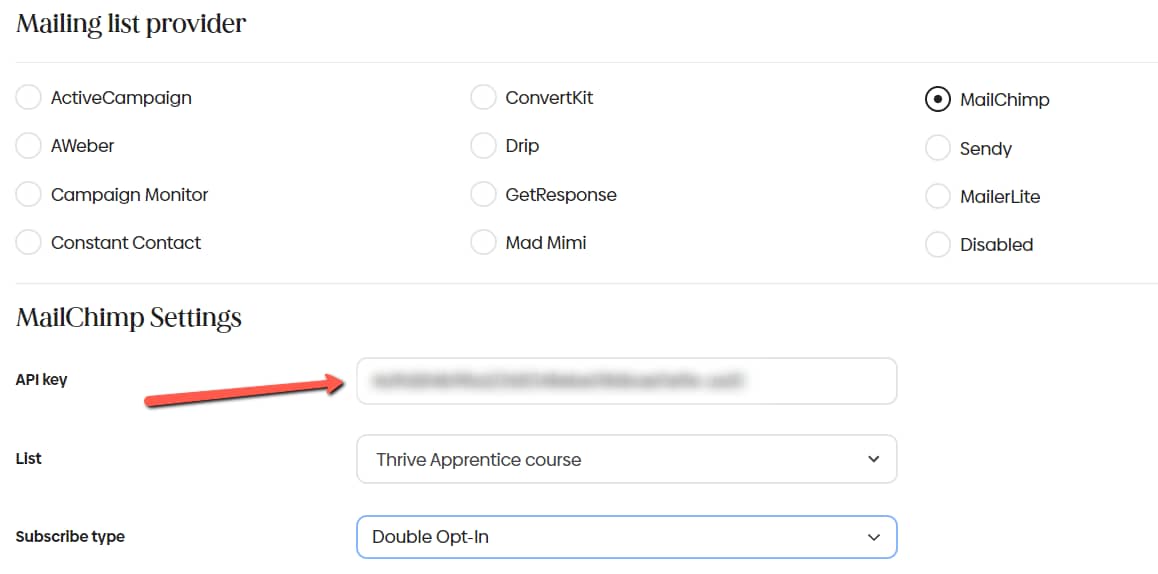
Select mailing list
After you have clicked on the “Update” button, you will see that the “List” section also appears. Open it and select the mailing list that you would like to add the SendOwl buyers to.
This way, whenever someone buys your SendOwl products, they will be added to this MailChimp mailing list by default:
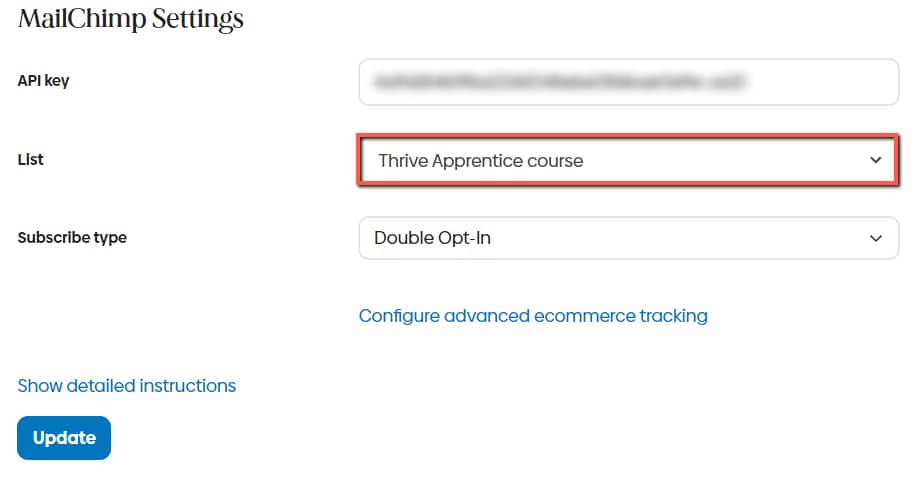
After you have selected the mailing list, make sure to click on the “Update” button again in order to save the setup.
When you finish setting up the connection with MailChimp, every customer who will buy your SendOwl products (in our case your Thrive Apprentice courses), will be automatically added to the mailing list that you have selected here.
Per product mailing lists
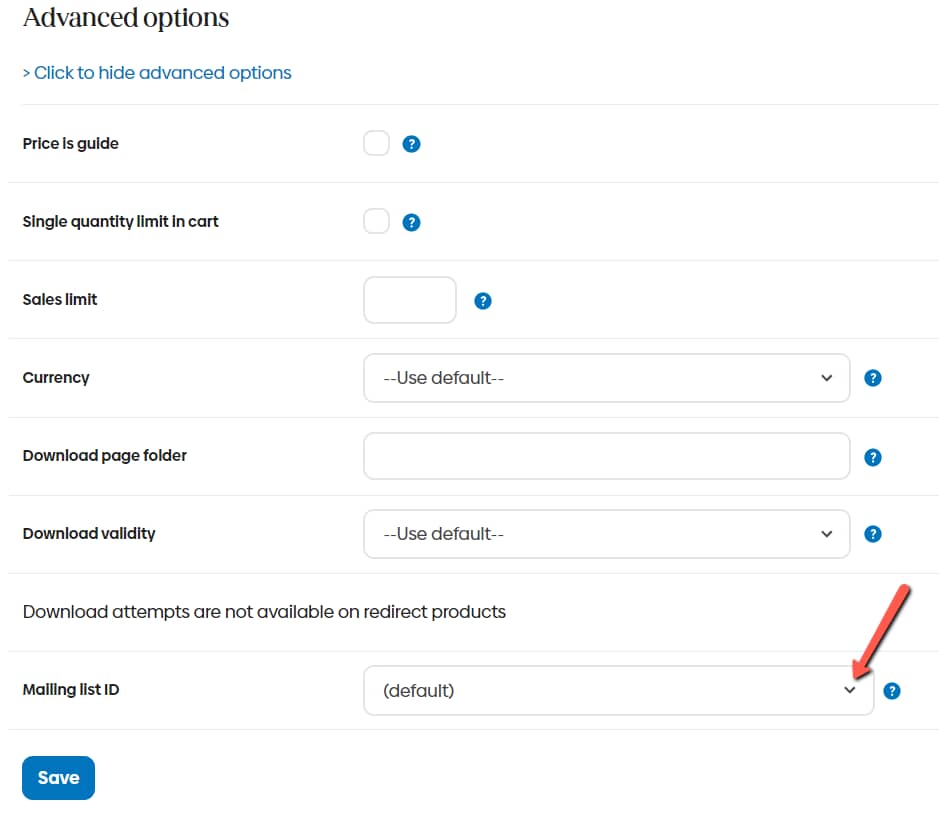
The mailing list that you have chosen as default (following the instructions mentioned above) can be overridden on a product level if you set up “per product” mailing lists. This means that you can select a list to which you want the buyers of a specific product to be added.
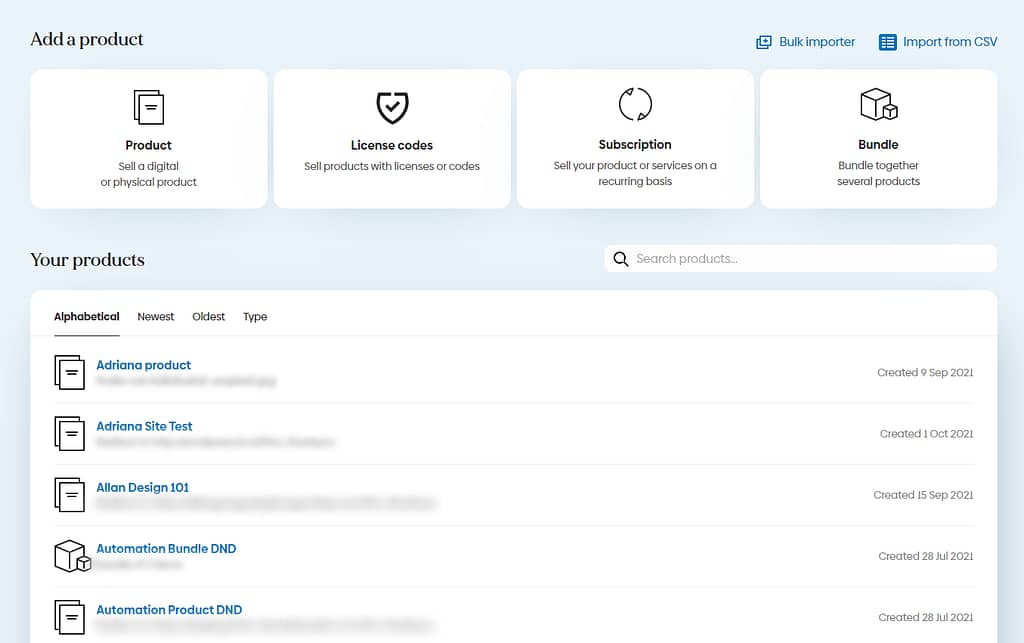
In order to do this, go to the “Products” section of your SendOwl account and click on the product where you want to change the mailing list to open the editing page of the product:
Access the “Advanced options”:
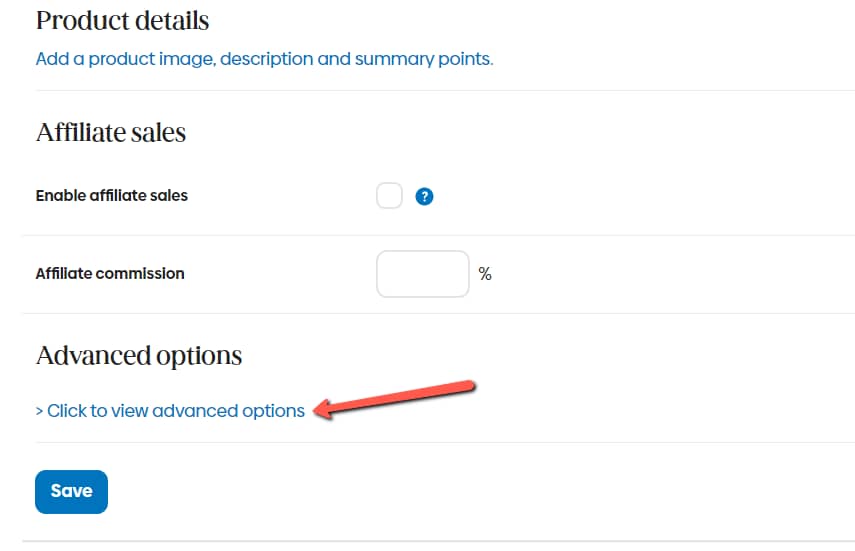
Then, look for the “Mailing List ID” section and click on the down arrow next to it, to open the drop-down and select your mailing list. Once set, click on “Save”:
All done! After you have done this, the buyers of the specific product will be added to the mailing list of your choice and not the default one that you have set before.
If you wish to find detailed information about SendOwl and how to set it up with Thrive Apprentice, please check out this knowledge base section.