Setting up a connection between your SendOwl account and Thrive Apprentice is useful, not only when you want to create pages dedicated for your courses but also when you want to have sales pages that include links to your courses in the form of your SendOwl products/bundles.
Where can I find the purchase links?
First of all, please make sure you have followed the steps described in this article and you have created the products/bundles in your SendOwl account.
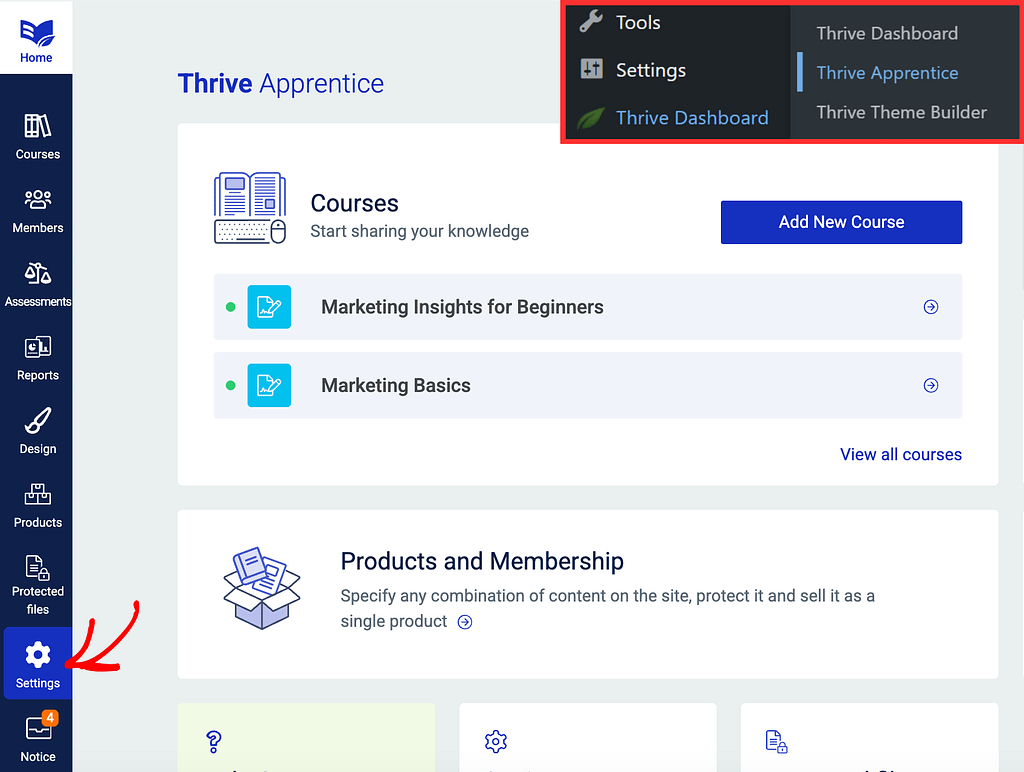
Then, go to the “Settings” section of your Thrive Apprentice navigation bar:
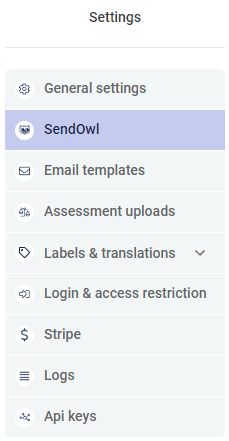
Then, from the available list, select “SendOwl”:
Once you are on the “SendOwl” page, look for the “Purchase Links” card, and once found, click on “Get Purchase Links”:
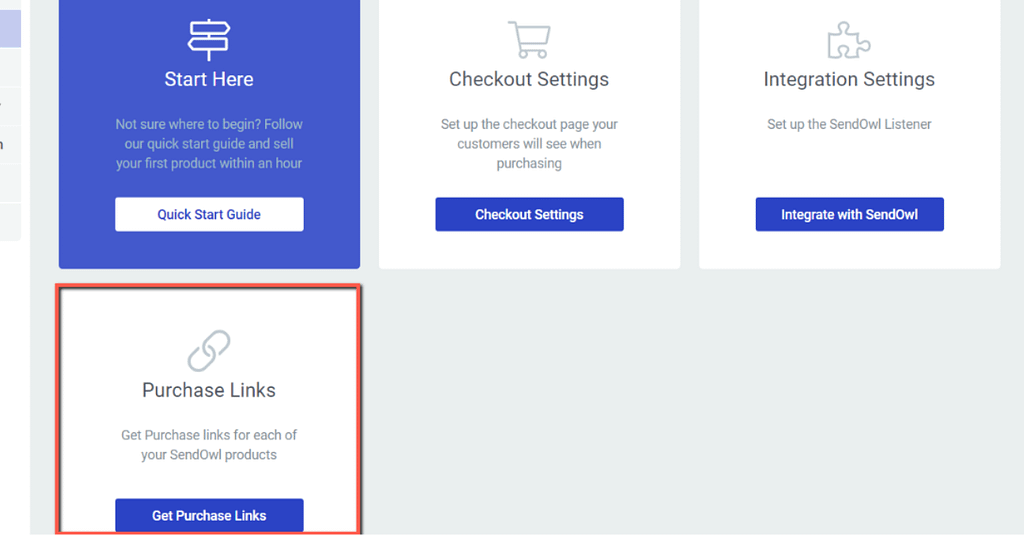
This will open the page where you can generate the purchase links for your products and bundles.
How to integrate the purchase links?
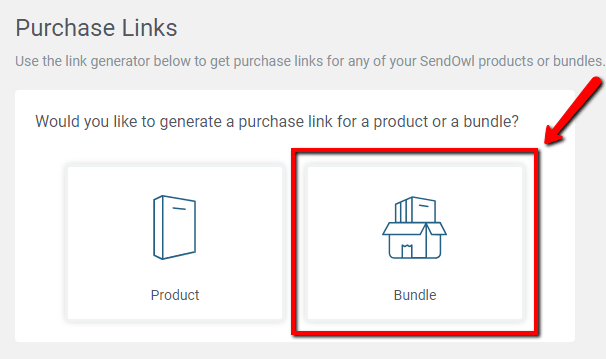
After you access the “Purchase Links” page, you will see that there are two sections you can choose from. The “Product” and the “Bundle” sections:

The procedure is the same for both sections. So, click on “Product” or “Bundle”, depending on what you need the purchase link of (a product or a bundle, that you have previously set up in your SendOwl account). In this example, we will go with a product:
You will see a new section appear, where you can select the respective product from. Click on the little down arrow and select the product you want to get the purchase link for, from this list:

This is a list of every course you have set up as products in your SendOwl account.
The next step is to copy the URL (which is the purchase link for the product you have chosen) that will be displayed in another section below the product section:

You can do this either by clicking in the respective field and copying the link or by simply clicking on the copy option (double file icon) next to the field.
If you want this product to be available with a discount follow these steps:
After you have selected the product, you will have to select the discount for it as well. Therefore, in the “Discount” section (next to the “Product” section) open the drop-down by clicking on the “Select an option” field and choose a discount you want to apply for your product:
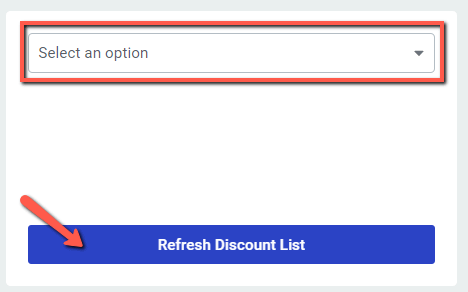
You will see that the URL, which is the purchase link in the field below, has now changed, and besides the product ID, the discount has also been added to it. You will have to copy this purchase link, just as mentioned above, in the case of the simple purchase link.
Once you have the URL you can insert it to any of your sales pages. You will simply need to use the linking option that your editor has.
Linking with Thrive Architect:
If you have purchased Thrive Architect then, you can simply use the linking option of the text elements, for example, to insert the purchase link into the sales pages you create.
In order to do this, access the “Pages” section of your WordPress Admin dashboard, and click on the “Edit with Thrive Architect” button, that appears when you hover over the sales page, where you want to insert the purchase link:

While you are editing the page, you can link a call-to-action (for example: Buy now!) to the purchase link. Simply select the words you want to be linked and then, click on the linking option (chain icon), from the panel options of the text element.
This will open a drop-down, where you can insert the link:

Complete the URL field with the purchase link that you have previously copied, choose whether or not you want the purchase page of the product/bundle to open in a new tab and then, click on “Insert”.
When you are done editing the page, don’t forget to save it, in order for the changes that you have made to be visible.
If you need more info on how you to apply links in Thrive Architect, please check out this tutorial.
Linking with the WordPress editor
If you are using the classic WordPress editor, then, here is how you can insert the purchase link to your pages:
Go to the “Pages” section of your WordPress admin dashboard and click on the “Edit” button that appears when you hover over the sales page, where you want to insert the purchase link:

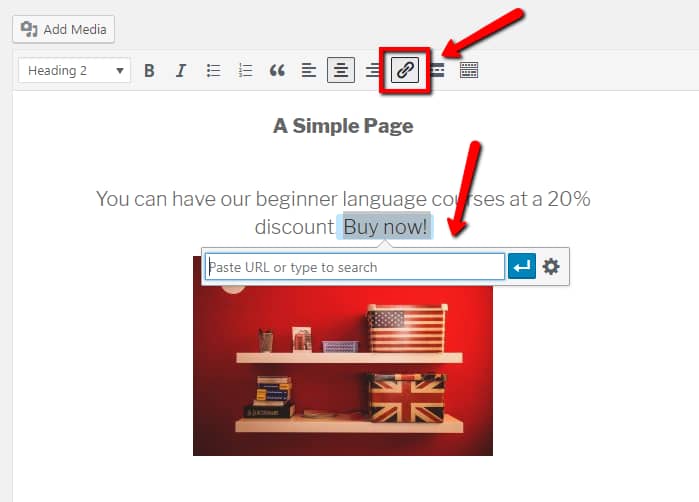
Then, while editing the page with the WordPress editor, add a text with a call to action, for instance, something like “Buy now!”.
Select the call-to-action, the words you want to link, and click on the linking option (chain icon) that appears among the text editing options.
This will open a pop-up where you can paste the purchase link that you have previously copied. All you have left to do is to click on enter or “Apply” (the arrow next to the field) and the link will be added to the page:
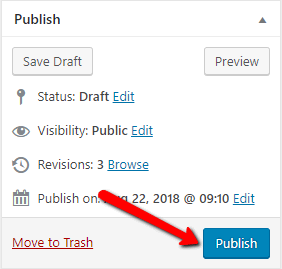
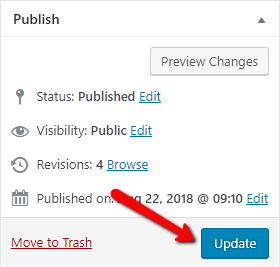
In order for the visitors of your page to see the link, you will need to either “Publish” or “Update” the sales page. Using the button from the right sidebar of the editor:
The only difference is that after you access the “Purchase Links” page you will need to select the “Bundle” section, instead of the one with the products:
After you have completed these steps, the links to your courses, in the form of your SendOwl products/bundles, will be displayed on the sales page of your choice.
If you want to find out more about how the Thrive Apprentice and SendOwl connection works, please look through this knowledge base section.