Whenever you build a “Simple Mega Menu” using the “Custom Menu” element, there are a few things you should consider.
In order to have Mega Menus on your website, you need to add a menu, in the “Custom Menu” element, that not only has second-level items but third level items as well.
Here is how you can do that:
In the case of a default Custom Menu
When you have chosen to create a default Custom Menu, the third level items were included by default. If you have deleted these, you will have to add them to the menu again.
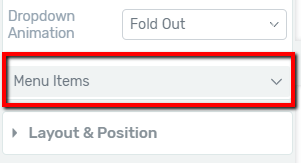
First, click on the “Custom Menu” element that contains the Simple Mega Menu that you are building. Then, click on the “Menu Items” section of the “Main Options” from the left sidebar to open its drop-down:
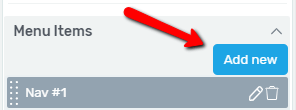
Here you are able to manage your menu items. Next, use the “Add new” button to add a new item to the menu:
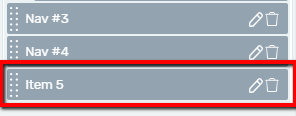
This will automatically add a new item to the end of the list of menu items, from this section:
If you want, you can edit this new item using the “Edit” option (pencil icon) that appears next to it. When you click on this option, a new drop-down window will open.
Here you can give a name to your item, link it to a specific page and make the link open in a new tab or be no-follow if you want:

Then, click on “Apply” to save the changes you have made for this item.
Once you have the new menu item ready, you will have to make it a third level item. Click on the dotted right side of the item, then hold the click and drag & drop the item in the position, where it is a third level item.
This means that you have to place the item under a second level menu item, like this:

In the example above, the items are arranged as follows:
-
“About us” → Top level item
-
“Our Products” → Second level item
-
“Dried fruits” → Third level item
After you have added a third level item and created such an order for your menu, the “No submenu items found…” error message will disappear and you can continue with building your Mega Menu.
In the case of an existing WordPress Menu
If you have used an already existing WordPress menu as the source of your Mega Menu, when adding the “Custom Menu” element, then you must add a third level item to that specific WordPress menu.
In order to do this, go to your WordPress admin dashboard, hover your mouse over the “Posts” or the “Pages” section, depending on what would you like your third level item to be and then, click on the “Add new” option from the section that just opened:
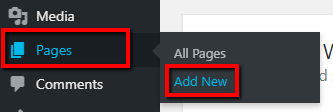
This will open the page where you can create and set up a new post/page, which you will, later on, add as your third level menu item. You will also have the option of editing this new post/page using Thrive Architect.
After you have set up the new post/page, publish it and then, you will have to add it to your menu. You can do this as well in your WordPress admin dashboard.
Hover your mouse over the “Appearance” option from the right sidebar and click on “Menus” from the section that appeared:
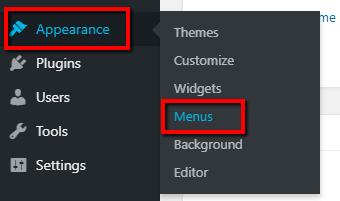
When you have reached the Menu page, you will have to edit the menu that you are using as the source for the Mega Menu in your “Custom Menu” element.
For that, click on the down arrow from the “Edit Menus” tab to open the drop-down with your menus and then, look for the respective menu in the drop-down:

After you have found it, click on the “Select” button from its right side to select and edit it:

Then, scroll down a bit and in the left part of the Menu page, you will see the section from where you can add new pages/posts to your menu. Open either the “Pages” or the “Posts” drop-down, depending on what you have created to be your third level item.
Select the respective page/post from the list and click on the “Add to Menu” button:
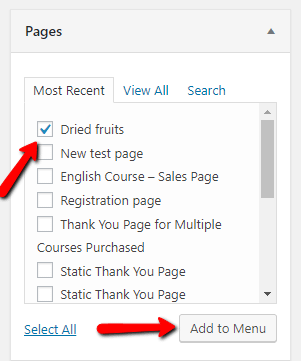
This will add your page/post to the bottom of your menu. You can see this in the “Menu Structure” section, right next to the section where you added the page/post from:
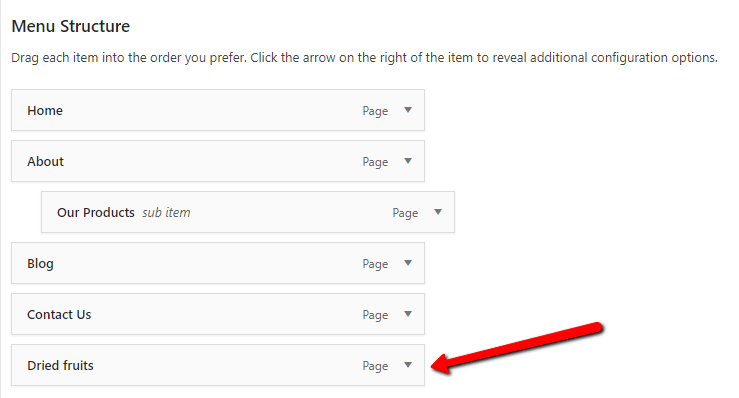
All you have left to do is to hover your mouse over this item and drag it to a position where it is a third level item, just like this:
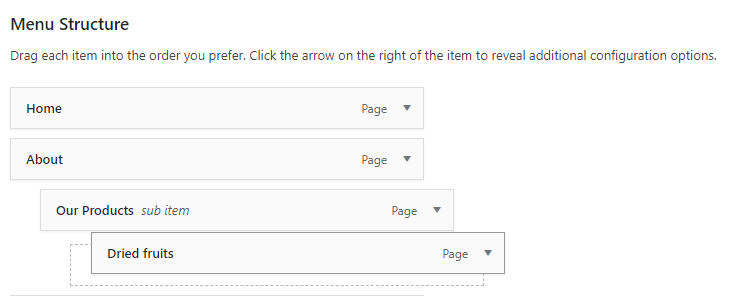
Once you place the item in a position like this, it will become a third level item:

In this example as well, the items are arranged as follows:
-
“About us” → Top level item
-
“Our Products” → Second level item
-
“Dried fruits” → Third level item
When you have added the third level item to your menu, click on the “Save Menu” button from the bottom-right corner of the page:
Then, go back to editing the page containing the “Custom Menu” element (with the Mega Menu) in Thrive Architect. Refresh the page and the “No submenu items found …” error should disappear.
Note: If you have not saved the page after adding the “Custom Menu” element to it yet, then, make sure to save it before refreshing it. Otherwise, the changes that you have applied to it, the work you have done on the page, will disappear.
After the error disappears, you can continue building your Mega Menu.
Hopefully, this article was useful for you. If so, please give it a smile below 🙂