This article will explain how to apply templates to a page or a post, as well as how you can use the options on a page/post level.
I will use a page as an example but keep in mind that the process works exactly the same for a post.
Apply templates to posts/pages
To begin with, in your WordPress admin dashboard, on the left sidebar, go to “Pages” (or “Posts”, depending on what you want to apply the template to):

This will take you to all of your pages. Find the one that you want to apply the template to, and hover over it in order to see the options:

Click on the first “Edit” option, in order to access the WordPress page settings. On the right sidebar of the WordPress settings page, you will notice some options.
If you have installed and activated Thrive Theme Builder, one of the options will be “Theme Builder Templates”:

Important!
If the page that you are editing is using a Thrive Architect landing page template, you will not be able to apply a Thrive Theme Builder Template to it, and this option will not be available.
By default, your newly created post or page will have the Default Page/Post Template applied to it. If you want to change that, click on the field next to the “Template” option:
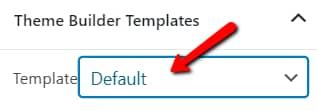
This will open a list with all of your previously created page/post template. Since in this example we are editing a page, all of the page templates that I have previously created in Thrive Theme Builder will be in this list.
If you are not sure about how you can create a template, you can check out this article that explains how to add a new post template, as well as this article, that goes through the steps in which you can add a new page template.
From this list, choose the template that you want to apply to the post or page:

After that, don’t forget to save the changes by clicking on “Update” or “Save Draft”, if your page or post is not published yet:

This is how you can apply a template to a post or page. As mentioned before, the example above shows how to apply a page template to a page, but the way to apply a post template to a post is exactly the same.
Use the related options
Visibility Settings
In the WordPress page/post editor, besides the “Theme Builder Templates” section of the right sidebar, there is one more section with options related to Thrive Theme Builder. This is the “Theme Builder Visibility” section:

Click on the down arrow in order to expand the options:

This will expand the Thrive Theme Builder visibility options:

Note: It is important to know that the “Theme Builder Visibility” options will be visible here (in the WordPress settings) only if you have not opened or edited the post/page using Thrive Architect.
If the post/page has been opened in the Thrive Architect editor, the visibility options will migrate there.
If you have opened the page or post using Thrive Architect, here is where you can find these options. In the editor, click on the “Page” (or “Post”) item from the breadcrumbs:

Click on the “Visibility Settings” section in order to expand it and see all the options. You can notice that they are exactly the same as the ones from the WordPress editor:

You can use the “Visibility Settings” in order to set up what you want to show on your page/post.
Show/Hide Template Sections
The first options from this section are related to the sections of your post or page, and you can choose between three visibility options for each of them:

By default, each of the sections is set to inherit the visibility settings of the template applied to the post or page. You can, however, change that.
In order to change the settings of one of the sections, click on the field next to the section name:

This will open a small drop-down with the three options where you can choose from:

Here is what each of these options does:
- Inherit – if you choose this option, the section will be inherited from the template applied to the post or page you are editing.
For example, let’s say a template has the “Top Section” hidden from the template options. When editing a certain post/page on which this template has been applied, if the “Visibility Settings” for the “Top Section” is set to “Inherit”, then the “Top Section” of the post/page you are currently editing will also be hidden.
- Show – if you choose this, the section will be visible on the post/page you are editing, even if the section is hidden for the template.
For example, if a template has the “Sidebar Section” hidden from the template options, and in the post/page visibility section you choose “Show”, then the “Sidebar Section” will be visible on the respective post/page.
- Hide – if you choose “Hide”, the section will be hidden, regardless of the settings of the template.
This means that, even though the template has a visible “Header”, for example, if you choose “Hide” from the “Visibility Options” of a post/page, there will be no “Header” section on that respective post/page.
In order to choose one of these options, simply click on it when you open the drop-down:

Show/Hide Other Elements
The next options that you can set from the “Visibility Settings” are related to the post/page title, featured images/videos, as well as the “About the Author”, “Breadcrumbs” and “Comments” elements:

You can choose whether you want to show/hide these elements, by using the switch buttons next to each option:

All of these options are enabled, therefore visible, by default.
Note: The first option here is called “Post Title”, even though you might be editing a “Page”. This is because in both situations (editing a post and editing a page), the element that beholds the title of the post/page is called “Post Title”.
Lastly, you can choose whether you want to show the hidden modules. This option is disabled by default. Activate the switch next to the option if you want to change that:

These are the ways in which you can use the “Visibility Settings”. Besides these, in the Thrive Architect editor, there a few more options above the “Visibility Settings” section:

Status & Visibility
The first section from the left sidebar is the “Status & Visibility” one. Click on it in order to expand the options:

Visibility
The first option from this section is the “Visibility” option. This is where you can make the post or page to be public or private. In order to change the visibility settings, click on the option next to “Visibility”:

A small pop-up will open, where you can choose the option that you want:

- A public page will be visible for everyone.
- A private page will only be visible to the administrators and editors of the page.
If you want to make the page private, choose the “Private” option from the pop-up:

When you do that, a pop-up message will show, asking you to confirm that you want to privately publish the post/page. Click on “Yes, privately publish” in order to continue:

- A Password Protected page is a page that can be accessed only by someone who has the password.
Choose this option if you want to provide a password for the respective page. A password field will show immediately after you choose the option, and you can insert the password that you want the page to be accessed with:

After choosing any of these options, don’t forget to click on “Apply” to save the modifications and close the pop-up:

Publish Status
The next option from the “Status & Visibility” section is the “Publish Status” one, where you will see if the post or page is published or it’s still a draft:

Right below the status, there is a button, and there are two possible situations:
- If the page is unpublished, the button will allow you to publish it. To do that, click on “Publish”:

When you do that, a small pop-up message will appear, where you can confirm that you want to publish the page, by clicking on the green “Yes, publish” button:
- If the page is published, the button will say “Switch to Draft”, allowing you to unpublish it:

Just like in the other case, when you click on it, a pop-up will show, asking you to confirm this action. Click on “Yes, unpublish” to continue:

Page Template Settings
After the “Status & Visibility” section, the next one is the “Page Template Settings” one. Click on it in order to expand the section:

This will open the page templates that you have created in Thrive Theme Builder. They are the same ones that you can find in the drop-down described here, as well as some options:
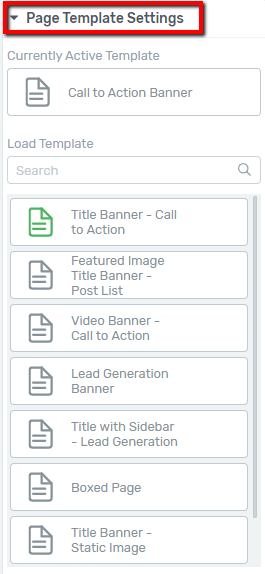
Here is how you can use the Page Template Settings:
Currently Active Template
This is where you will see which template is active at the moment:

Load Template
This next option will come in handy if you want to quickly find the template that you want to apply to the post.
You can either look for the template using the search bar, or you cant type its name in the field:
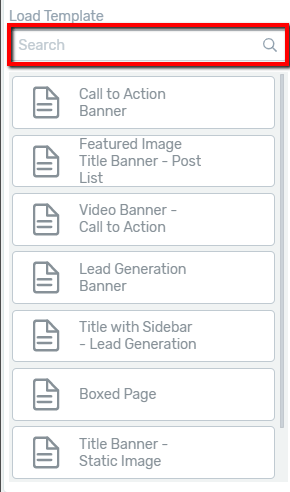
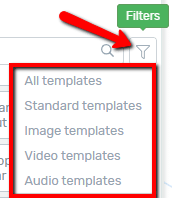
Note: In the case of applying a Post Template to a post, there is also a filtering option that you can use here, right next to the search bar:

If you click on the “Filters” option, a small drop-down will appear, from where you can choose a type of Post Template, so that only the respective templates will show:
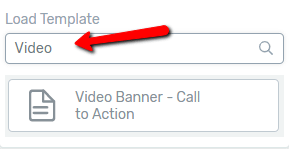
The search bar can be used like any other search bar: start typing the name of the template, and the templates that match will appear below:
You will notice that, in the list of templates, some of the templates have a green icon in front of them, and for some of them, the icon is grey:
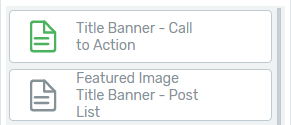
The difference is that the templates for which the icons are green are the Default Templates, and the rest of the templates have grey icons.
To apply a template to this post, once you find the template of choice, hover over it and click on “Activate”:
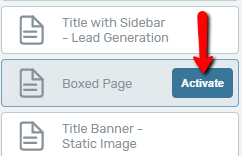
The template will automatically change.
Page Content
The third section of the left sidebar here is the “Page Content” one. Click on the section in order to expand it:

As you will notice, there are two options inside this section: you can change the page/post title, as well as change the featured image:
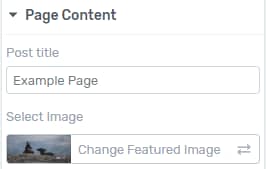
Post Title
This option allows you to change the title of the page/post you are editing. Keep in mind that, even if you are editing a page, the option will be called “Post Title”.
If you want to change it, delete the current name from this field, and enter the new name:
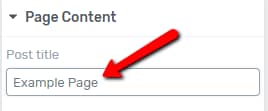
After changing the title, you can click anywhere outside the field, and it will be changed.
Featured Image
This is the featured image that you have previously set from the WordPress settings. You are still able to change it from there, as well, but you also have this possibility in Thrive Architect.
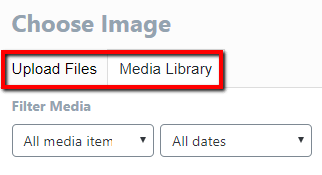
To change the image, click on the “Change Featured Image” field:

This will open the pop-up where you can upload a new image, or use one from the Media Library:
If you need more information about how to set a featured image, make sure to read this article.
After you select a different featured image, click on the blue “Insert into post” button from the lower side of this pop-up:

After the “Page Content” section, the last one from this sidebar is the “Visibility Settings”, which was described a bit earlier in this article, here.
This concludes the article about how you can apply templates to a post or page and how to use the related options.
Don’t forget that, for this article, we used a page as an example, but everything works exactly the same when handling a post.
We have also created these two articles, that might come in handy:
If you need more information about various Thrive Themes products and features, make sure to check out our knowledge base.