Thrive Leads is a powerful list-building plugin for WordPress that allows you to create and deploy conversion-focused opt-in forms on your website. Whether you want to grow your email list, deliver lead magnets, or display targeted offers, Thrive Leads provides the tools to design, target, and test your forms.
Installation and Activation
Before you can use Thrive Leads, you need to install and activate it on your WordPress site.
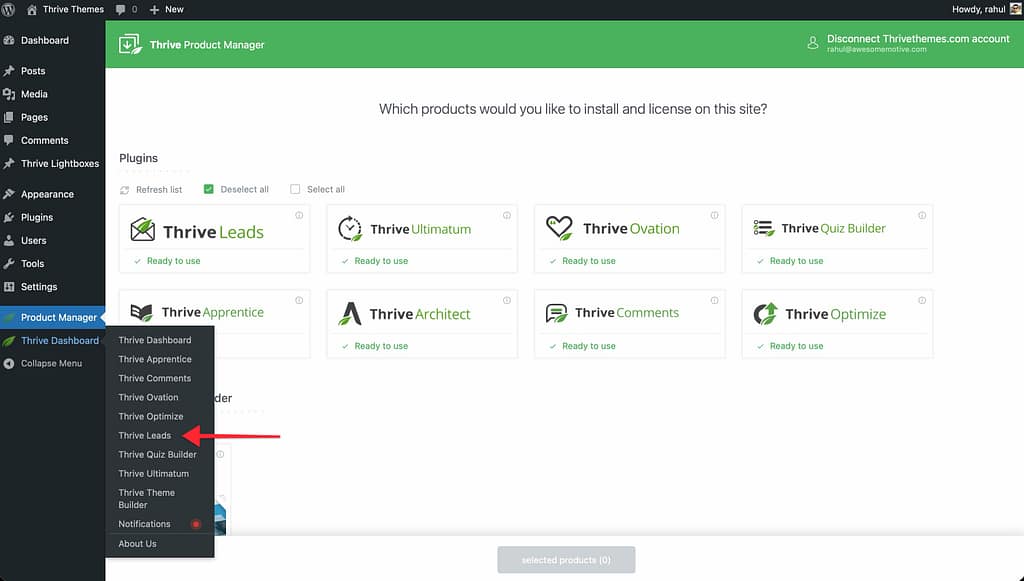
- Install the Thrive Product Manager plugin if you haven’t already.
- Navigate to Thrive Dashboard in your WordPress admin.
- Located Thrive Leads in your list of available products and check the Install & Activate box.
- Click Install Selected Products.
Once activated, you can access the plugin by going to Thrive Dashboard >> Thrive Leads.
Core Concepts: Form Types
Thrive Leads offers several ways to display forms on your site. Understanding the difference between them is key to choosing the right tool for your campaign.

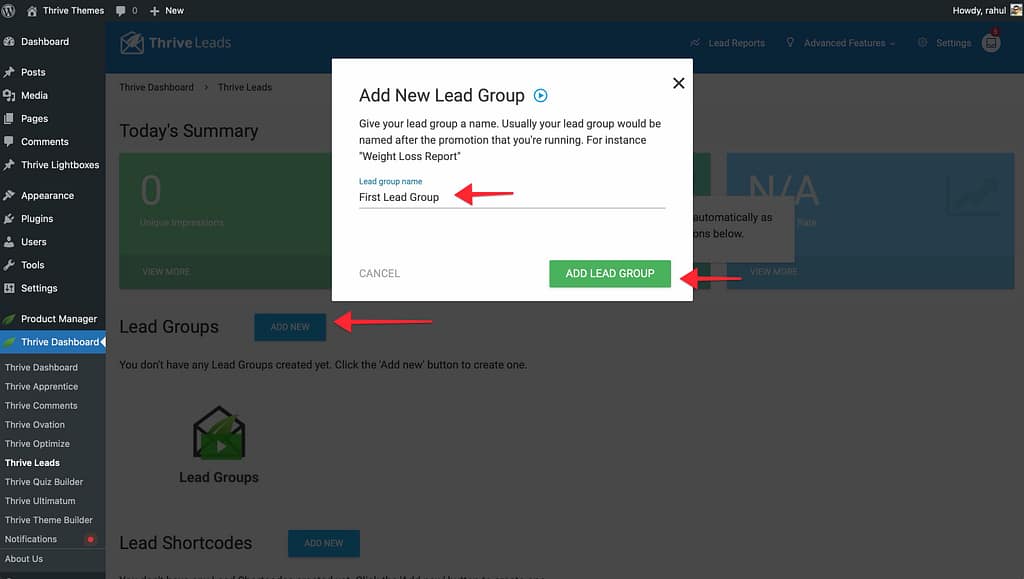
1. Lead Groups
Lead Groups are the most powerful way to automate your list building. A Lead Group acts as a container for one or more forms (like a Ribbon, Lightbox, Slide-in, or Widget) that share the same targeting rules.
- Automatic Display: You define where these forms appear (e.g., “All Blog Posts” or “Front Page”) and Thrive Leads automatically inserts them.
- Smart Targeting: You can show different offers to different segments of your audience.
- Testing: You can A/B test different form types against each other within a group.
2. Lead Shortcodes
Lead Shortcodes allow you to manually place a form anywhere you can use a WordPress shortcode.
- Manual Placement: Ideal for inline forms within a specific blog post or page content where you want exact control over placement.
- Design: These are typically “Post Footer” style forms embedded directly in the content.
- Limitation: Unlike Lead Groups, you have to manually add the shortcode to every page where you want it to appear.
3. ThriveBoxes
ThriveBoxes are pop-up lightboxes that open on click rather than automatically.
- 2-Step Opt-in: You can link a text, image, or button to a ThriveBox so the form appears only when a user engages.
- Behavior: They are hidden by default and triggered by user interaction.
4. Signup Segue
Signup Segue allows existing subscribers to sign up for new offers with one click, without re-entering their email address. This is useful for webinar registrations or bonus content delivery.
How Thrive Leads Works: The 8-Step Roadmap
Setting up a high-converting campaign follows a logical sequence. Here is the step-by-step workflow to get your first form live:
- Everything starts with a Lead Group. This is the container for your campaign (e.g., “Main Newsletter”).
- Navigate to the dashboard and click Add New under Lead Groups.
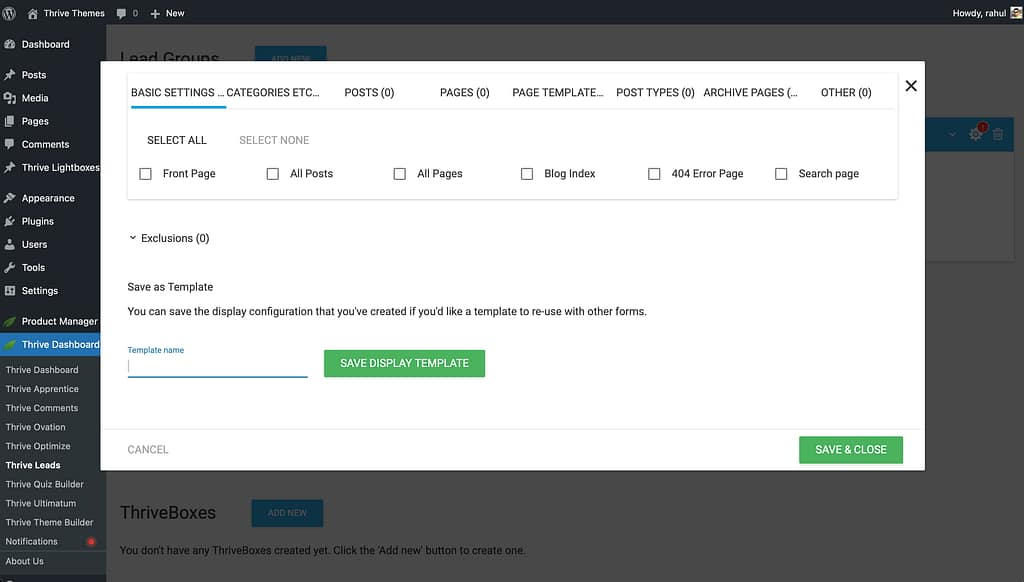
- Click the Cogwheel icon on your Lead Group to define where the forms should show. You can target “All Posts,” specific categories, or even individual pages using granular display logic.
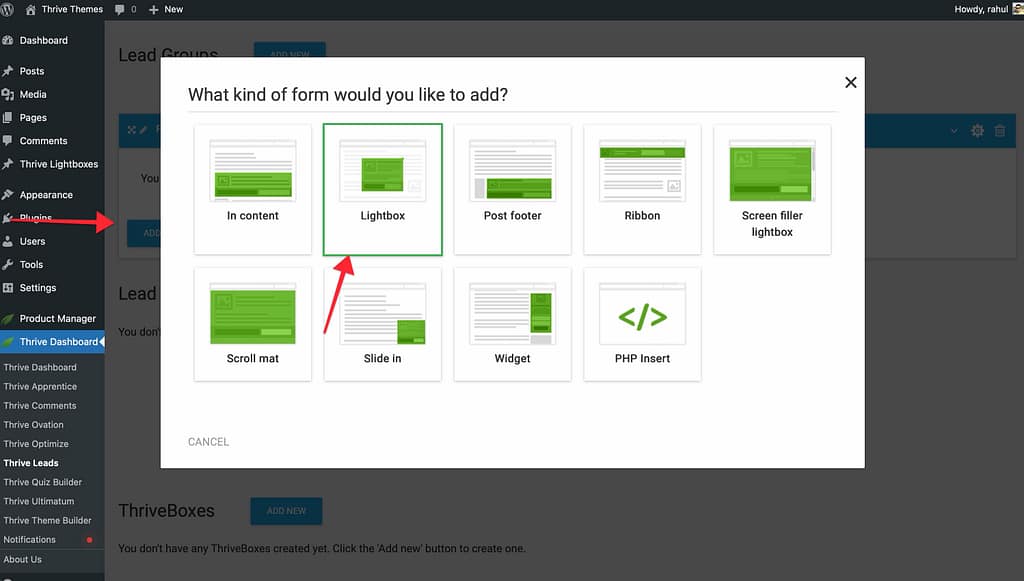
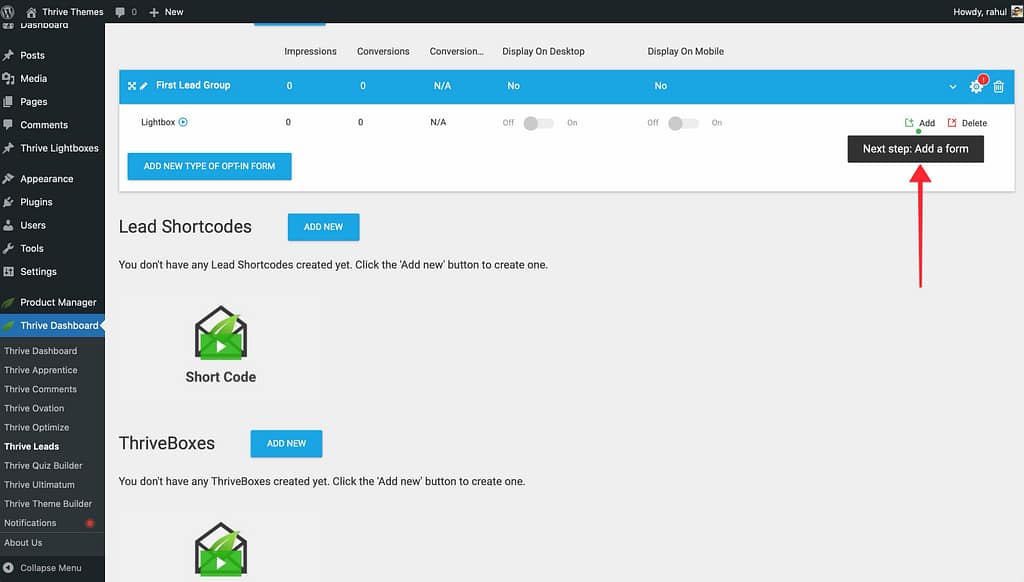
- Inside your Lead Group, click Add New Type of Opt-In Form. Choose a format that fits your goal, such as a Lightbox (popup), Ribbon (sticky bar), or Slide-In.
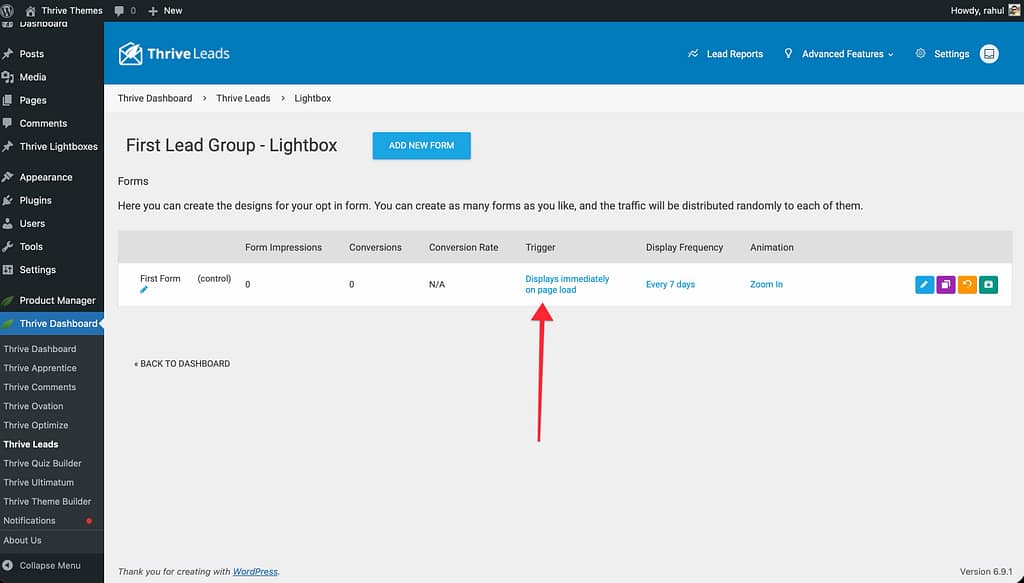
- Click Add on your form type card, then Create Form. Once created, click the Edit Design (pencil icon). A library of hundreds of professionally designed templates will open; pick one as your starting point.
- Use the Thrive Architect editor to drag and drop elements. Change headlines, swap images, and adjust colors to match your brand without writing a single line of code.

- Click on the Lead Generation element (the form fields) and use the “Connection” tab in the sidebar to link the form to your email marketing provider (e.g., Mailchimp) via API.

- Back in the dashboard, set your Trigger (e.g., “Show on Exit Intent” or “After 10 seconds”) and Display Frequency (e.g., “Show every 7 days”) to balance conversions with a great user experience.
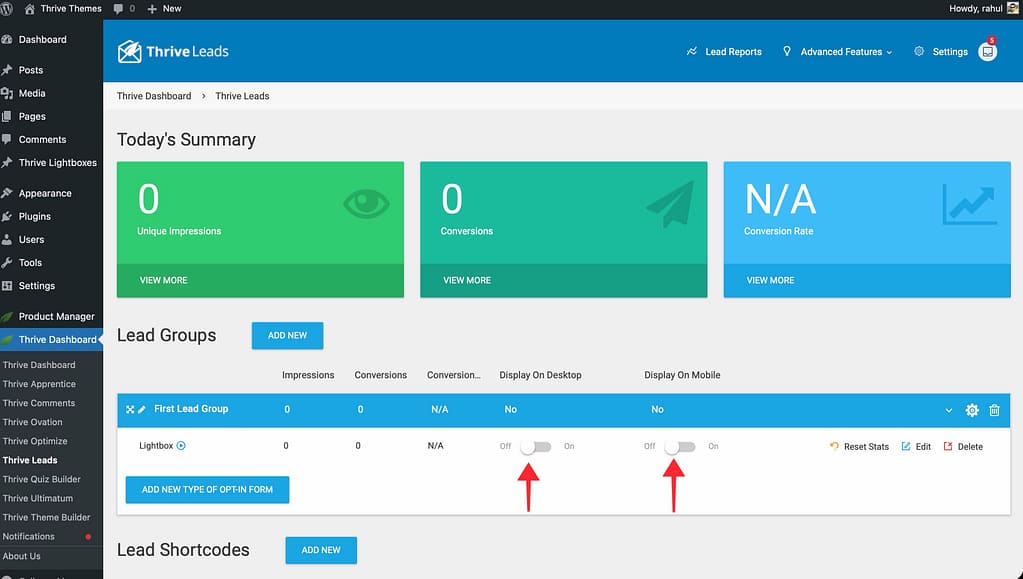
- Use the Desktop and Mobile toggles on the form card to ensure visibility. Finally, ensure the main Lead Group switch is toggled to ON (green) to make your campaign live.
The Thrive Leads Dashboard
Your command center is the Thrive Leads Dashboard. Here you can:

- View daily performance stats (Impressions, Conversions).
- Create and manage Lead Groups, Shortcodes, and ThriveBoxes.
- Run A/B tests.
- Access advanced features like Asset Delivery and Reports.
To get a detailed tour of the interface, read our guide on Understanding the Thrive Leads Dashboard.
Next Steps
Ready to build your first campaign? Follow our step-by-step tutorial: