Do you want to add gamification to your online course website? You can use GamiPress with Thrive Apprentice to do so.
This means that anytime your students complete a lesson, module, or course, they are awarded points. Based on those points, they can unlock different achievements and ranks. This keeps them engaged and motivated to return to learn more and unlock other types of rewards.
In this example, we’ll show you how to create point types and award them to your online school students each time they complete a lesson.
Here’s how the integration works and how you can use it on your website.
- Installing and Activating the GamiPress Plugin
- Adding New Point Type in GamiPress
- Managing Display Settings in WordPress Website
Installing and Activating the GamiPress Plugin
To integrate Thrive Apprentice with GamiPress, you must install and activate the GamiPress plugin on your website.
To install the plugin, open your WordPress admin area, click Plugins >> Add New Plugin, and type GamiPress in the search field.
After you search for the plugin, click the Install Now button on the GamiPress box.
When installing the plugin, click the Activate button on your website.
Once you activate the GamiPress plugin, it has an in-built integration with Thrive Apprentice.
Adding New Point Type in GamiPress
Next, we’ll see how you can set up various point types to be awarded to your students each time they complete a lesson.
The GamiPress documentation page explains how to learn about other types of achievements and ranks.
To add new point types, open your WordPress admin area, navigate to GamiPress >> Point Types, and click the Add New button.
After clicking the Add New button, you’ll be taken to the page where you can configure the new Point Type being added.
When you add New Point Types, you can set conditions for the following:
Awarding Points Automatically
As mentioned above, after configuring the new point types, you can scroll down the page to ensure these points are awarded automatically when the conditions are met.
To manage this setting, scroll down on the point type configuration page and click the Automatic Points Award bar.
Once you click the Automatic Points Award tab, you’ll see two buttons that let you add new point awards and save any existing ones.
To award this point type automatically, click the + Add New Points Award button.
After you click the Add New Points Award button, you’ll see a box where you can add the details of when and how you’d like to award the points.
This box allows you to set the following:
- When: Set the trigger, the achievement type, and the number of times it should occur for GamiPress to award the points.
- Earn: Set the points you’d want to grant for this activity and the maximum number of times a user can win them.
- Label: Add a label for this award. You can also leave this field empty for it to be autogenerated.
The above image shows a user will be awarded when he completes a lesson once (and he can repeat this unlimited times). Completing a lesson will grant him 5 points, and he will be awarded for a maximum of 1 time.
Similarly, you can add multiple New Points Awards by clicking the +Add New Points Award button.
After clicking the button, you can add more conditions like these.
Finally, after you add the New Point Awards, you can save all of them by clicking the Save All Points Awards button.
After you add the new points and the associated awards, click the Publish button in the right column.
Deducting Points Automatically
Like awarding points, GamiPress also allows you to deduct points automatically.
To manage this setting, scroll down on the point type configuration page and click the Automatic Points Deductions bar.
Once you click the Automatic Points Deductions tab, you’ll see two buttons that let you add new point deductions and save any existing ones.
To deduct this point type automatically, click the + Add New Points Deduction button.
After you click the Add New Points Deductions button, you’ll see a box where you can add the details of when and how you’d like to deduct the points.
This box allows you to set the following:
- When: Set the trigger, the achievement type, and the number of times it should occur for GamiPress to award the points.
- Earn: Set the points you’d want to grant for this activity and the maximum number of times a user can win them.
- Label: Add a label for this award. You can also leave this field empty to auto-generate it.
Like awarding points, here too you can add conditions based on which you’d want to deduct points for students.
Managing Display Settings in WordPress Website
It is important to manage the display settings so you can display the points a student has earned. The best place to do that is in a widget that’ll be seen while the student takes up the course.
Adding a Widget
To begin, open your WordPress admin area and navigate to Appearance >> Widgets.
On the widgets page, scroll down to select where to display the points. For example, we’ll click on Thrive Apprentice Lesson Sidebar to extend the section and click on + to add a block.
You’ll see a list of blocks you can select when you click the plus icon. Here, choose GamiPress: Point Types.
After you pull the GamiPress: Points Types, you must fill out the fields associated with the block.
- Title: This is the name of the widget area.
- Point Type: This is the Point Type you want to include in this widget.
- Columns: The number of columns in which you want to show the Point Types.
- Columns on Small Screens: The number of columns you want to show on small screens.
- Title Size: The size of the widget titled being displayed.
- Show Thumbnail: Enabling this will show the featured image set for the point type selected here.
- Thumbnail Size: Here, you will select the size in which you want the thumbnail to be displayed. The value will be considered in pixels.
- Show Points Awards: Enable to display points awards.
- Show Points Deductions: Enable to display points deductions.
- And more.
After filling in the required fields for the GamiPress Point Types block for the widget, click the Update button in the top right corner.
Displaying the Widget Area
Now that we’ve seen how to add the GamiPress Point Types to a widget, we’ll move on to how to display it on the default lesson template.
Next, you must edit the Thrive Apprentice Lesson template to add a widget to your default lesson template. To do so, open your WordPress admin area, navigate to Thrive Dashboard >> Thrive Apprentice, and click on Design.
On the Design page, click the Edit Design button on the Active Template block.
On the Edit Design page, click Manage Templates under Template Editor.
On the Templates page, hover on the Default Lesson template and click Edit.
When you click Edit, the lesson template will open in the editor.
In the template editor, click the plus ‘+’ icon in the right column to add an element.
When you click the plus icon, you’ll see a menu to select the element you want to add. In the search bar, start typing widget and click the Widget Area element in the template sidebar.
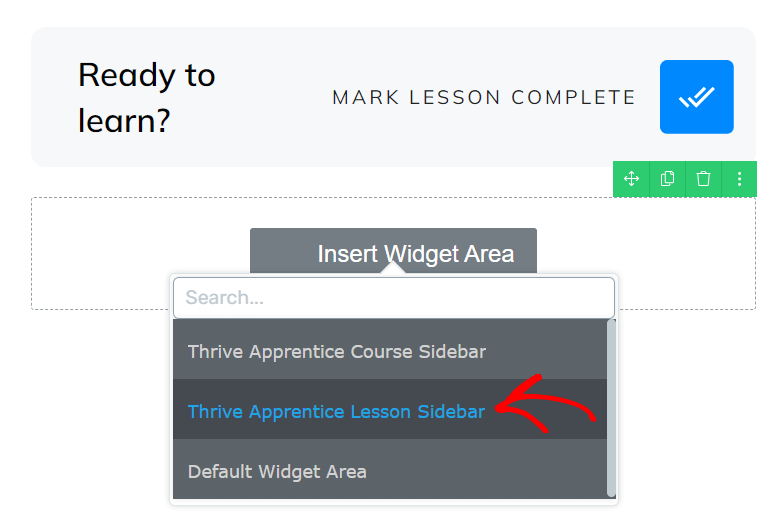
When you click the Widget Area element, it’ll be added to the lesson template sidebar where you can click on it to fetch the content you want to include. Once you click on Insert Widget Area, select Thrive Apprentice Lesson Sidebar.

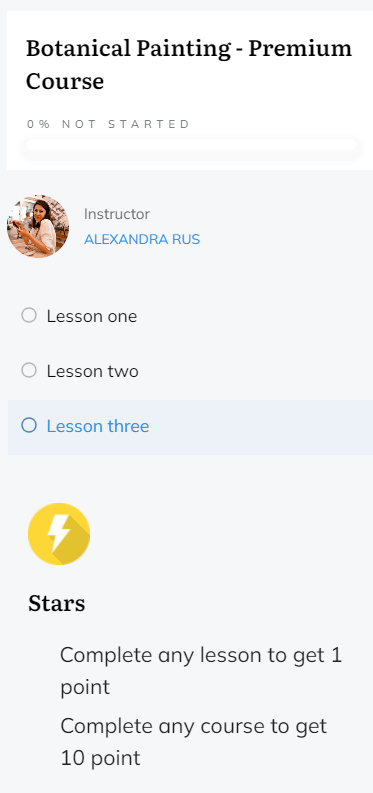
When you select Thrive Apprentice Lesson Sidebar in the widget area, it should show the GamiPress point types, just as you’ve set it up by following the steps above.

These articles from our knowledge base will help you learn more about the process described above:
- How to Use the Thrive Apprentice Widget Area
- Managing Thrive Apprentice Templates – Using the Basic Template Options
- How to Add a New Lesson Template
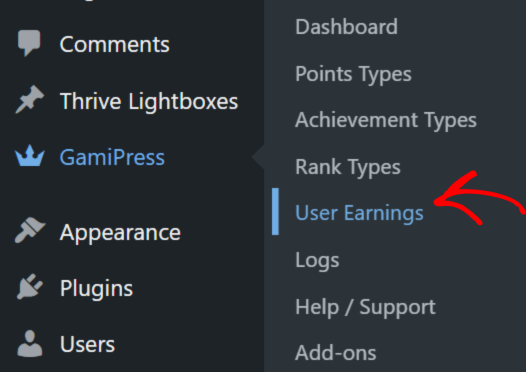
The awarded points and rewards will be listed under the “User Earnings” section of GamiPress:

Here’s where you can view what each user has unlocked and when:

We’ve just seen how you can use GamiPress with Thrive Apprentice to award points to students and display them alongside a Thrive Apprentice lesson.
Next, if you’d want to enable assessments in Thrive Apprentice, this document will help you do so.