Are you looking for a way to capture leads efficiently and streamline your form-building process? By integrating Gravity Forms within the Lead Generation element, you can create customizable forms that help you collect and manage valuable user information.
In this article, we’ll show you how you can embed a form created using Gravity forms in a Lead Generation element on page.
- Creating a Form in Gravity Forms
- Obtaining the HTML Code of the Form
- Adding the Gravity Forms HTML Code in a Lead Generation Element
Creating a Form in Gravity Forms
To be able to create a form using Gravity Forms, you’ll first need to install and activate the Gravity Forms plugin on your website.
Once you’ve installed and activated the plugin on your website, refer to this article here that will help you create a form using the Gravity Forms plugin.
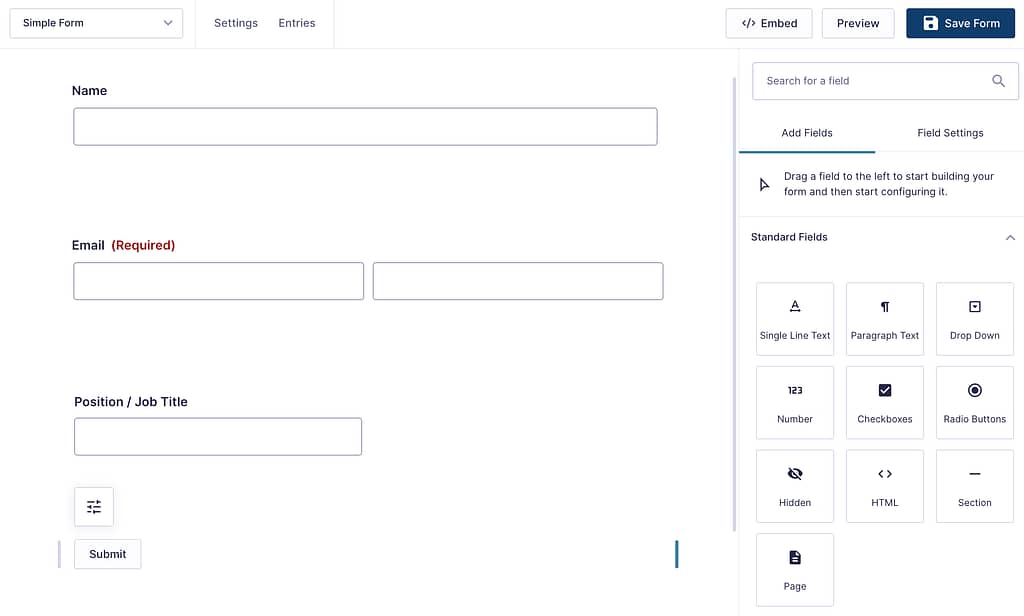
When you create a form, you’ll see that there are no placeholders inside the fields. Placeholder texts will help you add more context to the fields making it easier for users to know what it is meant for.
To add place holders, click on a field on the form and scroll down to the Appearance tab in the right panel.
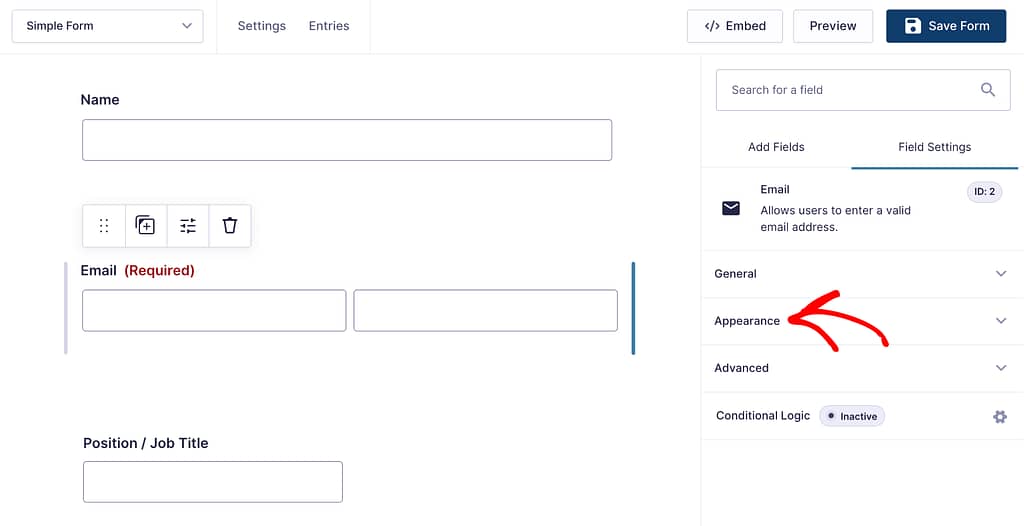
Under the field Appearance tab, you’ll see a Placeholders section where you enter the placeholder text in the given fields.
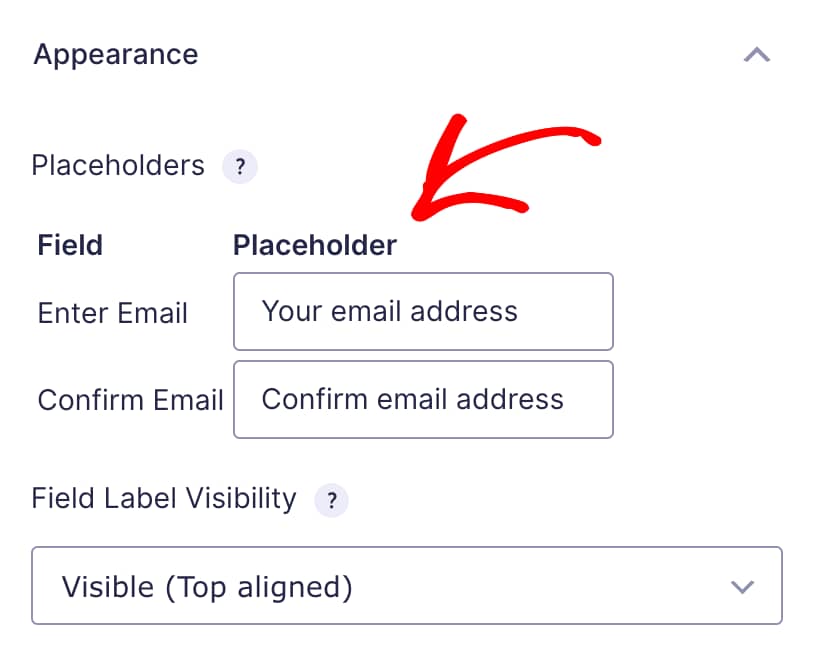
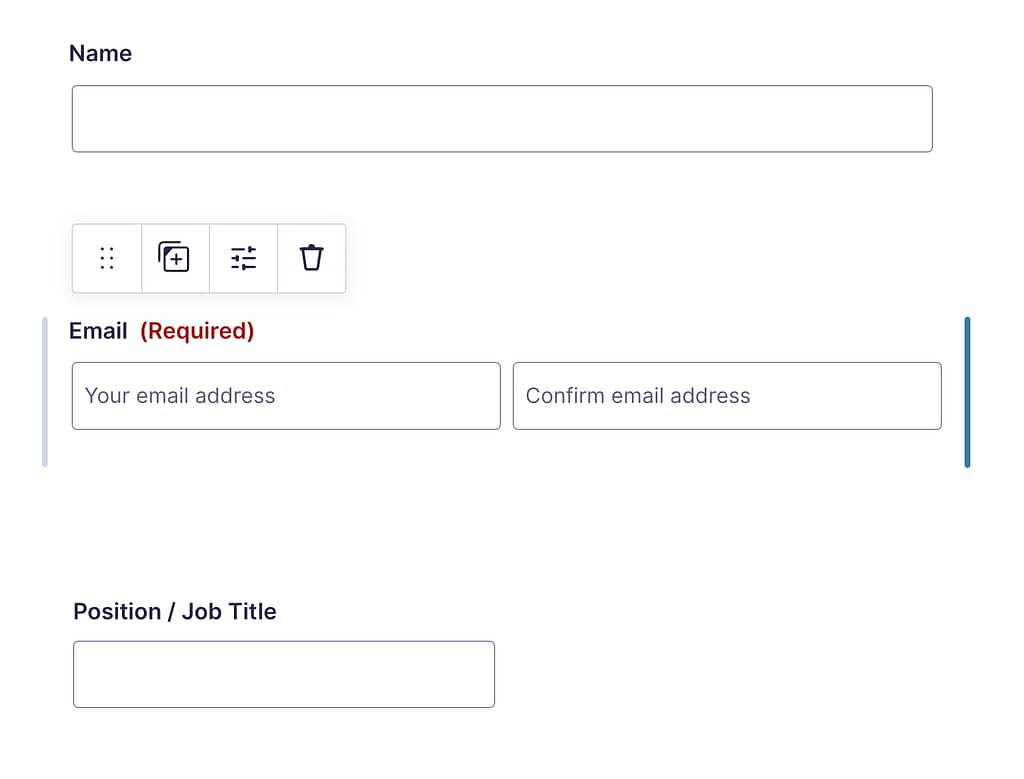
When you add the placeholder text in the fields below Appearance, you’ll see that reflected on the selected fields in the form as well.
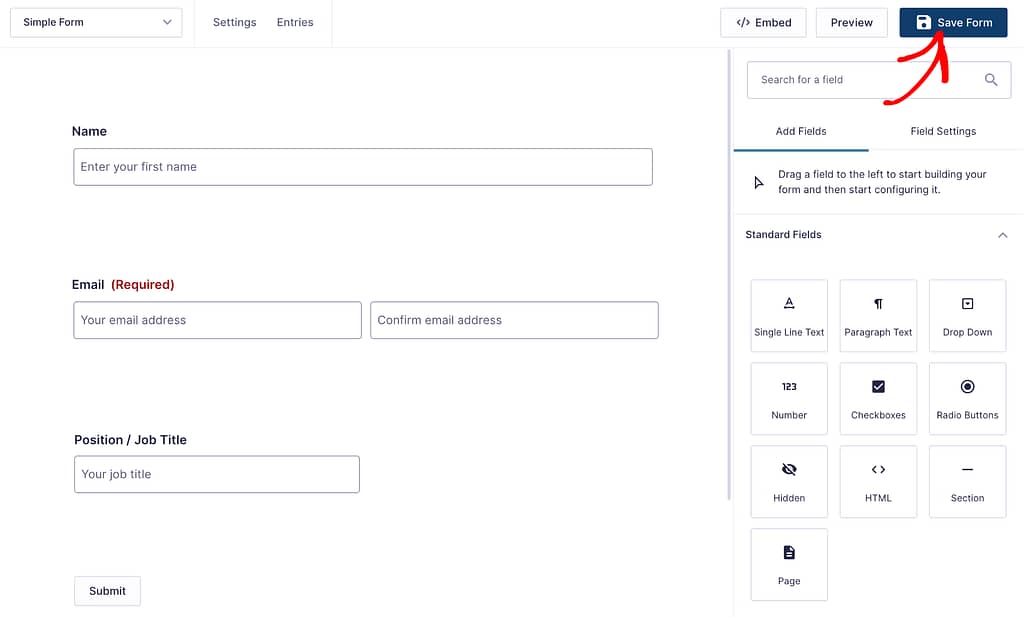
Once you finish creating the form and adding the placeholder text, click the Save Form button on the top right.
Obtaining the HTML Code of the Form
After you’ve created and saved a form in the Gravity Form interface, the next step is to copy the HTML code of this form.
To copy the HTML code, first choose to preview the form. To do so, click on the Preview button on the top right.
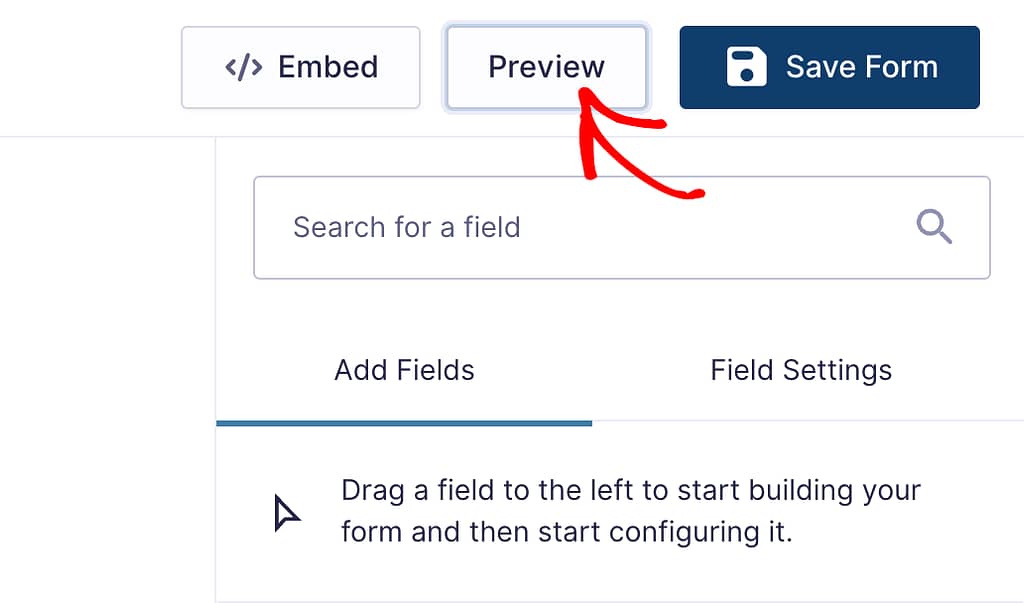
Clicking Preview, will open the form preview in the browser.

To access the HTML code of the form, first right click on the form and click on Inspect.
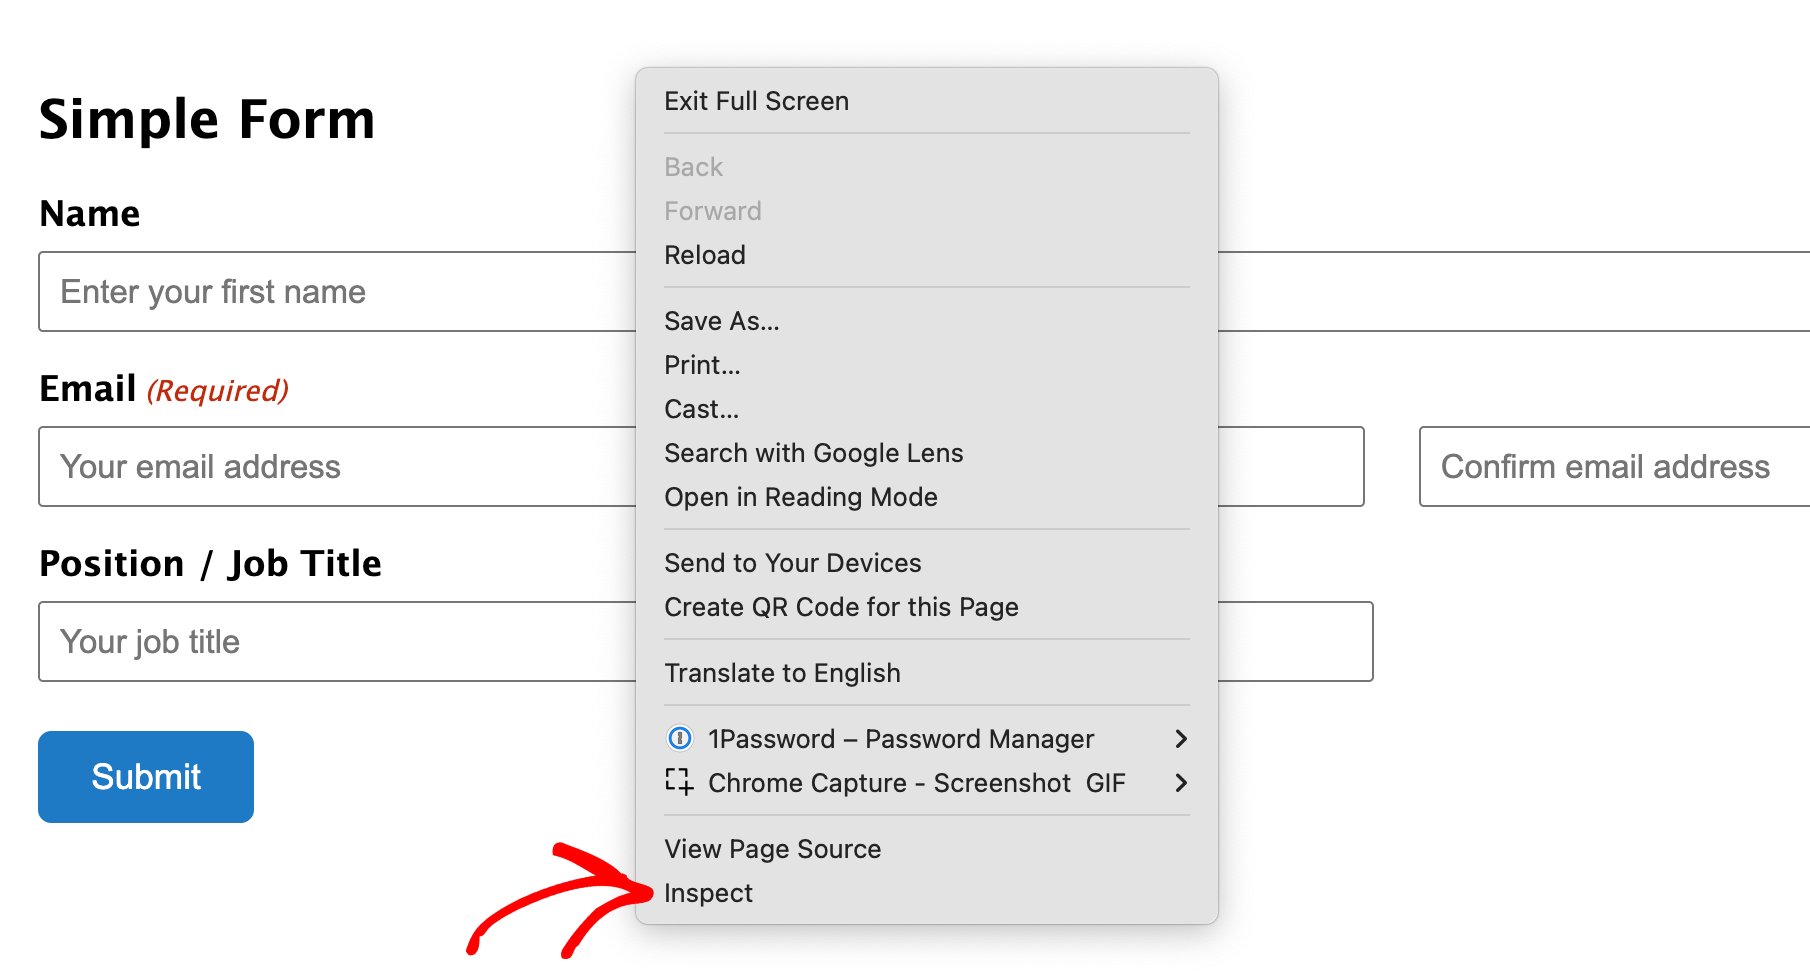
When you click Inspect, you’ll see the element code open inside the viewport.
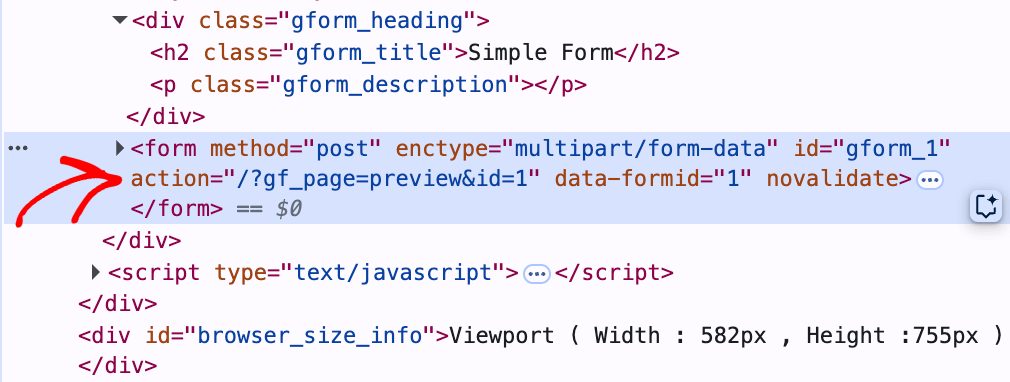
Once you see the element code, right click on it, hover on Copy, and click on Copy element.
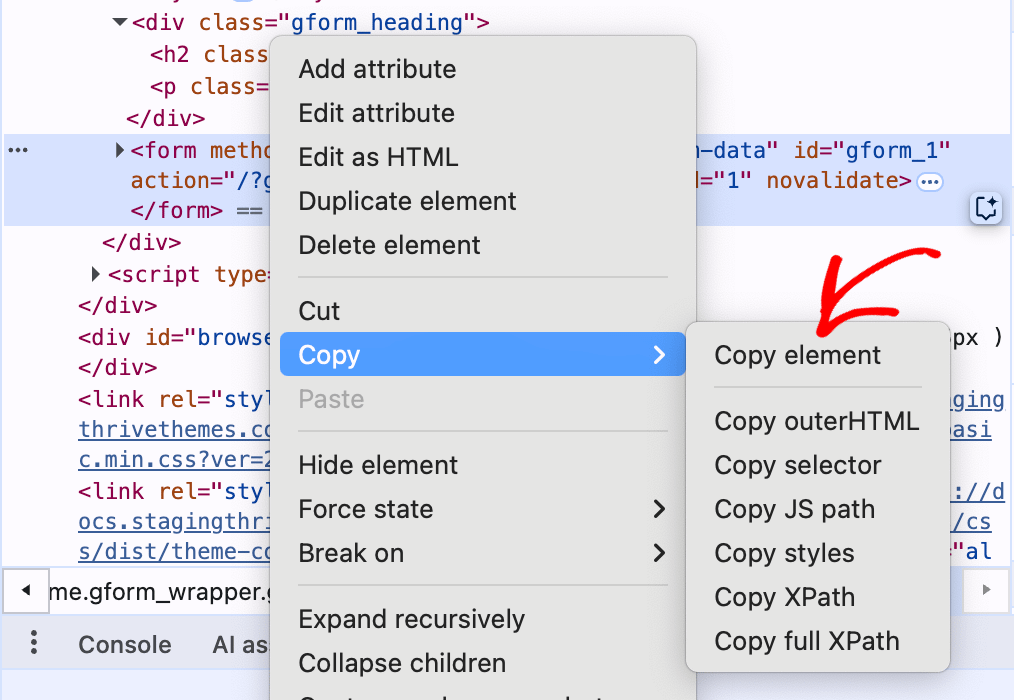
Once you click the Copy element, the HTML code of the form will be copied.
Adding the Gravity Forms HTML Code in a Lead Generation Element
After you copy the form element code, the next step is to paste it into a Lead Generation element on your website.
To do so, start by opening a page in Thrive Architect editor.

In the editor, ensure you’ve added a Lead Generation element to the page.
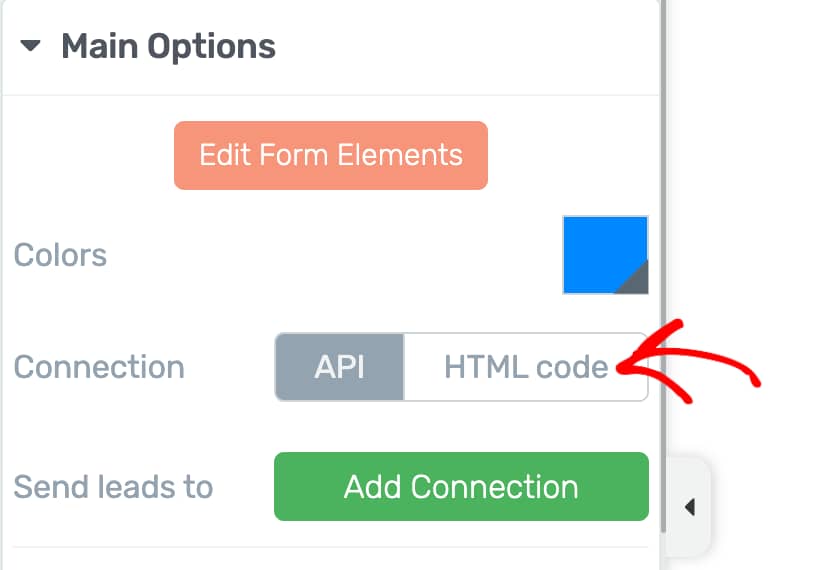
When you’ve added the Lead Generation element on the page, click on it to open its settings in the left column.

In the left column, under Main Options, click on HTML code beside the Connection setting.
When you choose to add an HTML code connection to a Lead Generation element in Thrive Architect, you’ll see a field that lets you insert the HTML code.
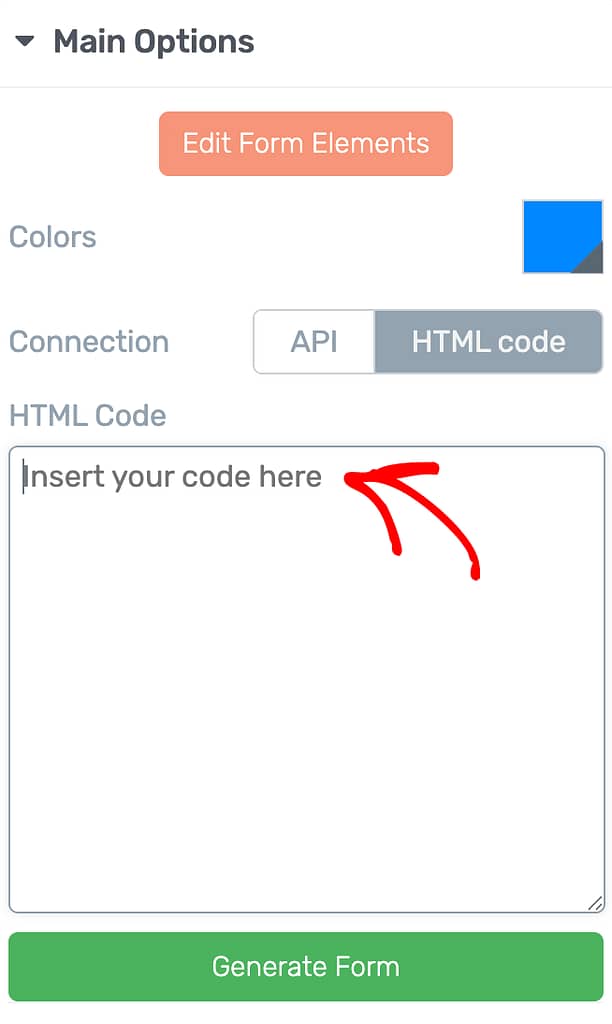
In this field, paste the Element code copied from the Gravity form preview and click the Generate Form button.
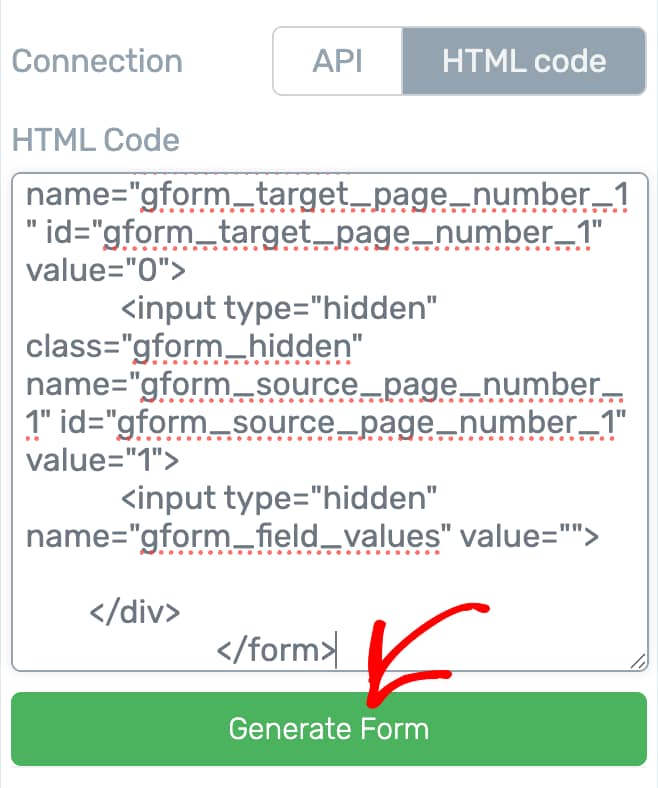
Immediately after pasting the code and clicking to generate the form, you’ll see the fields you added to the Gravity Form added to the Lead Generation form as well.

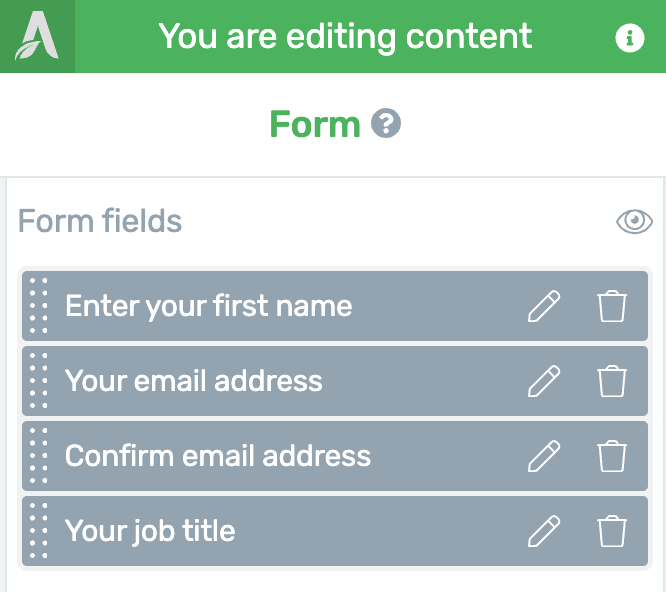
To further edit or remove the fields in the form, use the Form Fields section in the left column.
After you’ve finished editing, and customizing the form on the page, click the Save Work button on the bottom left of the screen.

We’ve just seen how you can use a Gravity Forms form within a Lead Generation element in Thrive Architect.
Next, you can choose to customize any Thrive Architect element using the HTML Attributes feature. Here’s an article that will help you learn more about it.