Do you want to add separate access restriction rules to override those set in the Thrive Apprentice settings or at the product level? Thrive Apprentice allows you to manage such exceptional cases for the courses you create.
Note: If you want to know the access restrictions we are talking about overriding here, you can refer to our document about setting login and access restriction rules in Thrive Apprentice and managing access restriction rules at product level in Thrive Apprentice.
In this article, we’ll show you how you can give free access to a lesson to non-logged in users through Thrive Apprentice.
- Setting Up a Course
- Giving Free Access to a Lesson
Setting Up a Course
Before you move to manage the access restrictions for a lesson, please ensure you’ve created a course in Thrive Apprentice and added it to a product.
You can refer to the following documents to learn more.
When you’ve created the courses and products in Thrive Apprentice, you can manage the login and access restriction rules in Thrive Apprentice settings and manage access restriction rules at product level.
Giving Free Access to a Lesson
When you are ready with the product and course, you can proceed to manage the access for a lesson. To do so, open the Thrive Apprentice Course dashboard.
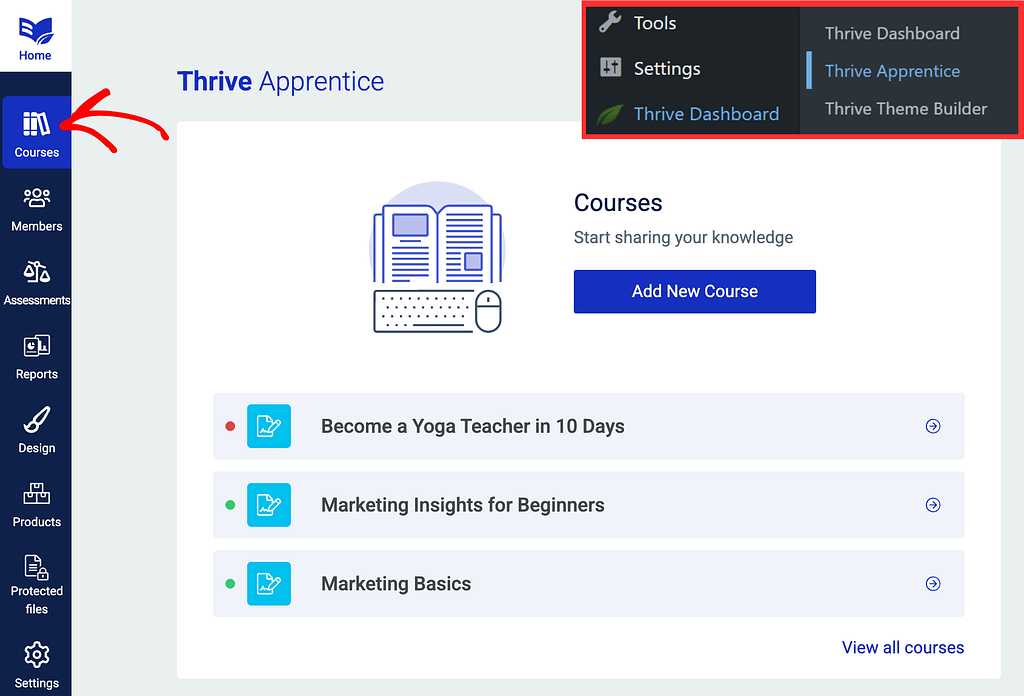
To open the course dashboard, open the WordPress admin area, navigate to Thrive Dashboard >> Thrive Apprentice, and click on Courses in the left panel.
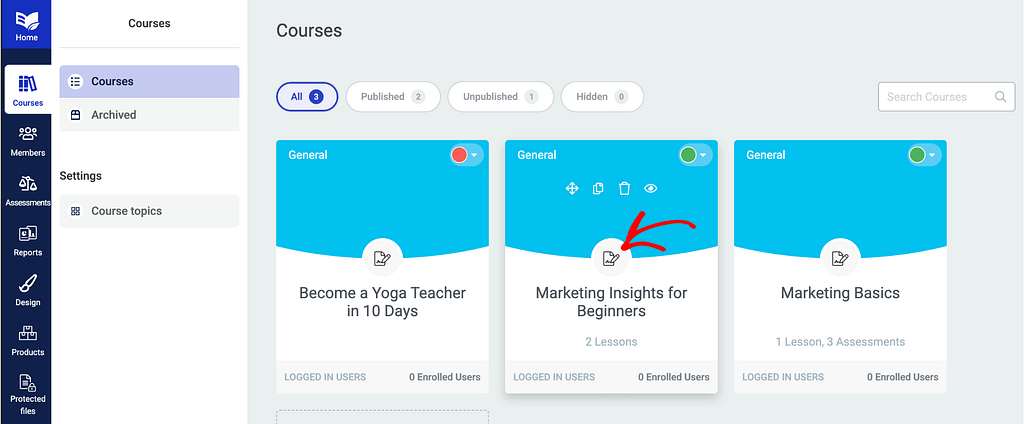
On the Courses page, click to open the course you want to edit the lesson in.
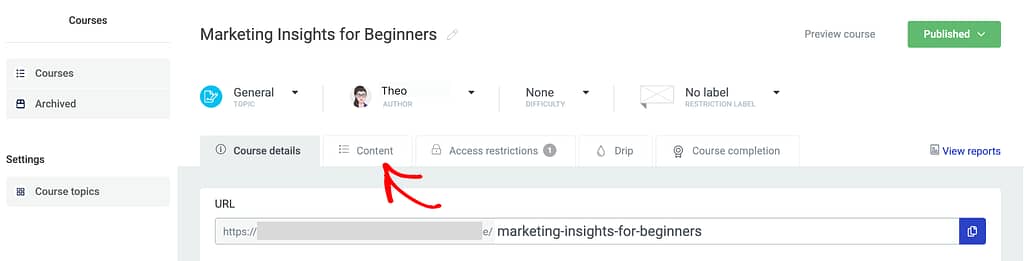
On the individual course page, click to open the Content tab.
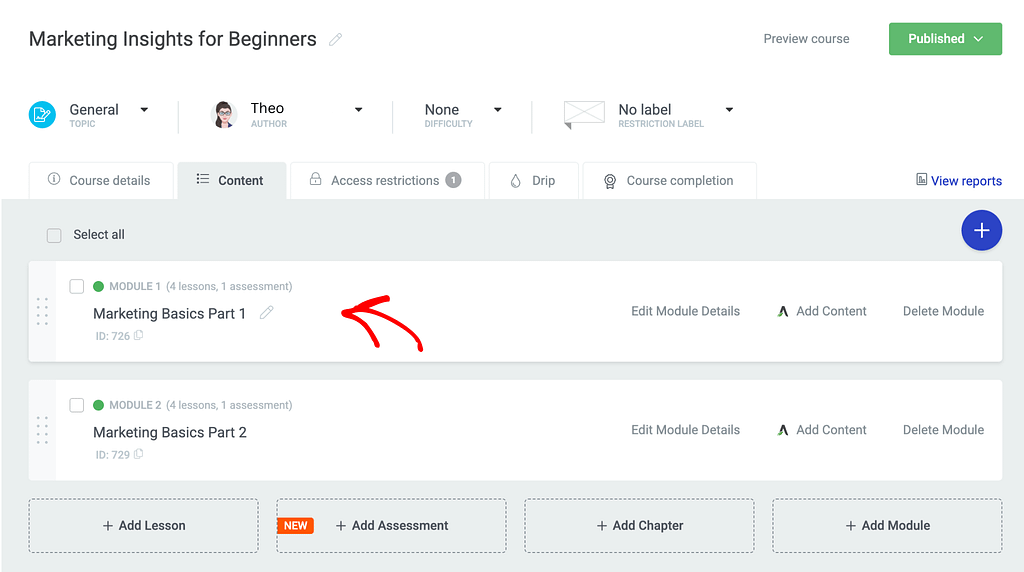
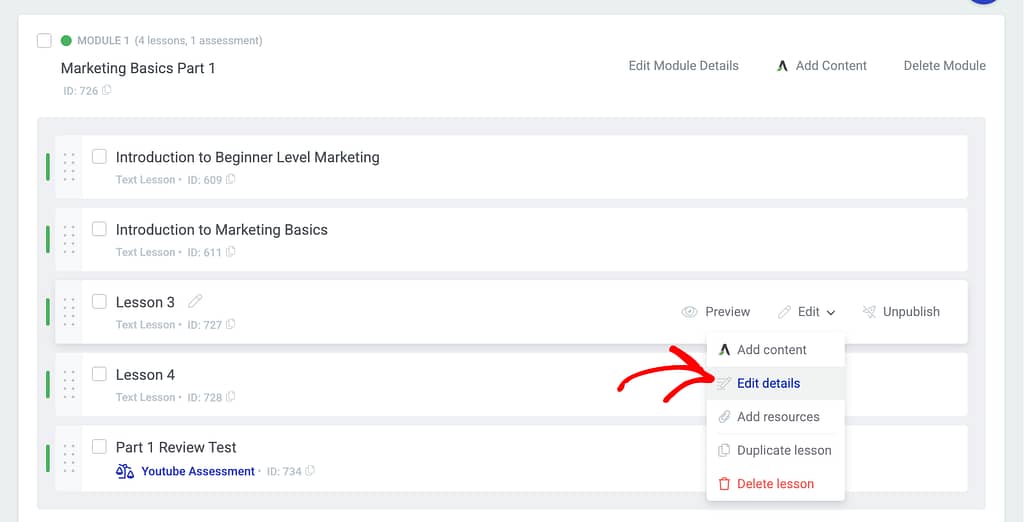
Under the content tab, you’ll see the list of lessons in it. In this example, we have the lessons added to modules within the course.
To access lessons inside a module, click on the Module you want to open.
After clicking the module, you’ll see the lessons it contains. Lessons here will have the same options you will see when they are placed outside a module, i.e. directly under a course.
In the list of lessons, hover on the lesson you want to edit the access for and click Edit.

When you click Edit, click Edit details in the options.
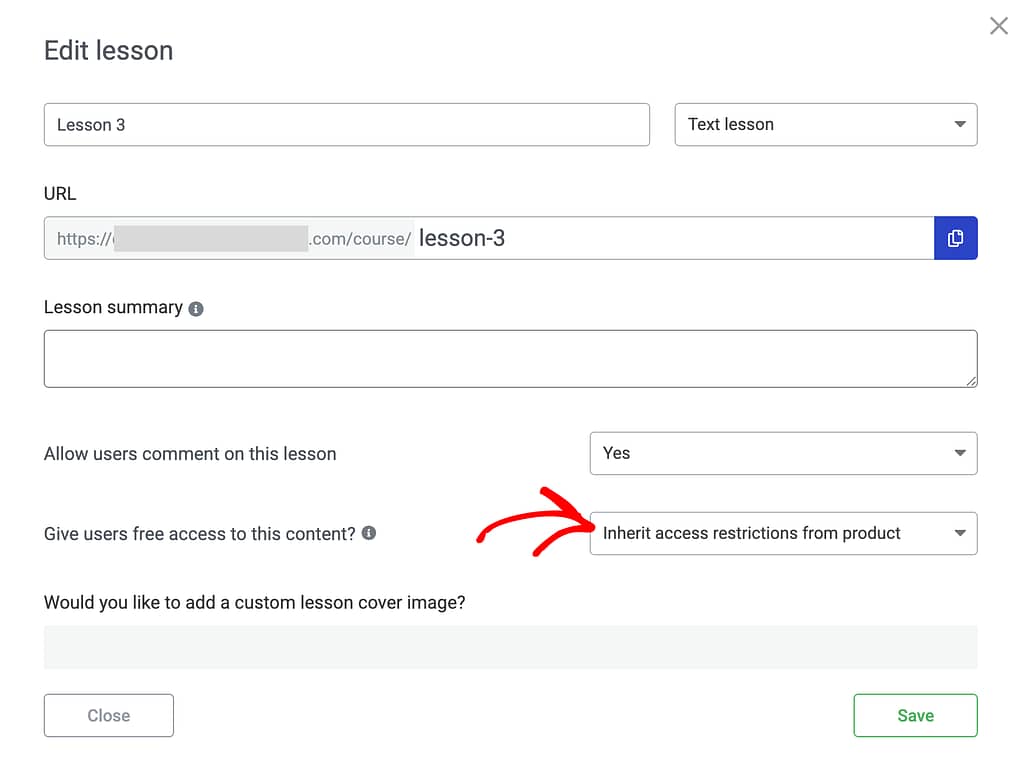
When you click to edit lesson details, you’ll see a popup with all the lesson details.
On this popup, click the dropdown to select whom you want to give the lesson free to.
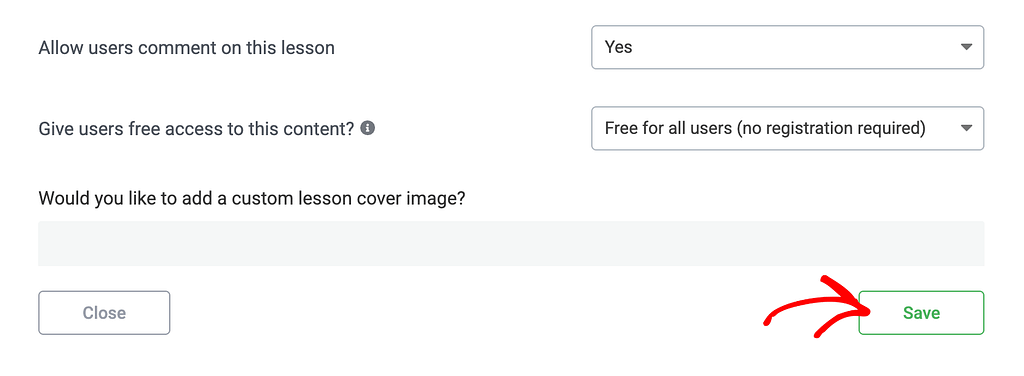
In the dropdown options, select Free for all users (no registration required).
This will ensure the lesson will be available for free even when users have not logged into your website.

After you select the audience you want to offer the lesson free to, click the Save button.
You have just set a lesson to be available for free for non-logged in users on your website.
Saving this setting will override all the access restriction rules you have set in Thrive Apprentice settings and at the product level.
Next, do you want to offer the first lesson of a paid course for free so website visitors get an idea of what the course contains? Here’s a document that will help.