Do you want to drip feed a paid Thrive Apprentice course on your website? You can not only sell courses through Thrive Apprentice, but enable different kinds of drip campaigns depending on how frequently you want to release lessons in that course.
In this article, we’ll show you how you can add a course to a drip campaign and set up access restriction rules that will allow only eligible students to access it.
- Setting Up a Thrive Apprentice Course
- Creating a Product
- Setting Up a Drip Campaign
- Configuring Access Requirements
- Assigning the Drip Schedule to a Product
- Configuring the Access Restriction Rules
Setting Up a Thrive Apprentice Course
First, begin by accessing a Thrive Apprentice course in your website backend. If you haven’t created a course yet, here’s a document that will help.
To access an already created course, open your WordPress admin area, navigate to Thrive Dashboard >> Thrive Apprentice, and click on Courses.
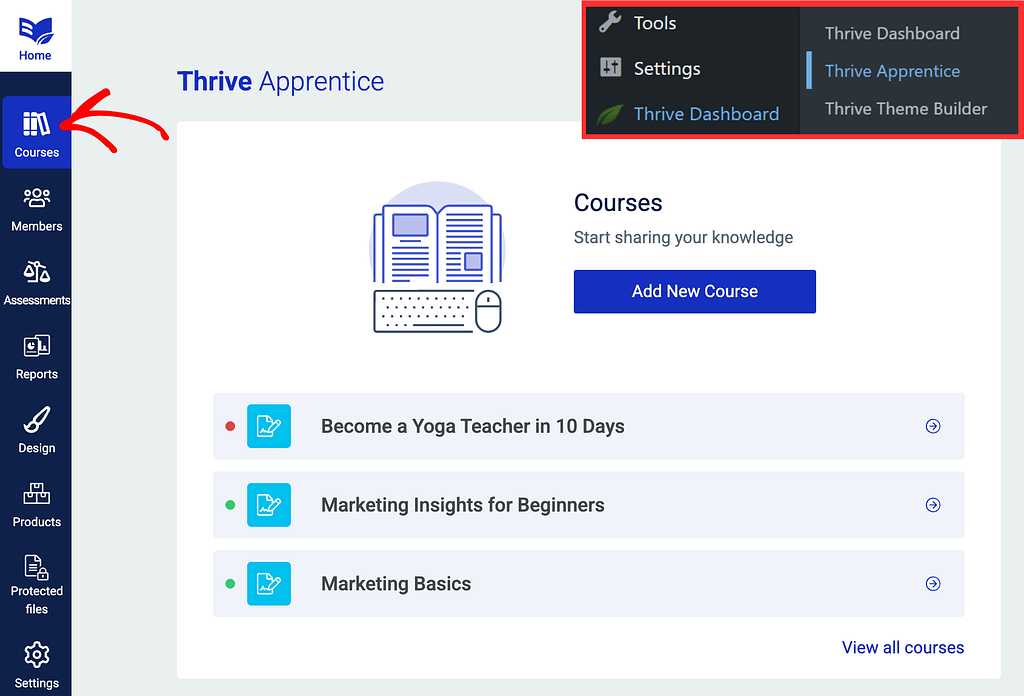
On the Courses page, click on the course you want to edit.
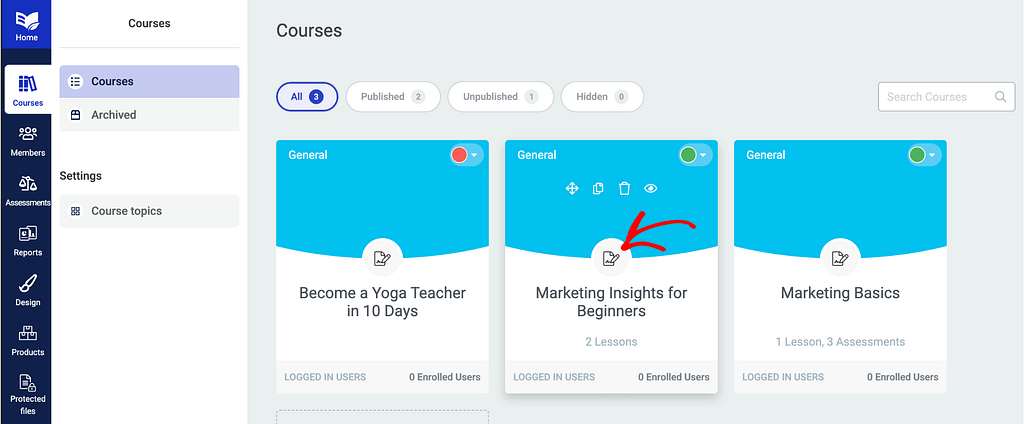
Clicking the Course will open the individual course dashboard where you can edit the name, content, drip, etc.
To be able to sell a Thrive Apprentice course, you need to add it within a product.
Creating a Product
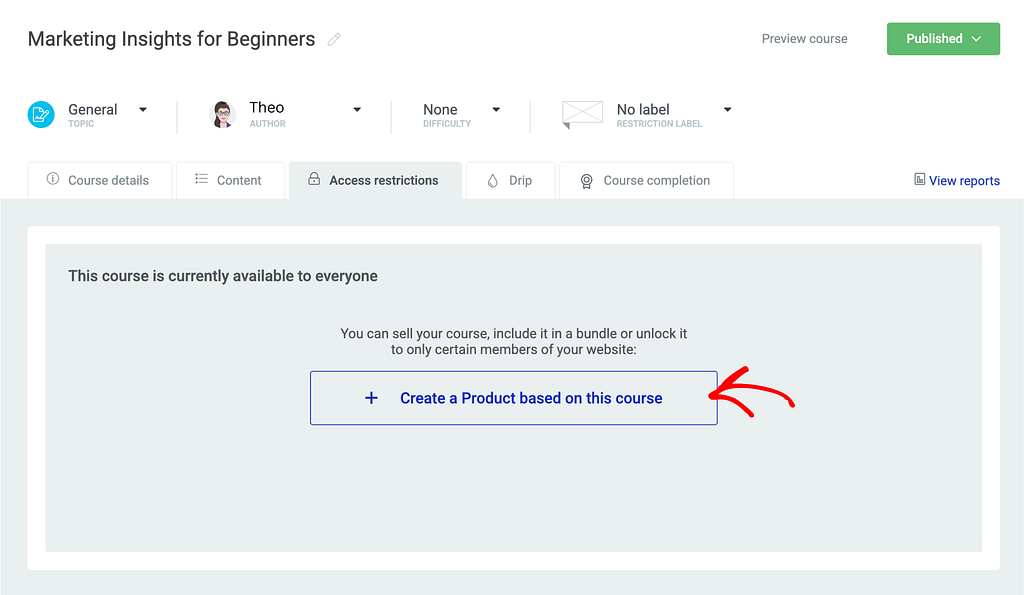
To create a product that contains the course, open the individual course page by following the steps above and click on the Access Restrictions tab.

Under the Access Restrictions tab, you can create a product by clicking the button saying Create a product based on this course.
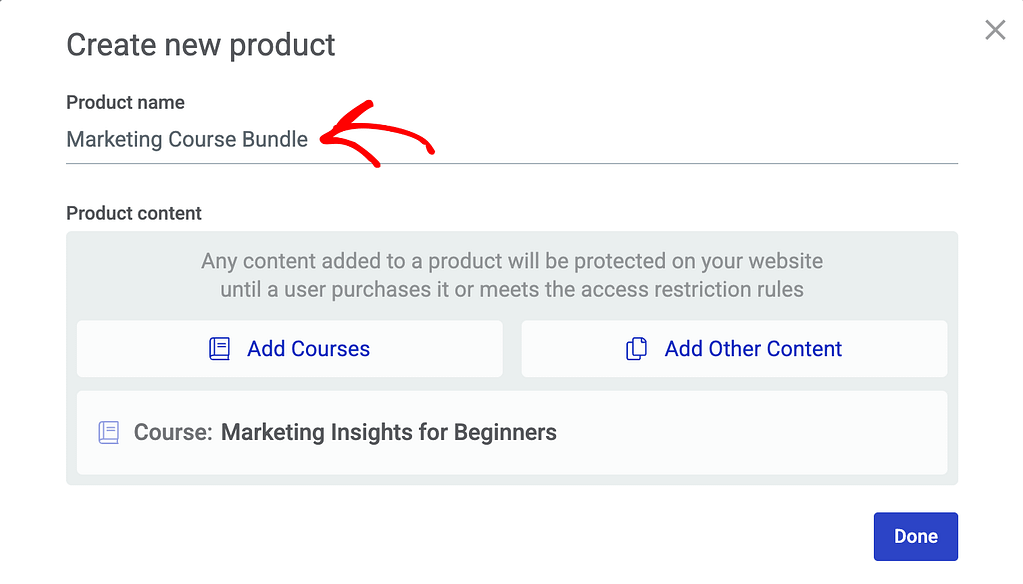
When you click to create the product, you’ll see a popup where you enter the product name in the given field and click the Done button.
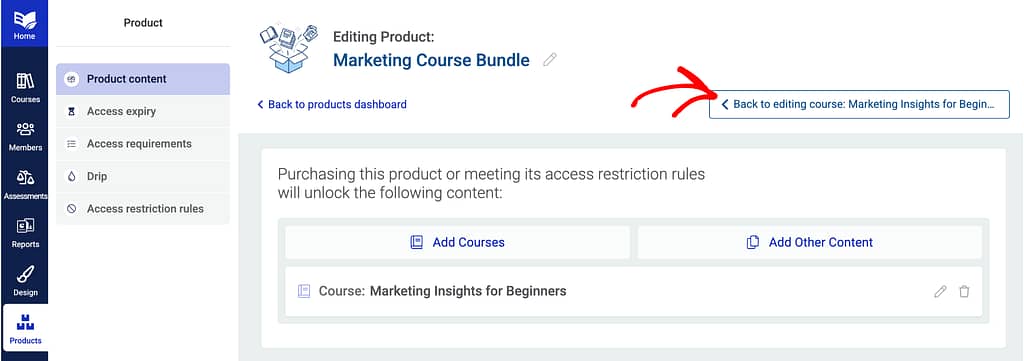
After creating the product, you’ll be taken back to the page where you can see the product details and edit it too. You can read more about products in Thrive Apprentice here.
To go back to the course page from the product page click the button saying Back to editing course.
Setting Up a Drip Campaign
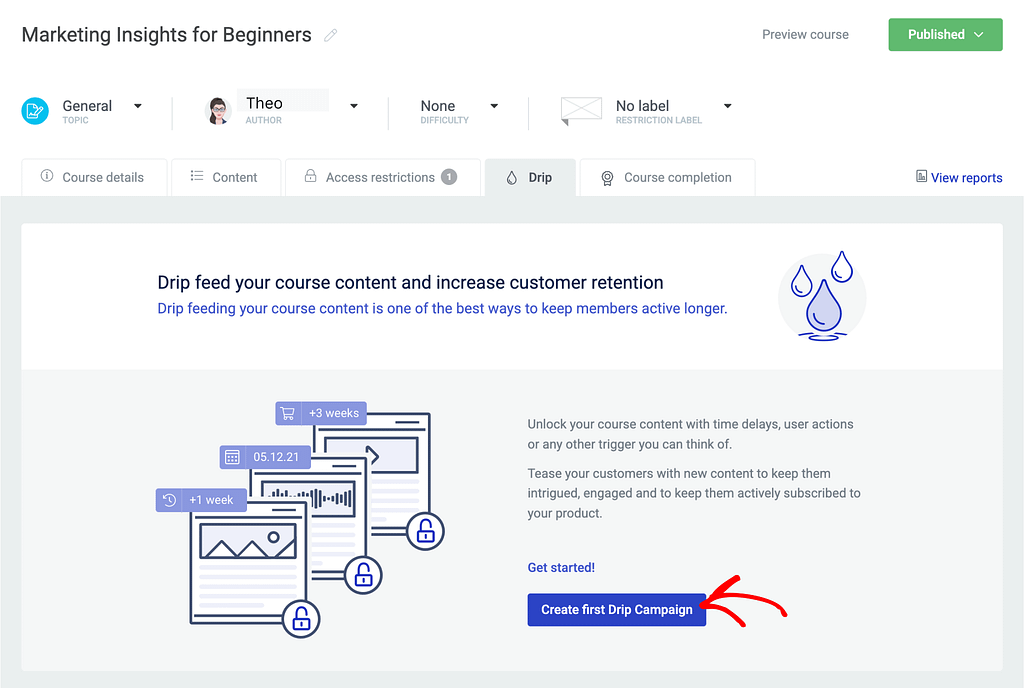
After the product is created and you return to the course page, click to open the Drip tab.

Under the Drip tab, click the Create first Drip Campaign button to start creating a Drip.
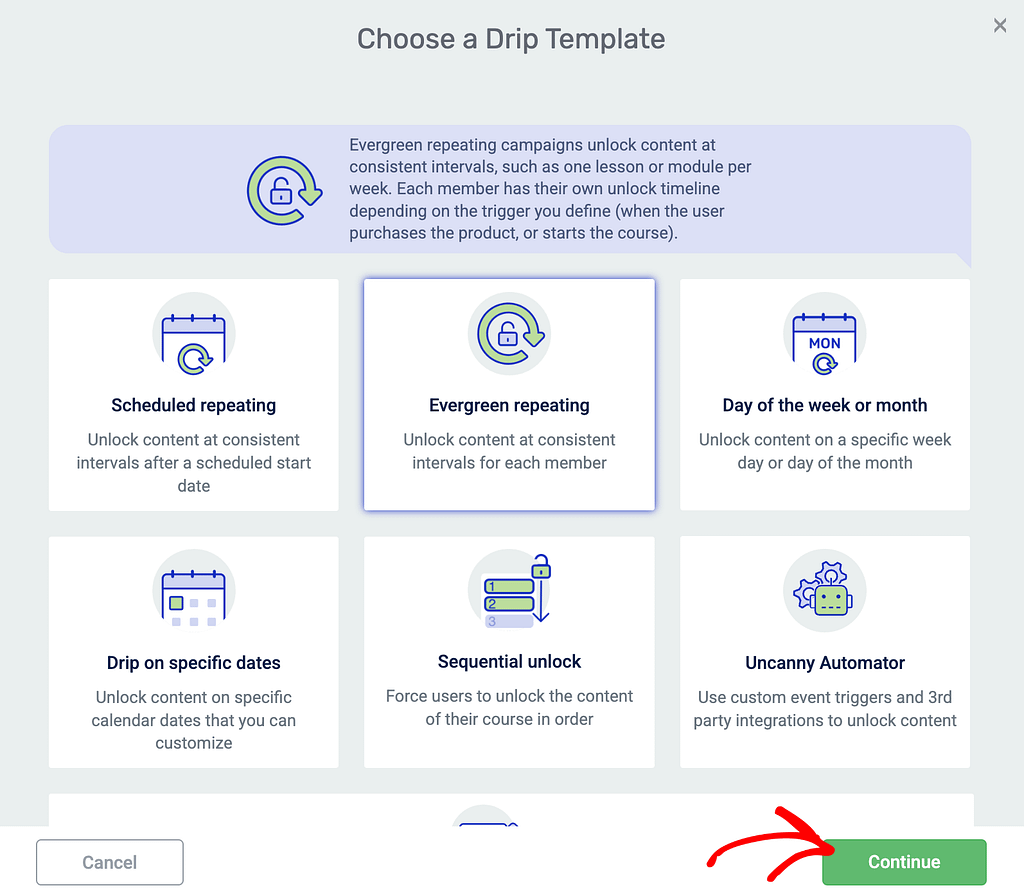
Clicking to create a new drip campaign will open a popup. On this popup, select teh drip template you want to use.
In this example, we’ll use the Evergreen drip template.
After you select the drip template click Continue.
Once you select the drip template, set up how you want the drip to act in the next step and click Create my campaign.
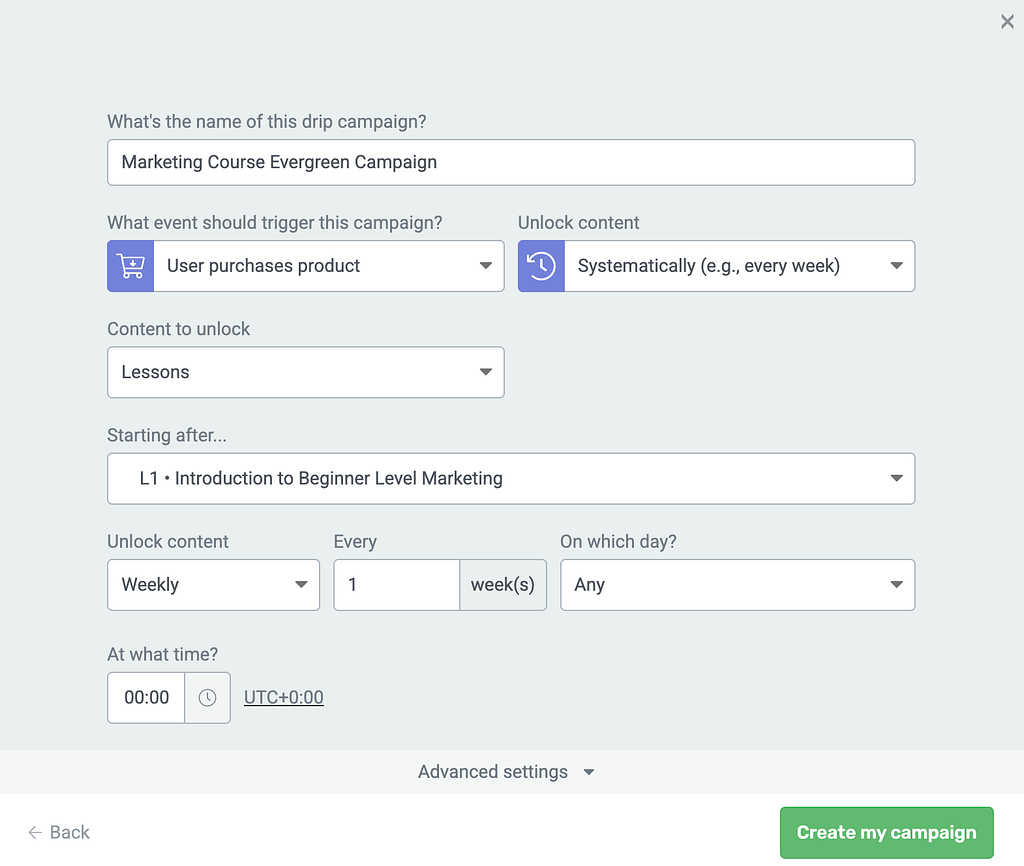
This adds the Drip campaign to the course.
Configuring Access Requirements
Now that you’ve created a course, a product based on it and a drip campaign for the course, you need to ensure you’ve set the right access requirements for the product. This is mainly because you are selling the product and it should be available to only those who’ve purchased it from your website.
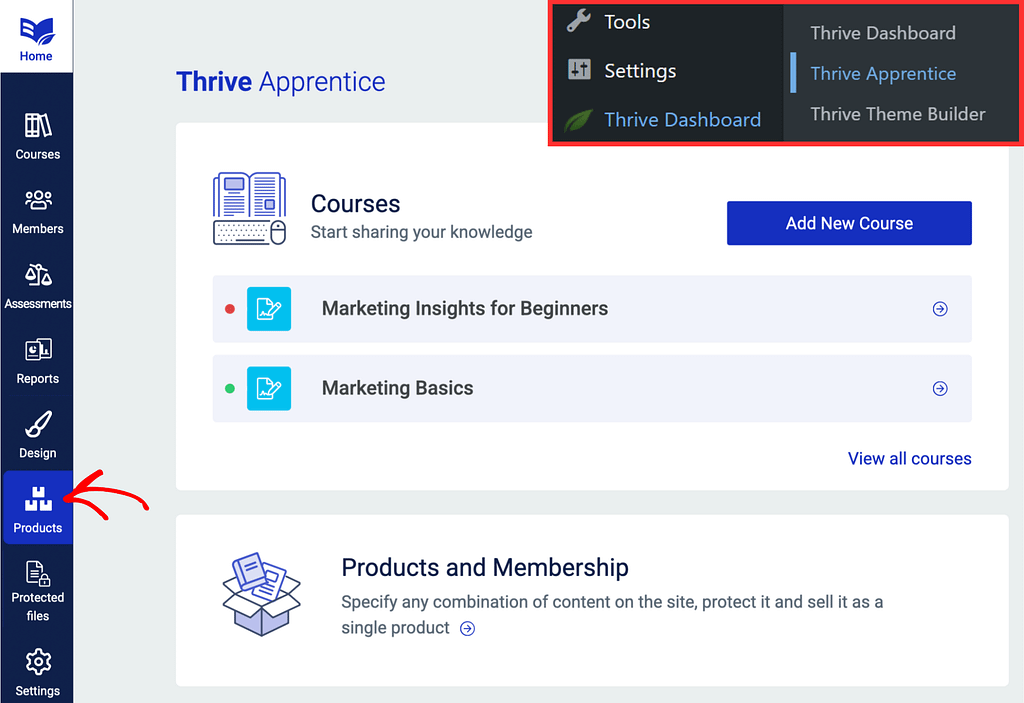
To reach the Access Requirements settings of a product, begin by opening your WordPress admin area, navigating to Thrive Dashboard >> Thrive Apprentice, click on the Products tab.
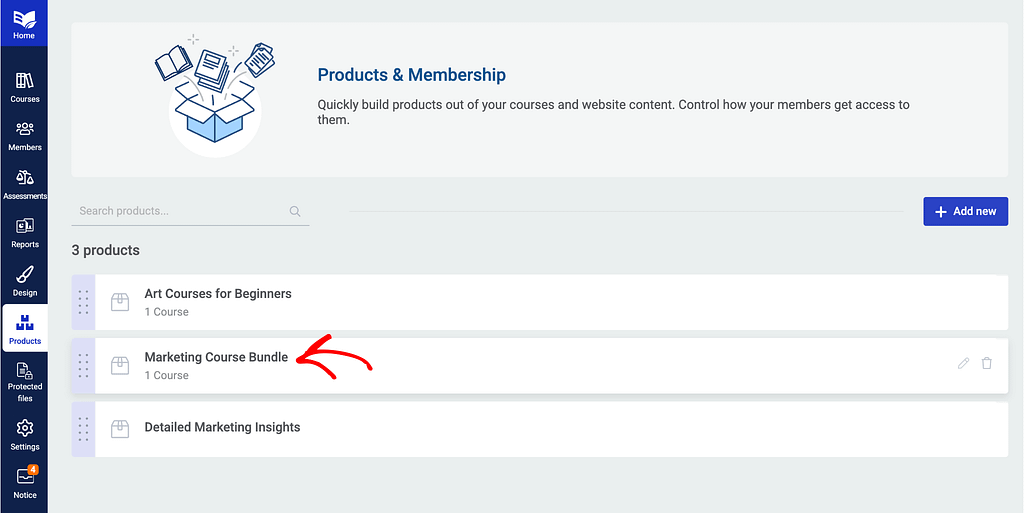
On the products page, click on the product you want to manage the access requirements for.
Note: This will be the product associated with the course above.
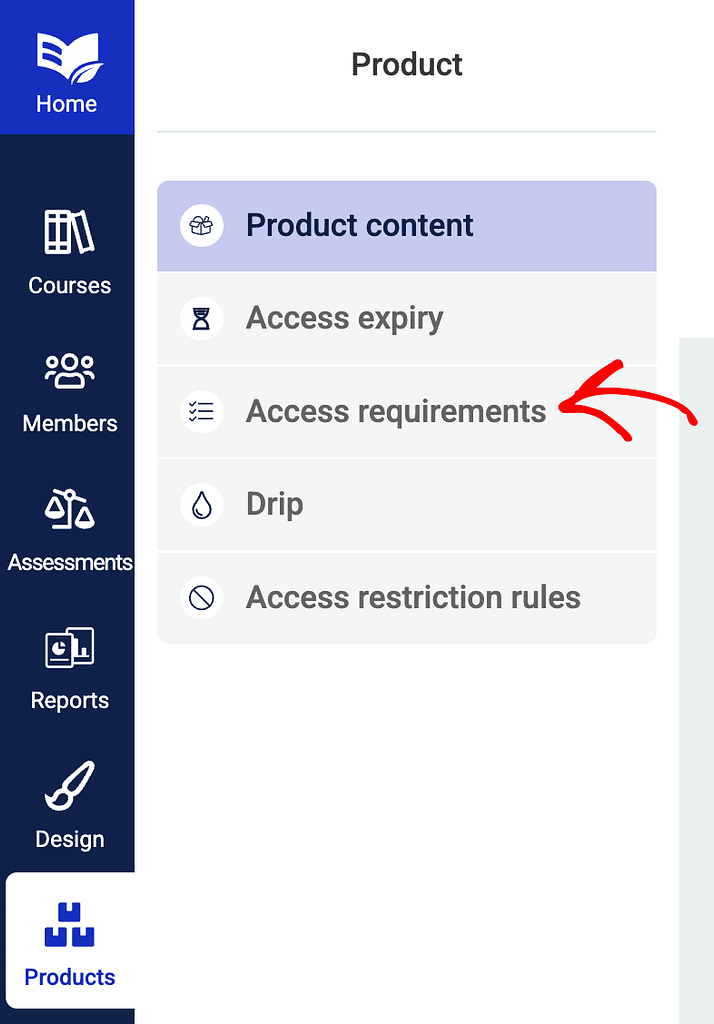
On the individual product page, click to open the Access requirements tab.
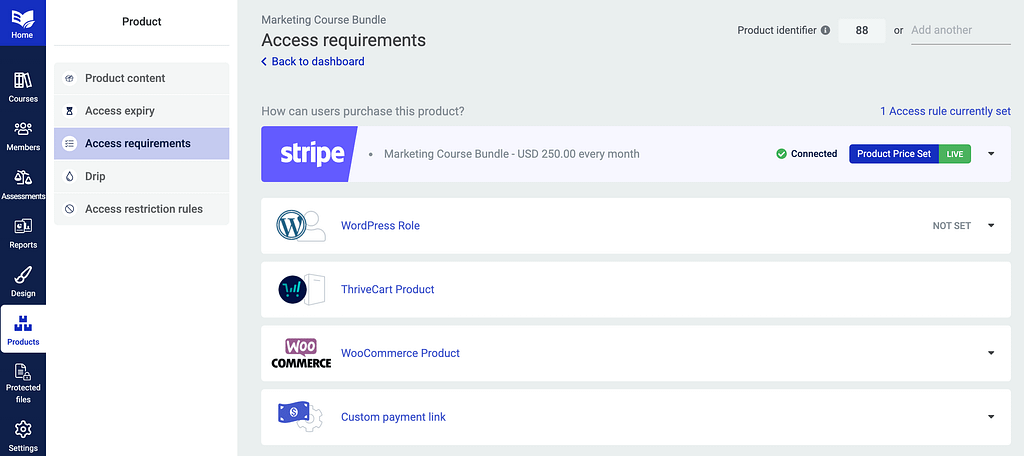
Under access requirements, you can select the criteria based on which you want to grant access to the product.
Since we are learning how you can sell a course, you need to set the access requirements to one that will grant product access only when the user has purchased it.
In this example, I’ve integrated Thrive Dashboard with Stripe to ensure a user gets access to the product only when he has made a purchase through Stripe.
Need help understanding how you can get Stripe and Thrive Apprentice work together? You can read our document here.
Assigning the Drip Schedule to a Product
When you’ve created a drip campaign and a product, this step will now help you assign the drip campaign to the product.
To begin, open the individual product page, and click to open the Drip tab.
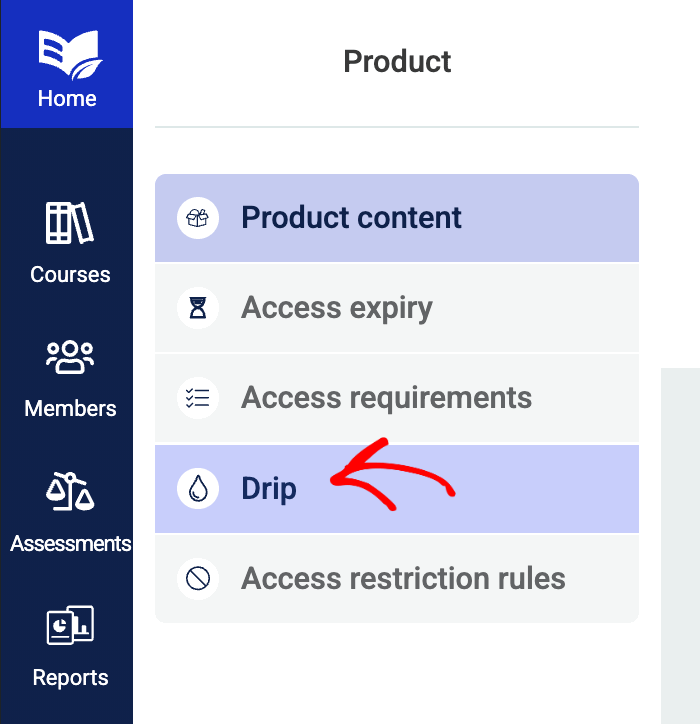
On the product drip page, you’ll see the course you’ve created the drip campaign for.
In the course block, click on the dropdown to select the drip campaign for this course.

Configuring the Access Restriction Rules
The final stage after creating a course, product, drip campaign and then managing the product access requirements and assigning a drip campaign is to manage the access restriction rules for the product.
To manage the access restriction rules for a product, open the Product page and click to open the Access restriction rules tab.
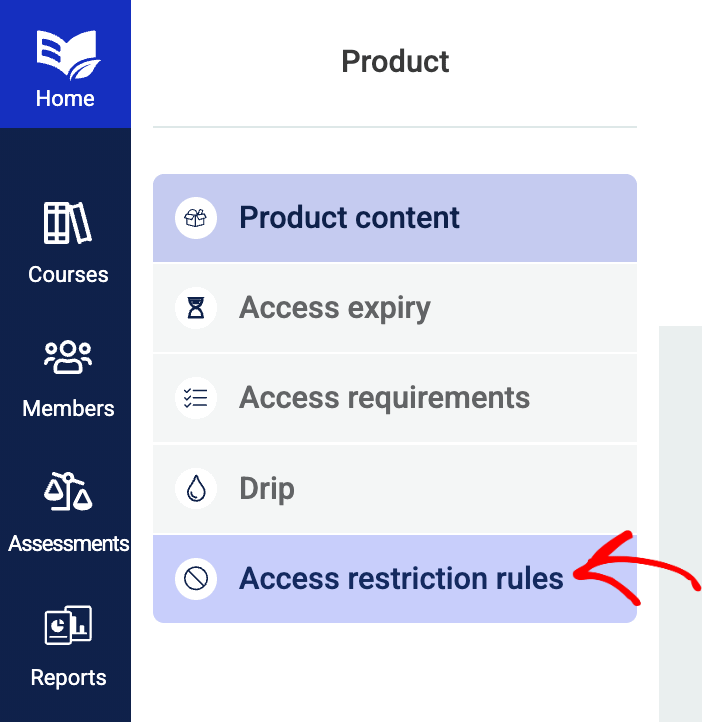
On the Access restrictions rules page you can manage different access restriction rules for the respective product. To learn more about Access restriction rules at product level in Thrive Apprentice, we’d recommend you to read our document here.
We’ve seen how you can sell a course on your website with its contents being dripped to eligible users over a period of time.
Next, do you want to exclude some lessons from the drip campaign? Here is our document that will help you do that.