Do you want to sell your Thrive Apprentice Courses and ensure you can maintain user subscriptions and course access restrictions accordingly? You can integrate your Thrive Dashboard with SendOwl and enable course purchases through it.
In this article, we’ll show you how you can integrate Thrive Dashboard with SendOwl and sell your courses with it.
- Setting Up an API Connection with SendOwl
- Creating a Thrive Apprentice Course
- Creating a Product or Bundle in SendOwl
- Completing the Checkout Settings
- Setting Up a SendOwl Listener
- Creating a Sales Page with a Purchase Link
- Managing Access Requirements and Restrictions for the Course
- Additional Documents to Help with the SendOwl Integration
Setting Up an API Connection with SendOwl
Before creating or setting up a course in Thrive Apprentice, begin by establishing an API connection between the Thrive Dashboard and SendOwl.
To connect the Thrive Dashboard on your website with your SendOwl account, refer to our document here.
Creating a Thrive Apprentice Course
To proceed, please ensure you’ve created a course in Thrive Apprentice and added it to a product.
You can refer to the following documents to learn more.
When you’ve created the courses and products in Thrive Apprentice, the next step is to link them to a product or bundle in SendOwl.
Creating a Product or Bundle in SendOwl
After you’ve established an API connection between SendOwl and Thrive Apprentice, start creating a bundle or product in SendOwl.
To link a Thrive Apprentice product to one in SendOwl, first open the Thrive Apprentice product in your WordPress dashboard. To do so, start by opening your WordPress admin area, navigating to Thrive Dashboard >> Thrive Apprentice, clicking on the Settings tab in the left panel.
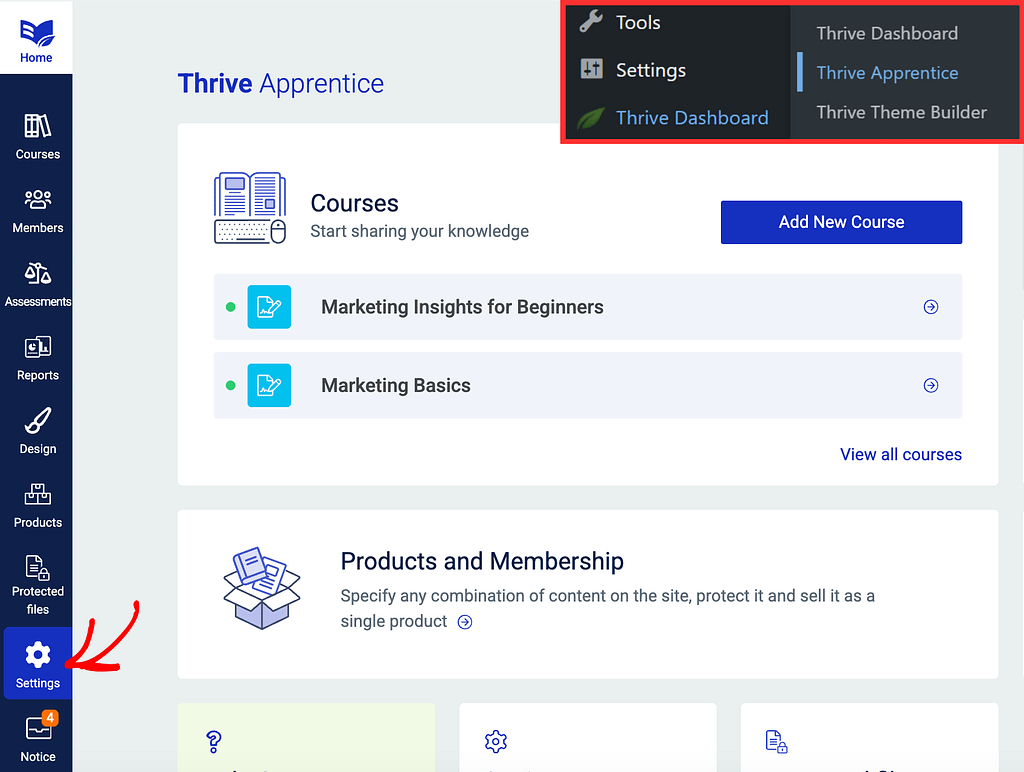
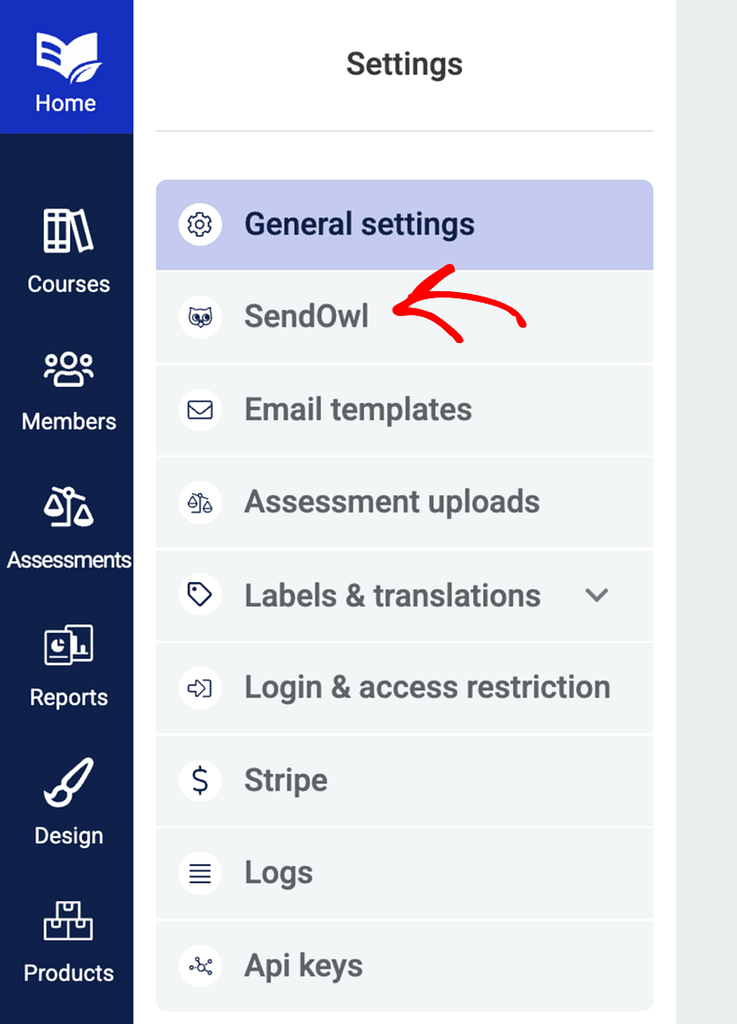
On the Settings page, click SendOwl in the left column.
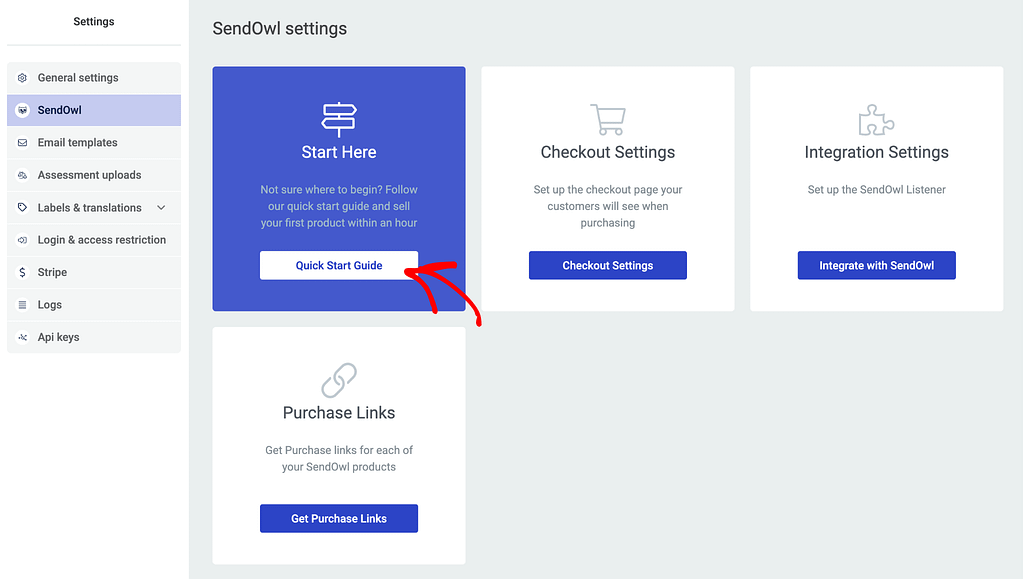
On the SendOwl settings page, click the Quick Start Guide button on the Start Here block.
On the Quick Start Guide form, click the Create a product in SendOwl button in step 1.

After clicking the button, you’ll be taken to a page with steps that’ll help you create a product in SendOwl.
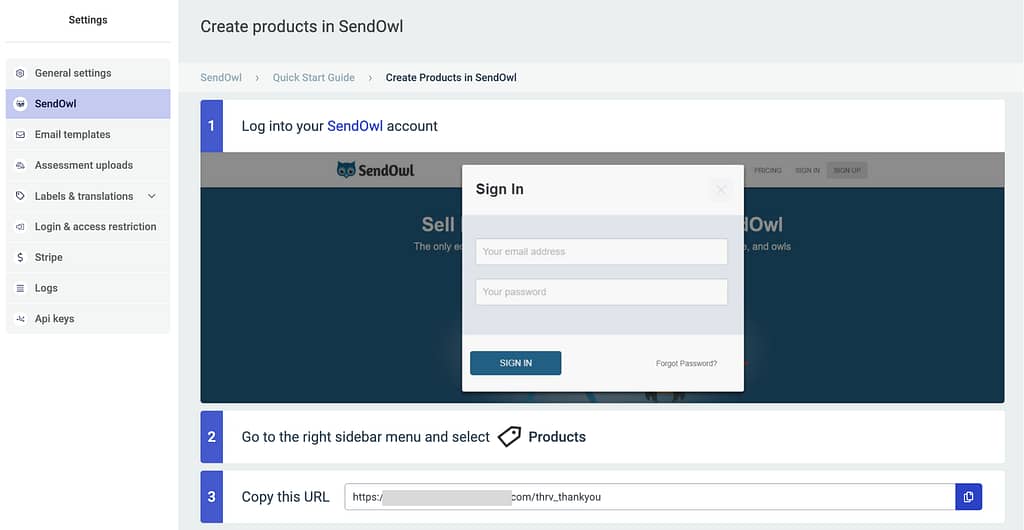
According to the steps, login and open your SendOwl account dashboard and click on Products in the left column.
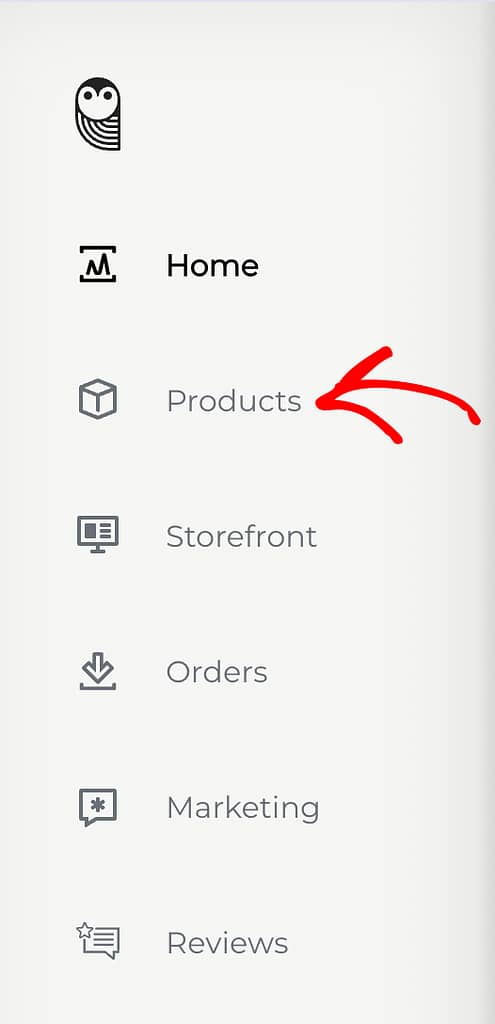
On the Products page, click the Add New button on the top right.

In this example, since we are selling a Thrive Apprentice course, it is necessary that the user will be taken to a Thank you page after the purchase. We’ll show you how to create and link this Thank you page in the next steps.
After clicking Add New, select URL Redirect.
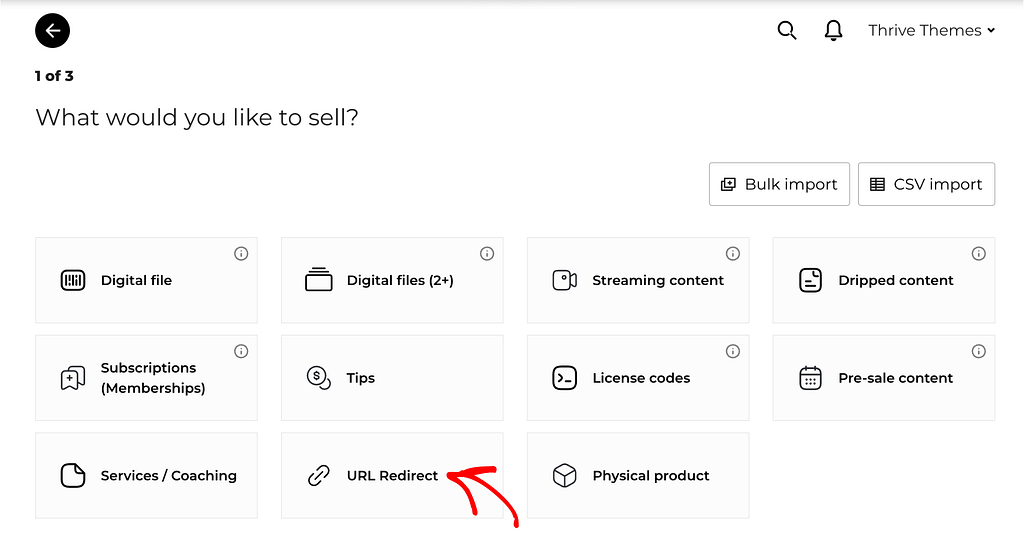
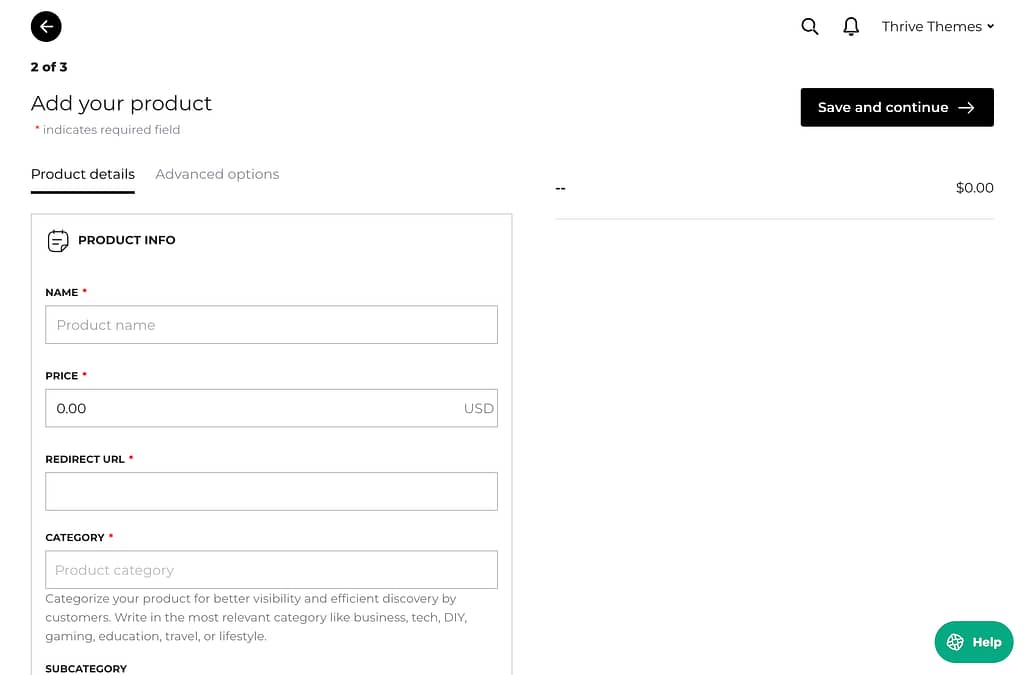
After selecting URL Redirect, you’ll see a form where you enter the product details.
In this form, enter the mandatory product details as below.
- Name: The product name you want to associate it with.
- Price: The price you want to sell this product for.
- Redirect URL: The Thank you page URL you see in the SendOwl Settings in the Thrive Dashboard on your website.
- Category: The category you want to add this product to.
To enter a valid redirect URL, copy the URL from the SendOwl Settings in the Thrive Dashboard on your website.
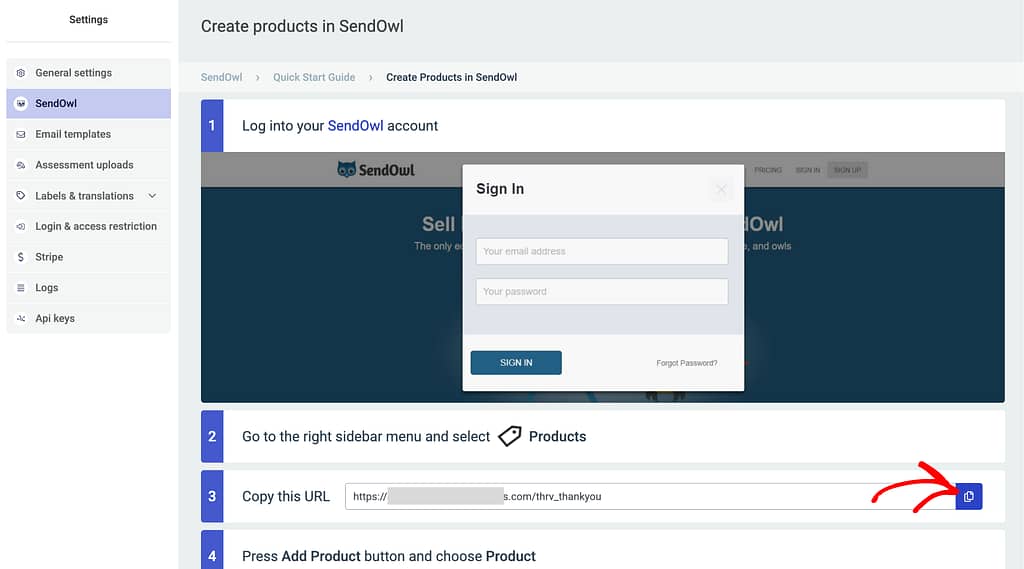
After you copy this URL, paste it along with the other product details entered to create a new product in SendOwl.
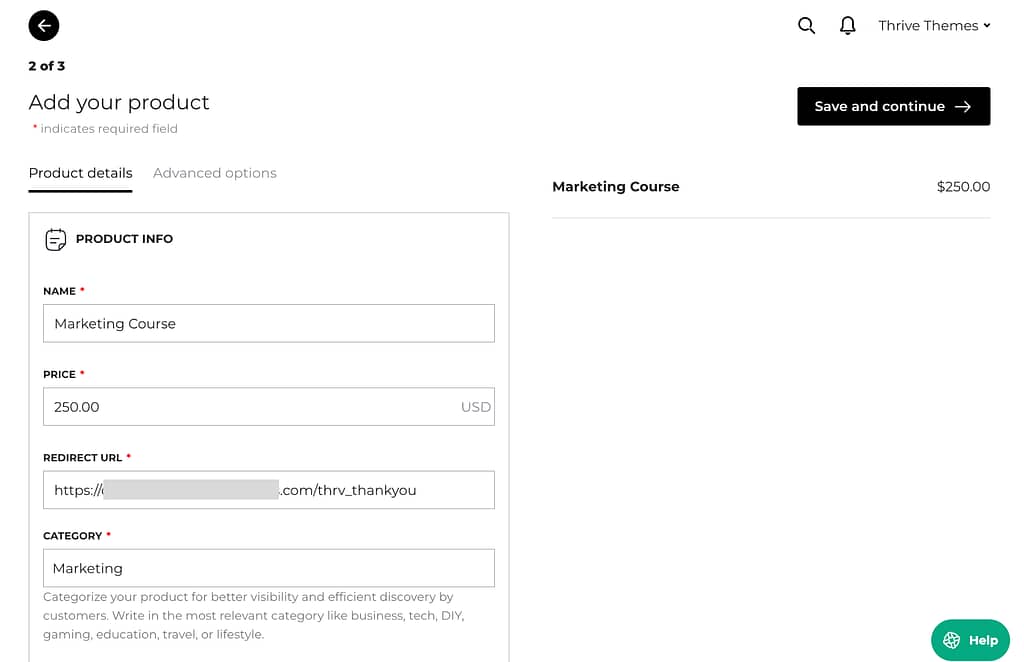
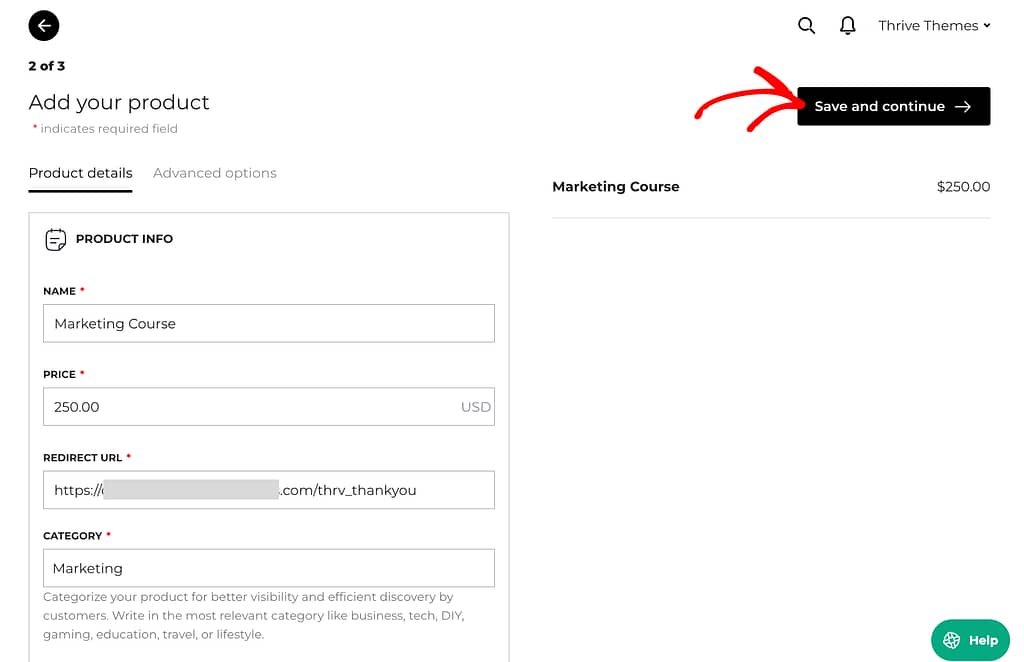
When you enter all the product details, click the Save and continue button on the top right.
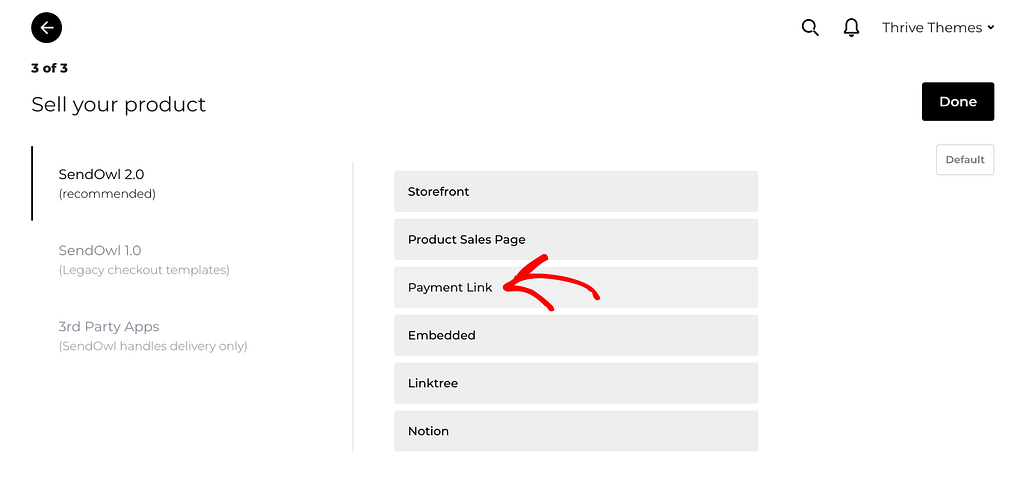
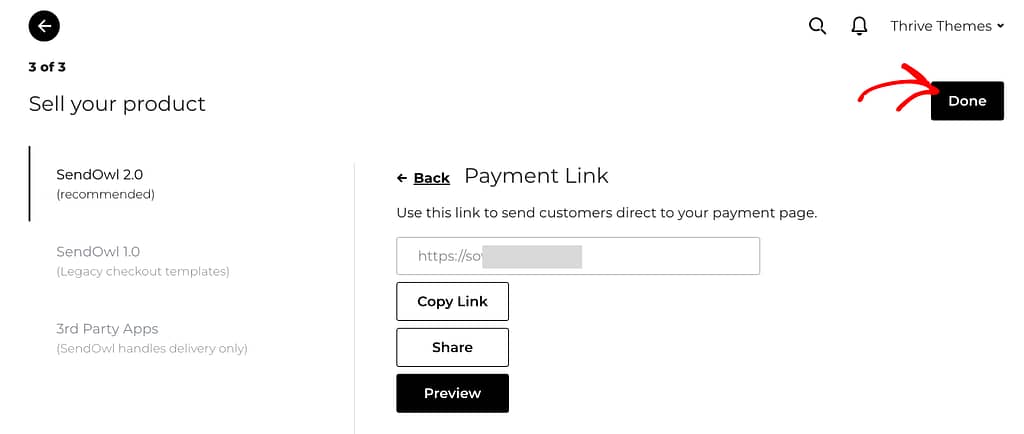
On the next page, click on Payment Link so you can view and copy the link to be used in Thrive Themes.
Clicking Payment Link will display the payment link that you have to copy by clicking the Copy Link button.
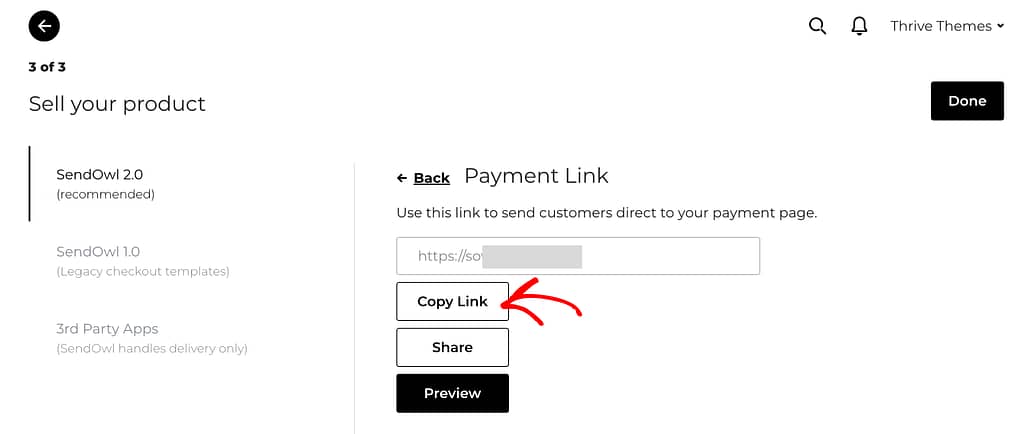
After copying the payment link, click the Done button on the top right corner.
After creating a product in SendOwl, you have to set the Checkout options too.
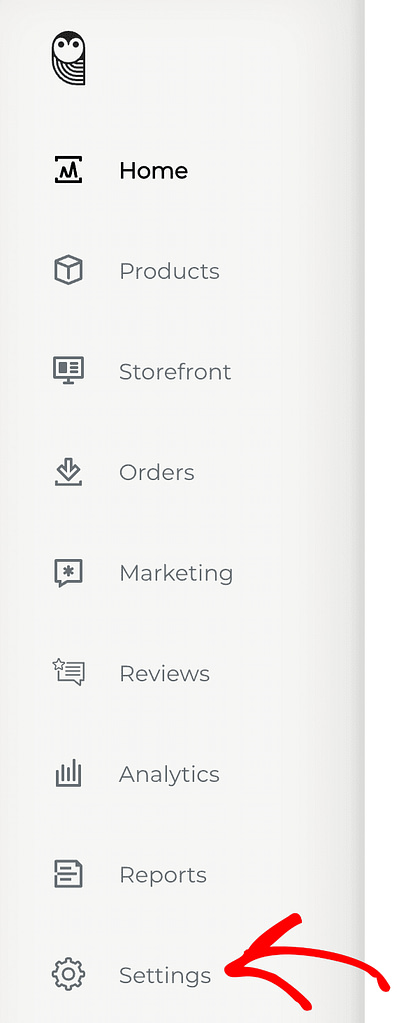
To set up the checkout options in SendOwl, click on Settings in the left panel.
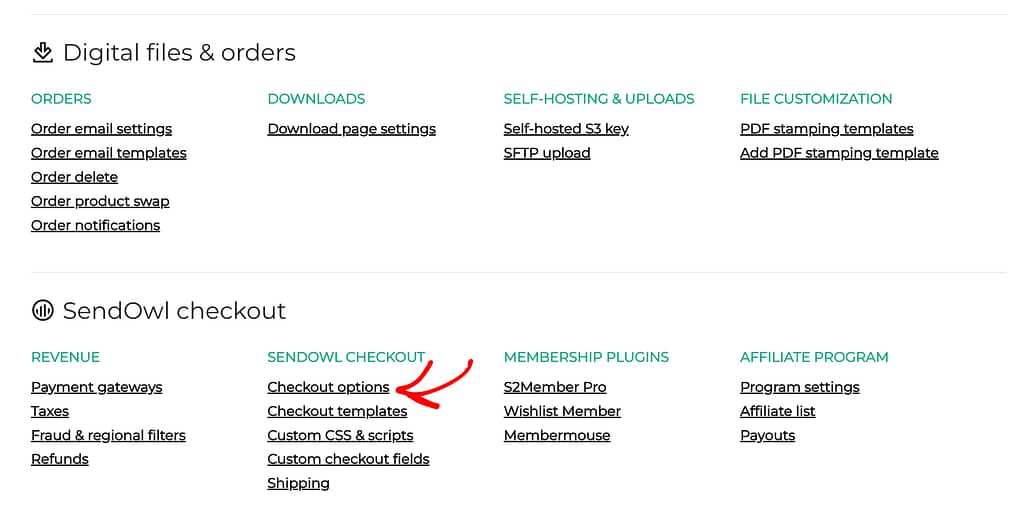
On the Settings page, scroll to SendOwl Checkout and click on Checkout options.
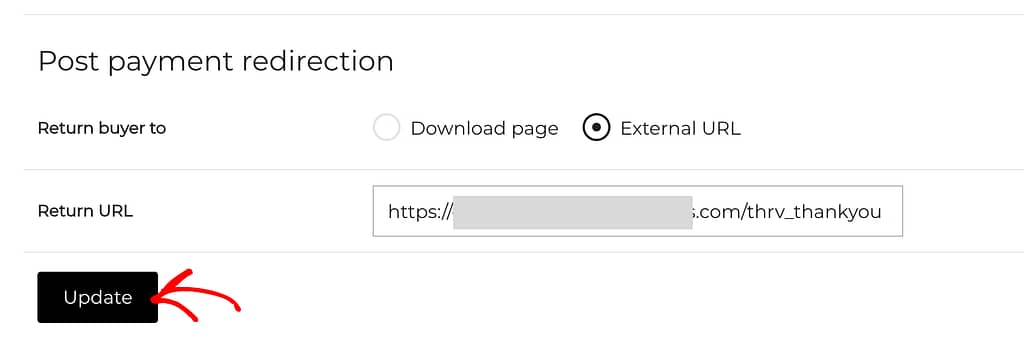
On the Checkout options page, scroll down to Post payment redirection, add the Thank You page URL you’ve copied from the Thrive Dashboard and click Update.
Completing the Checkout Settings
The next step after creating a product and copying the payment link from SendOwl, open the SendOwl settings in the Thrive Dashboard.
On the SendOwl settings page click the Checkout settings button on the Checkout settings block.
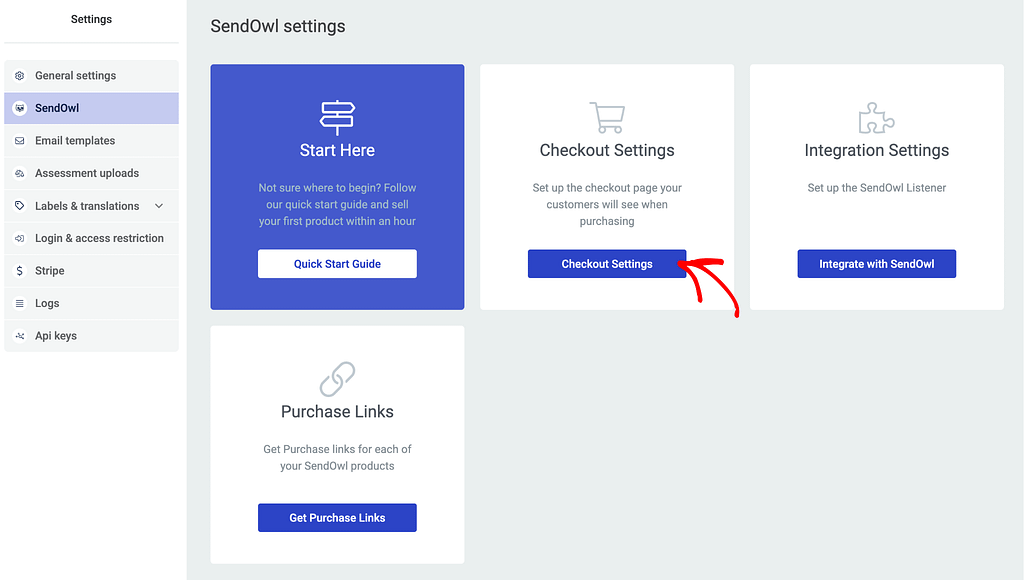
After clicking the Checkout Settings button, you’ll be taken to a page where you see two tabs.
Adding a registration page
On the SendOwl checkout page, open the Registration page tab.
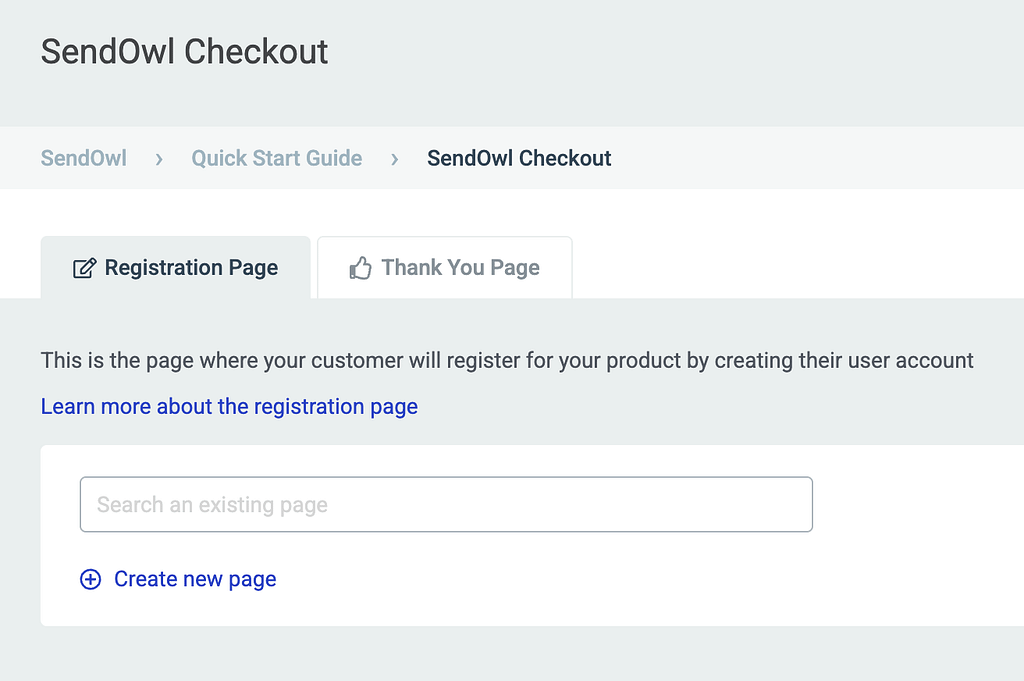
Under this tab, you can add an already existing page or create a new one. Once you have the page, you can edit it with Thrive Architect and use different landing page templates while doing so.
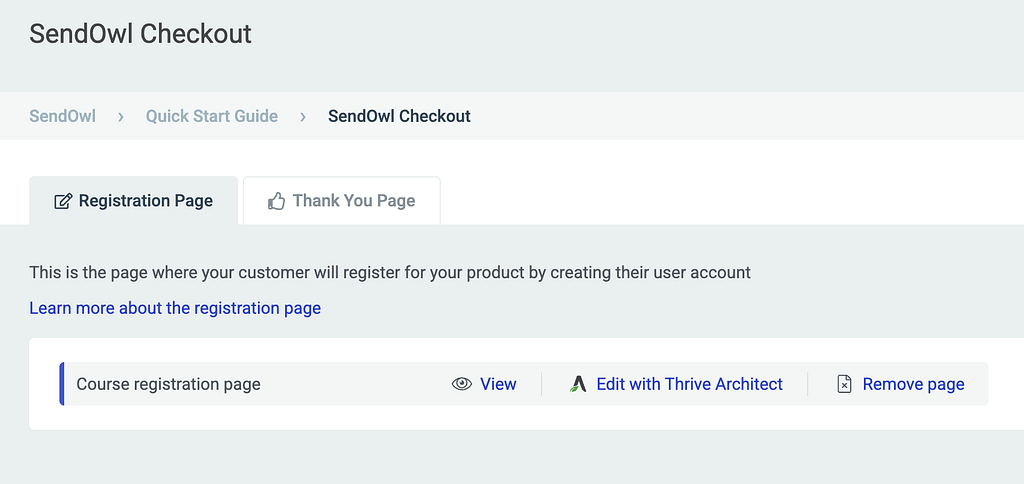
When editing the registration page, it is important to keep the “Checkout” element on the page, as this is an essential part of the purchasing process.
Need further help? Here’s a document you can refer to.
Setting a Thank you page
The next tab on the SendOwl checkout page is to add a Thank you page. To do so, start by opening the tab.
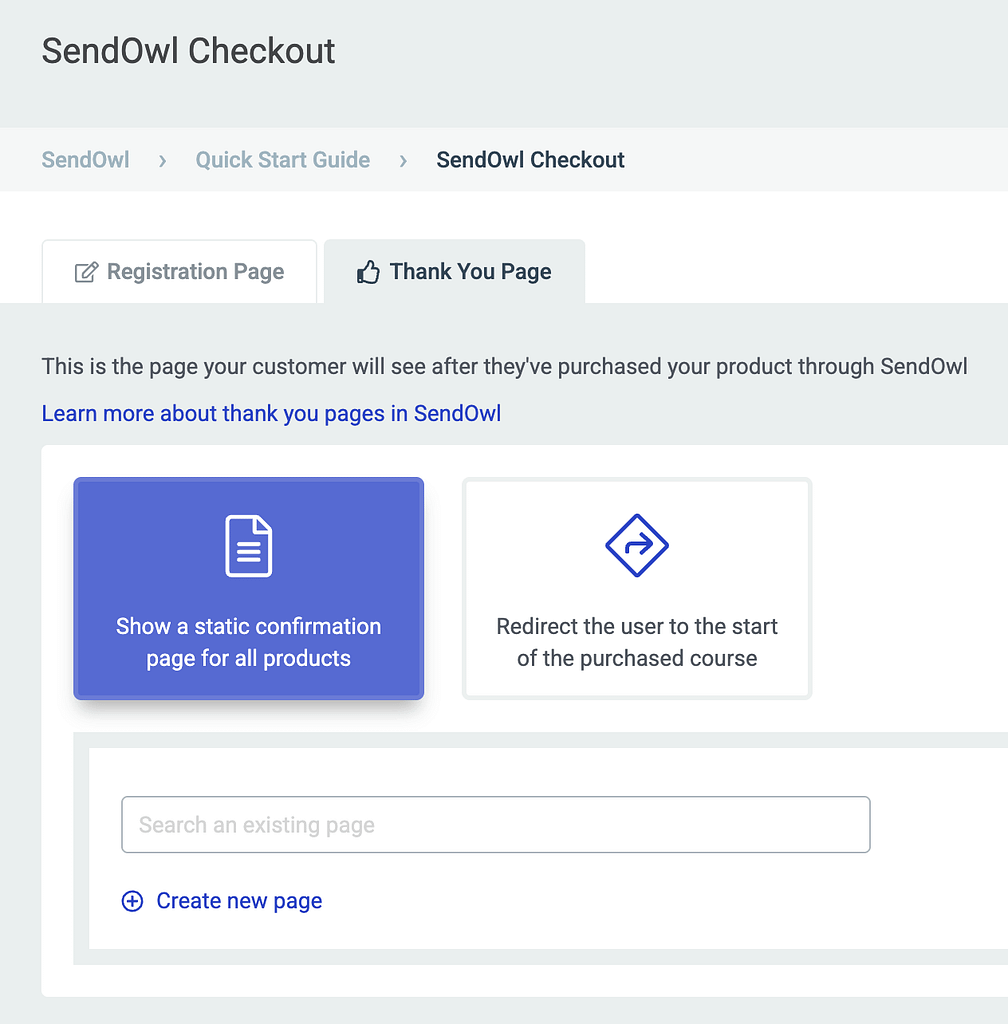
Under the Thank You Page tab, you can choose between having a “Static Confirmation Page for all products” or “Redirect the users to the start of the purchased course” along with a personalized message.
Here as well, you can either add already existing pages, or you can create new ones and then edit them. Thrive Architect also offers you multiple Thank You page templates that you can use from.
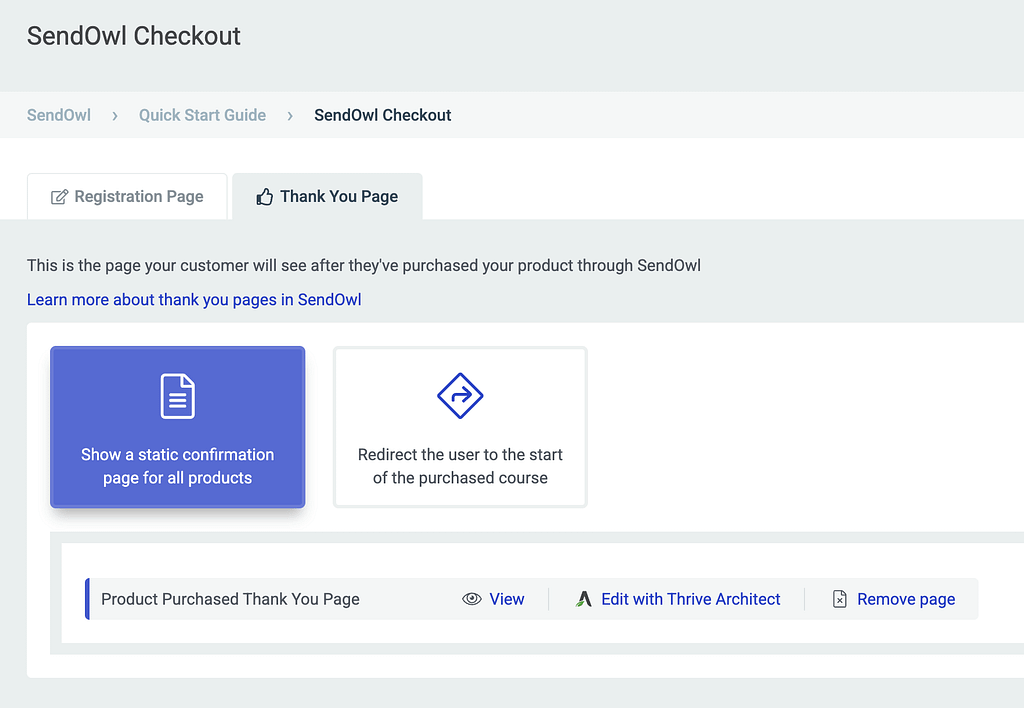
If you need more help creating and setting a thank you page, refer to our document here.
Setting Up a SendOwl Listener
The next step on the SendOwl settings page is to set up a SendOwl Listener to ensure the right actions are triggered at the right time.
To set this up start by clicking the Integrate with SendOwl button on the Integration Settings block.
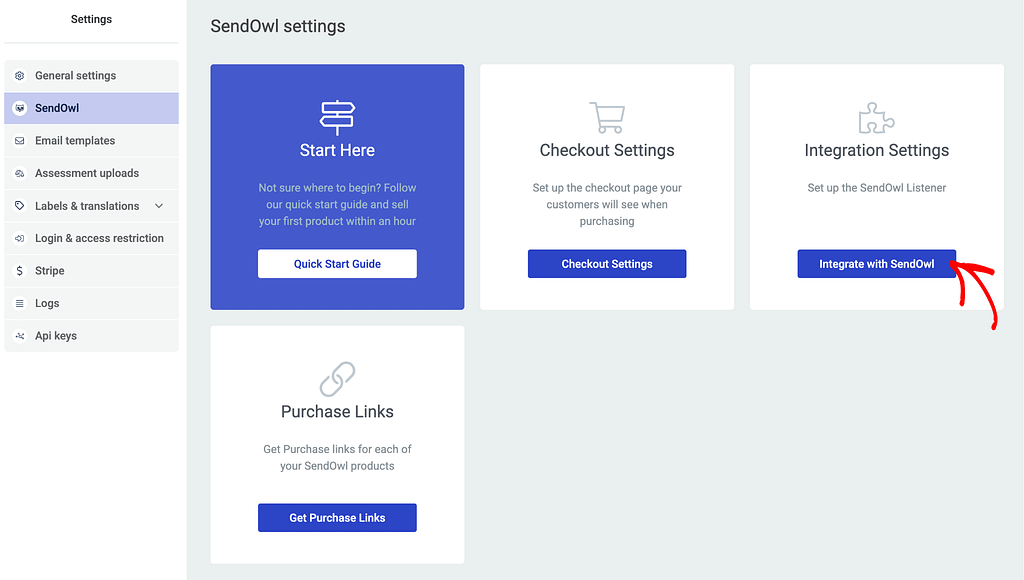
After you click the Integrate with SendOwl button, you’ll see a Listener URL that you need to copy and enter it in the webhooks you create in your SendOwl account.
While integrating SendOwl with Thrive Apprentice, you will have to create 4 webhooks selecting the following events:
- Order completed
- Order failed
- New payment
- Refund issued
To set up the SendOwl listener efficiently, we recommend you to refer to our document here.
Creating a Sales Page with a Purchase Link
Once the above setup steps are completed, you will have to create a ‘place’ where your clients can buy the course. This can be a sales page, for example.
You can create a new sales page that will have the purpose of presenting and selling your course, or you can use an already existing one.
The main point here is to insert the “Purchase Link” of the course on the page so that the visitor of the website can click on it and complete the purchasing process.
To start with this setting, on the SendOwl settings page, click the Get Purchase Links button on the Purchase Links block.
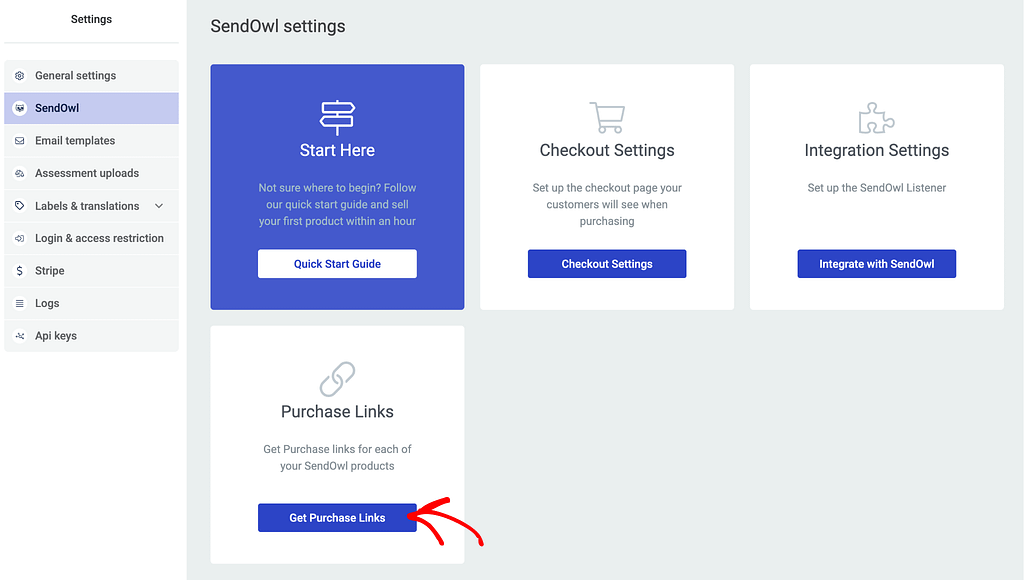
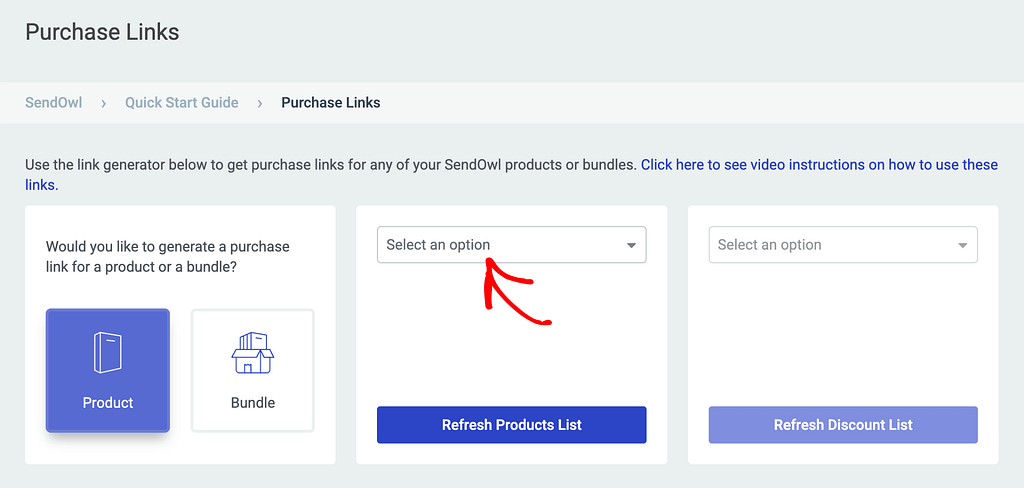
This will take you to a page where you select whether you want to integrate with a SendOwl product or a bundle.
Since we’ve created a product in SendOwl following the steps above, click Product.
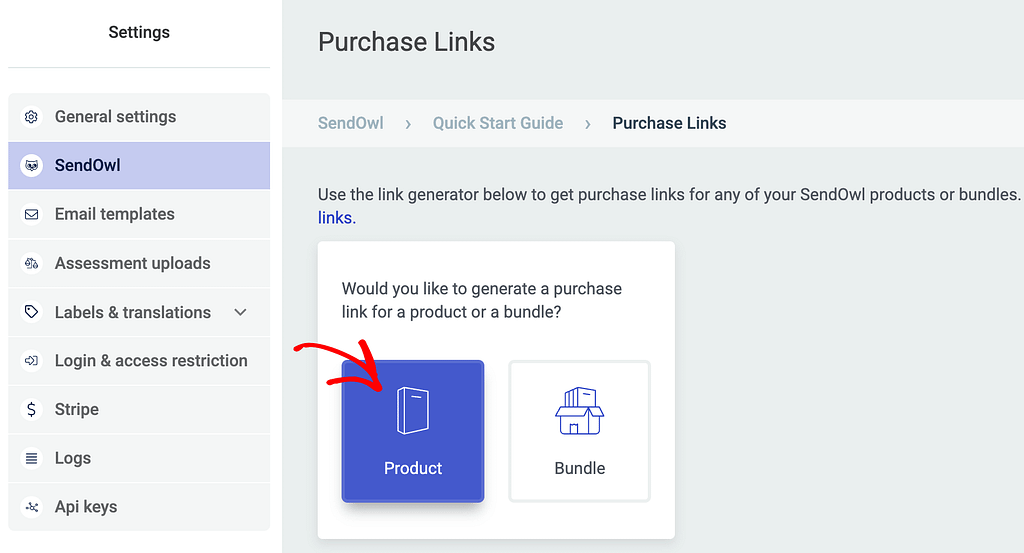
Clicking the product will open two new blocks. In the second block, click the dropdown and select the SendOwl product you want to link the Thrive Apprentice course with.
If you don’t find the SendOwl product in the list, click Refresh Product List.
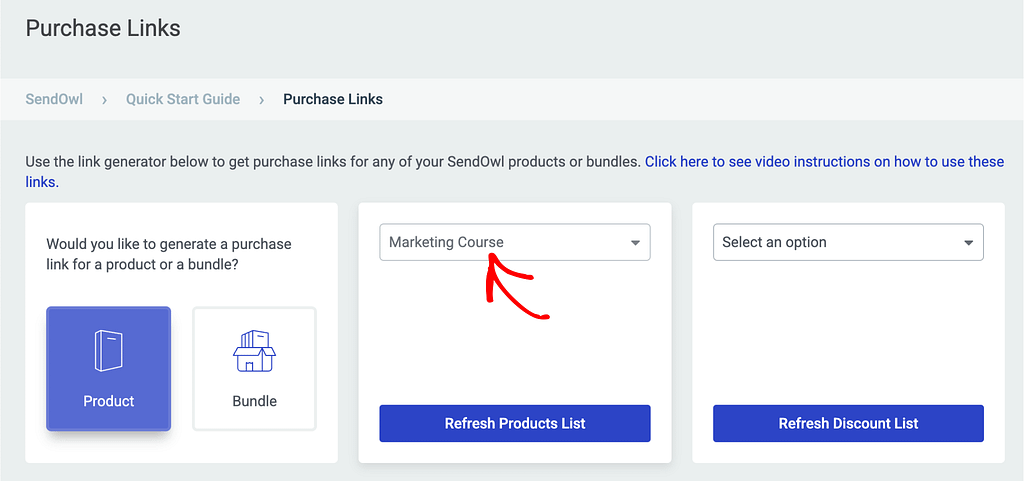
After you select the product, you’ll see the purchase links listed below. To proceed, copy the purchase link that you’ll be pasting in the sales page selling the course.
To know more about purchase links and how you can add them in a sales page, refer to our document here.
Managing Access Requirements and Restrictions for the Course
After you’ve set up an integration with SendOwl, created a product in SendOwl, set up checkout settings, a SendOwl Listener URL, and a purchase link, it is time to set access permissions for the course in Thrive Apprentice.
To set up Access Requirements for a Thrive Apprentice course, you’ll have to apply it to the product the course is placed in. To begin, open your WordPress admin area, navigate to Thrive Dashboard >> Thrive Apprentice, and click Products in the left panel.
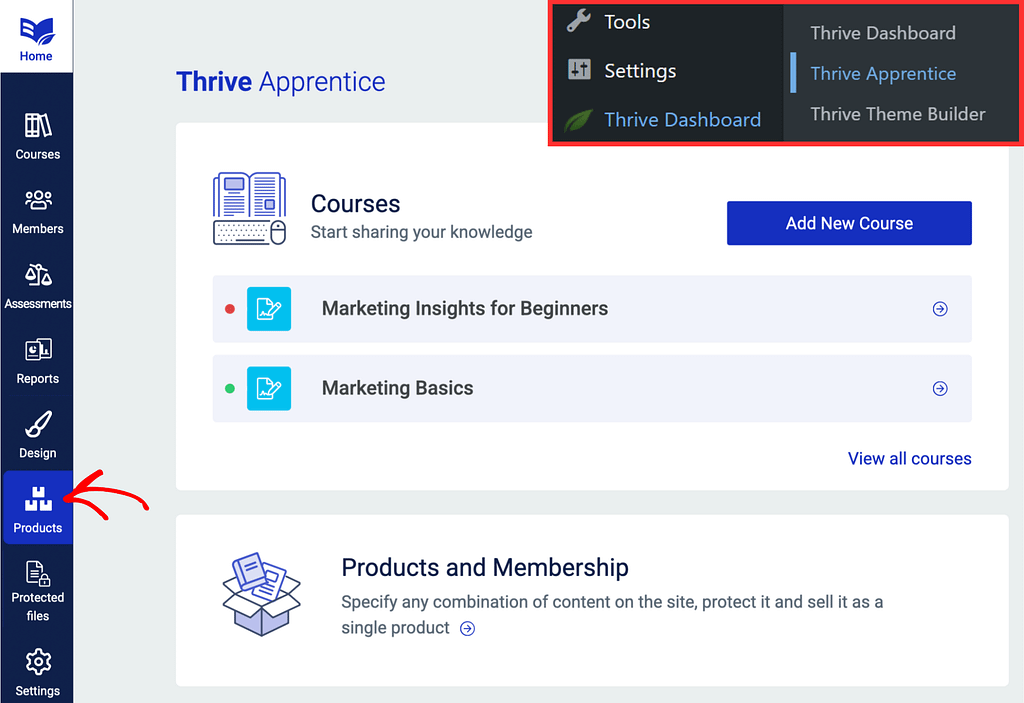
On the Products page, click the product that contains the lesson.
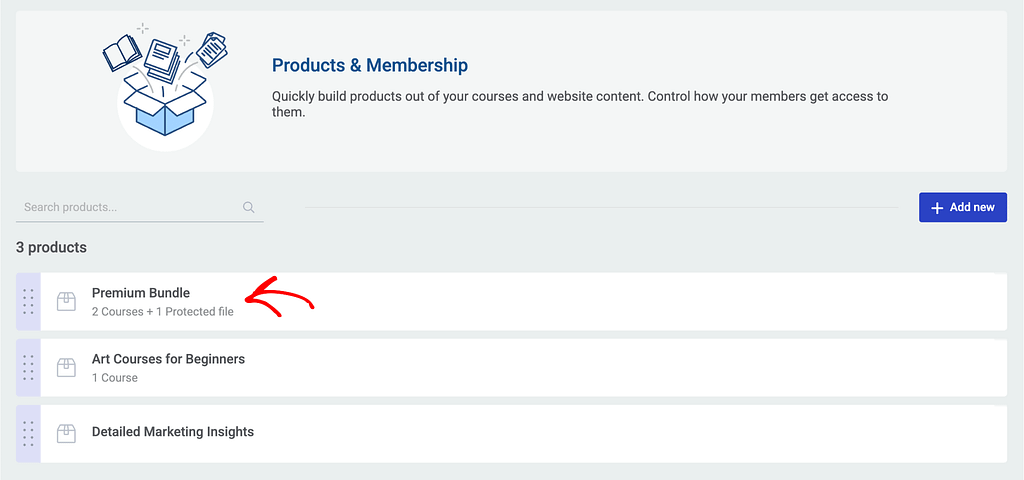
On the individual product page, click Access Requirements in the left column.
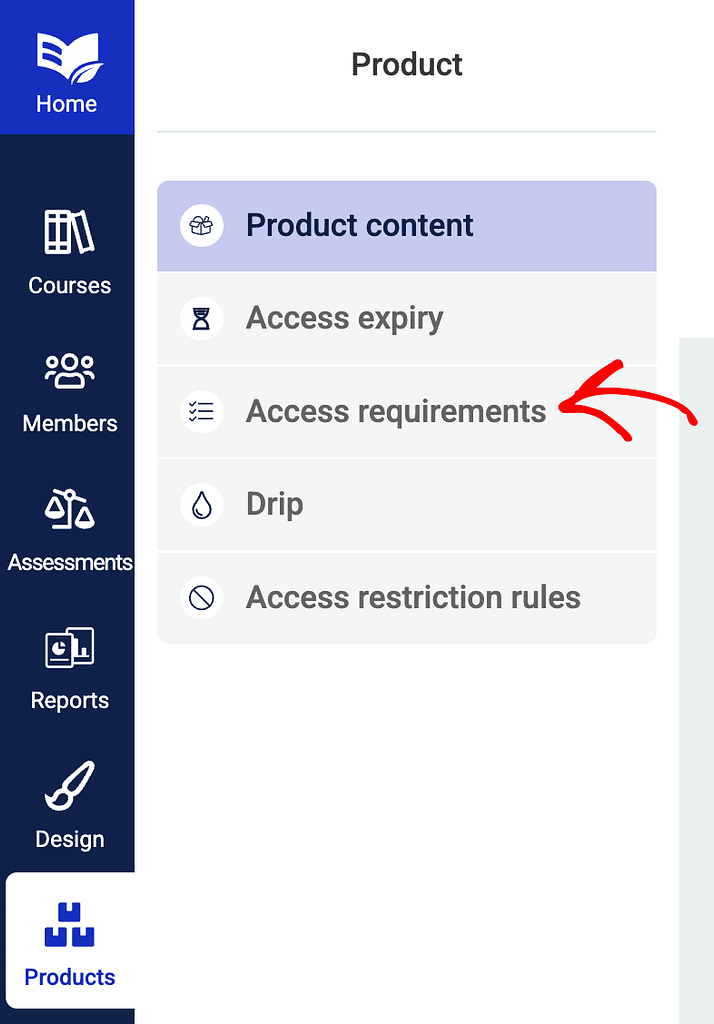
On the Access requirements page, click on SendOwl product since you want to associate the Thrive Apprentice product with the one you created in SendOwl.
Clicking on Sendowl Product will display a list of products from your SendOwl account. Select the one you want to link here and proceed.
The next step is to manage Access Restriction rules for the product. You can do so by opening the Access restriction rules on the individual product page.
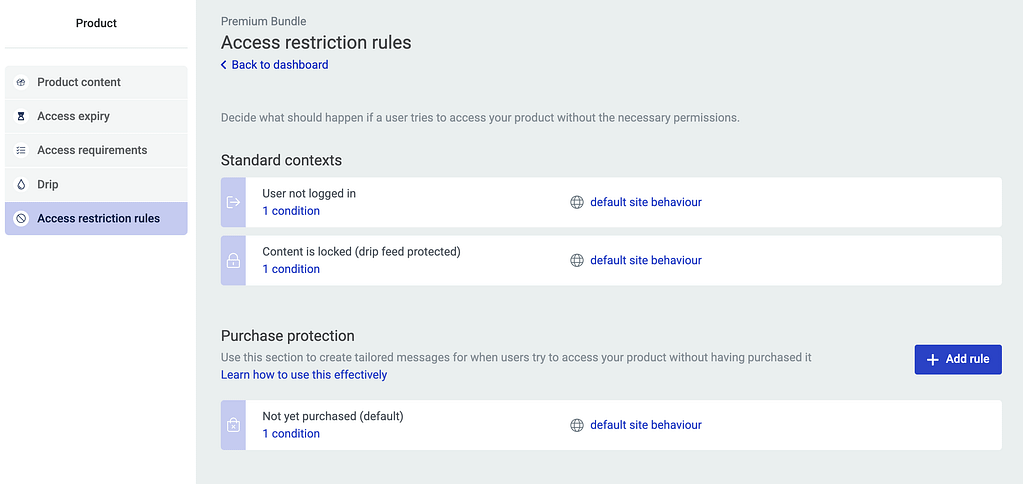
You can read more about how to set up these options in these two articles:
- How to Configure the Access Restriction Rules in Thrive Apprentice
- Access Restriction Rules at Product Level
When you finish setting up the restrictions, save them. This will ensure the visitors of the page, where your course is, will have to either log in (if they’ve already purchased the course) or register and purchase the course to get full access to it.
In the purchasing process, the customer clicking on the buy button will automatically log into SendOwl using the WordPress credentials, and then be redirected to the purchasing process. This is all automated, so the customer will just need to insert the payment details and complete the order.
Here’s another article that you might find useful with regards to how the purchasing process works:
We’ve just seen how you can create a course in Thrive Apprentice and sell it using SendOwl.
Next, do you want to know how users can access courses once they’ve purchased it? Read our document here.