In this article, you’ll learn how to set up each of the seven drip campaign templates available in Thrive Apprentice—including what each template does, when to use it, and step-by-step instructions for configuring it.
Note: Before setting up any drip campaign, you need a published course with lessons already created. All drip templates are accessed from the same location: Thrive Dashboard > Thrive Apprentice > Courses > select your course > Drip tab.
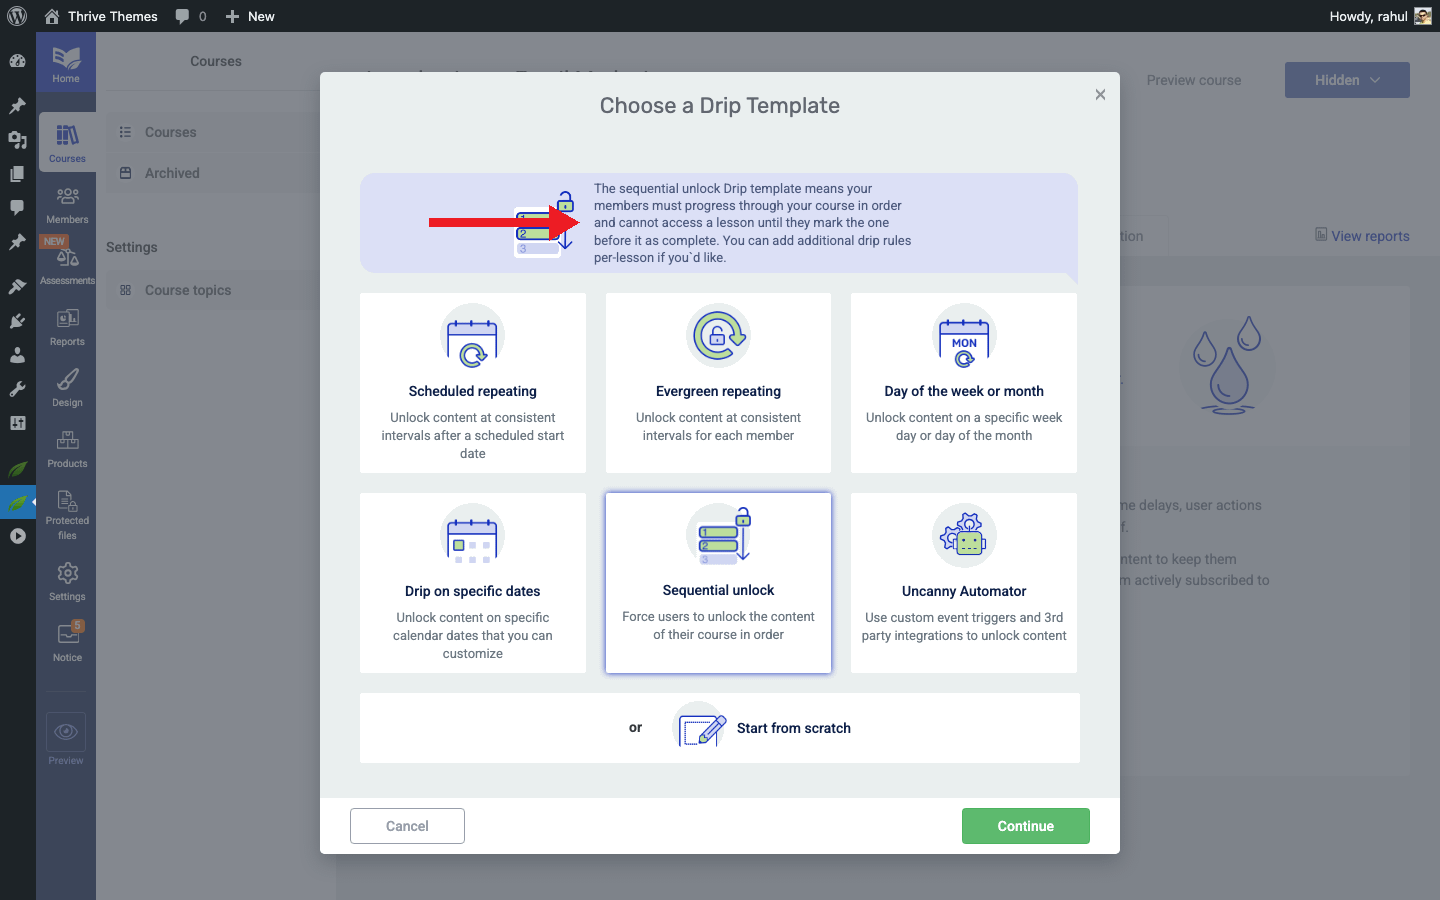
1. Sequential Unlock
What it does: The Sequential Unlock template ensures course content is unlocked in order for all students. Each lesson becomes available only after the previous one has been completed or after a set time interval. Students cannot skip ahead.
When to use it: Choose this template when your course material builds on prior knowledge and you want every student to progress through lessons in the same fixed sequence.
Setup Steps
- Open your course and click the Drip tab.
- Click Create first Drip Campaign (or Add Campaign).
- Select the Sequential Unlock template from the lightbox and click Continue.
- Enter a Campaign Name (e.g., “Weekly Sequential Release”).
- Configure the Start Event—choose what triggers the sequence (e.g., product purchase or enrollment date).

- Set the Unlock Interval—define how long students must wait between each lesson (e.g., 1 day, 3 days, or 1 week).
- Review the drip timeline preview to confirm the order and spacing of your lessons.
- Click Save to apply the campaign.
Tip: This template works especially well for certification courses or structured programs where lesson order matters.
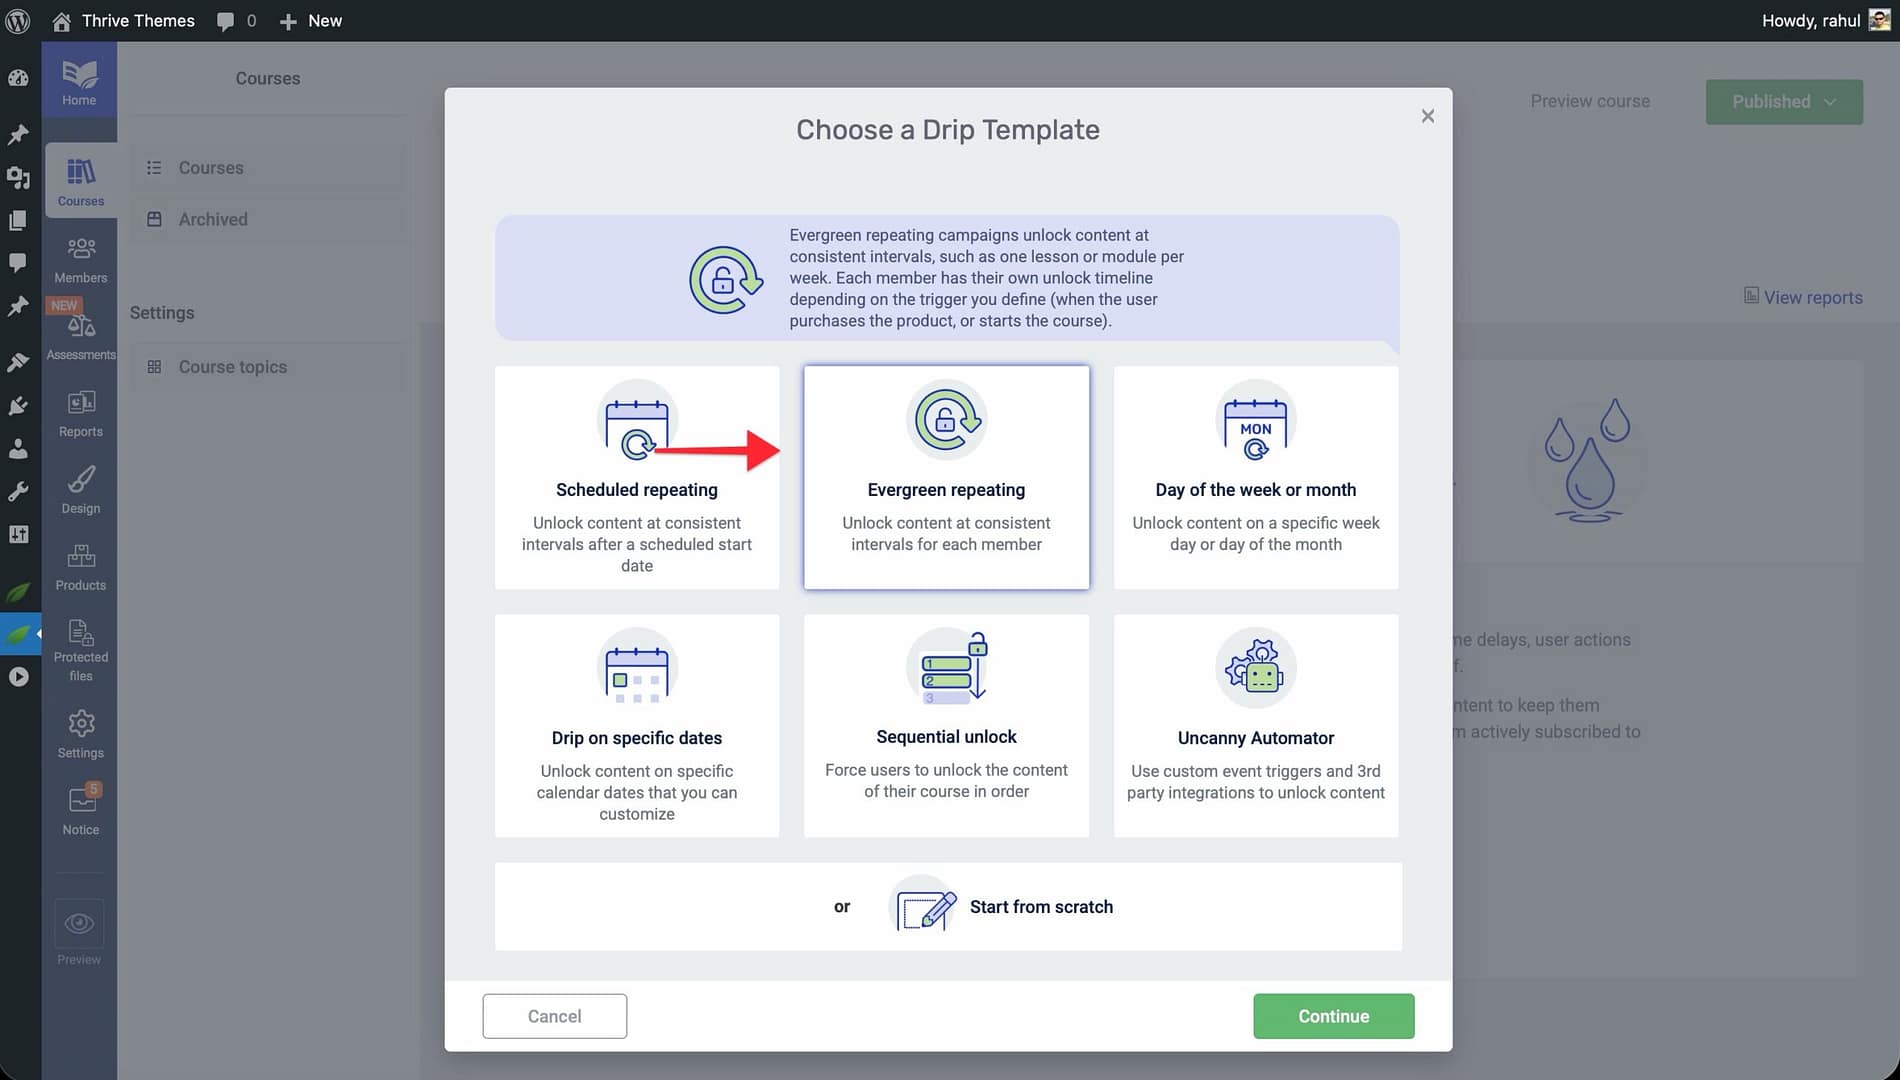
2. Evergreen Repeating
What it does: The Evergreen Repeating template unlocks course content at consistent intervals—such as one lesson or module per week—relative to each student’s individual enrollment or purchase date. Every student gets their own personalized timeline.
When to use it: Choose this template when you want a consistent release schedule that adapts to each student’s start date, rather than locking everyone to fixed calendar dates.
Setup Steps
- Open your course and click the Drip tab.
- Click Create first Drip Campaign and select the Evergreen Repeating template.
- Click Continue and enter a Campaign Name.
- Set the Start Event—typically Product Purchase or Course Enrollment—to define when each student’s drip timeline begins.
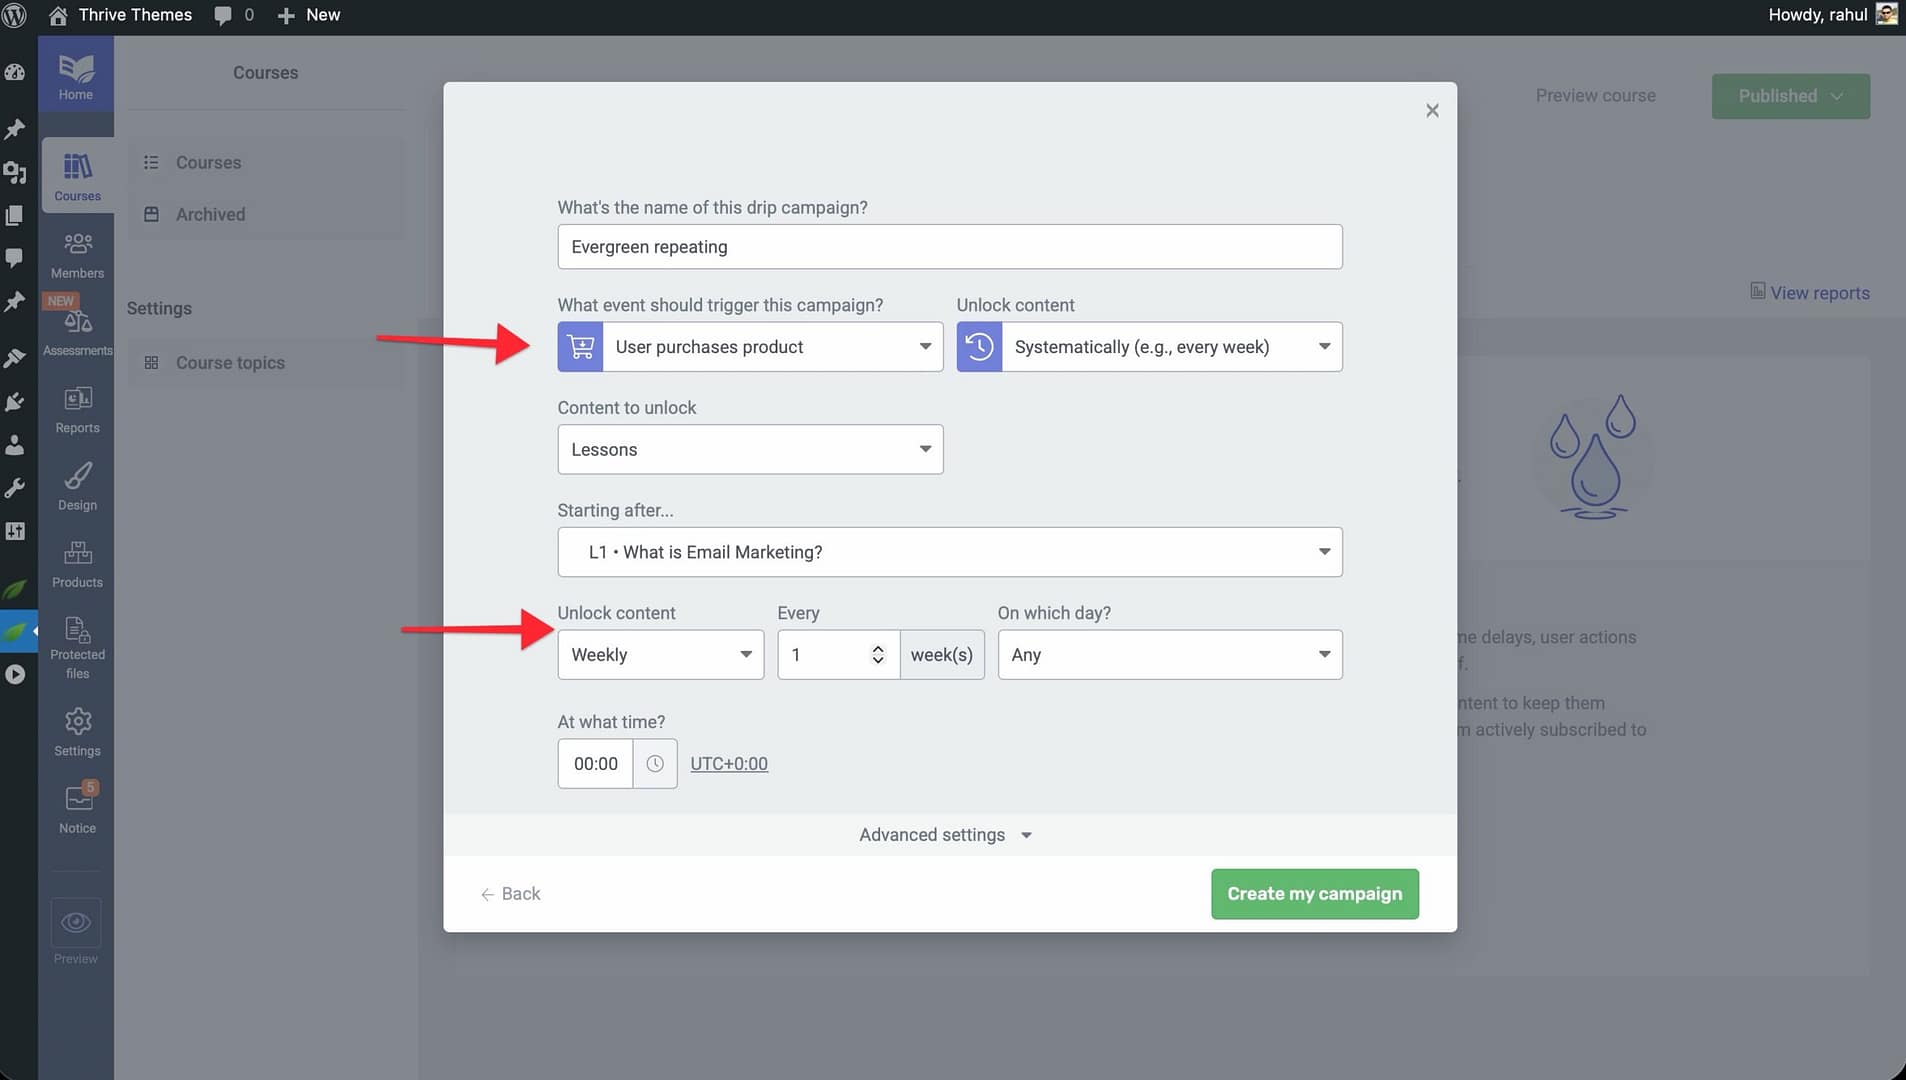
- Configure the Repeat Interval—specify how often content unlocks (e.g., every 7 days for weekly delivery).
- Define how many content items unlock per interval (e.g., 1 lesson per week or 1 module per week).
- Click Save to activate the campaign.
3. Scheduled Repeating
What it does: The Scheduled Repeating template unlocks content at regular intervals starting from a specific calendar date and time. Unlike the Evergreen Repeating template, all students receive content on the same dates regardless of when they enrolled.
When to use it: Choose this template for live cohort-style courses where everyone starts together and receives new content on the same schedule.
Setup Steps
- Open your course and click the Drip tab.
- Click Create first Drip Campaign and select the Scheduled Repeating template.
- Click Continue and enter a Campaign Name.
- Set the Start Date and Time—this is the exact calendar date when the first content item unlocks for all students.
- Configure the Repeat Interval—choose how often subsequent content unlocks (e.g., every 7 days, every 14 days).
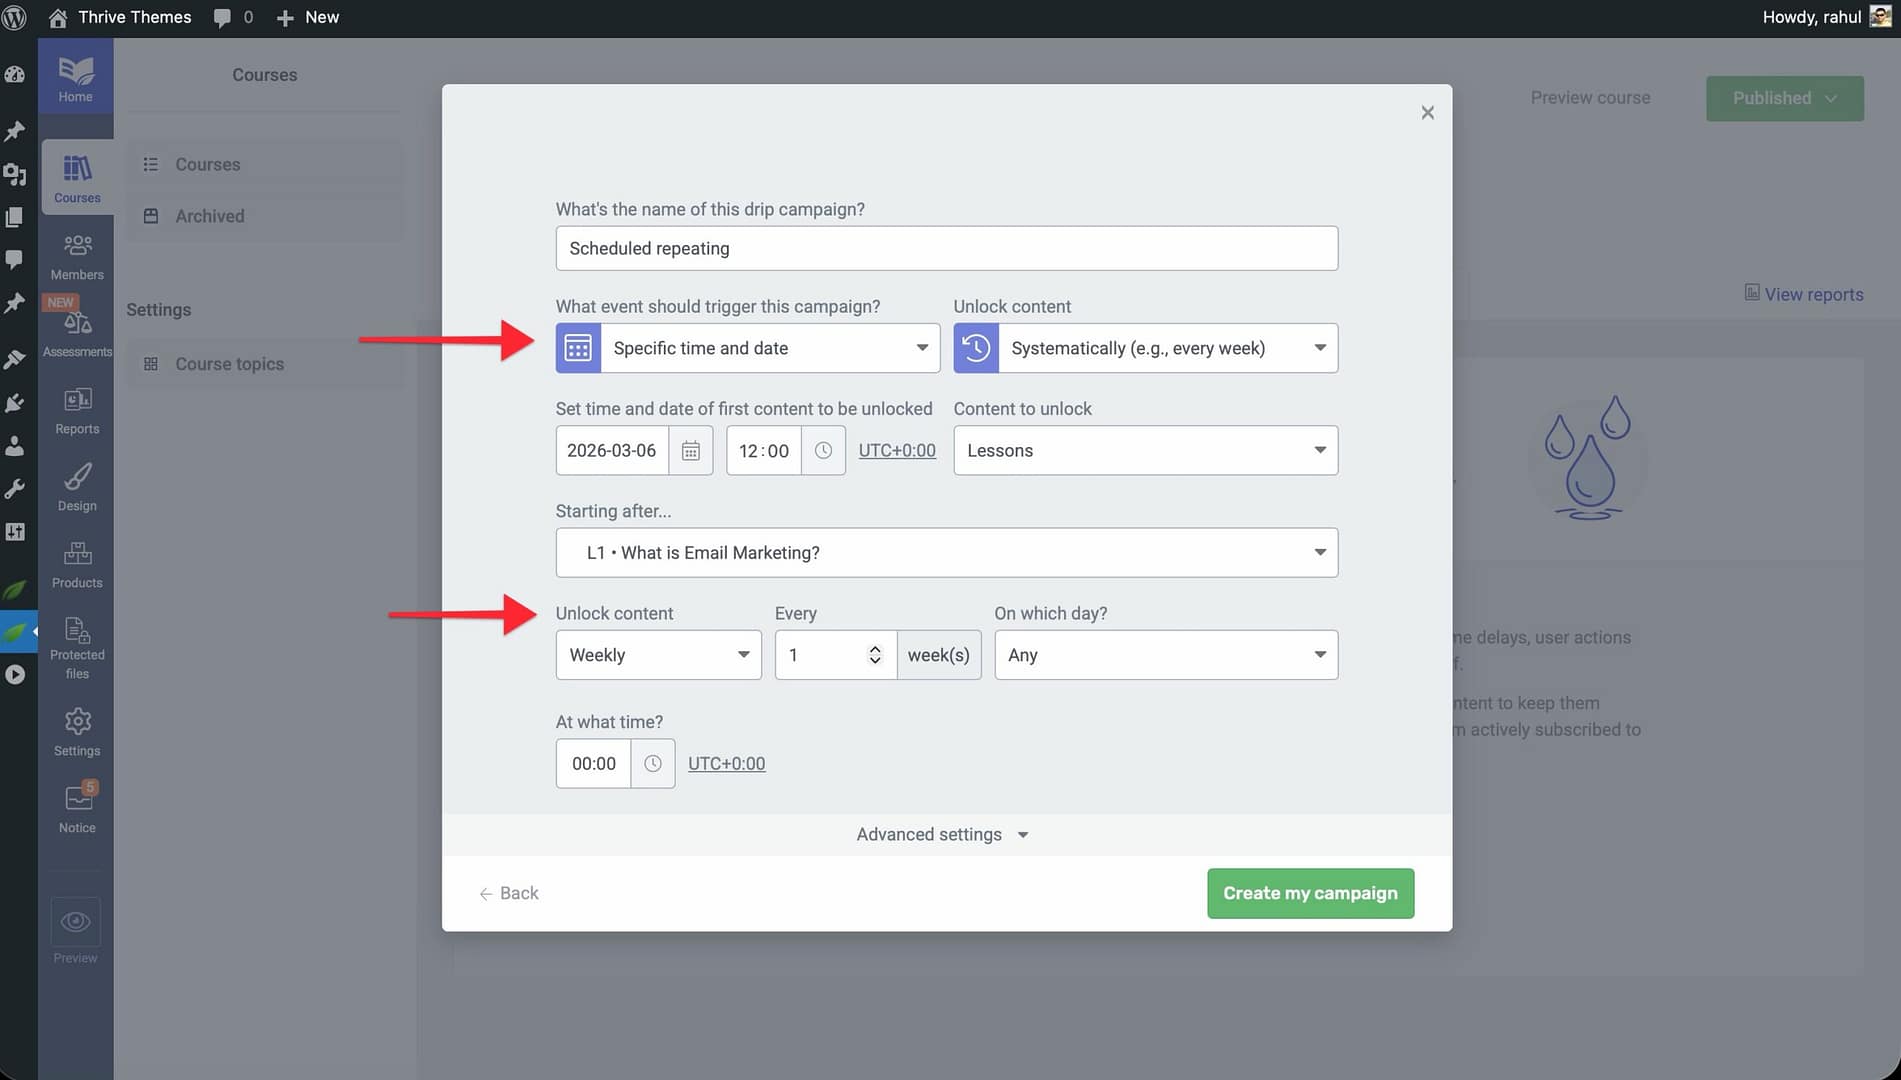
- Verify the drip timeline to confirm that each lesson’s unlock date aligns with your intended schedule.
- Click Save to apply the campaign.
4. Day of the Week or Month
What it does: The Day of the Week or Month template unlocks content on specific recurring days—such as every Monday, every second Thursday, or the 15th of each month. This gives you calendar-based control over when students receive new material.
When to use it: Choose this template when your course delivery needs to align with a predictable weekly or monthly rhythm, such as releasing a lesson every Monday for a semester-style program.
Setup Steps
- Open your course and click the Drip tab.
- Click Create first Drip Campaign and select the Day of the Week or Month template.
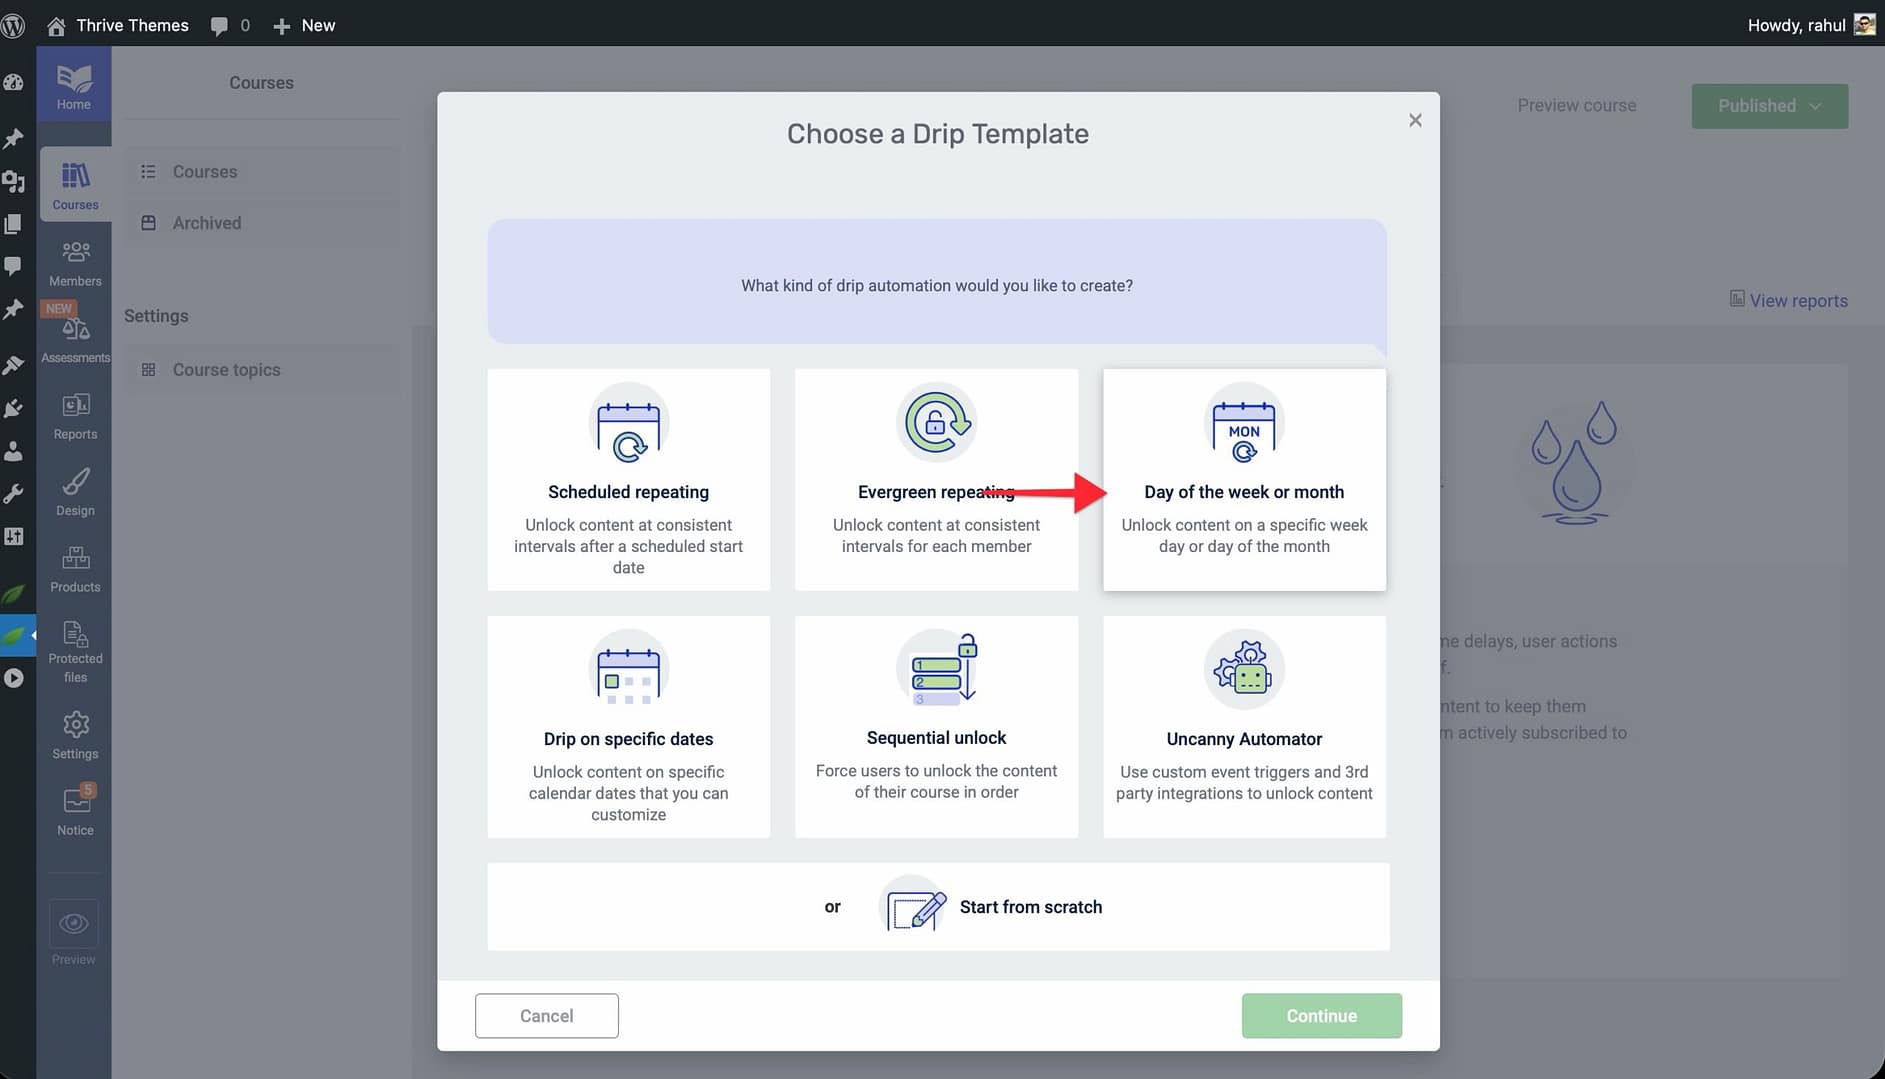
- Click Continue and enter a Campaign Name.
- Choose your scheduling pattern: – Day of the week — Select a specific weekday (e.g., Monday) for recurring unlocks. – Specific occurrence — Select a pattern like “second Thursday of every month.” – Day of the month — Choose a fixed monthly date (e.g., the 1st or 15th).
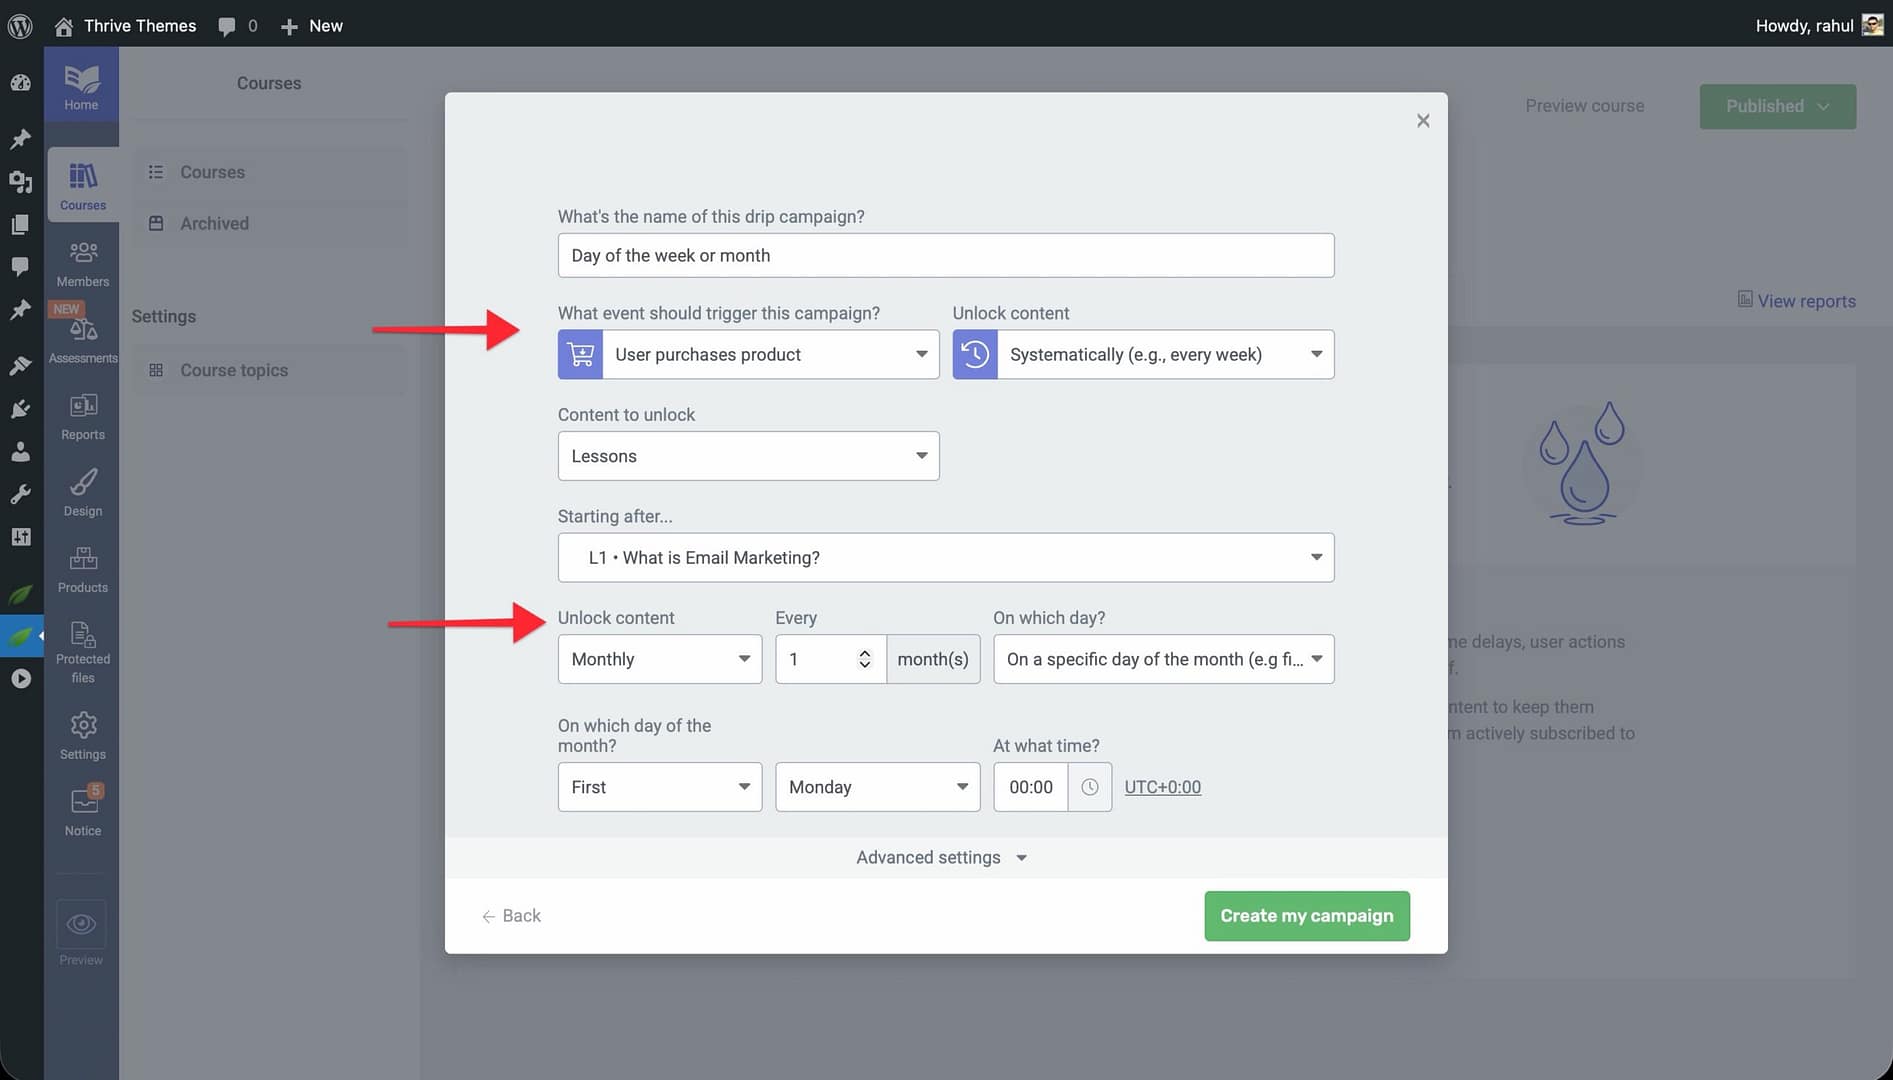
- Configure how many content items unlock on each occurrence.
- Click Save to activate the schedule.
Tip: This template is excellent for courses that mirror an academic calendar or for membership sites releasing weekly content drops.
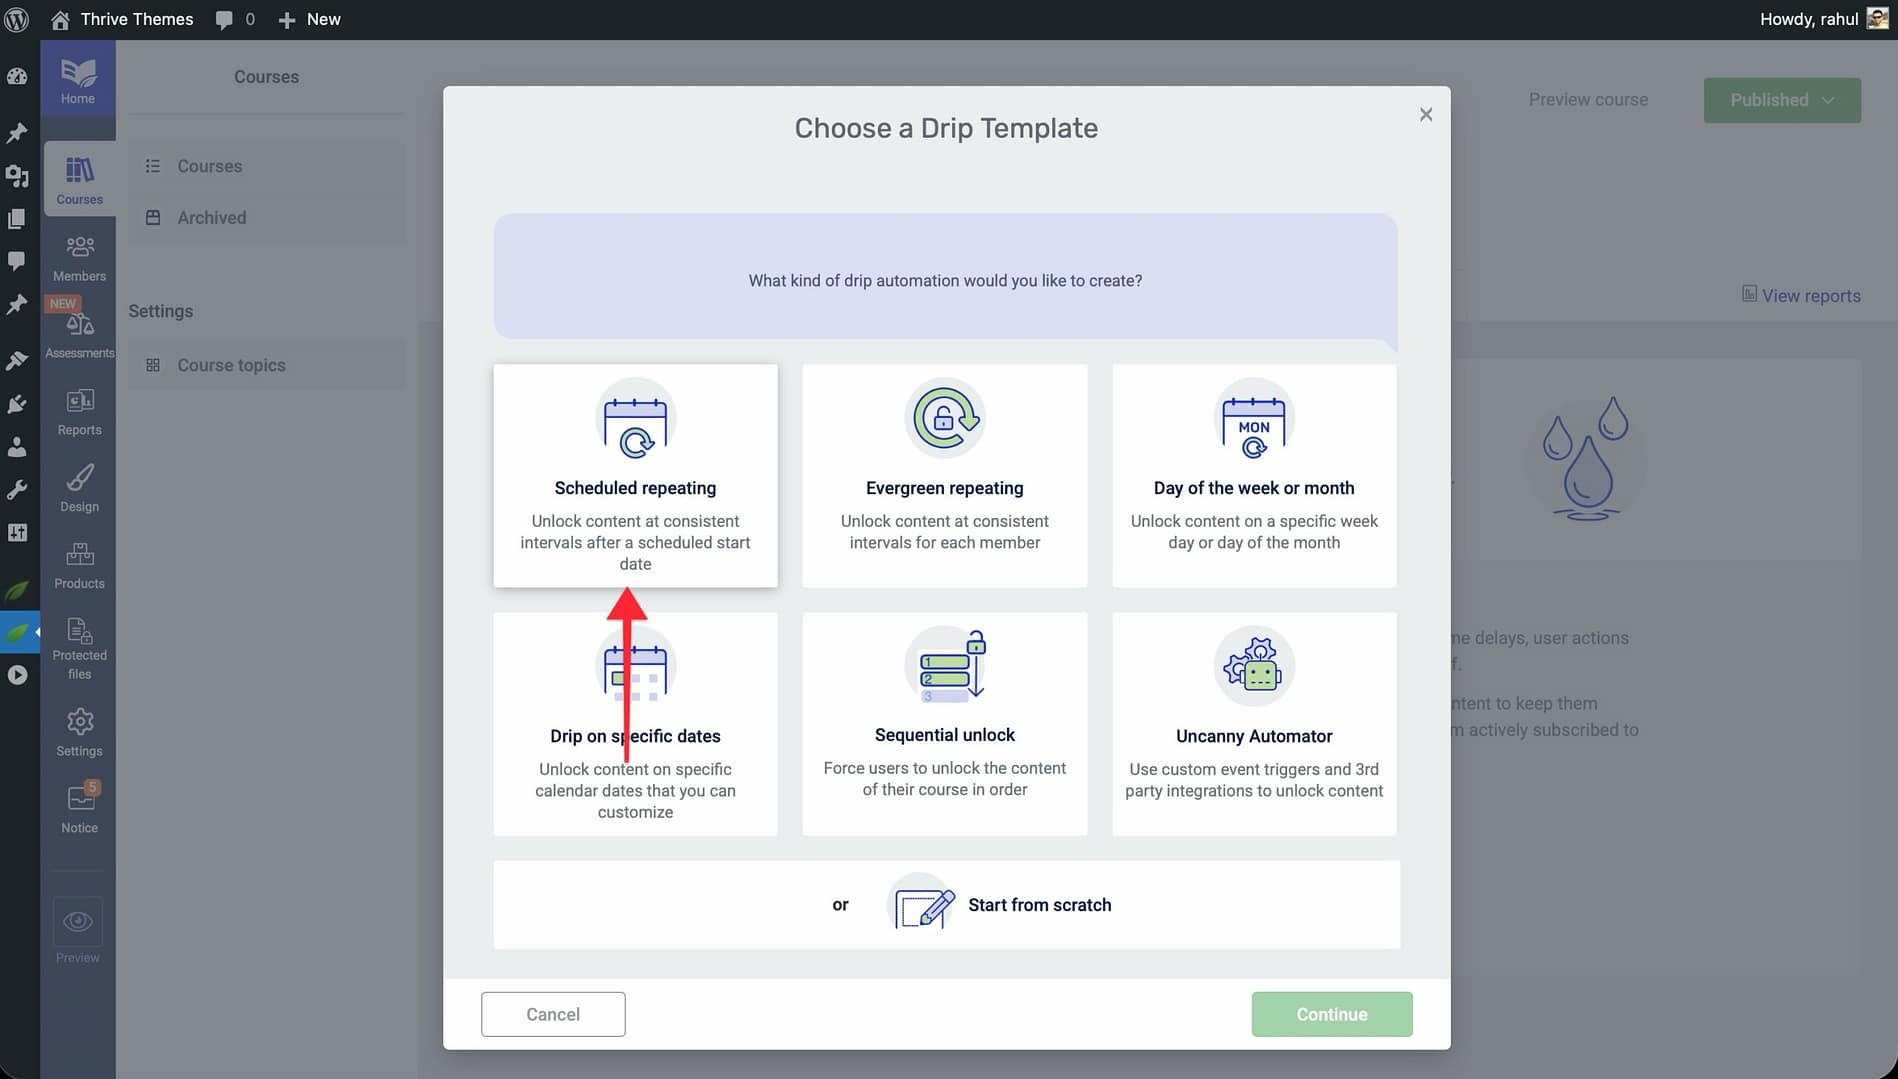
5. Drip on Specific Dates
What it does: The Drip on Specific Dates template lets you assign an exact calendar date to each lesson or module. Content unlocks precisely on the date you specify—no intervals, no recurring patterns.
When to use it: Choose this template when your course aligns with real-world events, fixed deadlines, or a custom calendar where each lesson needs to unlock on a unique date.
Setup Steps
- Navigate to Thrive Dashboard > Thrive Apprentice and open your course.
- Click the Drip tab and then click Create first Drip Campaign.
- Select the Drip on Specific Dates template and click Continue.
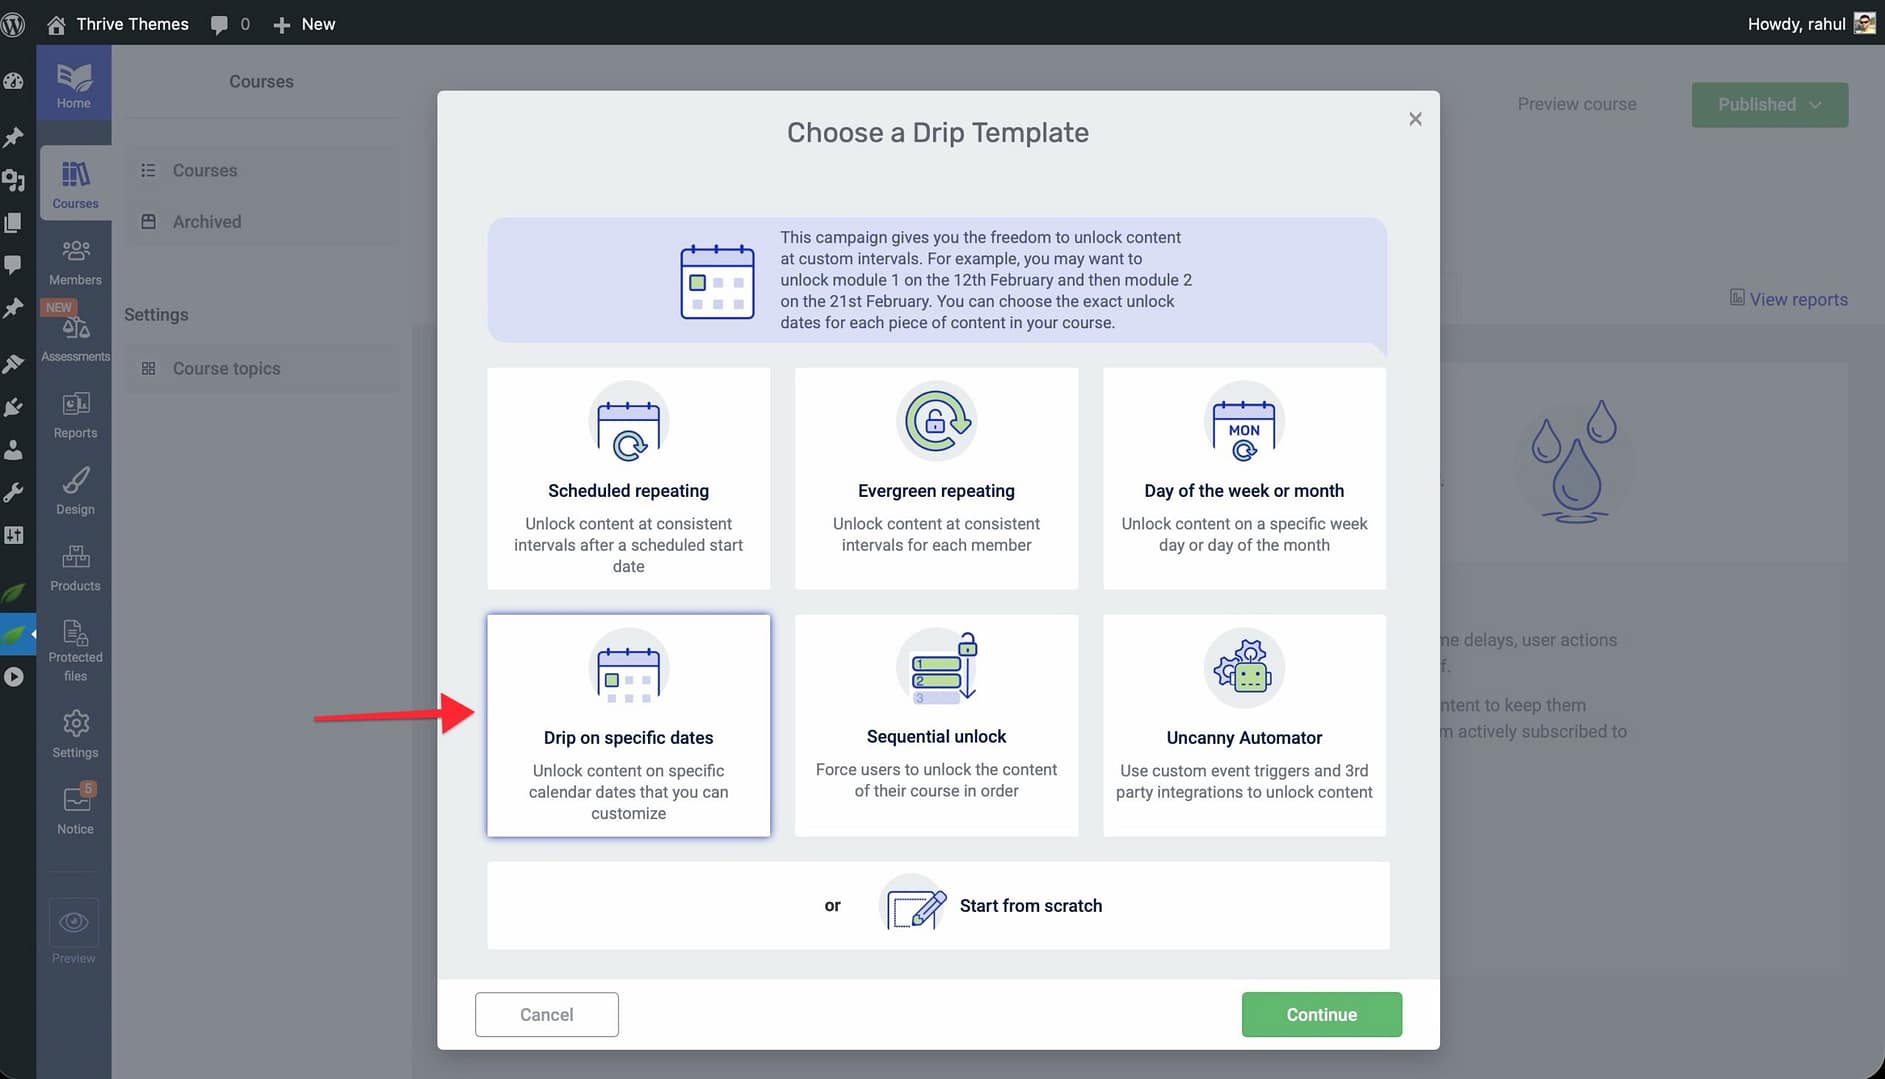
- Enter a Campaign Name.
- For each lesson or module in your course, assign a specific Unlock Date using the date picker.
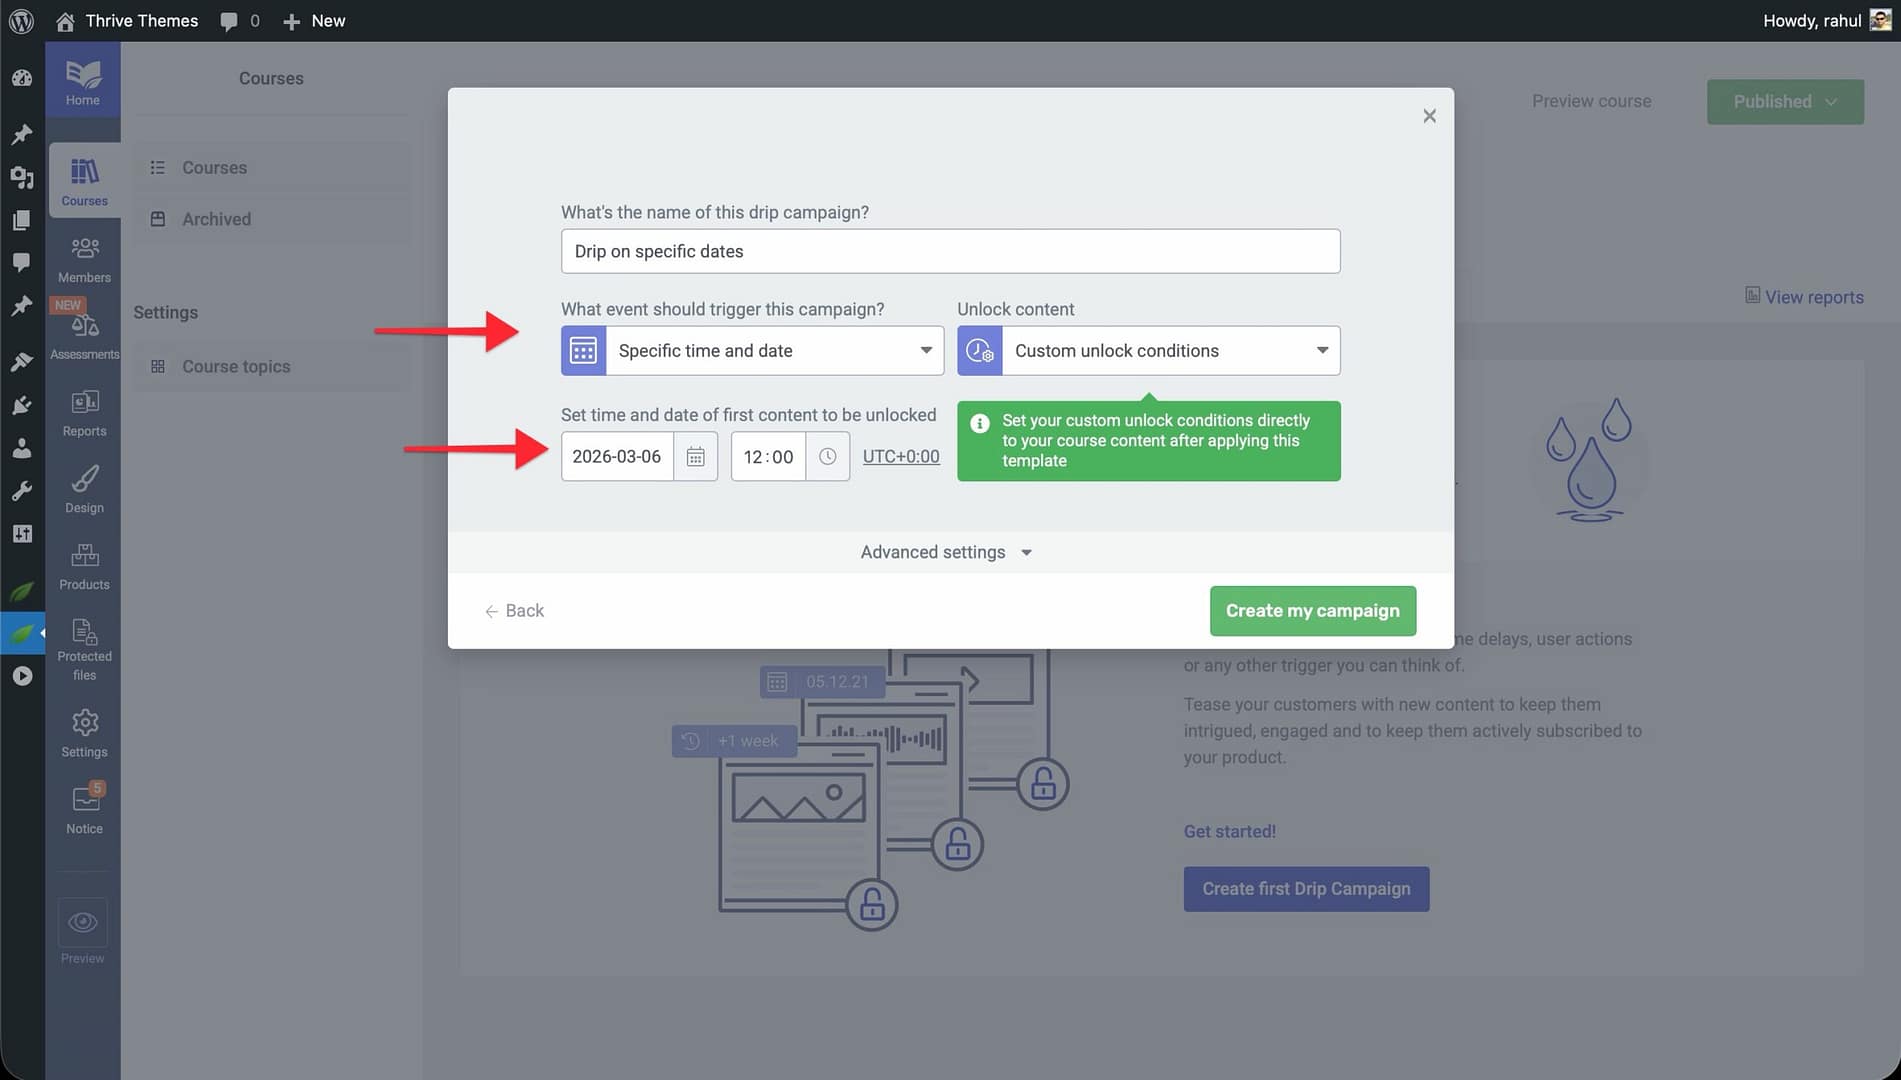
- Review the full timeline to confirm that all dates are correct and in the desired order.
- Click Save to apply the campaign.
Important: If you rearrange lessons in your course after setting dates, double-check that the unlock dates still make sense for the new order.
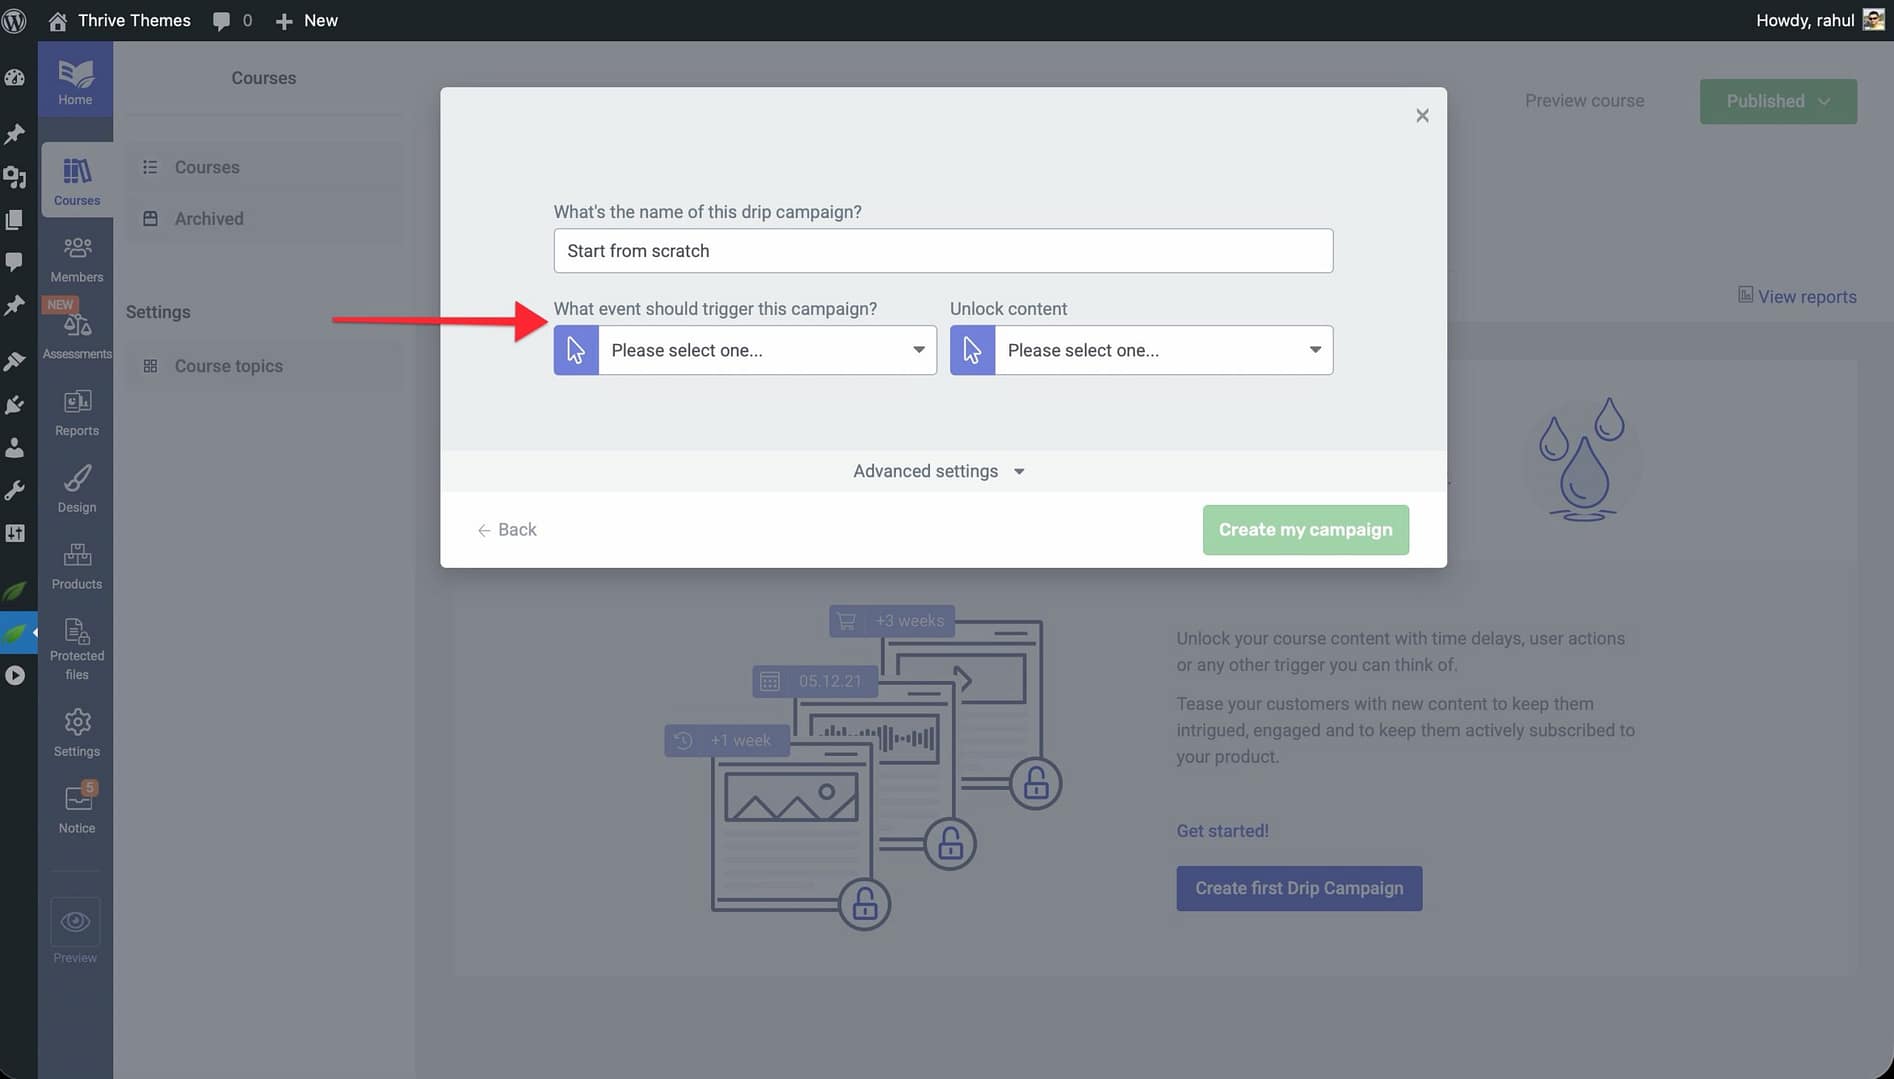
6. Start From Scratch
What it does: The Start From Scratch template provides a blank canvas with full control over every aspect of your drip campaign—trigger events, unlock intervals, and custom unlock conditions for each individual lesson. No predefined scheduling logic is applied.
When to use it: Choose this template when none of the pre-built templates match your needs and you want to build a completely custom drip schedule with unique timing for different lessons.
Setup Steps
- Navigate to Thrive Dashboard > Thrive Apprentice and open your course.
- Click the Drip tab and then click Create first Drip Campaign.
- Select the Start From Scratch template and click Continue.

- Enter a Campaign Name.
- Define the Trigger Event for the campaign—choose what initiates the drip timeline (e.g., product purchase, enrollment, or a custom automation event).
- For each lesson or module, configure individual unlock conditions: – Set a Time Delay (e.g., unlock 3 days after trigger). – Add a Completion Requirement (e.g., unlock after the student completes a specific previous lesson). – Assign a Custom Date if needed.
- Optionally, select Unlock content at custom intervals to set unique timing for each lesson rather than a uniform interval.
- Click Save to finalize your custom campaign.
Tip: The Start From Scratch template is also the best choice when you want to exclude specific lessons from the drip schedule entirely, making them immediately accessible. See Advanced Drip Techniques for more on excluding lessons.
7. Uncanny Automator Unlock
What it does: The Thrive Automator Unlock template locks your course content without setting built-in unlock rules. Instead, lessons are unlocked through external automation triggers configured in Uncanny Automator (which replaced Thrive Automator). This lets you integrate third-party services and custom events to control when content becomes available.
When to use it: Choose this template when you need to unlock content based on external events—such as completing a quiz in another plugin, making a payment through a third-party gateway, or reaching a milestone in your CRM.
Setup Steps
- Open your course and click the Drip tab.
- Click Create first Drip Campaign and select the Uncanny Automator Unlock template.
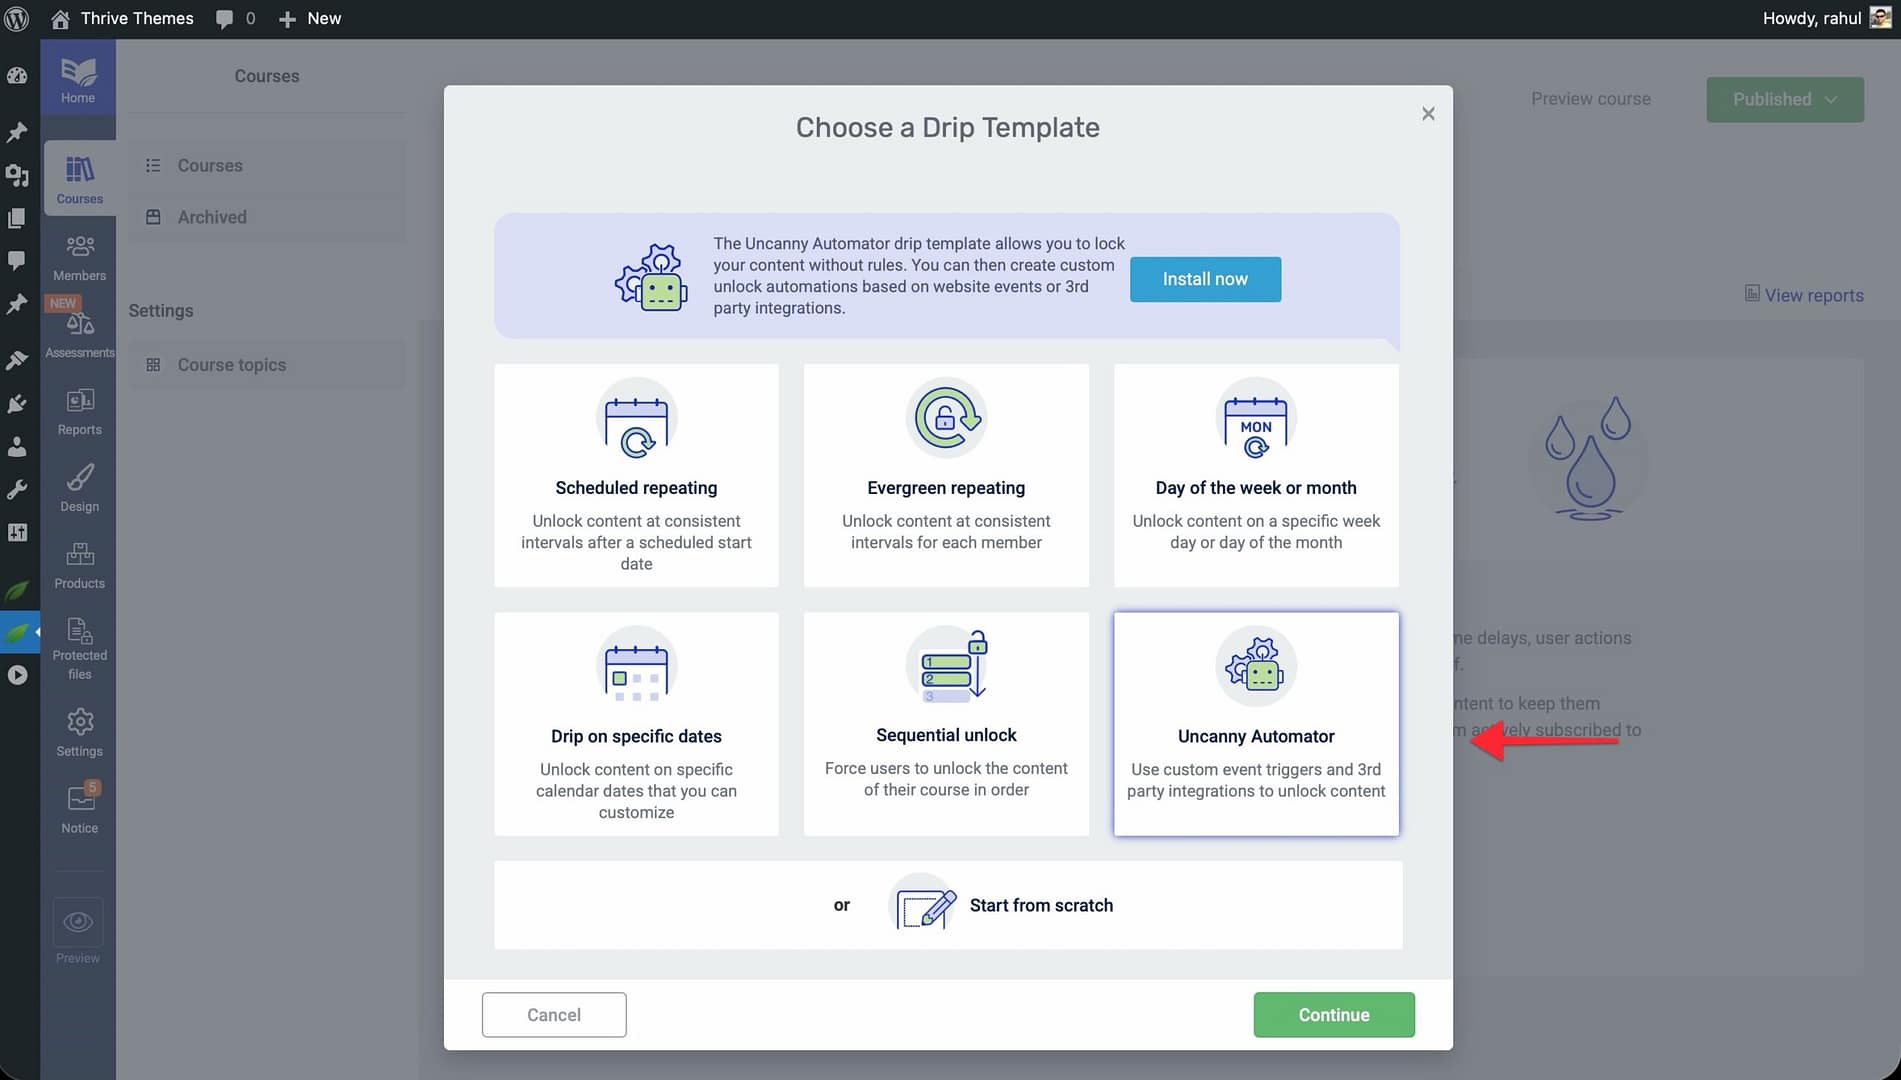
- Click Continue and enter a Campaign Name.
- The campaign will lock all course content by default—no built-in unlock rules are created.
- Click Save to apply the campaign to your course.
- Open Uncanny Automator from your WordPress dashboard.
- Create a new automation recipe with: – Trigger: The external event that should unlock content (e.g., a form submission, a purchase, or a tag being applied in your email platform). – Action: Select the Thrive Apprentice action to unlock the appropriate lesson or module.
- Activate the automation recipe.
That’s it! You’ve successfully reviewed all seven drip schedule templates in Thrive Apprentice. Choose the template that best matches your course delivery strategy, and refer to the setup steps above to configure it.
Related Resources
- Getting Started with Drip: Learn drip fundamentals in How to Get Started with Drip Content.
- Advanced Drip Techniques: Explore cohort-based classes, weekday-only dripping, decoupled schedules, and more in Advanced Drip Techniques.
- Access Restrictions and Rules: Control who can view your courses with the Access Restrictions and Rules guide.
- Uncanny Automator: Learn more about automation integrations at Uncanny Automator.
- Thrive Apprentice Knowledge Base: Browse the full Thrive Apprentice Knowledge Base for more tutorials.