If you’re using a “Lead Generation” element and you want to add a custom field, one of the options you have is to add a “Hidden” field.
First of all, you have to connect your “Lead Generation” element to your desired services. As an example for this article, I have connected my “Lead Generation” element to Mailchimp.
Make sure to check out this list and click on any of the services that we support, to see a tutorial on how you can establish an API connection.
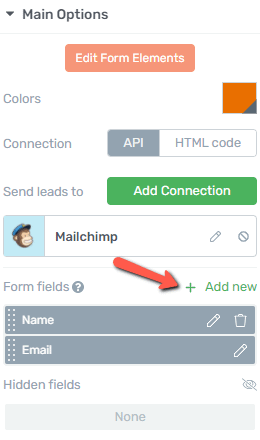
Then, after setting up a connection, you will have to add a new form field.
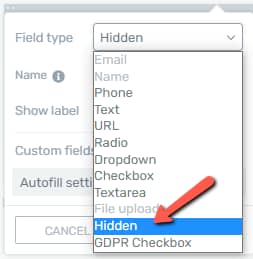
A pop-up will open. In the “Field Type” section, choose “Hidden”:
Then, you can change the name of the field, if you want, but this is optional:
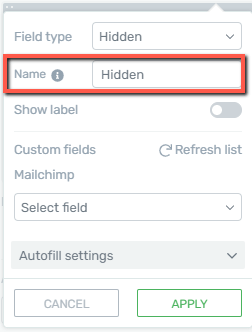
Providing a name here is just going to help you identify the “Hidden” fields if you have used multiple ones. Then, you will have to set if you want to show the label of the field or not:
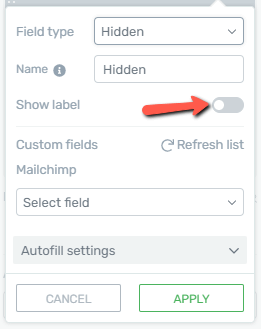
If you select this custom field type, you can add a hidden field to your element. This means that the respective field will not be displayed for the visitors of your website, but it can still contain and transfer information to your MailChimp account.
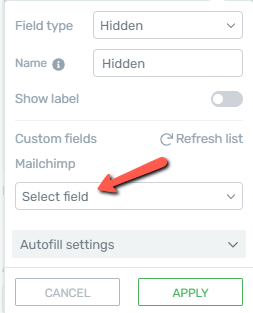
In order to achieve this, use the “Select field” drop-down to choose the corresponding MailChimp field:
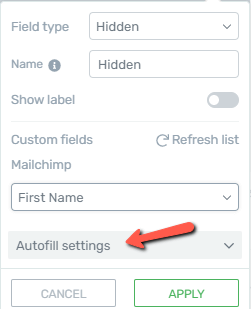
Once this is done, you will have to use the “Autofill Settings” to set up what information should this hidden field be automatically completed with. First, open the “Autofill Settings” by clicking on this section:
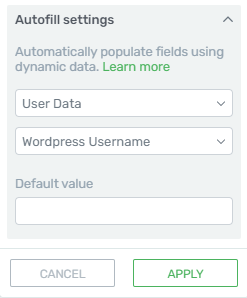
Then, from the section that opens, set up the “Autofill” options and choose what information should automatically be completed. Here is an example:
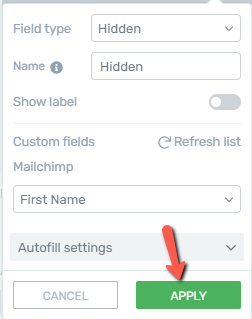
If you need detailed step-by-step information about how to use the “Smart Complete” feature, please read this article. After you have set up everything related to the custom “Hidden” field, click on “Apply” to add the field to the element:
Edit and Remove Hidden Fields
If you ever want to come back and edit this field, you can do that, from the “Hidden Fields” section of the “Lead Generation” options:
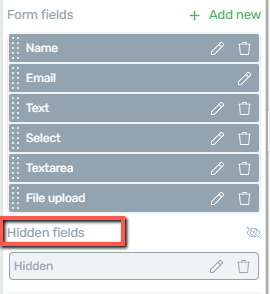
Clicking on the pencil icon next to the field will open the pop-up again, that you have previously used to set up the field, and you can make the modifications that you want:

In order to remove this field, all you have to do is click on the trash can icon, and the field will be deleted:

This is how you can add and customize the “Hidden” field type to your “Lead Generation” element.
As always, feel free to use all of the other general options for even more in-depth customization of this field. For all of the other options, you will be able to find articles in our knowledge base.
Make sure you also check out this article, to see what other types of custom fields can be added to this element.
Hopefully, this article was useful for you. If that’s the case, don’t forget to rate it with a smile below 🙂