Do you want to customize the unlock conditions for each content piece in your drip schedule? This can be helpful when you want to unlock content based on a custom condition apart from the selected drip schedule.
In this article, we’ll show you how you can set up unlock conditions for content within a drip scheduled course in Thrive Apprentice.
- Applying a Custom Unlock Condition to a Content
- Applying Multiple Unlock Conditions to a Content
- Frequently Asked Questions About Unlock Conditions
Applying a Custom Unlock Condition to a Content
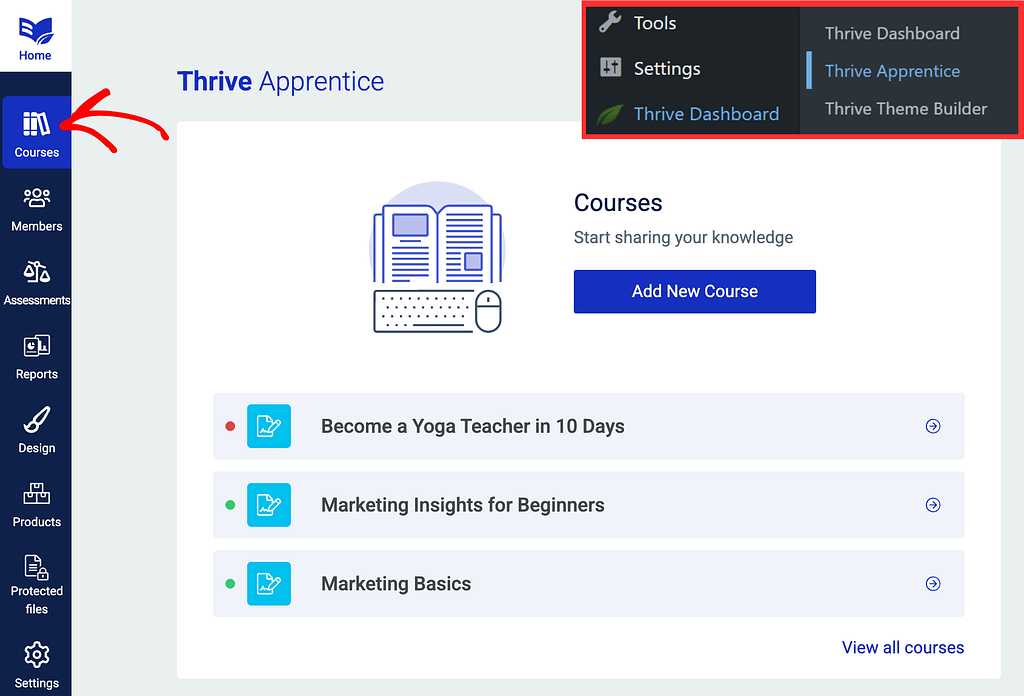
To edit or set up an unlock condition for a course content, start by opening the course that contains the content. To do so, open your WordPress admin area, navigate to Thrive Dashboard >> Thrive Apprentice, and click on Courses in the left panel.
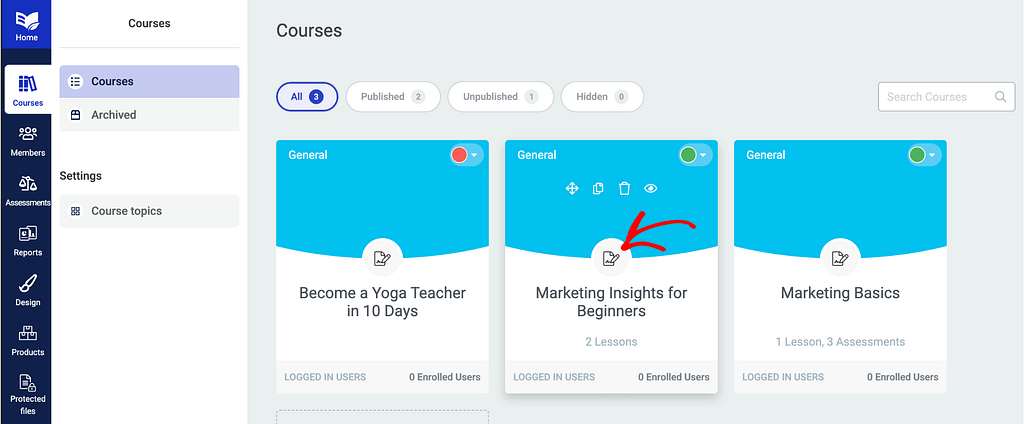
On the Courses page, select the course that you’ve applied the drip schedule to.
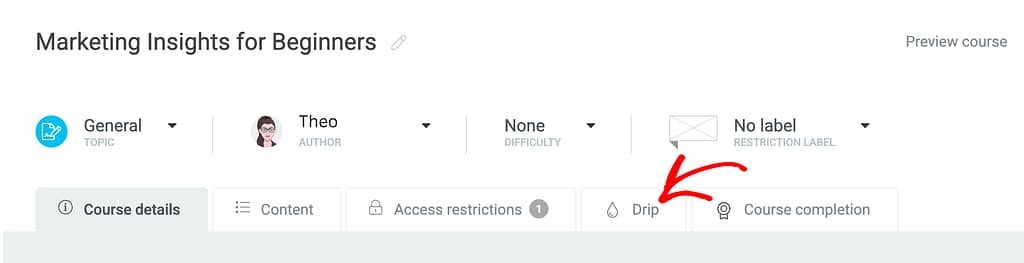
On the course page, click to open the Drip tab.
Under the Drip tab, you’ll see the applied drip schedule. To view the lessons and content bounded by the drip schedule in the course, click on the drip block you see.
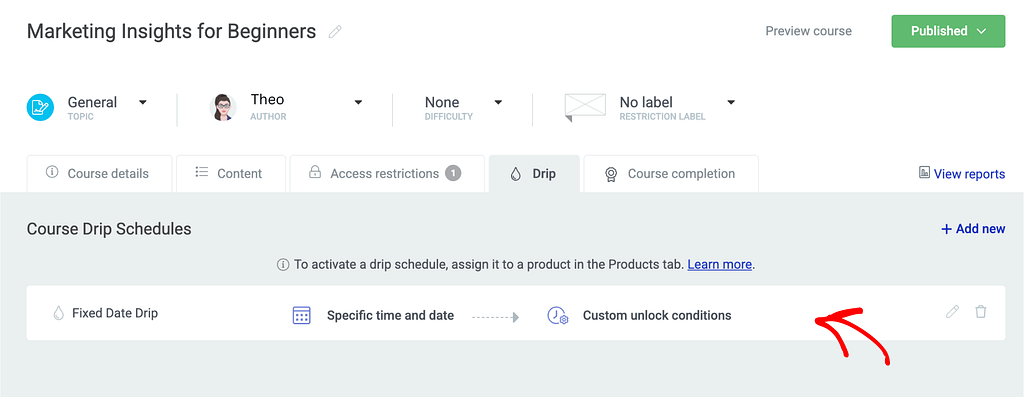
When you click the Drip schedule, you’ll see the list of lessons or content that the course contains.
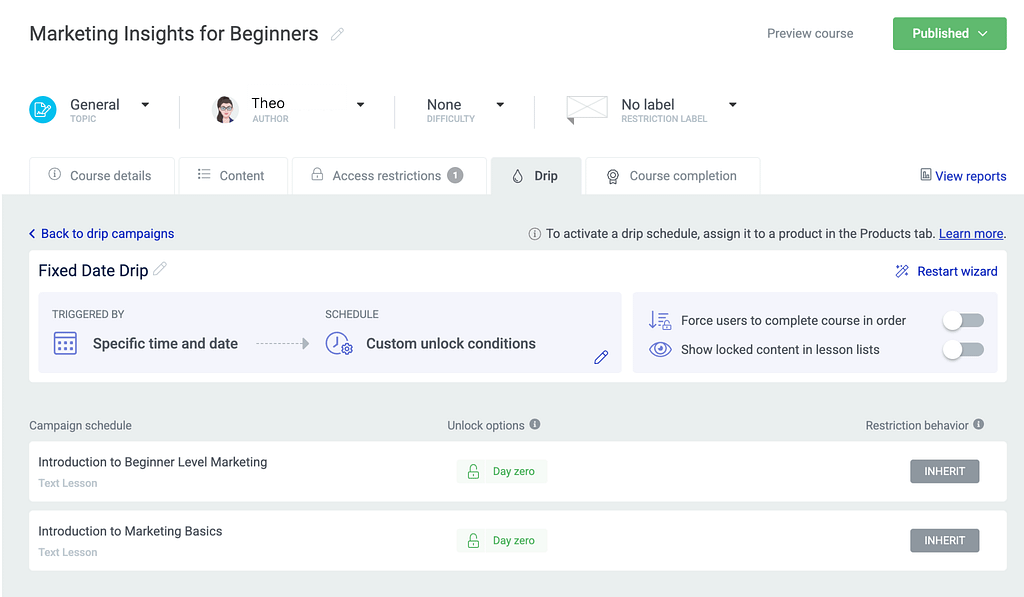
To edit or set up an unlock condition for a lesson, start by clicking the current unlock condition that you see beside the lesson.

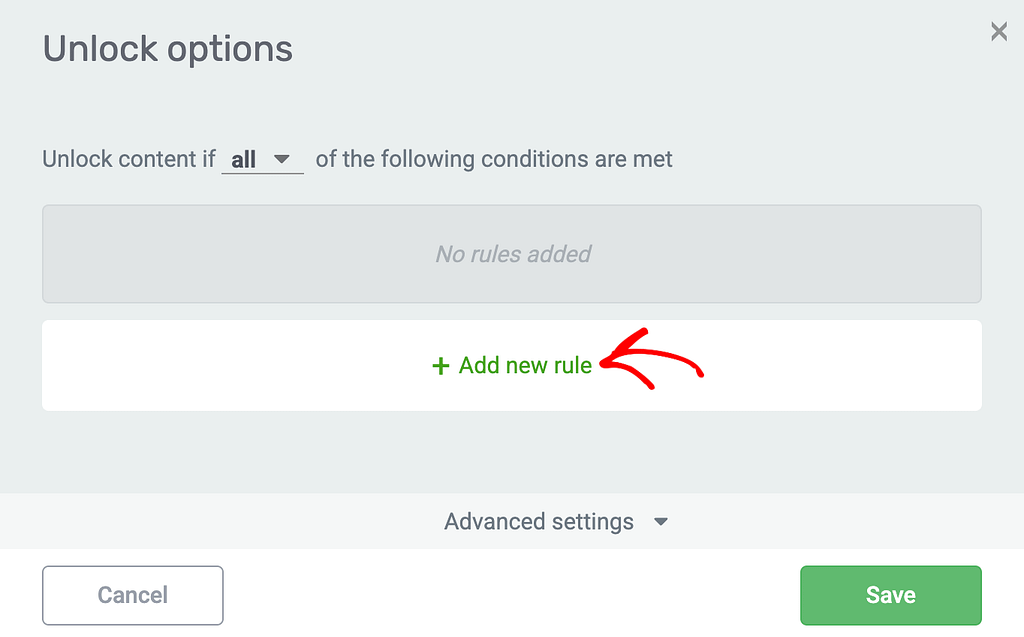
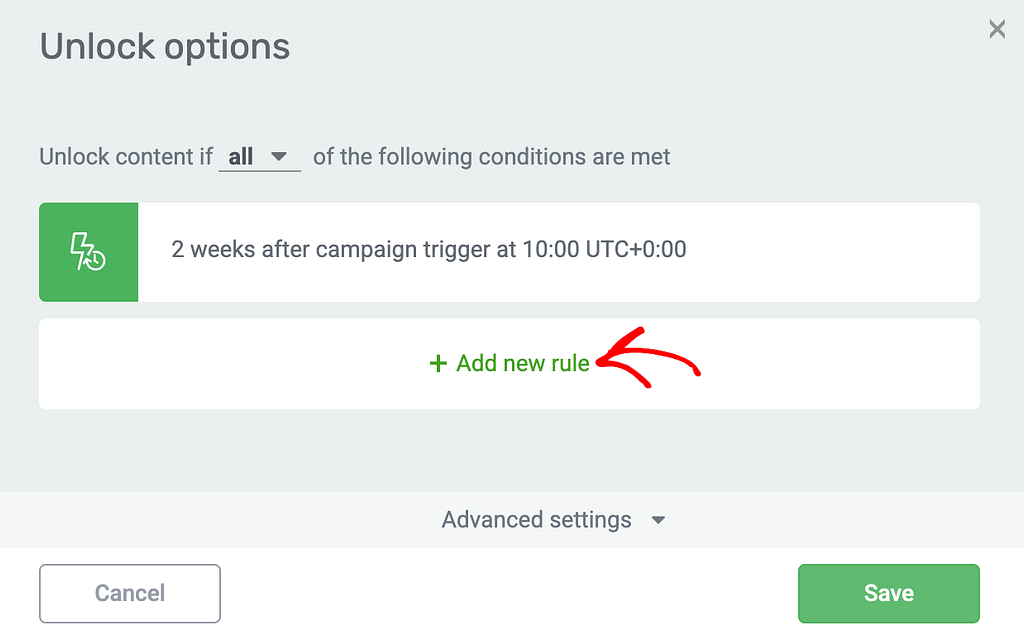
Clicking the unlock condition will open a popup where you click Add new rule to add an unlock condition you want.
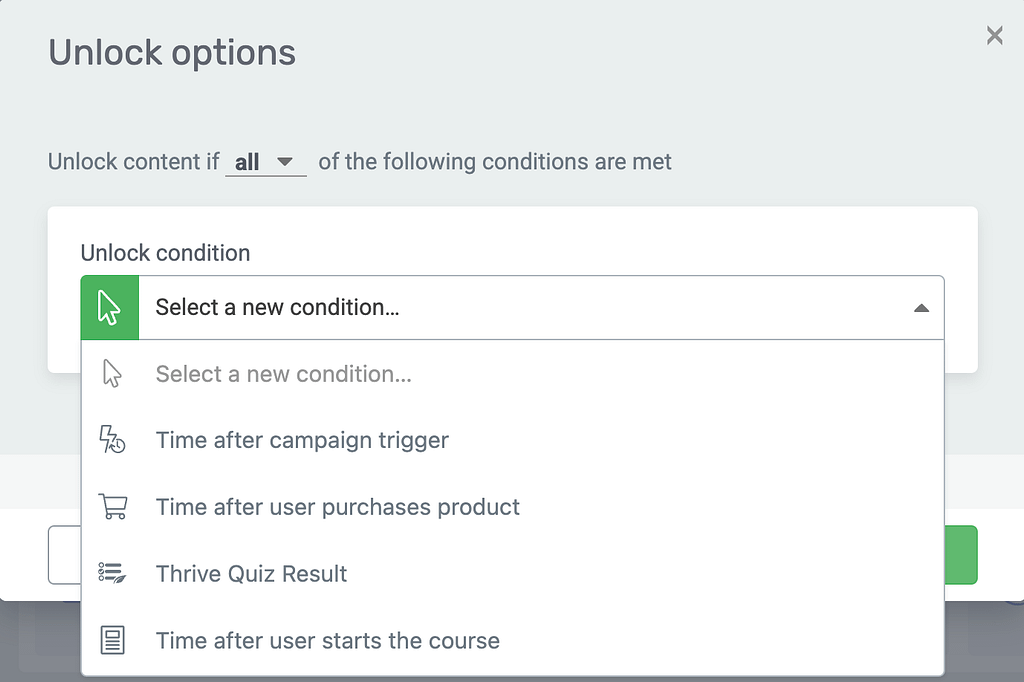
Once you click Add new rule, select the unlock condition you want to use from the dropdown that appears.
The options you see in this dropdown are as listed below.
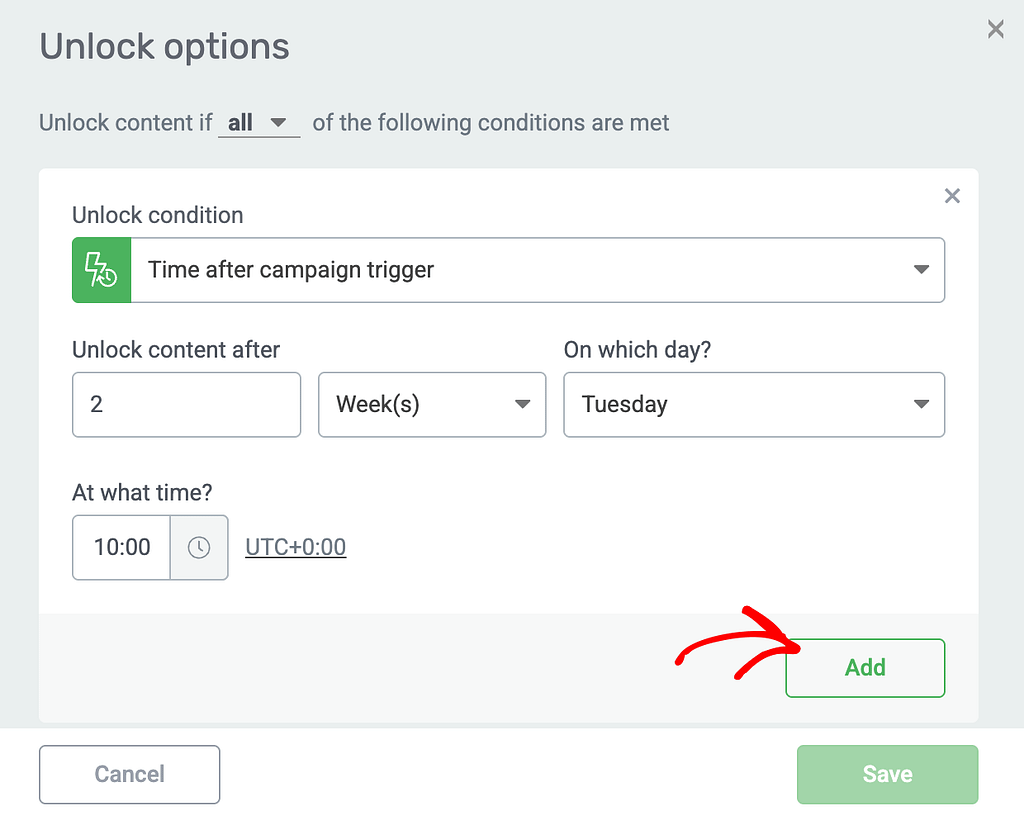
- Time after campaign trigger: With this you can set to unlock the content after a specified number of hours, days, weeks or months after the drip campaign has been triggered. You can also select the specific day of the week and time when you want to unlock it after the set period.
- Time after user purchases product: With this you can set to unlock the content after a specified number of hours, days, weeks or months after a user has purchased the product. You can also select the specific day of the week and time when you want to unlock it after the set period.
- Thrive Quiz result: With this you can set to unlock the content after a user completes a quiz that you select in the following field.
- Time after the user starts the course: With this you can set to unlock the content after a specified number of hours, days, weeks or months after the user has started the course. You can also select the specific day of the week and time when you want to unlock it after the set period.
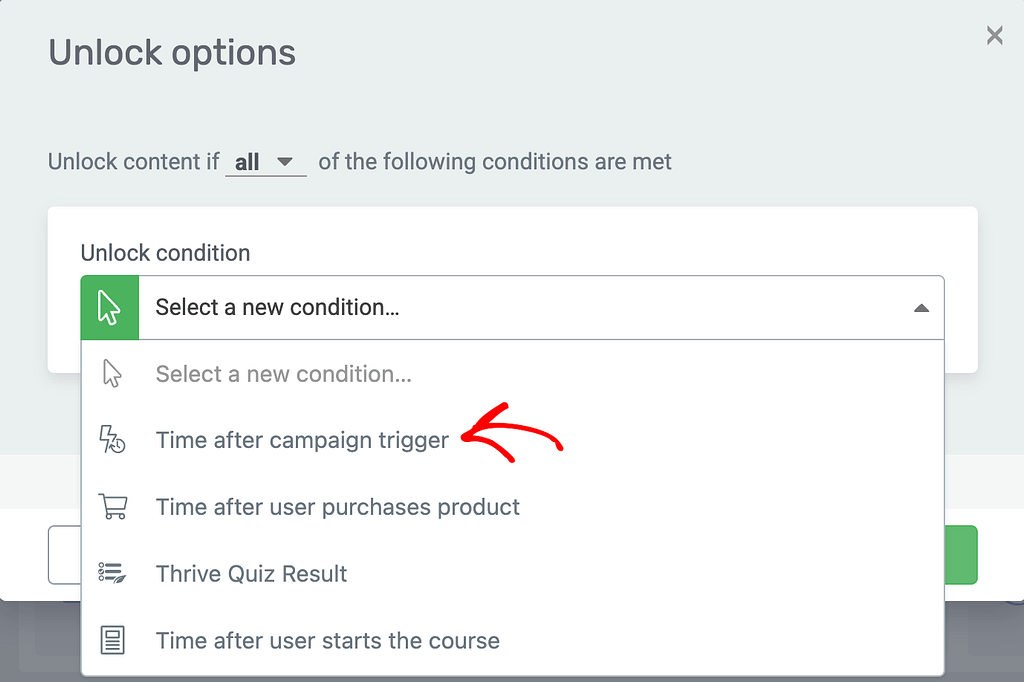
In this article, we’ll select Time after the campaign trigger. To select an unlock condition, click on it in the dropdown options.
After selecting the unlock condition, select the values within to determine the exact time after which you want the lesson to be unlocked. You can also select the day of the week and the time for the unlock.
Once you do this, click the Add button.
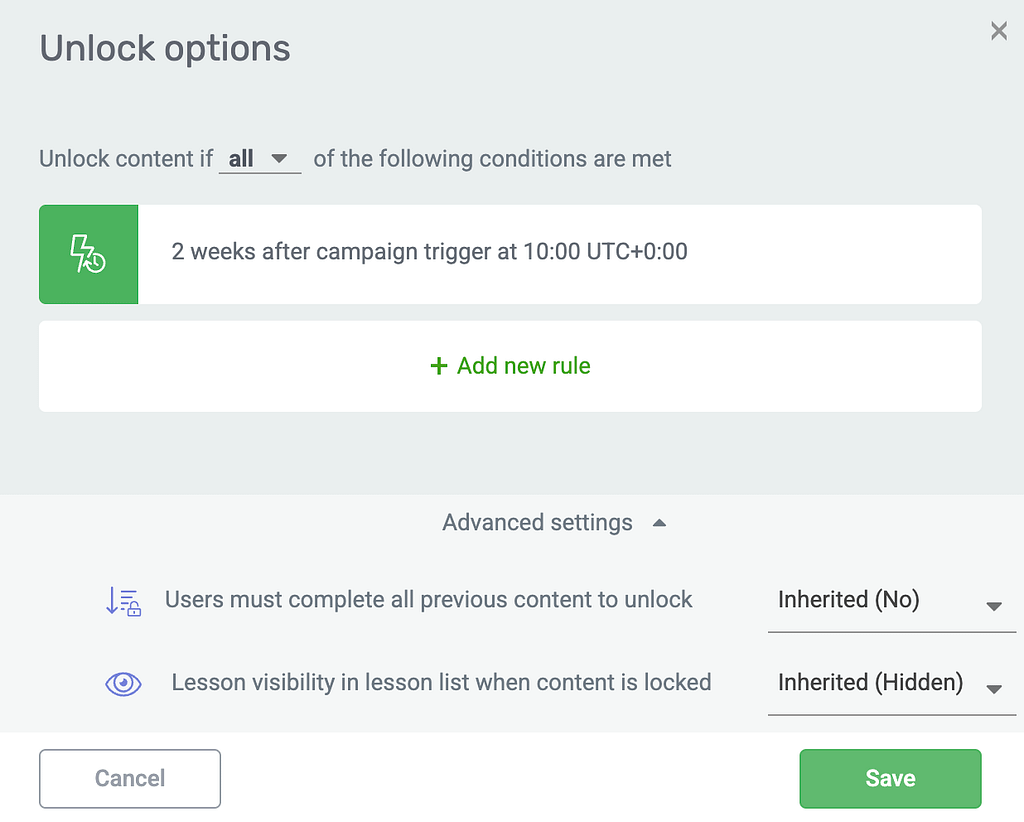
Once you add this unlock rule, you can choose to manage the advanced settings for the rule by clicking Advanced settings.
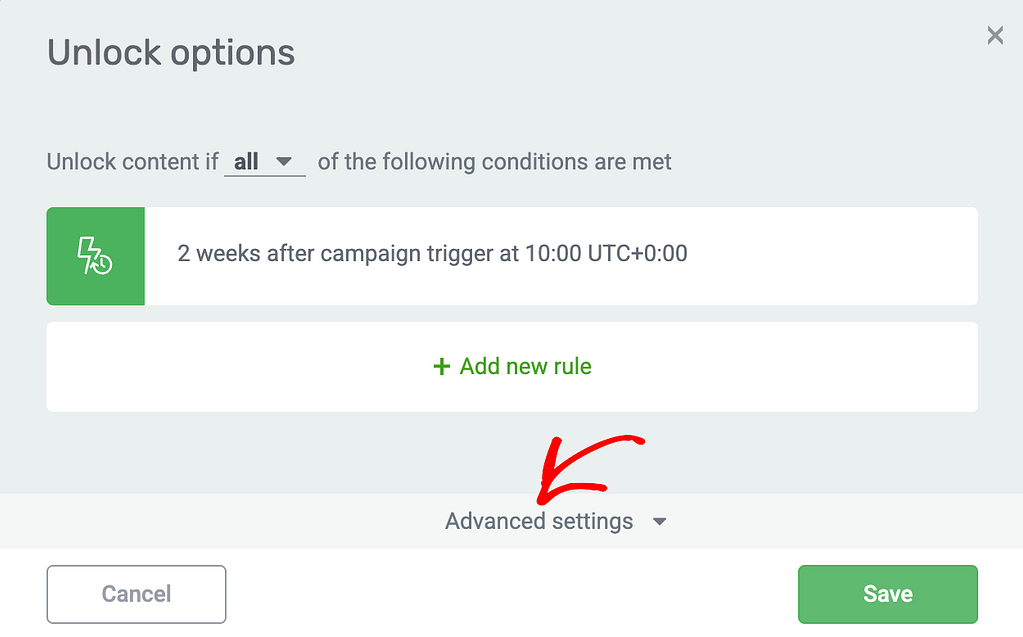
When you click to open Advanced settings, you’ll see the following options that inherit the settings from the Drip schedule. These can be changed for individual lessons or content within this popup.
After you set the unlock options, click the Save button to apply this unlock condition to the selected lesson.
Applying Multiple Unlock Conditions to a Content
Need to club multiple unlock conditions or unlock the same content on different instances? You can do this too.
When you click to edit the Unlock condition for a lesson, you’ll see a sentence that says Unlock content if any/all of the following conditions are met.
- When you select any and set multiple unlock conditions, the lesson or the content will be unlocked even if one of the selected conditions is met.
- When you select all and set multiple unlock conditions, the lesson or the content will be unlocked only when all the set conditions are met.
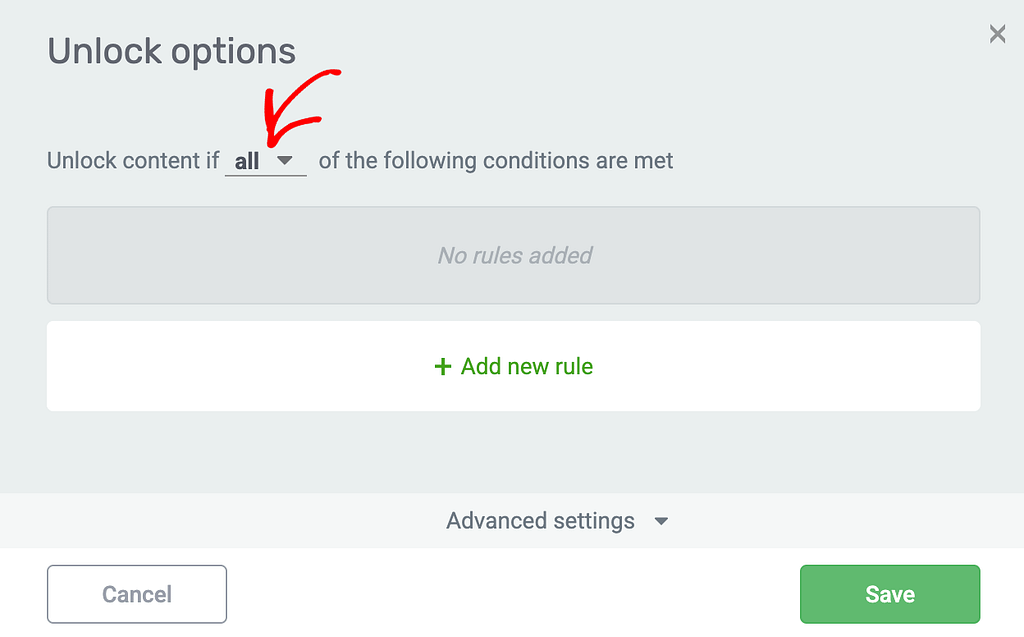
In this example, we’ll add multiple conditions and prefer to unlock the lesson when all of them are met. To proceed, I select all in the dropdown and click the +Add new rule button to add an unlock condition following the steps here.
When you click the Add new rule button, you can select another condition and set it up just like the first one.
After you finish adding as many conditions as you want, click Save.
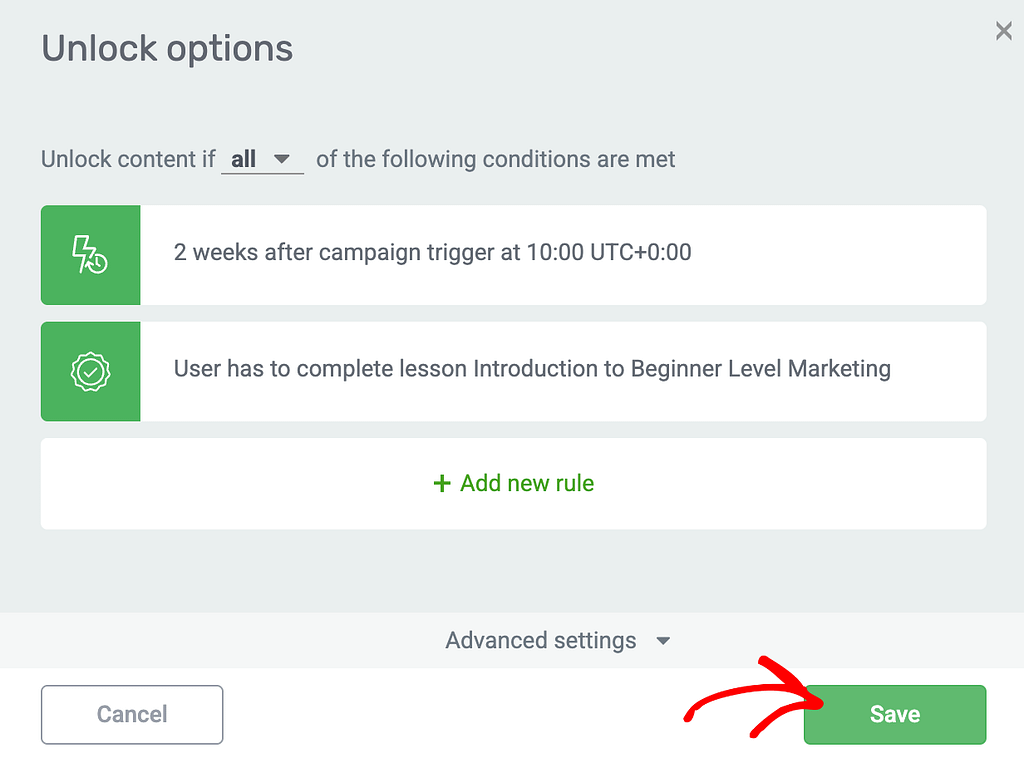
This will ensure the selected lesson is unlocked only when all the set conditions are met.
Frequently Asked Questions About Unlock Conditions
Here are a couple of questions that you may have about the Content or Lesson Unlock Conditions in Thrive Apprentice.
What are the Unlock Conditions?
Unlock conditions are those that allow you to set conditions which when fulfilled will unlock the selected content or lesson for the user. These are applicable when the content or lesson is part of a drip schedule set on your website.
Can I change the unlock conditions after the campaign has started?
Yes, you can change the unlock conditions and the entire drip schedule while having students already taking the course.
However, the change you make to the schedule will be applied immediately to the course, and will therefore affect any students who are currently enrolled.
If the new schedule is more restrictive than the original one, this could potentially result in them losing access to lessons, including lessons they have already completed.
This is where you can help such students by unlocking lessons manually for them.
We’ve just seen what are unlock conditions and how you can set up single and multiple conditions for a lesson within a course.
Next, you can exclude lessons from a drip campaign applied to a specific course on your website. Read our article here to learn how.