Do you want to create a sense of urgency while displaying a limited time offer on your website? Countdown timers can be the best fit for it.
With Thrive Architect, you can use the Countdown and the Countdown Evergreen for this purpose.
In this article, we’ll show you how you can use the Countdown and the Countdown Evergreen element, the difference between them, and ways to customize them on your page.
- Difference Between a Countdown and Countdown Evergreen Element
- Adding a Countdown Element on Page
- Adding a Countdown Evergreen Element on Page
- Main Options of the Countdown Element
- Main Options of the Countdown Evergreen Element
- Other Settings of the Countdown Elements
Difference Between a Countdown and Countdown Evergreen Element
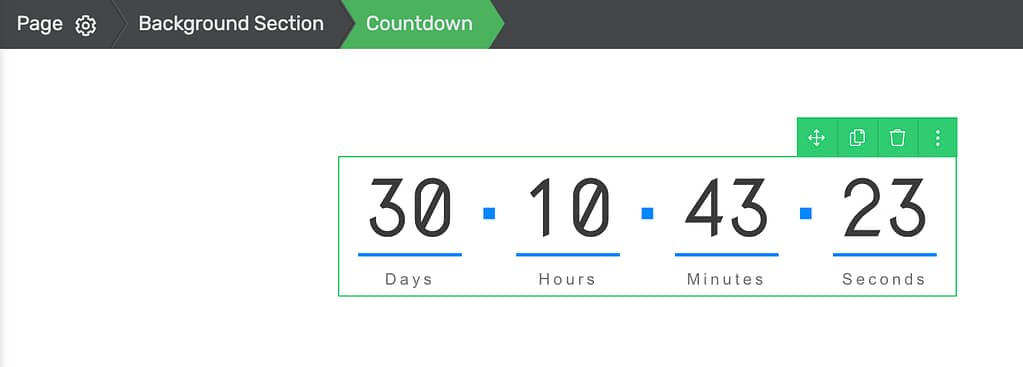
A Countdown element is used to display a standard countdown timer, while a Countdown Evergreen element can be used to display an evergreen countdown timer on page.
A standard countdown timer runs until a set date and time, then stops when it hits zero. An evergreen countdown timer, however, starts fresh for each visitor – making every user feel like they’re getting a limited-time offer, every time.
Adding a Countdown Element on Page
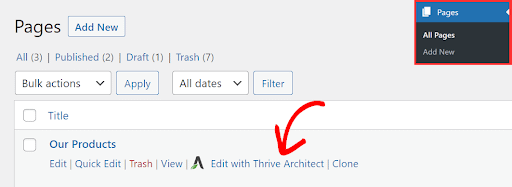
To add the Countdown element to a page, begin by opening the page in the Thrive Architect editor. To do so, open your WordPress admin area, Pages >> All Pages, hover on the page you want to edit and click Edit with Thrive Architect.
When the page is opened in the Thrive Architect editor, go to the right panel and click the plus (+) icon.
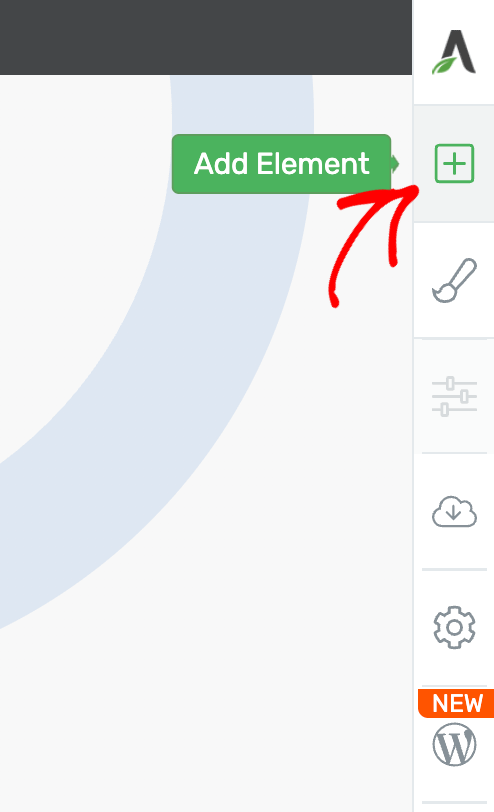
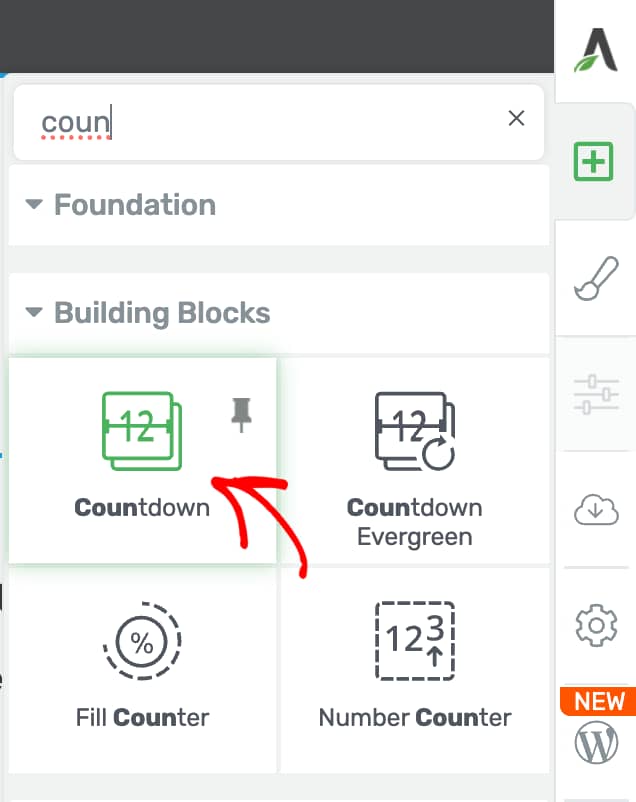
Clicking on the plus icon will open up the list of Thrive Architect elements to choose from. From this list, drag and drop the Countdown element on the page.
Once you drag and drop the element in your desired location you’ll see a popup where you select the Countdown template you want to use.
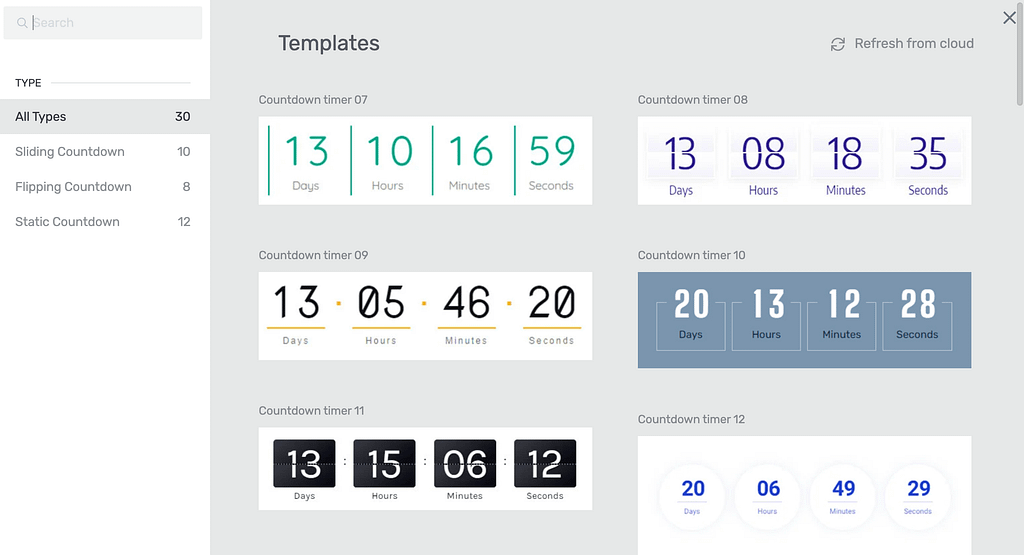
On the popup, click on the template you want to use and see it added to the page.
Once on the page, you can click on the element and see the main options and other settings in the left column. We learn about these further on in this document.
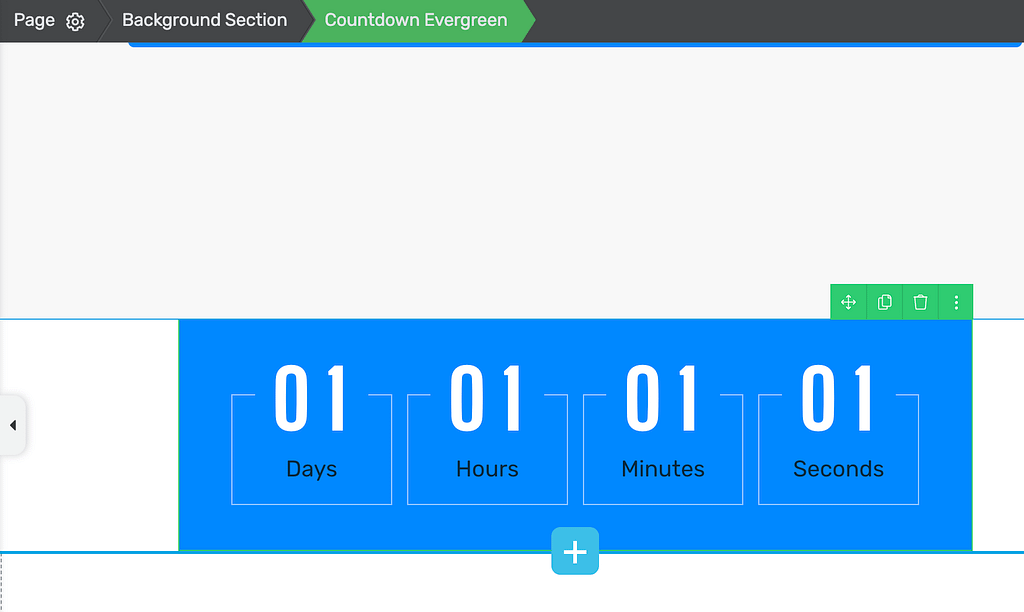
Adding a Countdown Evergreen Element on Page
To add the Countdown Evergreen element to a page, begin by opening the page in the Thrive Architect editor. To do so, open your WordPress admin area, Pages >> All Pages, hover on the page you want to edit and click Edit with Thrive Architect.
When the page is opened in the Thrive Architect editor, go to the right panel and click the plus (+) icon.
Clicking on the plus icon will open up the list of Thrive Architect elements to choose from. From this list, drag and drop the Countdown Evergreen element on the page.
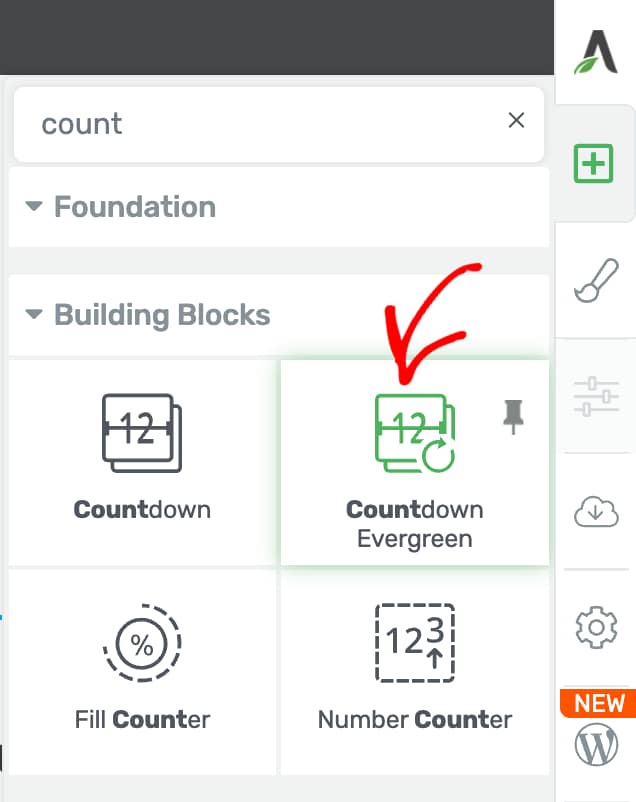
Once you drag and drop the element in your desired location you’ll see a popup where you select the Countdown timer template you want to use.
On the popup, click on the template you want to use and see it added to the page.
Once on the page, you can click on the element and see the main options and other settings in the left column. We learn about these further on in this document.
Main Options of the Countdown Element
Just like the other Thrive Architect elements, when you click on a Countdown element you will see the Main Options open in the left column.
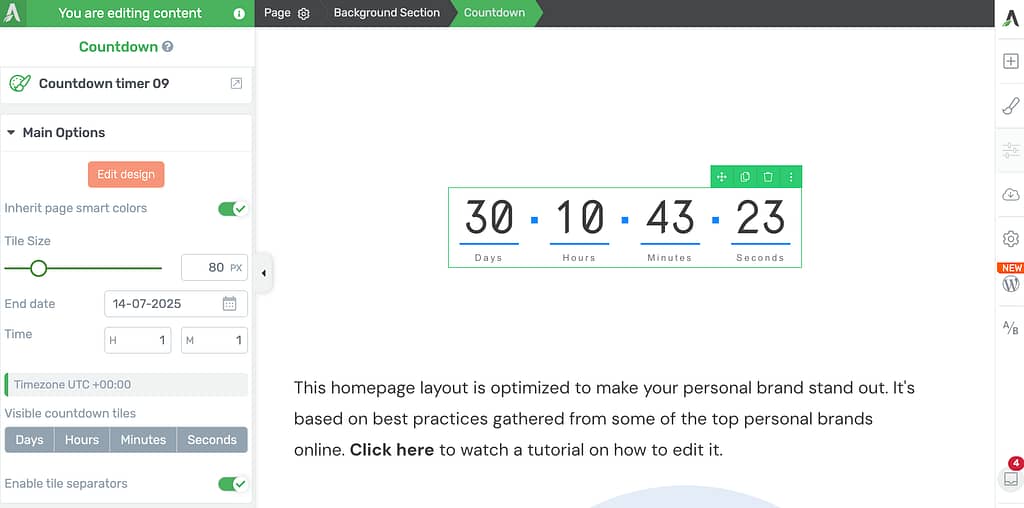
The Countdown element’s Main Options let you do the following.
- Edit the Design of the Countdown element
- Inherit Page Smart Colors
- Set the Tile Size
- Select an End Date and Time
- Visible Countdown Tiles
- Enable Tile Separators
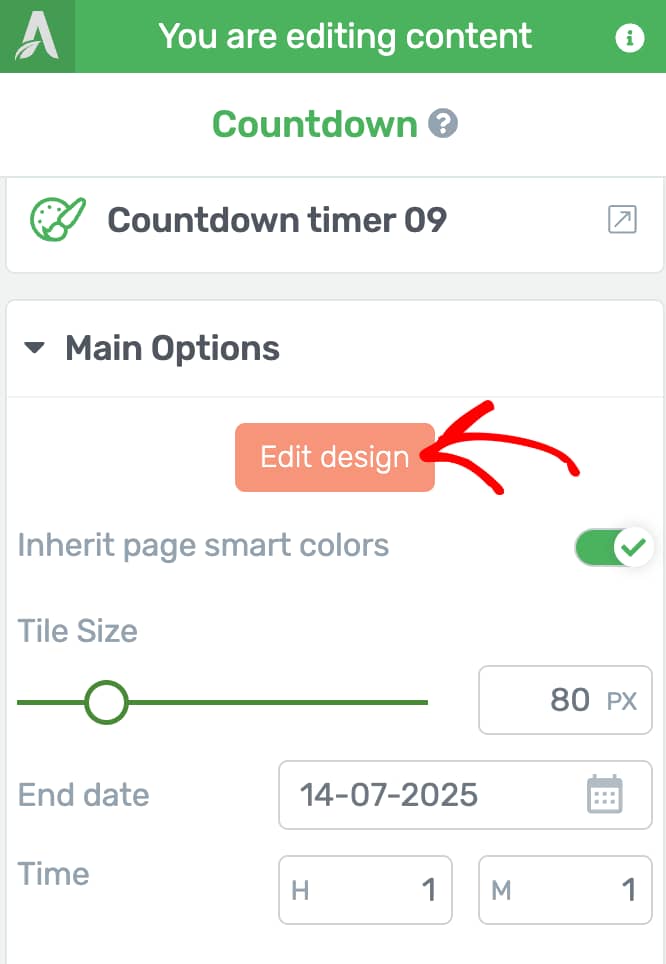
Edit the Design of the Countdown element
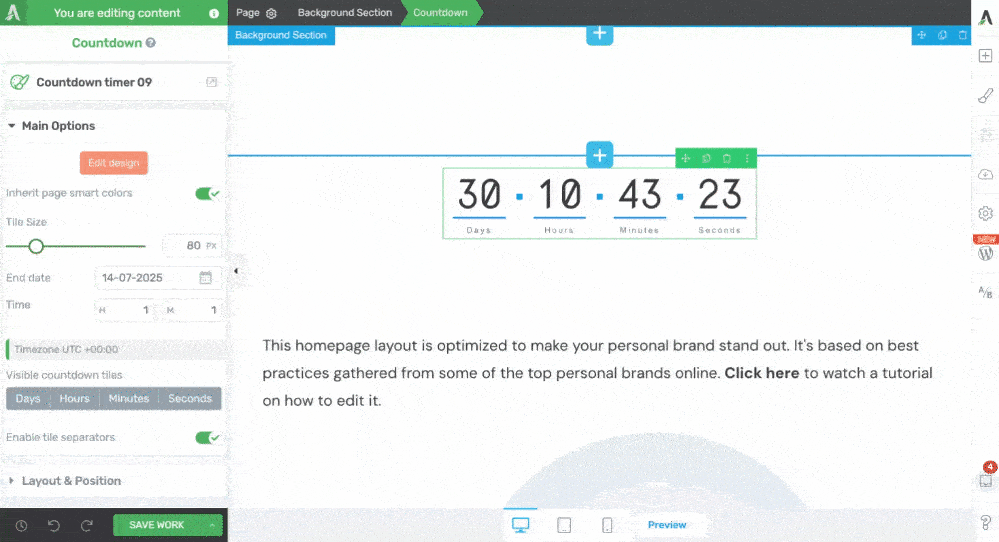
To edit the design of the Countdown element added on the page, click the Edit design button in the Main Options.
When you click the Edit design button, the Countdown element will be opened in the Edit Mode. In the Edit Mode, click on the elements in the countdown and edit it using the settings in the left column.
This can be done in two different states.
Active State of the Countdown Element
When in the Edit Mode, you can select the state you want to edit. To select the state you want to edit, click on the selected state in the floating panel.
As the name suggests the Active state of a Countdown element is the state users see when the countdown is active.

After selecting the Countdown element state, click on the elements within the Countdown element and use the settings in the left column.
Expired State of the Countdown Element
When in the Edit Mode, you can select the state you want to edit. To select the state you want to edit, click on the selected state in the floating panel.
As the name suggests the Expired state of a Countdown element is the state users see when the countdown has expired.
After selecting the Countdown element state as Expired, click on the elements within the Countdown element and use the settings in the left column.
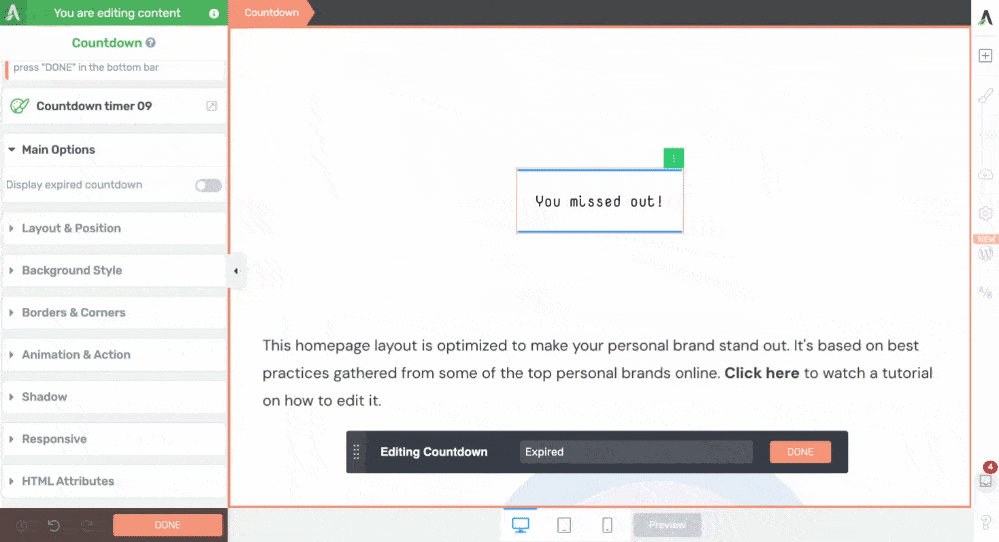
Once you finish editing both the states, click Done in the floating panel.
Inherit Page Smart Colors
The Countdown element template you select inherits the colors you’ve already used on the page.
If you want to change the color and set your own, disable the toggle button beside Inherit Page Smart Colors, click on the color box that appears and use the color picker to set the color you want.
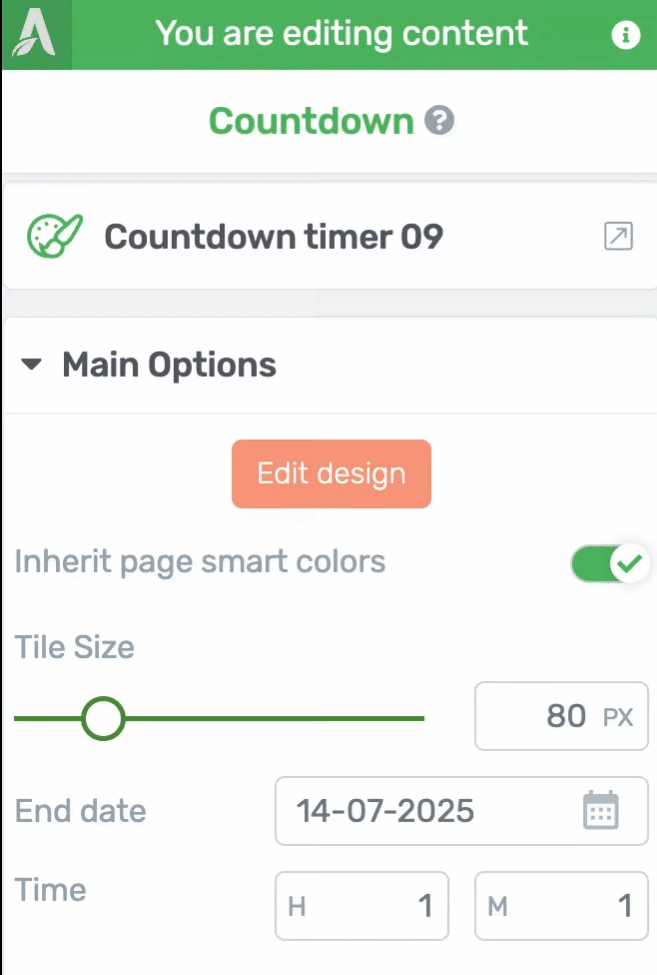
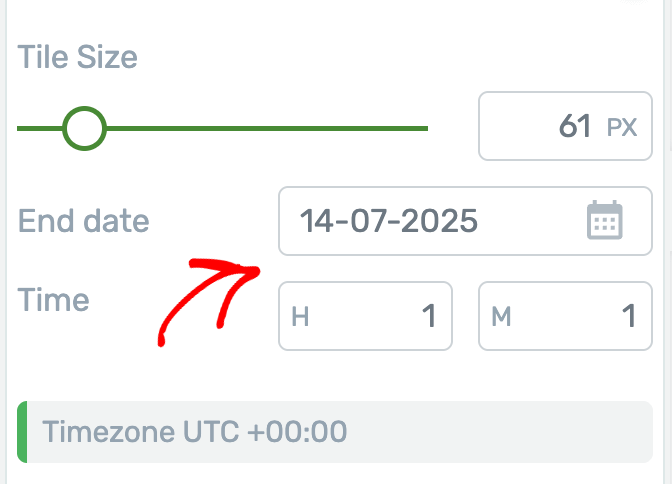
Set the Tile Size
The Tile size slider lets you manage the size of the tiles within the countdown element.
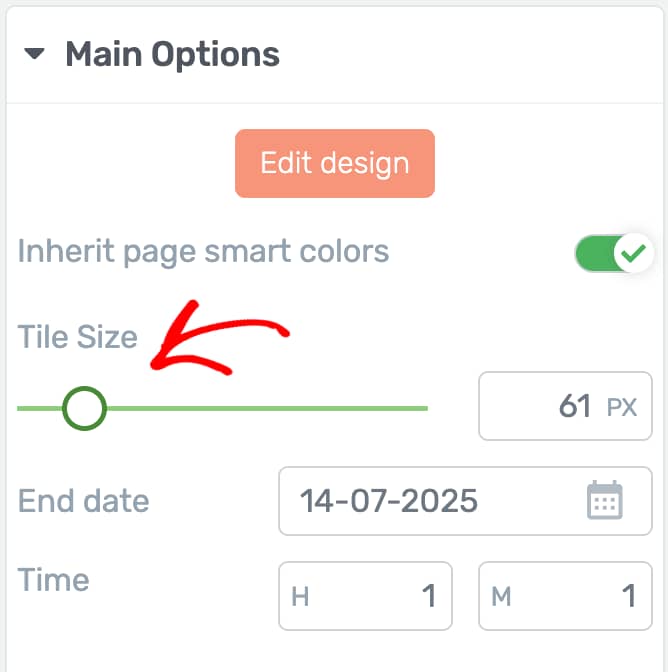
Select an End Date and Time
The End date and time of a Countdown element is when you want the countdown timer to end.
To add this information, select an end date using the calendar field and enter the time in the hours and minutes below.
Note: The timezone is mentioned below this section.
Visible Countdown Tiles
This setting lets you decide the times you want to show up in the Countdown element.
To add or remove a tile from the countdown, select or deselect it from the options given below.

Enable Tile Separators
This setting lets you decide whether you want to add tile separators within the Countdown element.
To add or remove the tile separators, enable or disable the toggle button beside the option.

Main Options of the Countdown Evergreen Element
Just like the Countdown element, the Countdown Evergreen element also comes with a number of Main Options that you can manage in the left column.
To access the Main Options, click on the Countdown Evergreen element and see the settings open on the left.
Again, since the Countdown and the Countdown Evergreen elements are similar, they have similar settings under the Main Options.
The ones you see for the Countdown Evergreen element are as listed below.
- Edit the Design of the Countdown Evergreen Element
- Inherit Page Smart Colors
- Set the Tile Size
- Select the Time
- Starts Again After
- Visible Countdown Tiles
- Enable Tile Separators
Edit the Design of the Countdown Evergreen element
Just like the Edit Design option for the Countdown element, the Edit Design option for a Countdown Evergreen element also opens up the Edit Mode in which you can edit the Active and the Expired state of the element.
Since they work the same, we’d recommend you to refer to this section here.
Inherit Page Smart Colors
Like the Countdown element, you can choose to inherit the colors of the page in the timer too. This can be done using the toggle button beside this option.
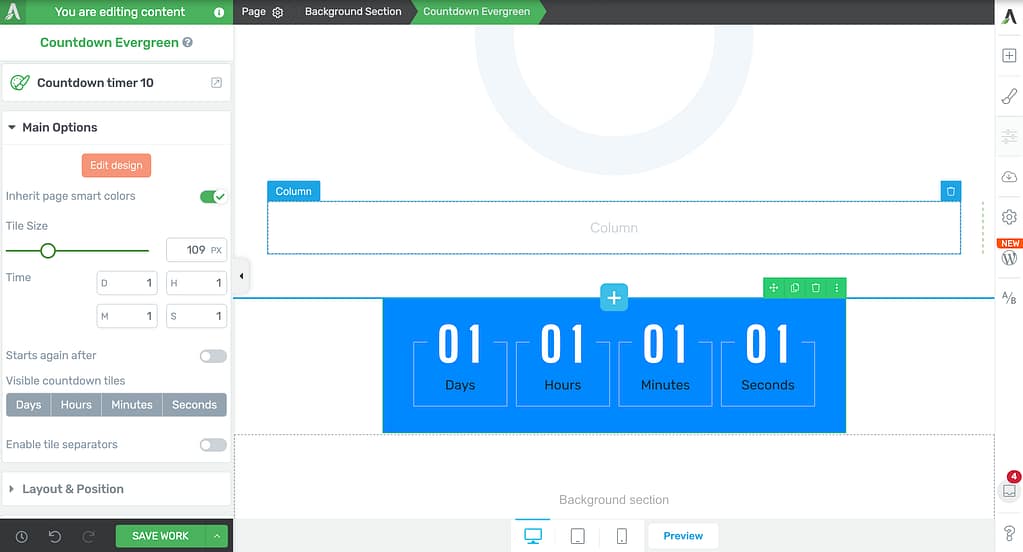
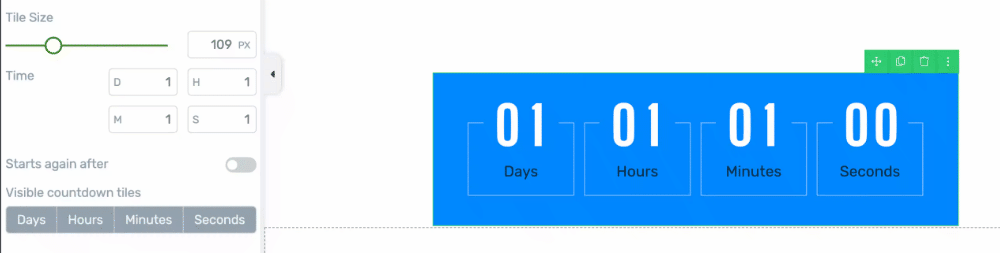
Set the Tile Size
Again, since both the Countdown and the Countdown Evergreen element have tiles, this setting works the same – letting you manage the size of the tiles within the element.
Select the Time in a Countdown Evergreen Element
The time field in a Countdown Evergreen element determines the time a user will see when he first arrives on the page.
To add the timer, enter numbers in the given fields like Days, Hours, Minutes and Seconds.
Starts Again After
An evergreen timer starts fresh for each visitor – making every user feel like they’re getting a limited-time offer, every time.
This setting lets you decide whether you want to start the timer again after it has ended for a visitor.
If you don’t want it to start, leave the toggle button disabled. But, if you want the timer to restart, enable the toggle button and then enter the number of days and hours that you want the timer to start from.
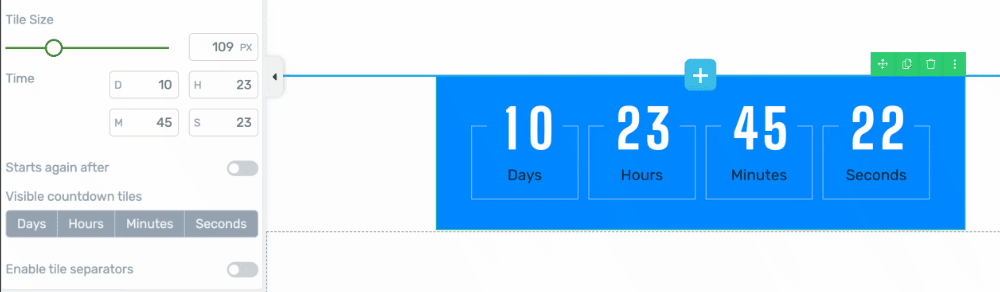
Visible Countdown Tiles
Just like the Countdown element, here too you can select the tiles you want to show up in a Countdown Evergreen element. You can read more about it here.
Enable Tile Separators
Again, just like you can enable tile separators in a Countdown element, you can do that for a Countdown Evergreen element too.
Other Settings of the Countdown Elements
Just like the other Thrive Architect elements, the Countdown elements come with additional options where you can manage the layout and positioning, borders and corners, background styling, shadows, etc. of them.
To learn more about these options, read the documents listed below.
- Using Layout and Position Options in Thrive Architect
- Using the Background Style Option in Thrive Architect
- Using Borders and Corners Settings in Thrive Architect
- Adding Shadows to Thrive Architect Elements
- Using the Responsive Option in Thrive Architect
- Using Conditional Display in Thrive Architect
- Using HTML Attributes in Thrive Architect
We’ve just seen how you can add and customize a Countdown and a Countdown Evergreen element on a page using Thrive Architect. You can take a visual representation of the same in the video here.
Next, do you want to add a simple mega menu on your website? You can read our document here.