In this article, you’ll learn how to use the Lead Generation element in Thrive Architect. This is the primary form element for collecting leads, building email lists, and connecting your forms to autoresponders, webhooks, and HTML-based email services.
The Lead Generation element replaces the older Contact Form element and provides a complete system for building opt-in forms, multi-field sign-up forms, and custom data collection forms—all with built-in connections to your favorite email marketing platforms.
Adding the Lead Generation Element to Your Page
Follow these steps to add a Lead Generation element:
- Open your page or post in the Thrive Architect editor.
- Click the green plus (+) icon in the right sidebar to open the element panel.
- Type Lead Generation in the search field at the top of the panel.
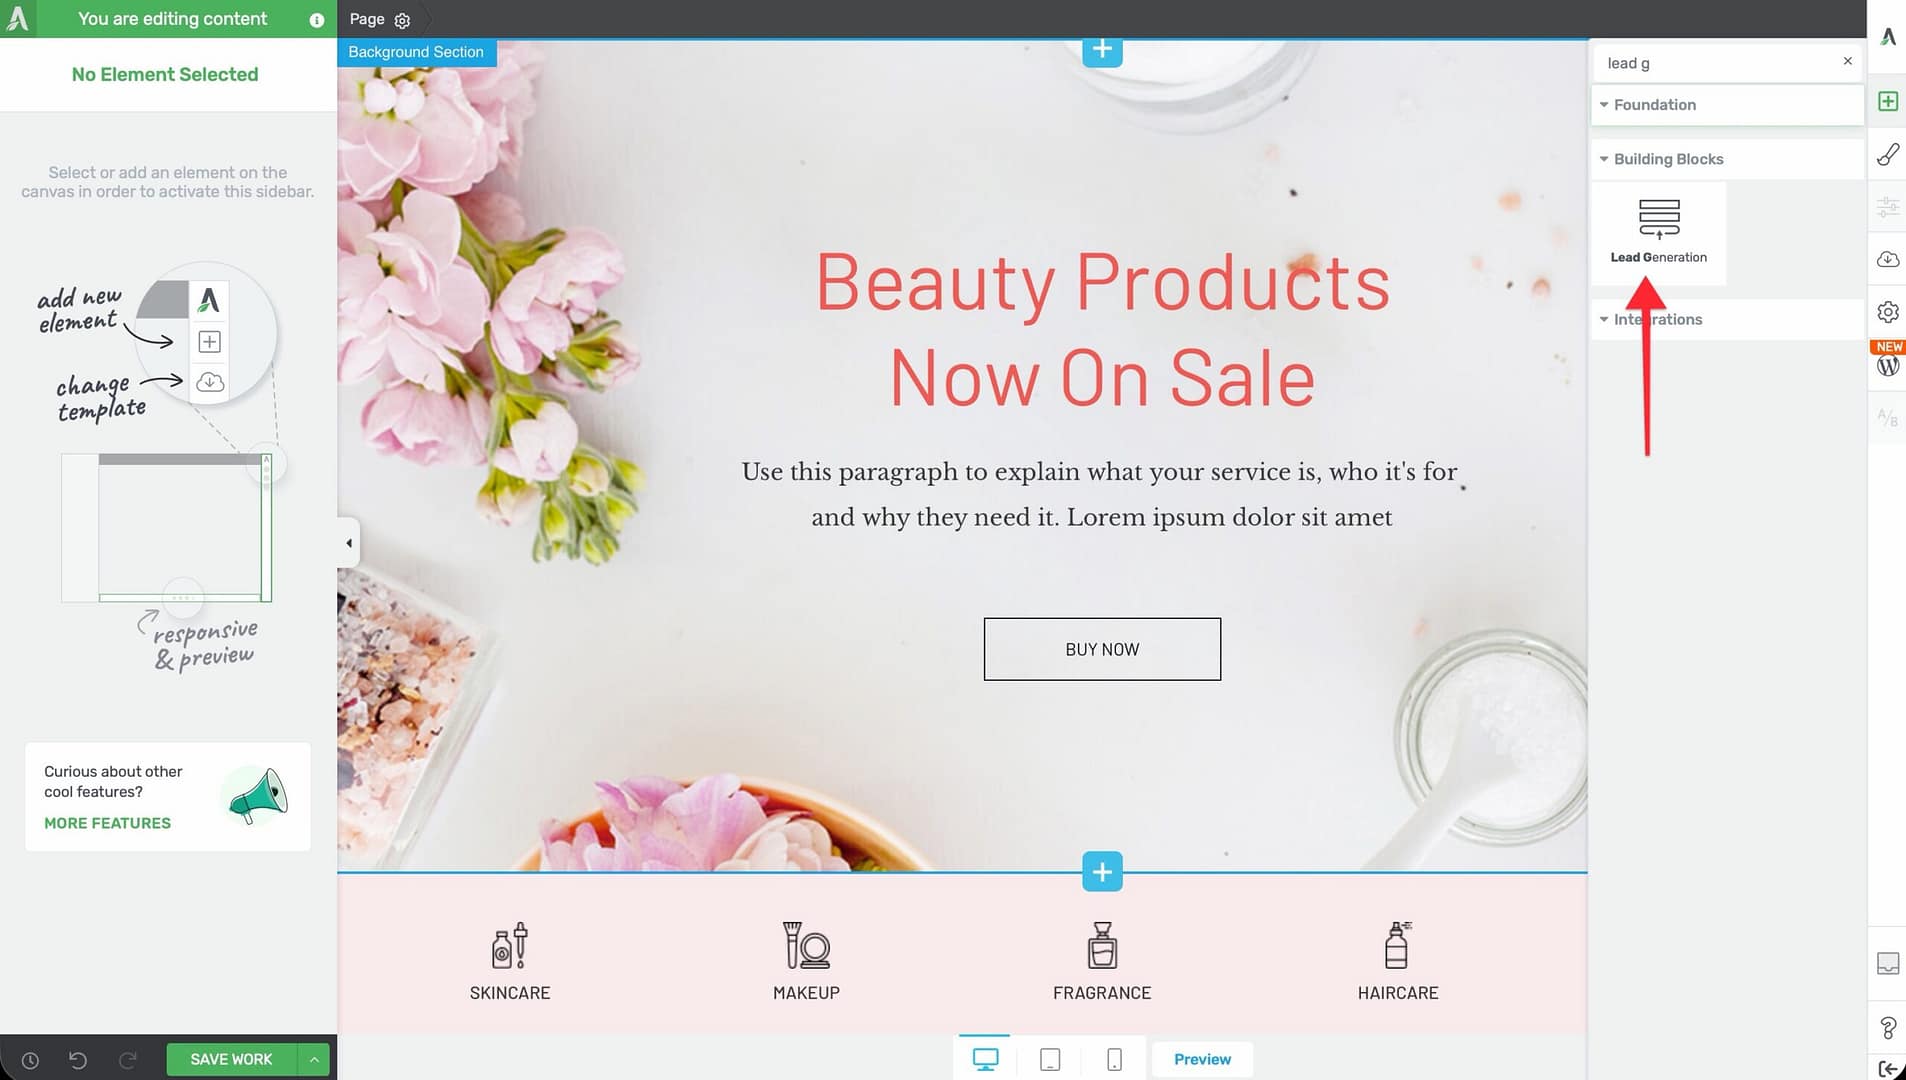
- Drag the element from the panel and drop it onto your page canvas—typically inside a Background Section, Column, or Content Box.
- A default form layout will appear on the canvas with a name field, email field, and submit button.
Once added, click on the Lead Generation element to select it. The element’s configuration options will appear in the left sidebar.
Choosing a Form Template
When you first add a Lead Generation element, you can select a pre-designed template to start with:
- Select the Lead Generation element on the canvas.
- Click the Template option in the left sidebar to open the template picker.
- Browse through available form templates organized by style and layout.
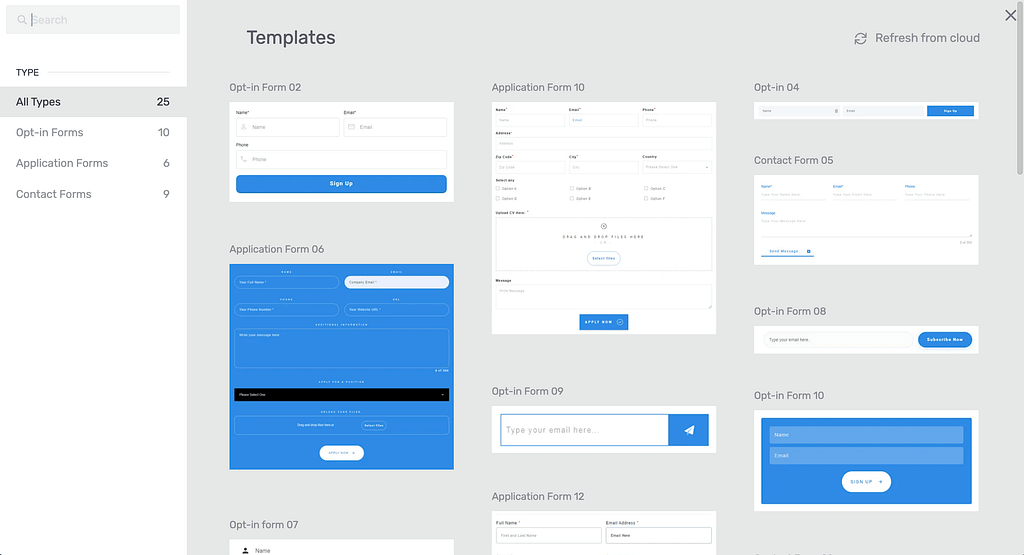
- Click on a template to apply it to your form.
Form Palettes
After selecting a template, use the Form Palettes option to quickly change the color scheme of your entire form. Form Palettes apply a coordinated set of colors to the form background, fields, buttons, and text—saving you from styling each element individually.
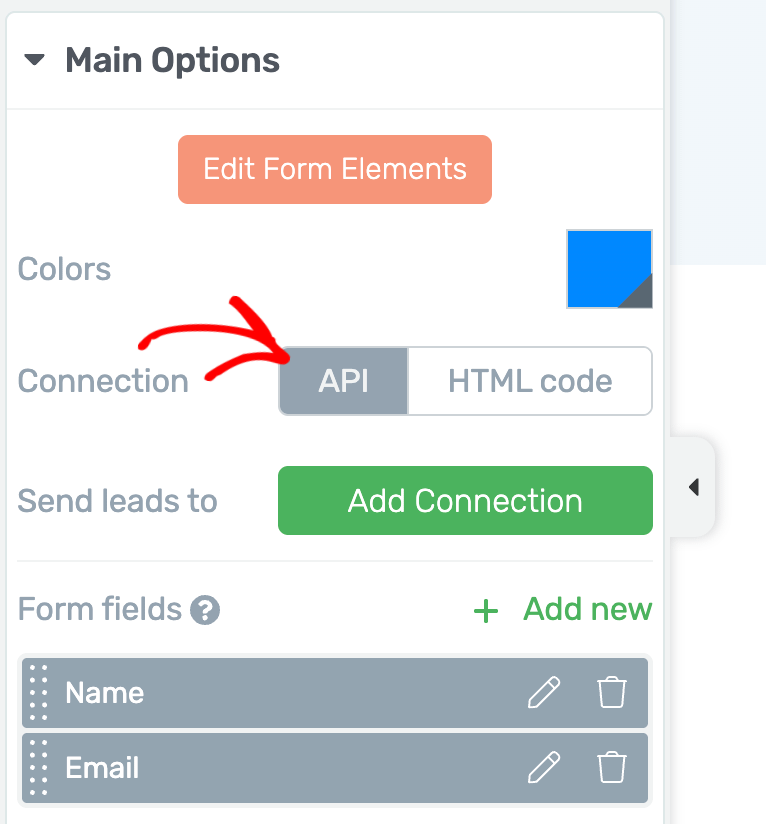
Configuring the Connection Type
The Connection setting determines how your form sends collected data. Choose from three connection types using the button group in the left sidebar:
API Connection
This is the default and recommended connection type. It connects your form directly to supported email marketing services through Thrive’s built-in API integrations.
To set up an API connection:
- Select the Lead Generation element.
- Make sure API is selected in the Connection button group.
- Click Add Connection under the API Connections section.
- Choose your email marketing service from the dropdown list (e.g., Mailchimp, ActiveCampaign, ConvertKit, Drip).
- If you have not already connected the service, click Go to the API Dashboard to add your API key through the Thrive Dashboard.
- Once connected, select the mailing list or tag where new subscribers should be added.
- Map your form fields to the corresponding fields in your email service.
- Click Apply to save the connection.
HTML Code Connection
Use this connection type when your email service provides an HTML form embed code (also called a “web form” or “raw HTML form”) instead of a direct API integration.
To set up an HTML code connection:
- Select HTML code in the Connection button group.
- Paste the complete HTML form code provided by your email service into the code field.
- Thrive Architect will parse the HTML and map the form fields automatically.
- Adjust any field mappings as needed.
Webhook Connection
Use this connection type to send form data to any URL endpoint, such as a Zapier webhook, custom API, or third-party automation tool.
- Select Webhook in the Connection button group.
- Enter the Webhook URL where form data should be sent.
- Form data will be sent as a POST request in JSON format when a visitor submits the form.
Managing Form Fields
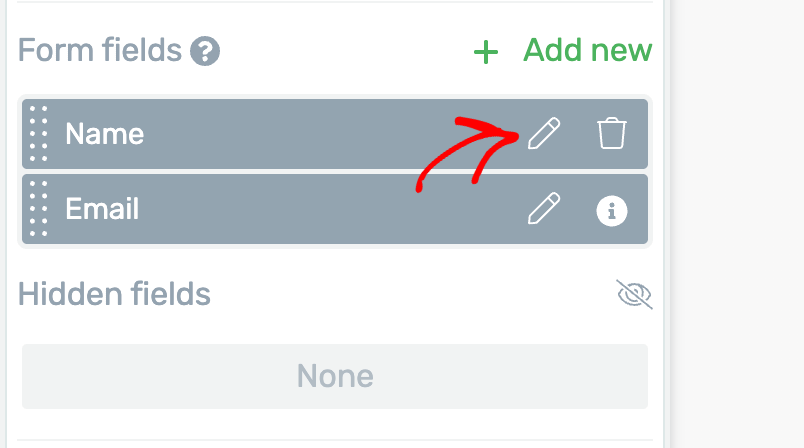
The Form fields section in the left sidebar displays a sortable list of all visible fields in your form. Each field has a settings icon that opens its individual configuration options.
Adding a New Field
- Click the Add new option at the bottom of the Form fields list.
- Choose the field type you want to add (e.g., Text, Dropdown, Checkbox, File Upload, GDPR Consent).
- The new field will appear in the form and in the fields list.
Reordering Fields
Drag and drop fields within the Form fields list to change their display order on the form.
Configuring Field Settings
Click the settings icon next to any field to configure:
- Field Label — The visible label text above or beside the field
- Placeholder — Placeholder text displayed inside the field when empty
- Required — Toggle to make the field mandatory for form submission
- Field mapping — Map the field to your email service’s corresponding field (for API connections)
Note: For a complete reference of all available field types and their individual configuration options, see the Custom Fields Reference article.
Hidden Fields
Click the Hidden fields section to add invisible fields that capture data without displaying anything to the visitor. Hidden fields are useful for:
- Tracking the page or campaign a visitor signed up from
- Passing UTM parameters or other URL data
- Tagging subscribers based on which form they completed
After-Submission Behavior
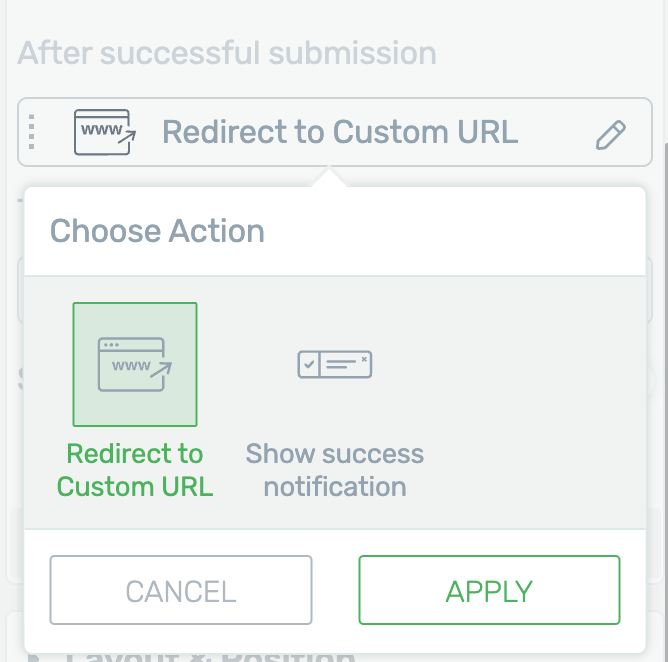
Configure what happens after a visitor submits the form. The after-submission options are available under the form’s connection settings:
- Show success notification — Display a custom success message on the same page
- Redirect to URL — Send the visitor to a specific thank-you page or offer page
- Reload page — Refresh the current page after submission
- Switch state — Change the form element to a different state (useful for showing a confirmation message in place of the form)
Single Opt-in vs. Double Opt-in
Opt-in behavior is controlled by your email marketing service, not by the Lead Generation element itself.
- Single opt-in — The subscriber is added to your list immediately upon form submission. No confirmation email is sent.
- Double opt-in — The subscriber receives a confirmation email after form submission. They must click the confirmation link in that email before being added to your list.
To configure opt-in type:
- Log in to your email marketing service (e.g., Mailchimp, ActiveCampaign).
- Navigate to your list or audience settings.
- Enable or disable the double opt-in requirement based on your preference.
Form Layout Options
The Lead Generation element supports two primary layout modes:
Stacked Layout (Default)
Fields are displayed vertically, one below the other. This is the default layout and works well for forms with multiple fields.
Horizontal (Inline) Layout
Fields are displayed side by side in a single row. This layout is ideal for simple forms with only one or two fields (e.g., a name and email opt-in).
To create a horizontal form:
- Select the Lead Generation element on the canvas.
- Use the Columns or Layout options to arrange form fields and the submit button side by side.
- Adjust the width of each field and the button to fit within a single row.
Spam Prevention

The Spam Prevention dropdown provides tools to reduce spam submissions:
- Honeypot — Adds an invisible field that bots will fill in, allowing the form to detect and reject automated submissions. This is the least intrusive option and requires no configuration.
- reCAPTCHA — Integrates Google reCAPTCHA to verify that the visitor is a real person. You must configure your reCAPTCHA API keys in the Thrive Dashboard before enabling this option.
Consent Options
The Consent section lets you add user consent functionality to your form:
- Create WordPress account — When enabled, form submissions will automatically create a WordPress user account for the subscriber. This is useful when you want to grant site access (e.g., for membership content or Thrive Apprentice courses) as part of the sign-up process.
Form Identifier
The Form identifier field assigns a unique ID to your form. This identifier is used by other Thrive plugins (such as Thrive Automator and Thrive Leads) to recognize and reference this specific form in automation workflows, reporting, and lead tracking.
Additional Styling and Design Options
For styling and design options shared across all elements—including Layout & Position, Background Style, Borders & Corners, Shadow, Responsive Display, Scroll Behavior, Animations & Actions, and HTML Attributes—refer to the Thrive Architect Styling and Design Guide.
Related Resources
- Custom Fields: How to Configure Lead Generation Custom Fields — Complete reference for all field types
- Advanced Techniques: How to Use Advanced Lead Generation Techniques — Tagging, Smart Complete, 2-step opt-ins, and more
- Contact Form Migration: How to Migrate from the Contact Form Element — Replace deprecated Contact Form with Lead Generation
That’s it! You’ve successfully learned how to use the Lead Generation element in Thrive Architect. From simple email opt-in forms to complex multi-field data collection forms, the Lead Generation element provides everything you need to capture leads and connect them to your email marketing services.