Do you want to make it easier for website visitors to fill out a Lead Generation form quickly? The Smart Complete feature of the Lead Generation element in Thrive Architect identifies logged-in users and auto-fills some of the fields based on the information it has.
In this article, we’ll see how you can enable the Smart Complete feature in the Lead Generation element.
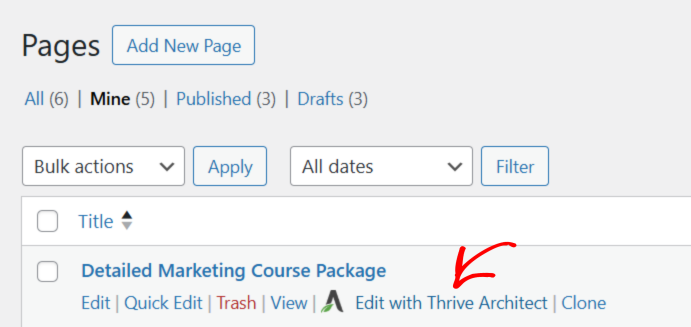
To enable the Smart Complete feature of a Lead Generation element, open the page in the Thrive Architect editor.
When the page opens in the Thrive Architect editor, click the Lead Generation element to open its Main Options in the left column.
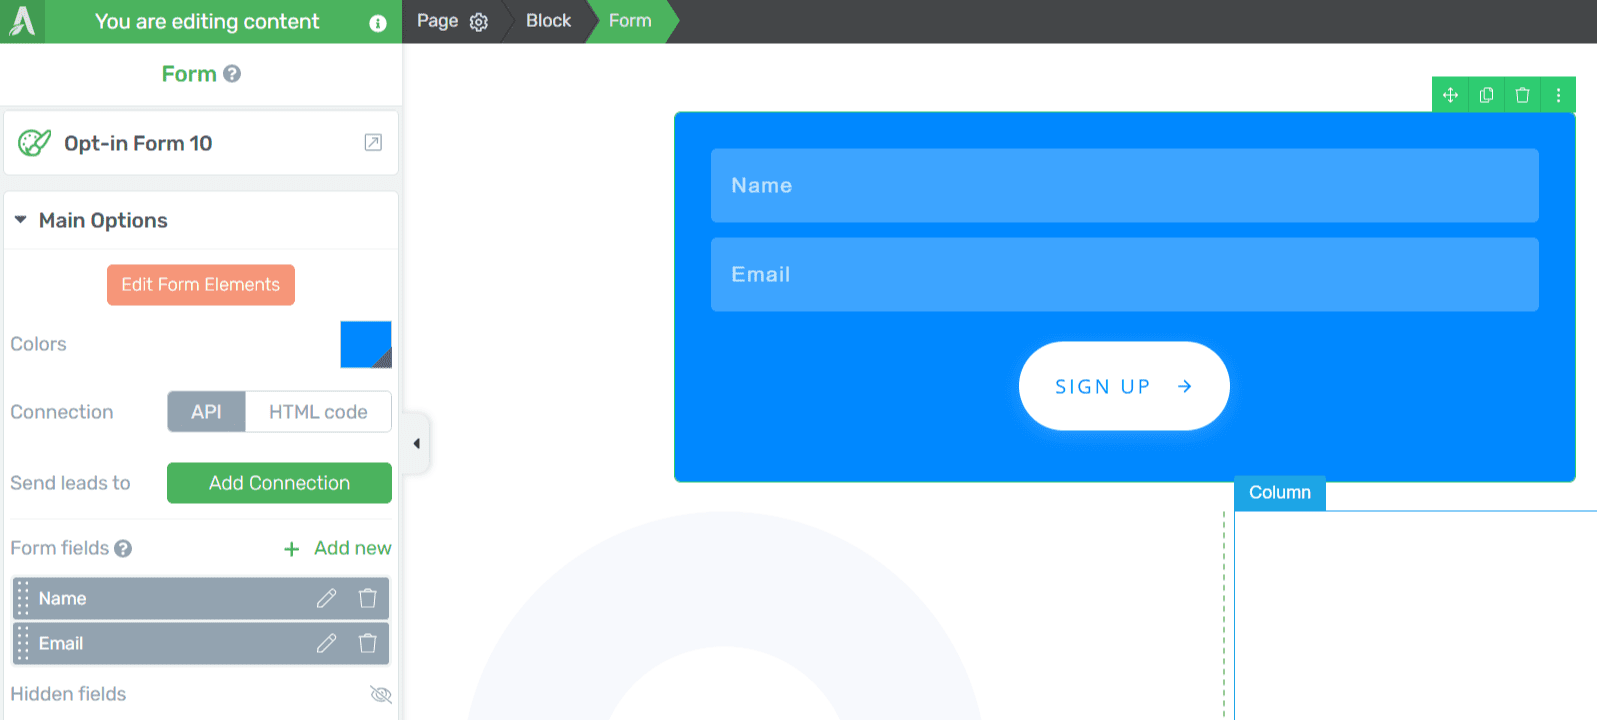
Under Main Options, scroll down to the form fields section to add more fields as required. Once you have added all the fields you want in the form, click on the Pen icon beside the field you want to enable the Smart Complete feature.
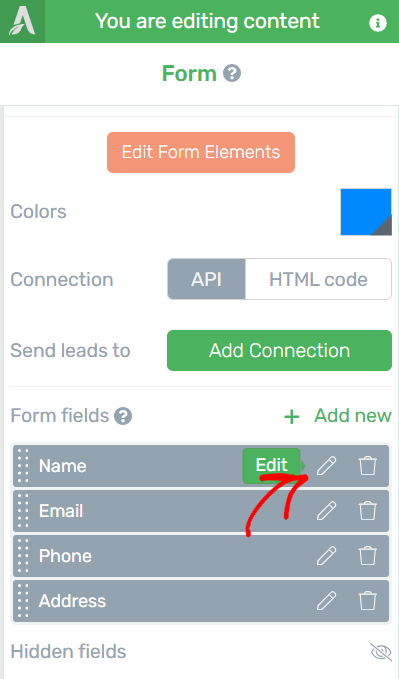
In this example, we’ll enable it for the Name field.
After you click to edit a field, you’ll see a popup in which you’ll need to expand the Autofill settings section.

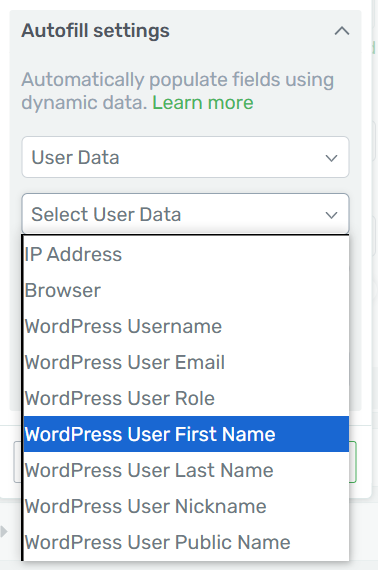
Under the Autofill settings, click the dropdown to Select a Variable Type. Among the dropdown options, click User Data.
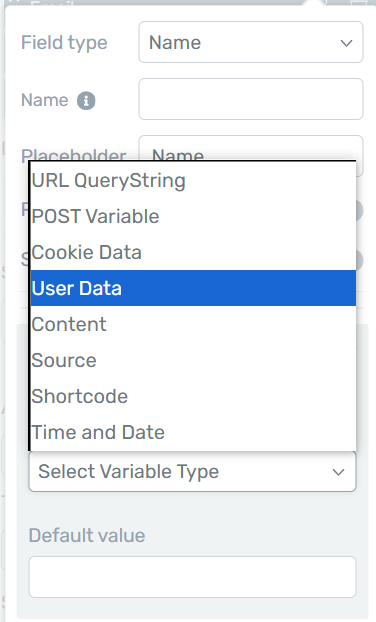
When you select the variable type as User Data, you’ll see another dropdown where you choose the User Data as WordPress User First Name or WordPress User Last Name.
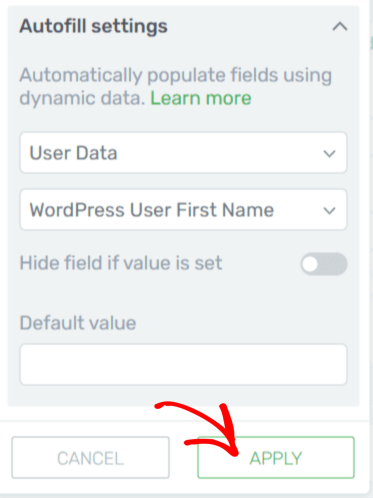
After you select User Data in the dropdown, you can choose to hide the field if its value is set or enter a default value using the following settings under Autofill.

Once you finish adding the Autofill settings, click Apply to apply these to the field.
Once you apply autofill settings to a field, you can repeat the same steps for fields like the email or any other you’d want to add autofill.
Next, do you need help understanding Smart Complete in depth? You can refer to our document here.